- How do I set up a hard drive and partition in Windows?
- How to open Disk Management
- Windows 10, 8, and 7
- Windows XP and 2000
- How to set up a new drive
- How to create or add a partition
- Further information on partitions
- FIX: New hard drive not showing up in Windows 10
- What can I do if my hard drive won’t show up on Windows 10?
- 1. Check if the disk is well-connected
- 2. Initialize the disk
- 3. Update your drivers
- DriverFix
- 4. Use diskpart command to clean your drive
- 5. Check if your hard drive appears in BIOS
- 6. Connect the hard drive to a different port or use a different cable
How do I set up a hard drive and partition in Windows?

Unlike earlier versions of Windows, such as Windows 98, the fdisk command is no longer used to set up partitions. If you’ve installed a new hard drive on a computer that’s running Windows and want to change its partitions or divide the disk, use the Windows Disk Management tool. However, if you still prefer a command line interface to set up drives, you can use the diskpart command.
Users may also set up partitions during the Windows installation process. For further assistance with installing Windows, see: How to install the Microsoft Windows operating system.
To set up a new hard drive or partitions in Windows, you must have administrative rights.
To partition an external USB hard drive, you must be running Windows 10 Creators Update or later.
How to open Disk Management
Windows 10, 8, and 7
From the Windows desktop, press Windows key , type Create and format hard disk partitions, and then press Enter .
Windows XP and 2000
- Click Start, then click Run.
- In the Run text field, type diskmgmt.msc and press Enter .

How to set up a new drive
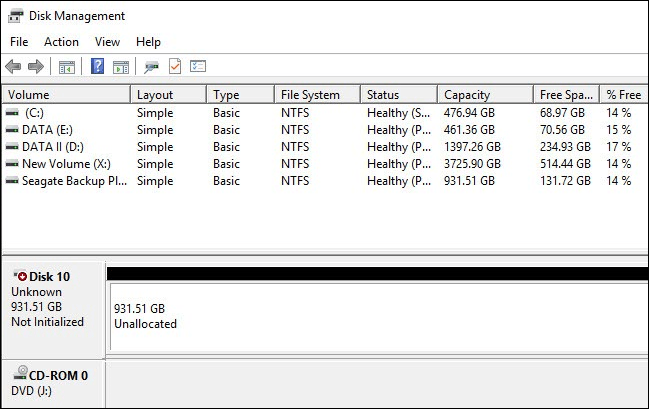
- The Windows Disk Management tool should look similar to the image above. Any disks not yet set up are shown as Not Initialized and Unallocated.
- Right-click the disk you want to set up select Initialize Disk. If you are dealing with a disk already set up, skip to the next section.
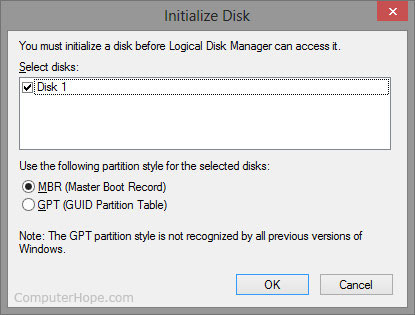
If you’re running a more recent version of Windows that supports GPT, you’ll be prompted to select a Partition Style. For most users, leaving as MBR will be sufficient. If you’re setting up a drive or partition larger than 2 TB or want to use the latest partitioning style, select GPT.
- Click the button.
How to create or add a partition
If you are unfamiliar with any of the terminologies in the following steps, the next section should be helpful to you.
- Once the drive is initialized, right-click it.
- Select New Partition or New Simple Volume from the drop-down menu that appears.

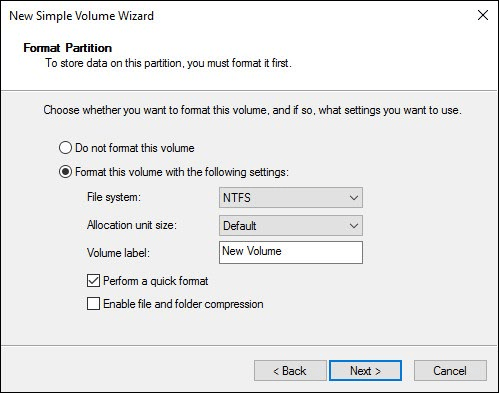
- A New Simple Volume Wizard opens. Click the button.
- Specify the size of the partition you want to create, and click the button.

- Select a drive letter for your new partition, and click the button.

- Ensure the drive format is NTFS, change the volume’s name (optional), and click the button.

- Click the button, and your new partition appears.

Further information on partitions
Partition or Volume Size — By default, the size is the maximum capacity in MB of the drive. If you want the drive to have multiple partitions, change the size to that which you desire. The remainder of the drive can be allocated later and, if you specify the maximum size, you can also shrink this size at a later time.
Drive letter or Path — Each drive or partition in Windows can be assigned an available drive letter. Most Windows users prefer this setting. However, versions of Windows which support NTFS can also mount a drive to a folder on an existing drive. If you plan on using the drive to store only a specific type of file, such as pictures, music, or programs, this can be especially useful.
Format — The format of the drive specifies the type of file system you want to use on the computer. For most users, we highly recommend leaving it at the default NTFS file system. Other options may include FAT32 or exFAT depending on your version of Windows.
FIX: New hard drive not showing up in Windows 10

- If your internal hard drive is not showing up, it might be because it is not set up.
- Make sure your disk is properly connected to your motherboard with the SATA cable.
- Your HDD not showing up on Windows 10 might also be because you need to initialize the disk.
- Updating your hardware drivers will also solve the internal drive not showing up on Windows 10.

There’s a chance that you might encounter certain problems when installing a new hard drive on your computer.
Perhaps the most common issue with new hard drives in Windows is that the system doesn’t show them for some reason.
So, if your new internal hard drive is missing from Windows, check out some of the solutions listed below. Here are some other common problems reported by users:
- Internal hard drive not showing up Windows 10, in Disk Management – If your hard drive isn’t showing in Windows at all, it’s possible that it’s not properly connected. To fix that, enter BIOS and make sure that the drive appears.
- Can’t see hard drive Windows 10 – If you can’t see your hard drive in Windows 10, it’s possible that your hard drive isn’t properly initialized and formatted. However, you can fix that with ease using Disk Management.
- External hard drive not showing up – This issue can also appear with external hard drives, and we already covered how to fix problems with an external hard drive on your PC in one of our previous articles.
- Hard drive won’t show up in BIOS, on PC, in File Explorer – In some cases, the hard drive won’t appear in BIOS at all. This is usually caused by your configuration in BIOS or by connection issues with your hard drive.
What can I do if my hard drive won’t show up on Windows 10?
1. Check if the disk is well-connected
First thing first, you need to make sure your hard drive is properly connected to your motherboard and power supply. If you’re already sure about this, skip this solution, and head over to solution 2.
If not, open your computer case, and make sure you attached a data cable to an appropriate port on the motherboard and a power cable to the power supply.
When you make sure your hard disk is connected properly, but still missing from your system, try some of the solutions listed below.
2. Initialize the disk
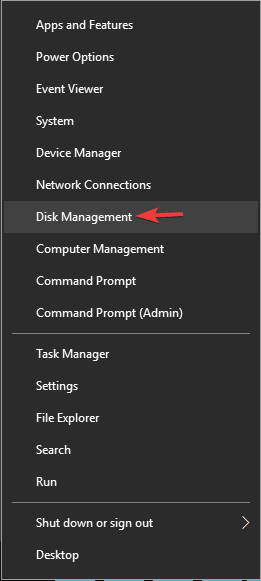
- Press Windows Key + X to open Win + X menu and choose Disk Management from the list.

- When the Disk Management window opens, you’ll see all connected hard drives listed.
- Take a look at the list, and find a drive listed as Disk 1, or Disk 10 (other names are possible, as well).
- You’ll recognize this drive because it is not initialized and is listed as unknown, and unallocated.
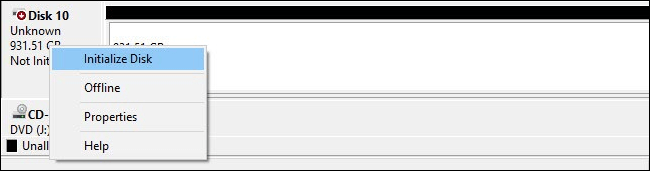
- Right-click on that partition, and select Initialize Disk from the right-click context menu
- As soon as you initiate the process it will ask you to choose between a Master Boot Record (MBR) or a GUID Partition Table (GPT).
- We advise you to choose a GPT, but if you want more info about these two, take a look at this article for some comparisons. Click OK.
- Once you do this, you’ll get back to the main window, where your new drive is going to be listed as Basic and Online, but it will still have unallocated space.
- To fix that, right-click on the stripped box, and select New simple volume…
- Right-click your hard drive and choose New Simple Volume.
- Click Next, and assign a drive letter.
- Now you just need to format your new drive. For the best results, choose the NTFS file system, and perform a quick format.
- Finish the process

There you go, after initializing your hard drive, it should start working again. If you’re not too fond of Disk Management, you can use any other third-party disk management software.
In most cases, all you need to do is simply initialize your new hard drive, after which the HDD will show up in your PC normally.
If you’re looking for a simple disk management application, we advise you to try Mini Tool Partition Wizard. For more alternatives, check out this list with the best disk management tools for Windows 10.
Additionally, if you encounter any problems with the disk management loading, fix them easily with the help of this detailed guide.
3. Update your drivers
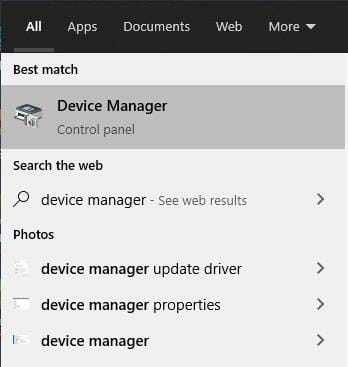
- Press the Windows Key + S and open the Device Manager.
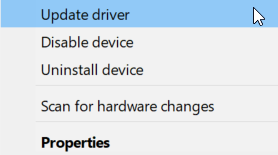
- In the Device Manager, select the device you wish to update.
- Right-click on it, then select Update driver.
- Repeat for all the devices you want to update.
If your hard drive won’t show up in Windows, it’s possible that you have a driver issue. To fix the problem, be sure that your drivers are up to date.
This goes for your motherboard and chipset drivers, so be sure to visit the manufacturer’s websites and download the latest drivers for your motherboard.
Update drivers automatically
Alternatively, you can download the missing drivers automatically using a third-party driver updater tool to keep your drivers updated.
This will save you the hustle of researching your component’s model numbers and finding compatible drivers by yourself.
DriverFix
4. Use diskpart command to clean your drive
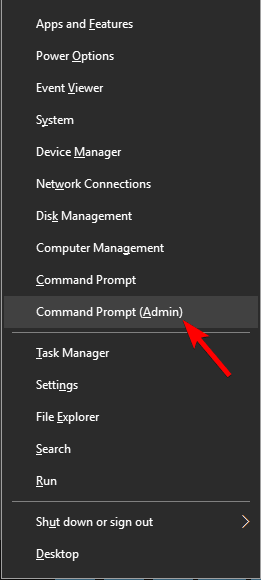
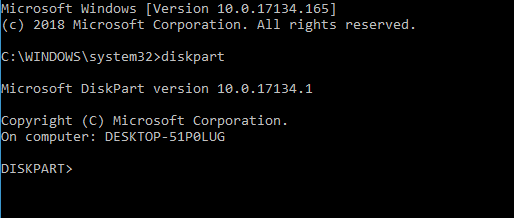
- Press Windows Key + X and choose Command Prompt (Admin) or Powershell (Admin) from the menu.
- When Command Prompt opens, enter the following command and press Enter: diskpart
- After diskpart starts, enter: list disk
- You should now see a list of all hard drives on your PC.
- It’s crucial that you select the correct hard drive. In case you select the wrong hard disk, you’ll wipe all your files and lose them, so be extra cautious.
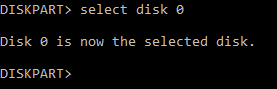
- Check the size of each drive in order to find the hard drive that is giving you trouble. Select the problematic drive by entering select disk X.
- In our example, we used select disk 0, but you’ll most likely need to use a different number on your PC.
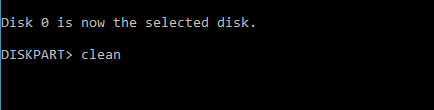
- After you select the hard drive, double-check everything and make sure that the problematic drive is selected.
- Now enter: clean
If your internal hard drive won’t show up, it might not be properly configured. Sometimes, you need to use a single command in order to completely wipe your hard drive and initialize it again.
Before we start, we have to mention that this solution will delete all files and partitions from the selected drive, so it’s best to use it with a new hard drive that doesn’t have any files on it.
In case your hard drive has some files on it, it would be best to back up the files to removable storage or to a different drive.
After a few moments, your hard drive will be wiped and all your files will be removed. Now go back to the Disk Management tool and initialize your hard drive.
Then, create a new partition , and assign a letter to it as we showed you in one of our previous solutions.
Alternatively, you can initialize and format your hard drive right from diskpart. Just start Command Prompt as an admin and run the following commands:
5. Check if your hard drive appears in BIOS
- Keep pressing F2 or Del while your system boots to enter BIOS.
- Sometimes it might be a different keyboard key, so if you’re not sure, check your motherboard’s manual.
- Once you enter BIOS, look for your hard drive.
Many users reported that their internal hard drive won’t show up in Windows, and this can be caused by various issues. However, you can always check if your hard drive shows in BIOS.
If your hard drive appears in BIOS, it means that it’s connected and working properly, so the issue is caused by Windows.
On the other hand, if the hard drive doesn’t show in BIOS, it’s rather likely that it’s not properly connected.
If you’re finding it hard to access your BIOS, take a closer look at our dedicated guide that will teach you how to easily do it.
6. Connect the hard drive to a different port or use a different cable
In some cases, your hard drive won’t show up due to problems with your ports.
If you suspect that a port might be a problem, open your computer case and connect the hard drive to a different SATA port on your motherboard.
If switching to a different port doesn’t fix the problem, it’s possible that your SATA cable is broken. To check if that’s the case, you’ll need to get a new SATA cable and try it out.
A couple of users reported that they fixed the problem simply by connecting their drive to a different port, so be sure to try that.
For more info on hard drive issues on Windows 10, you can check out this dedicated guide. If you have a second drive that isn’t detected in Windows, take a look at this article and solve the issue with ease.
That’s about it for our problem with invisible hard drives in Windows 10. In most cases, you just need to initialize it, and we sincerely hope this action will be the only one required.
If you have any comments, questions, or suggestions, let us know in the comments section below.


