- Fix: NVIDIA Code 43 (Windows has stopped this device because it has reported problems)
- Solution 1: Checking if the Graphics Card is inserted correctly
- Solution 2: Uninstalling Lucid VIRTU MVP Software
- Solution 3: Installing Latest Windows Update
- Solution 4: Installing Default Graphics Drivers
- Solution 5: Updating/Rolling back Drivers
- Solution 6: Updating your BIOS
- Solution 7: Checking Graphics Card Authenticity
- Solution 8: Install Latest Java Version
- Error code 43 on NVIDIA/Intel GPUs [BEST METHODS]
- How can I fix Error code 43 for a video card on Windows 10?
- Solution 1 – Revert to a Previous System Restore Point
- Solution 2 – Run the Hardware and Devices Troubleshooter
- Solution 3 – Update the Device Driver
- Solution 4 – Uninstall and Re-install the Device Driver
- Solution 5 – Check the GPU temperature
Fix: NVIDIA Code 43 (Windows has stopped this device because it has reported problems)
Code 43 usually means that the required device is unidentifiable. The computer tries to access and synchronize correctly with the device but fails to do. This usually occurs when you install a new driver, install a new update, or are running Lucid Virtu MVP.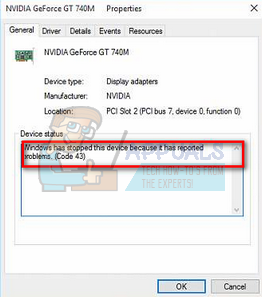
We will start by checking if the graphics card is inserted correctly into the slot. Then we will move on to software solutions including uninstalling the device and install the default drivers. In the last stage, we will update the BIOS of your computer also tweak around Windows Update.
Solution 1: Checking if the Graphics Card is inserted correctly
Before we move on to diagnosing the problem through software workarounds, you should first check if the graphics card is inserted correctly inside its slot. Press it firmly and make sure all the pins are inserted firmly. If you have a laptop, just perform the power cycle as explained below.
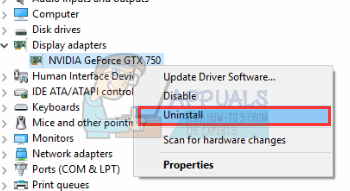
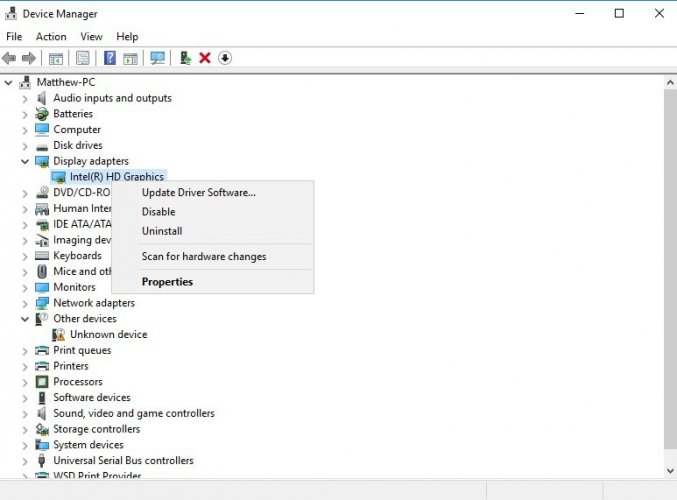
- Press Windows + R, type “devmgmt.msc” in the dialogue box and press Enter.
- Once in the device manager, expand the category of “Display adapters”, right-click on your device and click “Disable”.

- Now turn off your computer. Take out the battery (in case of a laptop) or take out the main power cable (in case of a PC).
If you have a PC, open its lid and make sure that the graphics adapter is inserted perfectly into the pins.
- After performing the above steps, start your computer back, enable the hardware the same way we disabled it, and check if it is working correctly.
Solution 2: Uninstalling Lucid VIRTU MVP Software
After the latest Windows update, NVIDIA issued an official statement that the software Lucid VIRTU MVP isn’t compatible with NVIDIA devices and is causing discrepancies which are resulting in various problems including the one we are experiencing. This software primarily allows you to switch between your onboard graphics and your discrete graphics card. It is a very useful tool but it seems it isn’t workable with NVIDIA software.
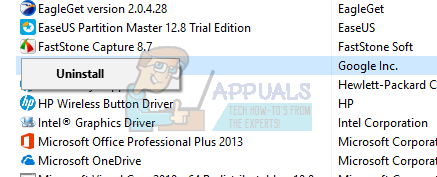
- Press Windows + R, type “appwiz.cpl” and press Enter.
- You will see all the applications installed on your computer in front of you. Search through them for “Lucid MVP” software, right-click it and select “Uninstall”.
- After uninstalling the application, restart your computer and check if the problem got solved. If the hardware still gives an error 43 code, try disabling it and then re-enabling it.
Note: Also, make sure to completely uninstall “UPSilon 2000” software or any other application that you installed prior to getting this error.
Solution 3: Installing Latest Windows Update
Windows roll out important updates targeting the bug fixes in the operating system. One of the bugs in our case; NVIDIA hardware giving the error message. If you are holding back and not installing the Windows update, we strongly recommend that you do. Windows 10 is the latest Windows operating system and new operating systems take a lot of time to get perfect in every regard.
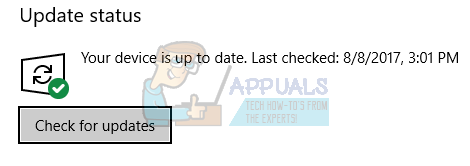
- Press Windows + S button to launch your start menu’s search bar. In the dialogue box type “Windows update”. Click the first search result which comes forward.

- Once in the update settings, click on the button which says “Check for updates”. Now Windows will automatically check for updates available and install them. It may even prompt you for a restart.
- After updating, restart your computer and check if your issue got fixed.
Solution 4: Installing Default Graphics Drivers
Faulty Graphics drivers are also known to be a cause of this issue. Drivers are the main driving force behind any hardware connected to your computer. If they are corrupt or outdated, it may cause the error to pop-up again and again.
We will start your computer in Safe Mode and delete the currently installed drivers for your display card. Upon the restart, the default display drivers would automatically be installed upon the detection of your display hardware.
- Follow the instructions on our article on how to boot your computer in safe mode.
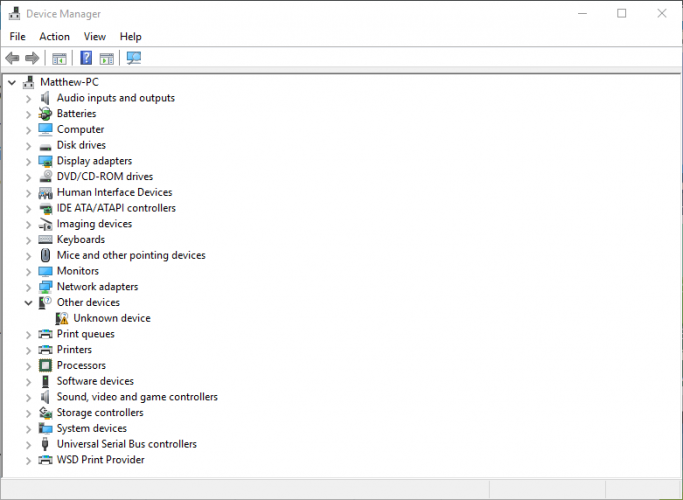
- Once booted in the safe mode, right click on Windows key and select Device Manager from the list of options available.
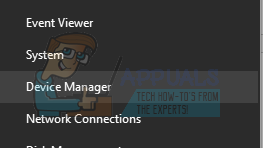
Another way to launch the device manager is by pressing Windows + R to launch the Run application and typing “devmgmt.msc”.
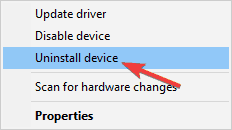
- Once in the device manager, expand the Display adapters section and right click on your display hardware. Select the option of Uninstall device. Windows will pop a dialogue box to confirm your actions, press Ok and proceed.
Now restart your device. Now check if the error is resolved.
Solution 5: Updating/Rolling back Drivers
If all the above solutions don’t work, we can try updating the graphics driver. It may be possible that your graphics driver is not properly configured or is outdated. We need to completely delete all driver files before we install the new driver, therefore, we need to use the utility Display Driver Uninstaller. You can download the utility over the internet easily.
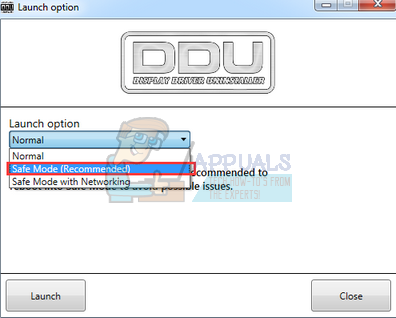
- After installing Display Driver Uninstaller (DDU), launch your computer in safe mode. You can learn how to boot your computer into safe mode by reading our article on it.
- After booting your computer into safe mode, launch the application which was just installed. Choose the option Safe Mode.
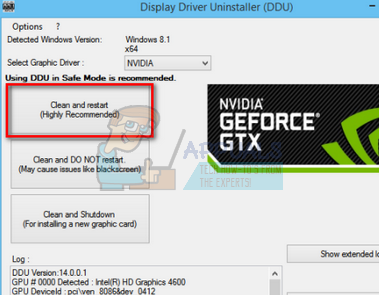
- After launching the application, select the first option “Clean and restart”. The application will then automatically uninstall the installed drivers and restart your computer accordingly.
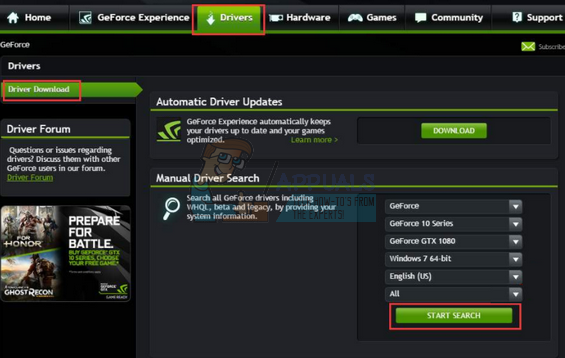
- Boot your computer into normal mode and launch the application. Launch the GeForce Application, open the “Drivers” tab and click the button “Driver Download”. Enter your specification on the right side of the screen and click “Start search” for the application to search for the optimal drivers for your computer.
- After the driver is updated, restart your computer and check if the problem got solved.
If installing the latest drivers don’t work (like in many cases), you should perform the following steps to make sure that the drivers don’t get updated automatically by Windows Update and install a driver of a previous version.
- Press Windows + S to launch the search menu of your start bar. Type “system” in the dialogue box and select the first item which returns in the result.
- Once in the system, click on “Advanced system settings” present at the left side of the screen.

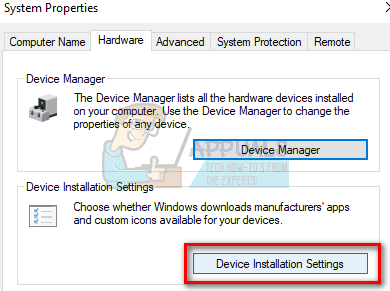
- Navigate to the Hardware tab and click on “Device installation Settings”.
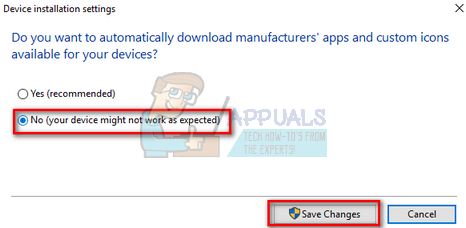
- Select the option of “No (your device might not work as expected)”. Press Save changes and exit. This will disable the Windows update from updating your graphics drivers automatically.
- Now press Windows + X to launch the quick start menu and select “Device Manager” from the list of options available.
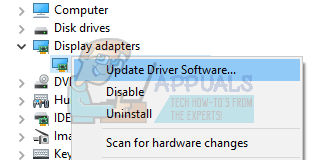
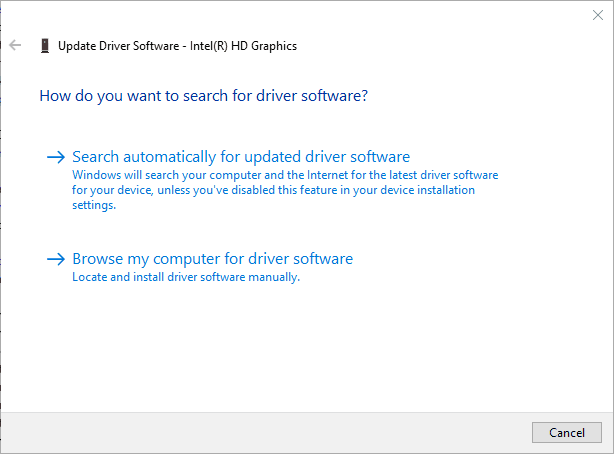
- Once in the Device manager, expand “Display adapters” category. Right-click on the hardware and select “Update Driver Software…”.
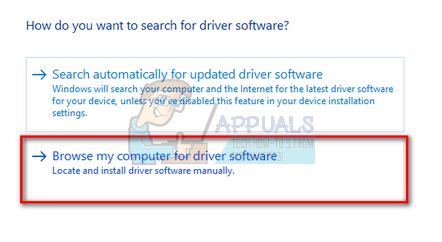
- Select the second option “Browse my computer for driver software”. Now navigate to the location where you downloaded the driver package and install it.
- After installing it, reboot your computer completely and check if the problem at hand got solved.
Solution 6: Updating your BIOS
BIOS stands for Basic input/output System and it is a firmware used to perform the hardware initialization during the booting process of your computer. The BIOS system is preinstalled on your computer by your manufacturer and it is the first software that runs when your computer is started up. It is more like a key that starts all other processes on your computer.
The BIOS is also responsible to test hardware components on your PC and make sure that they are working properly without any errors. Most of the BIOS are designed specifically to work with a specific model or motherboard. Traditionally, BIOS was written in ROM and hardware needed to be replaced when updating the BIOS. In modern computer systems, BIOS is stored in flash memory so it can be rewritten without the menace of replacing the hardware.
There were numerous reports that updating the BIOS of the computer solved the problem instantly but we kept it is a last resort as it is very technical. Backup your data completely before resorting to this solution. Also, consider reinstalling your BIOS even if it is updated to the latest build. We have a number of different articles targeting how to update the bios of your machine (search this site for bios update).
Solution 7: Checking Graphics Card Authenticity
In some cases, the Graphics card that you are using might be fake or a dud. Therefore, in order to verify its authenticity, note down the exact make and model of your Graphics card and check online for its normal speeds. Now, download GPU Z and run the executable to install it. After installing, check to see if your card is original or not. If it isn’t original and just a custom BIOS has been flashed on it, return it to the place where you bought it and get a new one.
Note: Also, it is recommended that you try to clean the GPU and reinstall its thermal compound as according to some reports it has helped some users in fixing this issue.
Solution 8: Install Latest Java Version
In some situations, it is possible that the Java Version on your computer might be outdated due to which this issue is being triggered when Nvidia tries to check for your hardware. Therefore, make sure to download and install the latest version Java from here.
Error code 43 on NVIDIA/Intel GPUs [BEST METHODS]

- The error code 43 is usually displayed in the Device status box on the hardware Properties windows. The error is related to your graphics card .
- A common cause for error code 43 can be your GPU temperature, and in order to fix this problem, you need to make sure that your graphics card is free from dust.
- If you have any other problems with your graphics card, be sure to check our GPU section for more solutions.
- We created the Windows 10 errors hub especially to offer you solutions for Windows 10 errors so check it out in case of other issues.
- Download Restoro PC Repair Tool that comes with Patented Technologies (patent available here).
- Click Start Scan to find Windows issues that could be causing PC problems.
- Click Repair All to fix issues affecting your computer’s security and performance
- Restoro has been downloaded by 0 readers this month.
The error code 43 is usually displayed in the Device status box on the hardware Properties windows.
Code 43 states the following, Windows has stopped this device because it has reported problems (Code 43).
So if you’re getting error code 43 for your video card, this is how to fix it.
How can I fix Error code 43 for a video card on Windows 10?
Error code 43 is related to your graphics card, and cause various problems. Speaking of problems, here are some common issues that users reported:
- Gtx 1060 code 43, gtx 1070 code 43 – This error can affect Nvidia graphics cards, and if you encounter it, be sure to run the Hardware troubleshoot and see if that helps.
- Windows has stopped this device because it has reported problems. (code 43) Intel hd graphics – This problem can also affect Intel’s graphics cards, and if you encounter it, be sure that you have the latest drivers installed.
- Nvidia Quadro error code 43 – This problem can appear while using Nvidia Quadro series and in order to fix it, you need to make sure that there aren’t any overheating issues.
- Error code 43 Windows 10 GPU, AMD, Nvidia – According to users, this error can affect any brand of graphics cards, and if you encounter this issue, be sure to try the solutions from this article.
Solution 1 – Revert to a Previous System Restore Point
If you recently added a new device, or made some other adjustment in Device Manager, consider restoring Windows to an earlier date with System Restore.
The adjustments you made might have caused error 43, and you can undo those system changes with the Windows System Restore tool as follows.
- Open Cortana by pressing its taskbar button and input type ‘System Restore’ in the search box.
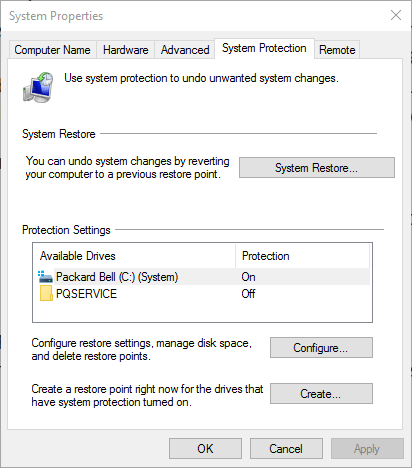
- Select Create a restore point to open the Systems Properties window below.
- Now press the System Restore button to open System Restore.

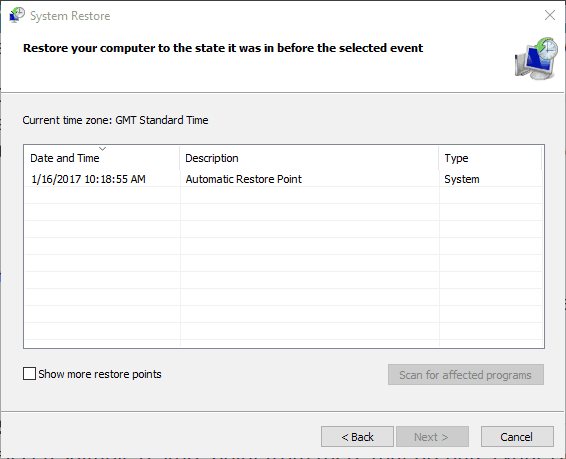
- Click Next on the System Restore window to open a list of system restore points.
- Select Show more restore points to expand the list of restore points.
- Now select a suitable restore point from there that predates your Device Manager adjustments.
- Click Next and the Finish button to restore Windows to an earlier date.
If you’re interested in more info on how to create a restore point and how would that help you, take a look at this simple article to find out everything you need to know.
Solution 2 – Run the Hardware and Devices Troubleshooter
The Hardware and Devices Troubleshooter in Windows can come in handy for fixing hardware errors. So it might also resolve error code 43.
This is how you can open and run that troubleshooter.
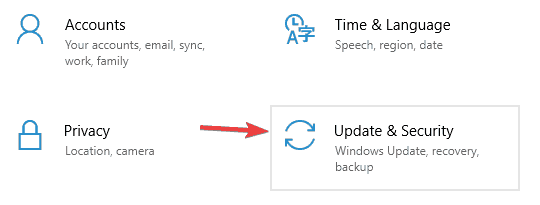
- Press Windows Key + I to open the Settings app.
- When Settings app opens, navigate to Update & Security section.
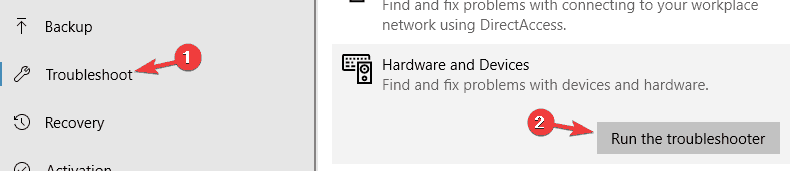
- Navigate to the Troubleshoot section in the left pane. In the right pane, go to Hardware and Devices and click Run the troubleshooter.
When the Troubleshoot window opens, follow the instructions on the screen to complete it. After the troubleshooter is finished, your issue should be completely resolved.
If you’re having trouble opening the Setting app, take a look at this article to solve the issue.
Solution 3 – Update the Device Driver
Faulty video card drivers usually cause error code 43. So one of the best ways you can fix it is by updating your graphics card‘s drivers. You can update those with Device Manager as follows.
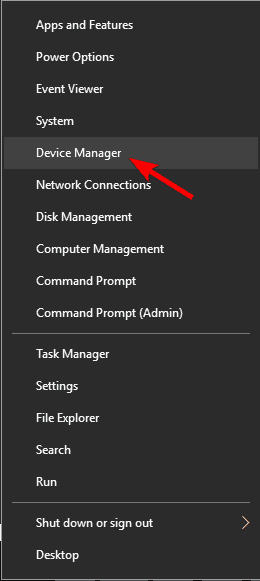
- Press the Win key + X to open the Win + X menu and select Device Manager from there. Alternatively, you can enter Device Manager in the Windows search box to open the window below.
- Click Display adapter and then you should right-click your graphics card to open further context menu options as below
- Now select Update Driver Software from there to open the window directly below.
- Select the Search automatically for updated driver software option on that window to see if any updates are required. Now Windows will update the video card drivers if required.
Solution 4 – Uninstall and Re-install the Device Driver
In some cases, error code 43 can appear if your display drivers are corrupted, and the only way to fix that is to reinstall them.
This is quite simple to do, and you can do it by following these steps:
- Open Device Manager.
- Locate your graphics card driver, right-click it and choose Uninstall device from the menu.
- When the confirmation dialog appears, check Remove driver software for this device and click the Uninstall button.

After removing the driver, restart your PC and Windows 10 will automatically install the default display driver.
If you want to completely remove the graphics card driver, you can also use Display Driver Uninstaller software.
After the default driver is installed, check if the issue is still there. If everything works, you can also download the latest driver from your graphics card manufacturer.
You can also use third-party software to remove and re-install video card drivers. Driver Talent is one handy utility with which you can re-install and repair drivers.
Check out the software’s website and click the Download Now button there to add the program to Windows.
Then you can press the program’s Scan button to install the required video card drivers.
Solution 5 – Check the GPU temperature
A common cause for error code 43 can be your GPU temperature, and in order to fix this problem, you need to make sure that your graphics card is free from dust.
To clean it, just open your computer case and blow the dust from your graphics card using the pressurized air.
Alternatively, you can install additional cooling or keep your computer case open and check if that affects your graphics card.


