- Методы исправления ошибки Application has stopped working
- Как исправить ошибку Application has stopped working?
- Windows Shell Common Dll has stopped working while using gamepad Frontech JIL 1731
- How to fix » game.exe has stopped working» problem?
- Replies (8)
- Application has stopped working – решение, исправление ошибки
- Смена графического процессора
- Для nVidia
- Для AMD
- Другие способы
- Disable Program Has Stopped Working Error Dialog in Windows
- Turn off the Error Dialog through the Group Policy Editor
- Turn off the Error Dialog Via the Registry
- Disabling Windows Error Reporting
Методы исправления ошибки Application has stopped working
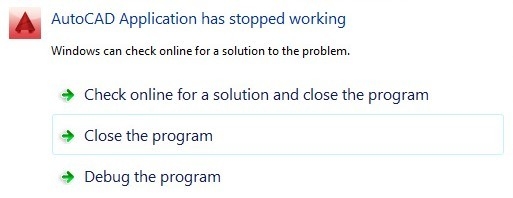
При запуске игры или программы на Windows 10, да и на более ранних сборках, пользователь может столкнуться с ошибкой Application has stopped working, которая требует принудительного завершения работы процесса. Причин такой ошибки много. Среди главных факторов можно выделить следующие: заражение системы вирусом, повреждение системных файлов, переполнение кэша игры (если это игра), устаревшие драйвера видеокарты, несовместимость какого-то драйвера с Windows 10.
Как исправить ошибку Application has stopped working?
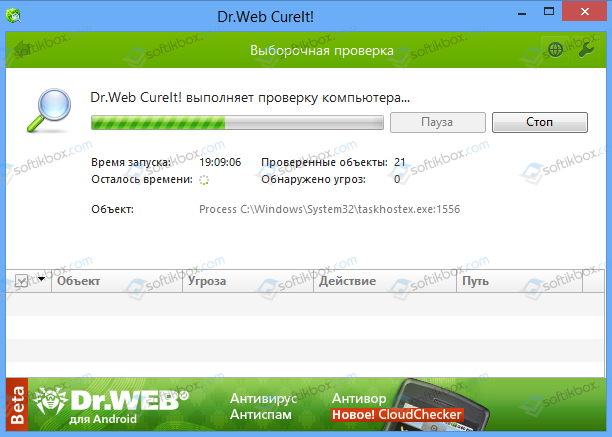
В первую очередь, если на вашем ПК появилась ошибка Application has stopped working, стоит проверить систему на вирусы. Для этой цели подойдет любой антивирус с актуальными базами сигнатур или лечащая утилита Dr.Web Curelt.
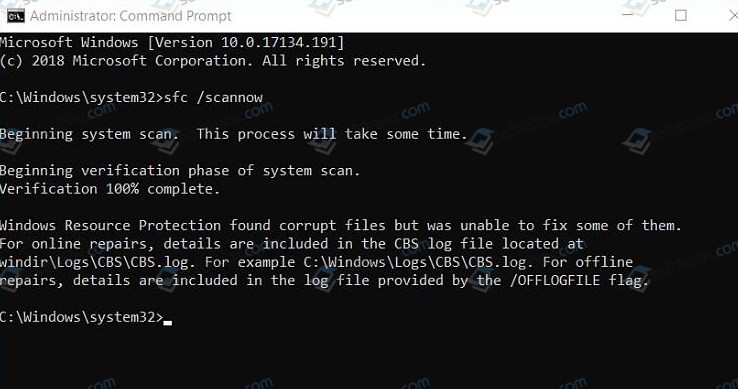
Если защитник обнаружит вирусы, то стоит после их удаления проверить системные файлы на целостность. Для этого нужно запустить командную строку с правами Администратора и ввести sfc /scannow или же DISM /ONLINE /CLEANUP-IMAGE /RESTOREHEALTH.
Часто ошибка Application has stopped working возникает из-за проблем с совместимостью. Если вы запустили на ПК старую игру или программное обеспечение, то попробуйте вручную изменить параметры совместимости. Для этого необходимо выполнить следующие действия:
- Находим папку игры. В ней находим установочный файл, который будет иметь окончание exe.
- Нажимаем правой кнопкой мыши на файле и выбираем «Свойства».
- Откроется небольшое окно. Переходим во вкладку «Совместимость» и ставим отметку «Запустить программу в режиме совместимости». Не помешает поставить отметку «Запускать с правами Администратора».
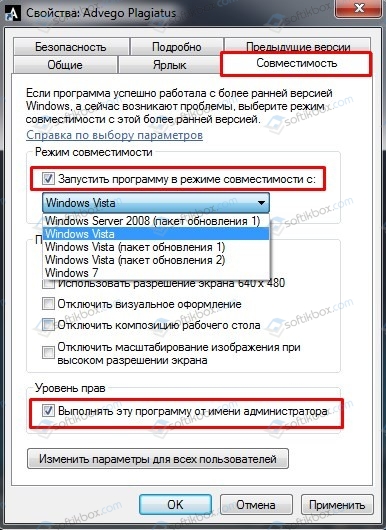
- После этого перезагружаем систему и повторяем попытку запуска приложения.
ВАЖНО! Некоторые программы и игры выдаю такую ошибку из-за отсутствия прав Администратора. Поэтому при запуске игры или программы попробуйте через контекстное меню правой кнопки мыши выбрать запуск софта с правами Администратора или вызовите свойства ярлыка (той же правой кнопкой) и установите отметку во вкладке «Совместимость» на разрешение использования прав Админа.
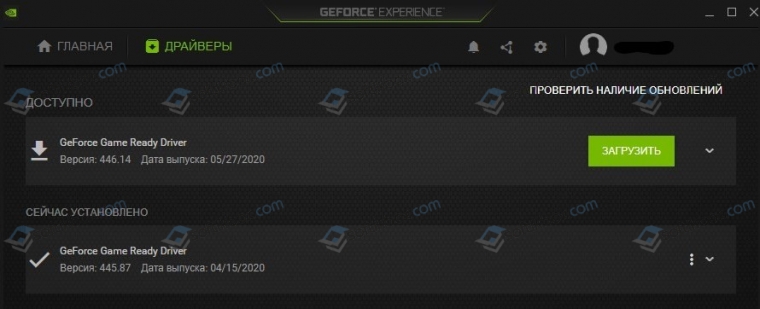
На зарубежных форумах пользователи отмечают, что ошибка Application has stopped working на Windows 10 часто появляется по причине устаревшего видеодрайвера, который операционная система при обновлении не всегда подтягивает. Нужно перейти на сайт производителя видеокарты и загрузить драйвер, который будет соответствовать версии и разрядности ОС. Сделать это можно вручную или воспользоваться специальной утилитой от NVidia, AMD и других производителей.
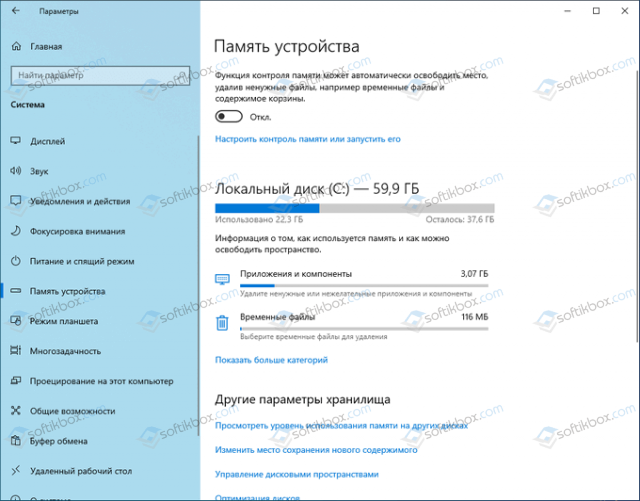
Временные файлы, а точнее их переполнение также могут вызвать такую ошибку. Первым делом стоит запустить очистку диска. Для этого нужно перейти «Параметры», «Система», «Память». В окне справа нужно выбрать «Временные файлы» и отметить галочкой те пункты, которые нужно очистить.
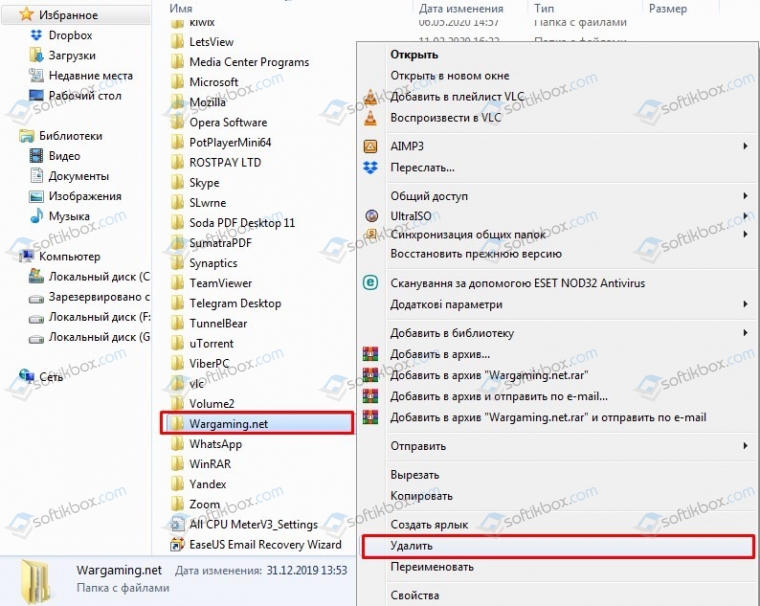
После удаления временных файлов стоит нажать на клавиатуре «Win+R» и ввести %AppData%. Далее находим папку с названием игры, при запуске которой появляется ошибка. Копируем её в другое место, а оригинал удаляем. Перезагружаем ПК. Программа сама создаст нужную директорию и будет работать без сбоев. Если папка не появится, то скопированную ранее папку можно вернуть обратно.
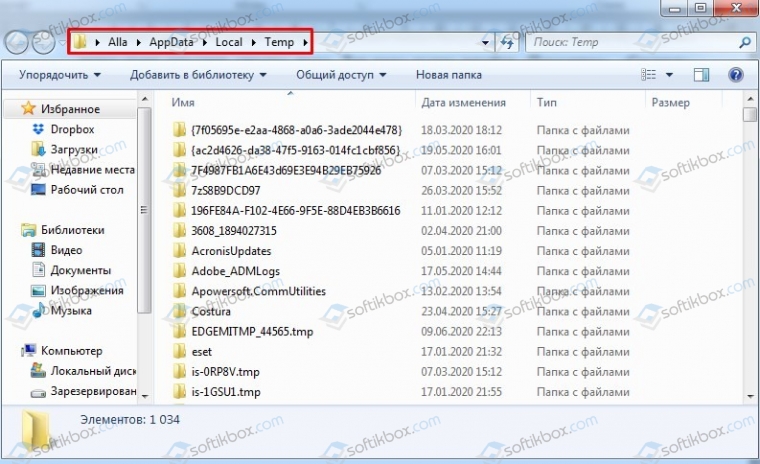
Также нужно нажать «Win+R» и ввести %Temp%. С этой папки нужно удалить все.
Если после удаления этих файлов и перезагрузки системы ошибка Application has stopped working не исчезла, нужно обновить Windows 10 или откатить систему до более раннего состояния и провести полную диагностику установленных компонентов.
Windows Shell Common Dll has stopped working while using gamepad Frontech JIL 1731
Original Title — Windows Shell Common Dll has stopped working.
I have a gamepad Frontech JIL 1731
Not helped at all. BTW i downloaded the latest drivers of this Frontech JIL 1731 Gamepad and it came up with a new icon in control panel that was «Game Controllers(32bit)» when i open it and click on test and on vibration test it worked fine. but when i play games with it i got no vibration even though vibration settings were on. When i installed drivers it had an icon on desktop named «Game option» when i opened it and clicked on properties > vibration test then also i got error ! Please help
Hi, i was getting same error with «USB Vibration Josytick». i downloaded «Frontech JIL 1731 Gamepad» driver for tests. ok, i stucked in same scenario then you,but after some testes o got a soluction for me.
Try this:
Install » Frontech JIL 1731 Gamepad» , then go to %windir%\SysWOW64 ,take a copy of USBJOYSTICK.cpl (or similar name, im not sure if is USBJOYSTICK.cpl or USBJOY.cpl. anyway is easy to find it). I recomend save a copy on desktop, then rename this copy to joy.cpl
Go to %windir%\system32 ,make a backup/rename «joy.cpl» file(the original one. ) , and move the file «joy.cpl» (copy of USBJOYSTICK.cpl previous renamed) to %windir%\system32
After that, you can acess Control Panel>Devices and Printers>Generic USB Joystick(Game Controller Settings)>Properties w/o crash on vibration tab, and it also enable vibration on games. (tested on TRA and others some games)
Btw..you can also double click on the new «joy.cpl» for tests.
I know. this isn’t the best soluction, but my joy is working fine now.
That works, but not well-worded. Plus, there’s no need to rename or MOVE the joy.cpl file.
To put it in language the average person can understand: Just make a backup of the joy.cpl file located in the System32 folder, then DELETE the original (because Windows 8 won’t always allow you to REPLACE an existing file in that folder for some reason.) If you can’t delete it just download and run unlocker. Then copy (NOT move) the joy.cpl file from the SysWOW64 folder into the System32 folder. This worked for my Kinobo Gamepad.
Mr. Ravaid, before I saw this thread I tried to use Windows Powershell (which turned out to be unnecessary in the long run), but it would just open and close quickly. I even tried running it from the cmd prompt and it did the same thing. So I was unable to even get to the GUI. What was I doing wrong? Thanks.
How to fix » game.exe has stopped working» problem?
Replies (8)
![]()
I would suggest you to check if the game is compatible with Windows 7.
If it is compatible and still shows the error message, let us check in a clean boot and try installing the game and check if it helps, a clean boot helps eliminate software conflicts.
Perform Clean Boot.
To help troubleshoot error messages and other issues, you can start Windows 7 by using a minimal set of drivers and startup programs. This kind of startup is known as a «clean boot.»
Important: Reset the computer to start as usual.
Note: After you have finished troubleshooting, follow these steps to boot to normal startup.
a) Press the ‘Windows + R’ key on the keyboard.
b) In the ‘Run’ windows type ’MSCONFIG’ and click ‘Ok’.
c) On the ‘General’ tab, click the ‘Normal Startup’ option, and then click ‘OK’.
d) When you are prompted to restart the computer, click ‘Restart’.
If the issue persists, I would suggest you to contact game support regarding the issue.
If you have any queries related to Windows, feel free to post. We will be glad to assist you.
200 people found this reply helpful
Was this reply helpful?
Sorry this didn’t help.
Great! Thanks for your feedback.
How satisfied are you with this reply?
Thanks for your feedback, it helps us improve the site.
Application has stopped working – решение, исправление ошибки

Ошибка application has stopped working в SnowRunner при запуске игры говорит о прекращении программы и обусловлена какой то проблемой, которую ты сможешь решить, применив мои советы.
Начинаю рассказывать о способах как исправить ошибку application has stopped working при запуске СноуРаннер в порядке наиболее рабочего варианта к маловероятному. Точнее, первый вариант будет более актуальный, второй менее и т.д.
Смена графического процессора
Для nVidia
Переходим в панель управления и меняем основной графический процессор (рисунок в помощь).

Для AMD
Открыть «AMD Catalyst Control Center» → Графика → Высокая производительность. На этом этапе выбираешь игру SnowRunner. Если список пуст, то добавляй через кнопку «Обзор». Далее жми «Применить» → закрыть панель управления и запустить игру. Если ошибка снова появится, то следуй следующему варианту.
Кстати, проблема с application has stopped working известна еще с выхода игры World War Z, которая также принадлежит EpicGames.

Другие способы
- Обновление драйверов видеокарты через панель nVidia – решение проблемы в 82%.
- Зайти в панель устройств и принудительно отключить Intel Graphics. Нажать «Отключить» – решение проблемы в 76%.
- Такой вариант как запуск лаунчера непосредственно из папки игры, а не с ярлыка помог некоторым игрокам, но не всем.
Следите за обновлением страницы, буду добавлять рабочие варианты, хотя уверен, что разрабы о проблеме знают, и будет обнова решающая данный лаг.
Disable Program Has Stopped Working Error Dialog in Windows
If a game or application you are running crashes it will likely show a popup window with the message “application.exe has stopped working. Windows can check online for a solution to the problem”. At this point the process is still present in the background and you can’t run another instance unless you physically click “Close the program” or choose to let Windows look for a solution online. Another possible message is a program has stopped responding popup which is similar but means the program has hung instead of crashed.

This is not ideal if you are running unattended automation scripts or hosting a game server such as Counter-Strike because the program or server software needs to be restarted automatically without user input. The problem is Windows will always show the dialog when a program crashes which means the computer cannot be left alone as what it’s doing will be halted until you return and click close.
The check online option of the error dialog is part of Windows Error Reporting that has been in Windows since XP. It’s function is to gather and send crash data to Microsoft and if they have a possible solution to the crash, it’s sent back to the user. If you disable Error Reporting, you will still get a similar error window but it won’t ask or try to check online. It will say “application.exe has stopped working. A problem caused the program to stop working correctly. Please close the program”.

There is a misconception that you can disable the program has stopped working popup through the Action center in Windows Control Panel. What it actually does is control the Windows Error Reporting options and lets you choose whether Windows checks automatically, asks the user or disables error reporting. The stopped working popup will still appear but with or without the check for solutions option, as shown above.
The way to disable the stopped working window from popping up completely requires something else, here are a few ways to accomplish it.
Turn off the Error Dialog through the Group Policy Editor
This method is obviously useful if you have the group policy editor available in your version of Windows because it doesn’t involve any manual registry editing. GPEdit is not available in Home or Basic versions of Windows.
1. Open the Group Policy Editor by typing gpedit.msc into the Start search box or the Run dialog.
2. Navigate to Computer Configuration > Administrative Templates > Windows Components > Windows Error Reporting. Double click on “Prevent display of the user interface for critical errors” in the pane on the right.

3. Click on the radio button Enabled and then press OK.

For Windows XP Professional the location in the Group Policy Editor is slightly different. Go to Computer Configuration > Administrative Templates > System > Error Reporting, and enable the option for Display error notification in the right pane.
Turn off the Error Dialog Via the Registry
Although editing the registry manually is not recommended for average users, sometimes there isn’t a choice because something like the Group policy Editor might not be available in your version of Windows or the group policy method itself doesn’t work. This works on Windows Vista and above.
1. Open the Registry Editor by typing regedit into the Start search box or the Win+R Run dialog.
2. Navigate to the following registry key:
HKEY_CURRENT_USER\Software\Microsoft\Windows\Windows Error Reporting
3. Double click the DontShowUI entry on the right and change its value to 1, then close the registry editor.

If you don’t feel comfortable editing your own registry or the DontShowUI value is for some reason missing, download the zip file below and run the ready made registry file inside, double click it to automatically import the correct data into your registry.
To reverse the setting and turn the error reporting UI back on use the WER_DontShowUI_Off.reg in the archive.
The above registry fix will turn off the popup dialog for the current user, if you want the setting to affect all users on the computer then a similar registry key needs to be created in the registry at HKEY_LOCAL_MACHINE. This key isn’t present by default so needs to be created. The below registry file inside the zip will do that for you.
Disabling Windows Error Reporting
Although you might have disabled the program has stopped working dialog from appearing altogether, if Error Reporting is set to automatically check for solutions, Windows will still send data to watson.microsoft.com in the background. This may delay the restarting of any scripts you are running or software to automatically restart the program in the event of a crash. In this case it will be a good idea to turn Error Reporting off.
1. Go to Control Panel > Action Center > Change Action Center settings (top left) > Problem reporting settings.
2. Select “Never check for solutions” and click OK. Ask before checking also works because the dialog won’t appear to ask you.

The above is the safest way to turn Error Reporting off, but if you want, it can also be controlled from the registry and is a value called Disable found in the same registry key as DontShowUI. For ease of use, below we have provided some registry files in a zip that will both enable the DontShowUI value in the registry to turn off the dialog box, and also set Error Reporting to Disabled.


