- Install and use a scanner in Windows 10
- How to Scan Documents or Photos in Windows 10
- Windows 10 – Scan Documents, Business Cards or Photos using a Scanner
- Scan Documents, Business Cards or Photos or Whiteboards using a Mobile Phone
- 17 Comments
- Сканирование документов в Windows 10 и 7
- «Факсы и сканирование» в Windows 7
- Как отсканировать документ на Виндовс 10
- Проверяем совместимость
- Устанавливаем сканер
- Программы для работы
- «Мастер» от производителя техники
- Приложение «Сканер»
- Видеоинструкция
- Если сканер не работает
- Утилита устранения неисправностей
- Ручная установка оборудования
- Конфликты
Install and use a scanner in Windows 10
When you connect a scanner to your device or add a new scanner to your home network, you can usually start scanning pictures and documents right away. If your scanner doesn’t automatically install, here’s some help to get things working.
Select one of the following sections, or select Show all. Any section you choose will open to show you more info on using your scanner.
In most cases, all you have to do to set up a scanner is to connect it to your device. Plug the USB cable from your scanner into an available USB port on your device, and turn the scanner on. If that doesn’t work, here’s a way to do it manually.
Select Start > Settings > Devices > Printers & scanners or use the following button.
Open the Printers & scanners settings
Select Add a printer or scanner. Wait for it to find nearby scanners, then choose the one you want to use and select Add device.
Note: If your scanner is included in a multifunction or All-In-One printer, you may only see the name of your printer. To see your scanner, under Printers & scanners, select your installed printer, select Manage, and then choose your scanner.
If your scanner is turned on and connected to the network, Windows should find it automatically. Available scanners can include all scanners on a network, such as Bluetooth and wireless scanners or scanners that are plugged into another device and shared on the network. Here’s a way to do it manually.
Select Start > Settings > Devices > Printers & scanners or use the following button.
Open the Printers & scanners settings
Select Add a printer or scanner. Wait for it to find nearby scanners, then choose the one you want to use, and select Add device.
If your scanner isn’t in the list, select The printer that I want isn’t listed, and then follow the instructions to add it manually.
If you use wireless access points, extenders or multiple wireless routers with separate SSIDs, you’ll need to ensure that you’re connected to the same network as the scanner for your PC to find and install it.
If you have a new wireless scanner that hasn’t been added to your home network, read the instructions that came with the scanner and check the scanner manufacturer’s website to learn more and to get up-to-date software for your scanner.
If your scanner is included in a multifunction or All-In-One printer, you may only see the name of your printer. To see your scanner, under Printers & scanners, select your installed printer, select Manage, and then choose your scanner.
You might need administrator permission to install some scanners.
If you want to see if your scanner is installed, make sure that your scanner is turned on and use the Open the Printers & scanners settings button, or follow these steps:
Under Printers & devices, look for your scanner.
Note: If your scanner is included in a multifunction or All-In-One printer, you may only see the name of your printer. To see your scanner, under Printers & scanners, select your installed printer, select Manage, and then choose your scanner.
Once your scanner is installed, use the Windows Scan app to scan a picture or document. Here’s how:
Note: Need to install the Windows Scan app? You can get the app at Microsoft Store.
Make sure your scanner is turned on.
In the search box on the taskbar, type Windows Scan, and then select Scan from the results.
Do one of the following:
Place the item you want to scan face down on the scanner’s flatbed and close the cover.
Place the item you want to scan in the scanner’s document feeder.
On the Scan page, do the following:
Under Scanner, select the scanner you want to use.
Under Source, select the location you prefer to scan from.
Under File type, select the type of file you want the scan to be saved as. For example, you can save the file in different file formats—such as JPEG, Bitmap, and PNG.
Select Show more to show the Save file to options.
Under Save file to, browse to the location where you want to save the scan.
Select Scan at the bottom of the screen to scan your document or picture.
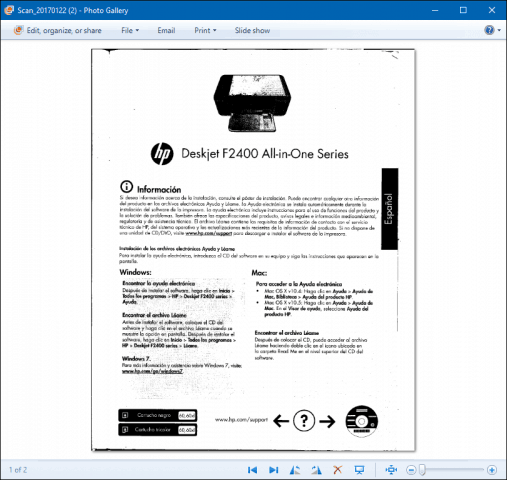
After your scan is finished, select View to see the scanned file before you save it, or select Close to save it. You can edit the scanned document or picture in the preview that appears when you select View.
To locate a previously saved scan file, select File Explorer from the taskbar, and then select the location that you chose to save your scanned files.
If none of these instructions solved your scanner problem, there could be an issue with the scanner itself. Go to the scanner manufacturer’s website for specific troubleshooting info.
How to Scan Documents or Photos in Windows 10


There are multiple ways to scan a document or photo in Windows 10. You might be wondering, who needs to scan stuff in this digital decade? Unfortunately, there are many many circumstances which paper is still the preferred or default format. Banking and Government documents for taxes, for example, still show up at the house in paper form — ick.. normally arrive at my house
In this article, I will review a few ways you can scan a document using a physical scanner or the free Office Lens app for Windows 10. After all, who wants to be buried under a mountain of unsearchable paper documents?
Windows 10 – Scan Documents, Business Cards or Photos using a Scanner
Even in 2017, it’s hard to beat the quality of a dedicated document or flatbed scanner. On Amazon, Prices range from $50 to $400 depending on the features, speed etc… If you want advice, stick with the big brands like Canon, Epson or Brother. Look for the highest number of reviews combined with a high Amazon rating (4+ star) and you should be just fine. So, once you get set up with your printer and get it configured with Windows 10, it’s time to start scanning!
Windows 10 includes a built-in scan utility, which you can access from the printer context menu.
Click Start, type: devices and printer then hit Enter. Right-click your scanner or printer, then click Start Scan.

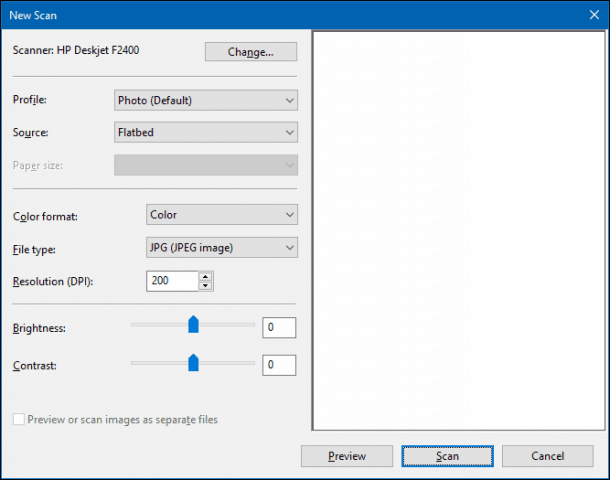
Users have several options on the screen which let you preview the document, choose a color format (color or black and white), adjust brightness, set the appropriate resolution and even choose the format you want to save it in: JPEG, PDF or PNG. If you are satisfied with the results after reviewing the document, proceed to click Scan.
Make your selections, Click Preview to ensure everything looks good then Click Scan.
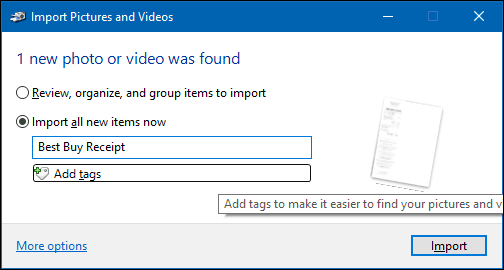
After giving your scanned document a Name, add a few tags to make it easier to search for later. Click Import.
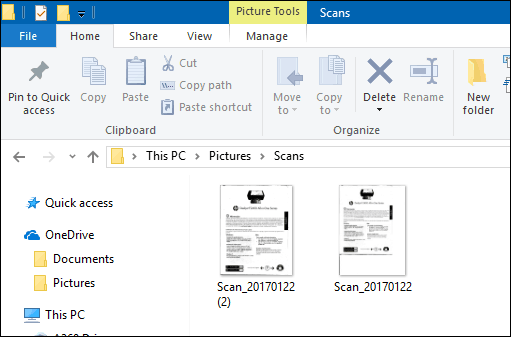
Your scanned document can normally be found in Pictures within the scanned files folder.
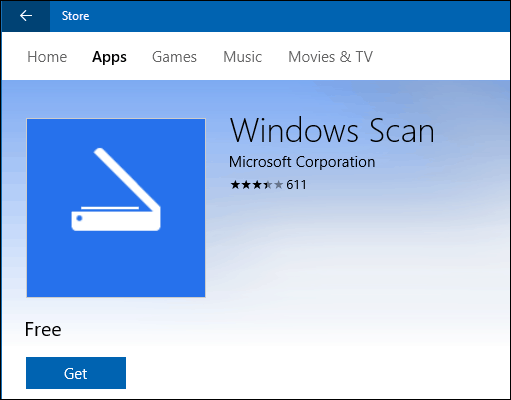
With each revision of Windows 10, Microsoft is slowly deprecating parts of the classic desktop and the built-in scan utility might become the next victim. Microsoft released a modern universal app you can download from the Windows Store called Windows Scan.
Depending on when you’re reading this article, the Windows Scan app might be the best place to start for scanning paper documents or photos. If you updated to Windows 10 from 8, you might even have it installed. That said, I had to blow away the app from my Windows 10 box and reinstall it from the Windows Store. Something must have been corrupted during the Windows 8 to 10 upgrade.
The interface is quite similar to the old scanning utility. You can preview your document, crop it before scanning the final document, adjust resolution, select appropriate file formats and choose your save location.
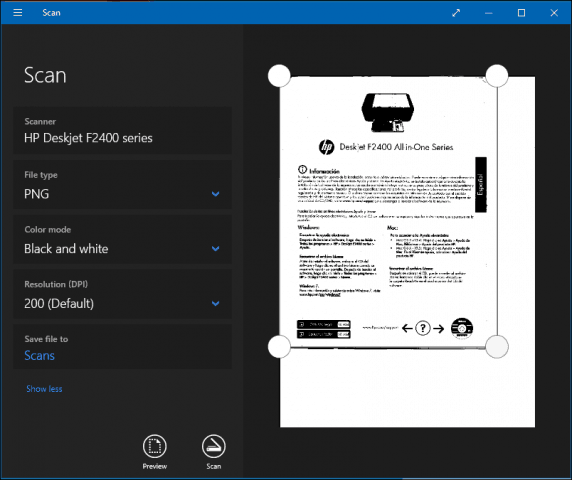
When ready, click Scan then review the scanned document.
Scan Documents, Business Cards or Photos or Whiteboards using a Mobile Phone
Although once very popular, many people just don’t buy scanners anymore. No worries, Microsoft also makes an excellent mobile app called Office Lens. We’ve written about the iPhone/iPad version in detail however it also works well on Android.
Download Links:
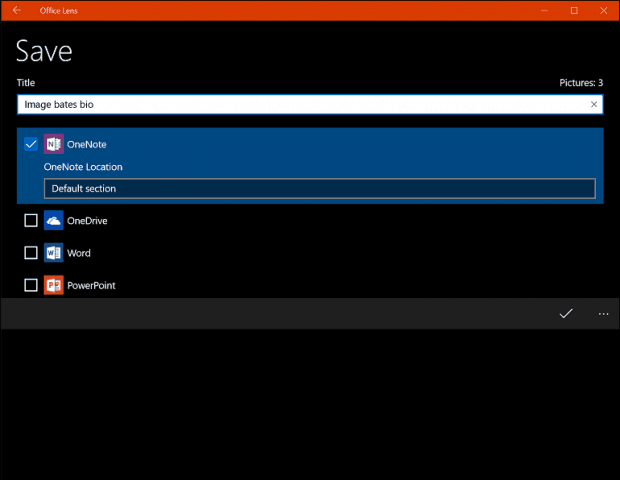
Office Lens scans photos, whiteboards, business cards, and documents quickly and easily. It’s fully integrated with other Microsoft apps like OneDrive, Word and OneNote.
It’s simple to use, just launch Office Lens, tap the scanner tab, then choose the type of content to scan. Office Lens will optimize its settings and create a frame around the document when it is recognized.

Tap the camera button to capture the file, preview the document then make further adjustments such as cropping or saving it in the desired format.

After scanning your document, there are other tasks you might want to perform such as adding a label, crop, delete it or save it for use in OneNote, OneDrive, Word or PowerPoint.
So, that’s a look at scanning documents and photos in Windows 10, both old and new. I must admit, using a dedicated flatbed scanner still remains the best choice for scanning documents; if you want the best quality. That said, it’s hard to beat the convenience and speed of a mobile combined with Onedrive. Sure, the quality might not be as good but, in most cases, it’s probably good enough.
17 Comments
I’ve never used the process you have described to scan documents, but will have give it a try. I have two flatbed scanners and use the HP scan software. However, when away from my office I use an iPhone app called “DocSanner”. It uses the iPhone camera. Once the image of the document, or sunset, etc. is captured you can crop, change dark/light settings, or rotate. Once complete you have the options to email as PDF or JPEG. You can upload to Dropbox, Evernote, eFax or HP eprint. You can even add a signature. The app also has an OCR option. Not bad for a free app!!
SCANNABLE is another great app. I use it a lot for scanning all my documents. You can create multi-page PDF documents with it and then either save the scan to your iPhone or email it. Works great. Might want to give that a look also.
Сканирование документов в Windows 10 и 7
Эта инструкция подскажет Вам, как сканировать в Windows 10 или 7 правильно. Но перед этим сперва нужно технику добавить на компьютер или ноутбук, установить драйвера и только тогда проводить сканирование документов или фотографий со своего принтера (МФУ). Сам процесс выполняется через специальные программы для таких целей. Это могут быть: приложение «Сканер» в 10-й версии ОС от Майкрософт (можно бесплатно скачать с «магазина»), встроенная служба «Факсы и сканирование» или фирменный «мастер работы» от компании производителя оборудования.
Некоторым пользователям после установки сложно найти сканер на ПК или создать ярлык программы, а кому-то даже запустить, чтобы что-то отсканировать. Детально расскажем, как выйти из такой ситуации. Cложнее, если система не видит устройство, оно не работает или не открывается. Но решение проблем такого плана тоже есть.
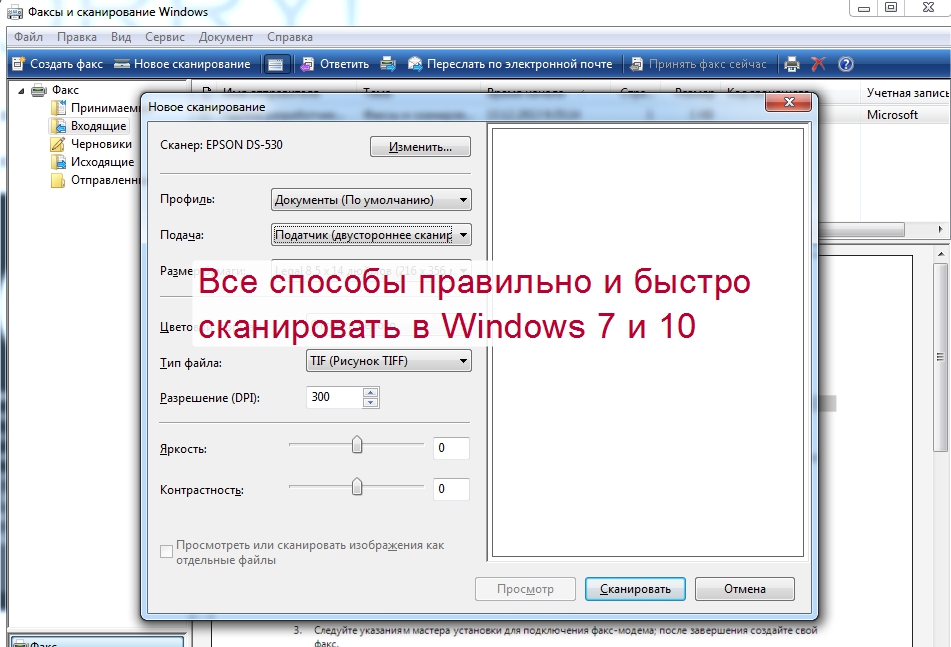
«Факсы и сканирование» в Windows 7
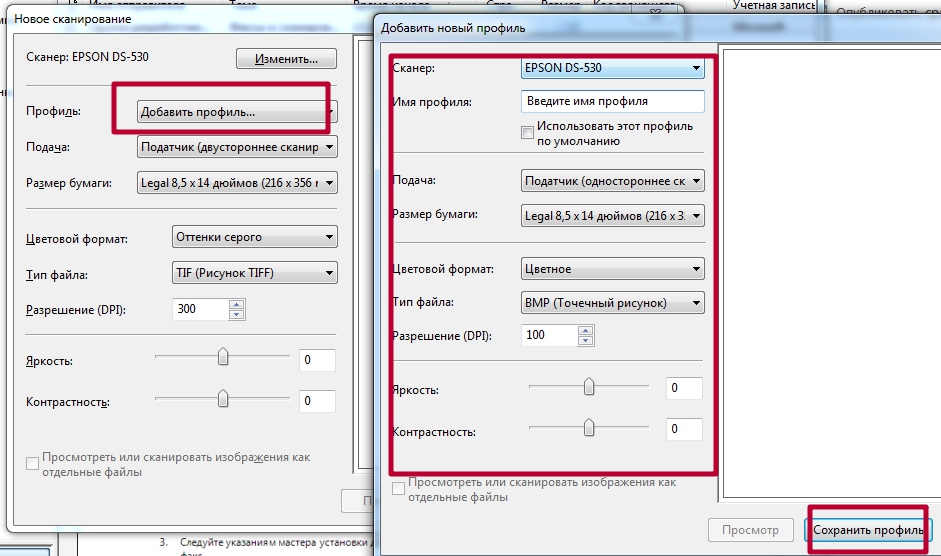
Ранее указанные параметры сканирования можно сохранить в отдельный профиль, чтобы не настраивать повторно.
Как отсканировать документ на Виндовс 10
Проверяем совместимость
Перед началом всех процедур стоит выяснить некоторые важные моменты совместимости. Как показывает практика, даже если есть драйвера, скачанные на сайте производителя, Windows 10 может конфликтовать с оборудованием. Так, к примеру, МФУ компании Canon рекомендуют использовать программное обеспечение более старого образца. Оно отмечено как рекомендуемое. А потому сканер в Windows 10 может работать не совсем корректно. К такому развитию событий следует быть готовым.
Если устройство старое, то драйверов к нему может вовсе не существовать. А также часто наблюдаются проблемы со сканированием по сети из «десятки». ОС их попросту не видит. А потому требуется прямое соединение через провод USB, хотя и это не гарантия корректной работы.
Если ранее свой МФУ Вы использовали только как принтер, а сейчас пробуете на нем отсканировать документ, то убедитесь, что установлены драйвера не только на печать, но и на сканер. Для многих моделей это разные пакеты файлов.
Устанавливаем сканер
Подключение сканера к компьютеру сводится к «связыванию» USB проводом и установкой драйверов. Последние могут быть скопированы системой Виндовс 7, а тем более 10, автоматически. Но если сканер уже старый, то ОС идентифицирует такую технику как неопознанную. В таком случае придется нужные файлы «дров» скачать с сайта производителя техники. Тогда все сводится к таким простым шагам:
- Соединяем сканер с компьютером.
- Ждем автоматической установки.
- Если все прошло удачно, то начинаем сканировать. В противном случае переходим к следующим пунктам.
- Скачиваем драйвер.
- Устанавливаем и перезагружаем систему.
Программы для работы
«Мастер» от производителя техники
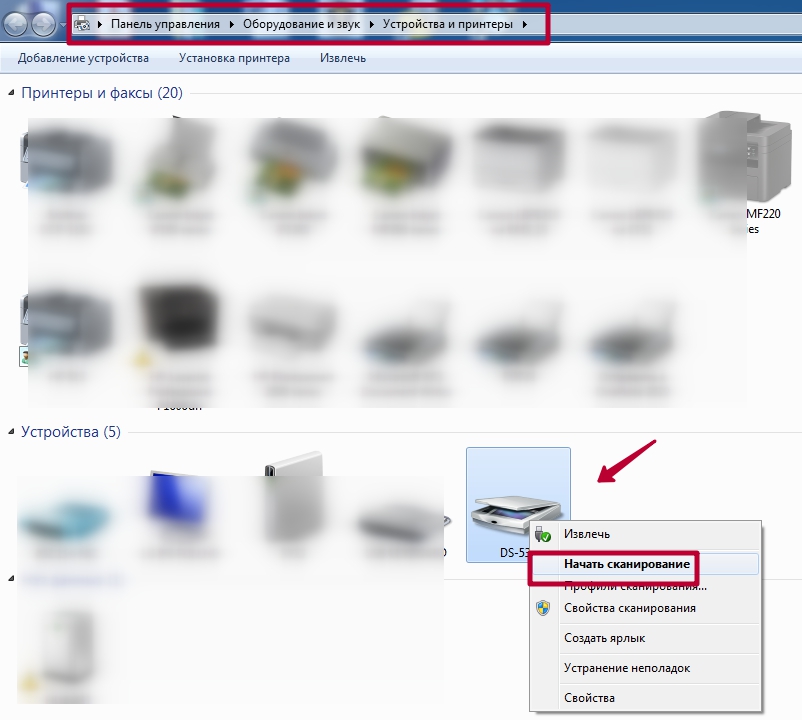
- Через «Панель инструментов» зайдите в раздел «Принтеры и факсы». Найдите свою модель сканера и выделите его.
- Правой кнопкой мышки вызовите контекстное меню, а среди списка отметьте «Начать сканирование».

- Система запустит встроенную утилиту бренда. Такого или такого вида .
- В этом окне можно настроить тип сканирования, размер бумаги, цветное или черно-белое сканирование. А также установить, в какой формат сохранять результат, указать разрешение, яркость и контрастность. После нажатия на просмотр увидите предварительный результат.
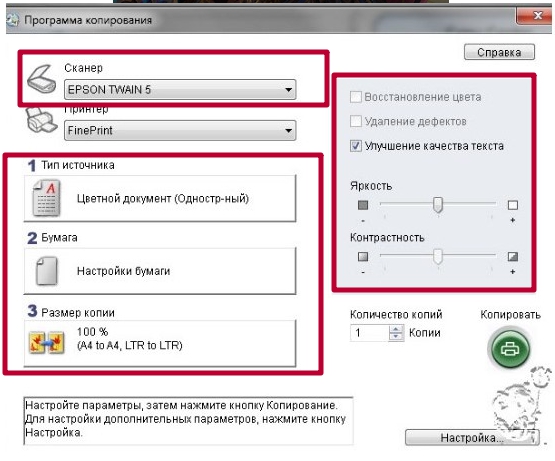 или такого вида
 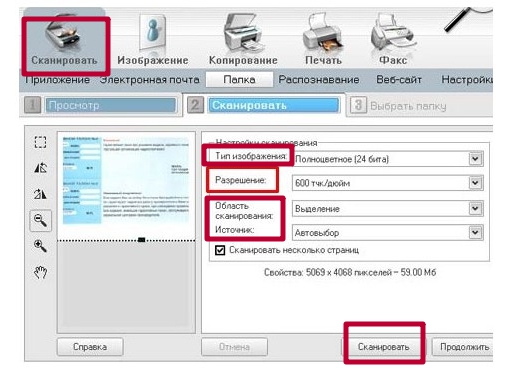 .
.Приложение «Сканер»
Это встроенный инструмент, который является усовершенствованной и визуально другим вариантом старой утилиты «Факсы и сканирование». А в плане возможностей инструмент потерял подержку работы с факсами и отправку сканов по электронной почте.
Чтобы воспользоваться инструментом, его сначала нужно скачать и установить из магазина приложений Microsoft. Несмотря на название — это бесплатно. Возможен вариант, что приложение уже установлено На ПК. Найдите его через строку поиска Windows. Значок программы имеет вот такой вид. 
Нажмите по нему, чтобы запустить.
Когда приложение откроет свое окно, то слева увидите модель сканера. Ее при необходимости можно сменить. Ниже — тип файлов, в который будет сохраняться результат сканирования. Кроме «PNG» доступны к выбору JPEG, TIFF и Bitmap. Все зависит от целей и дальнейшего применения оцифрованных документов. 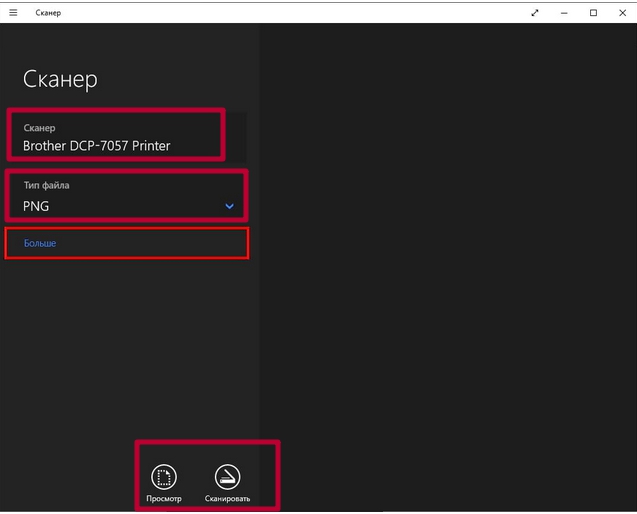
По ярлыку «Больше» откройте остальные настройки. Среди них:
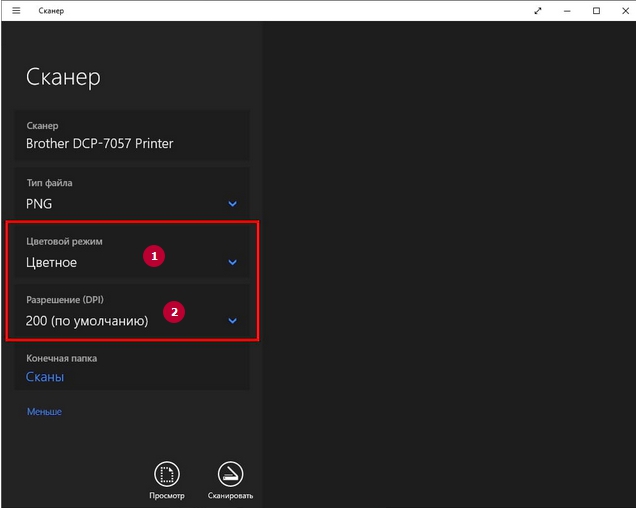
- Режим сканирования в цвете для фотографий или черно-белый для документов и текста.
- Разрешение в DPI по сути является указанием качества отсканированных результатов.
- Настройка «Конечная папка» позволяет указать место на диске компьютера, где будут сохраняться цифровые копии. По умолчанию это директория «Сканы» в папке документы. А полный путь к ней такой «C:\Users\Имя пользователя\Pictures\Сканы». Быстрый доступ осуществляется через проводник. При необходимости можно указать любую другую папку на диске.
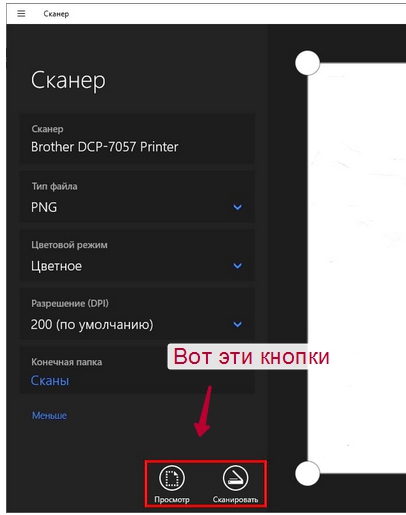
Когда все нужные настройки произведены можно приступать непосредственно к самому сканированию. Принимать листы разные сканеры могут одним или несколькими способами. Это могут быть автоподатчик документов или крышка со стеклом. При втором варианте 100% класть бумагу нужно заполненной стороной вниз. Крышку обязательно закрыть. При автоматической подаче, скорее всего, также, но все зависит от конкретной модели.
Для предварительного отображения результата используйте кнопку «Просмотр», а для получения готового скана — «Сканировать».
Видеоинструкция
Если сканер не работает
Утилита устранения неисправностей
Первым делом при возникновении каких-либо проблем в работе любого оборудования, будь то принтер или сканер, стоит воспользоваться штатными возможностями устранения. Переходим в раздел с устройствами и находим проблемное. Вызываем контекстное меню, в нем кликаем на пункт «Поиск неисправностей». 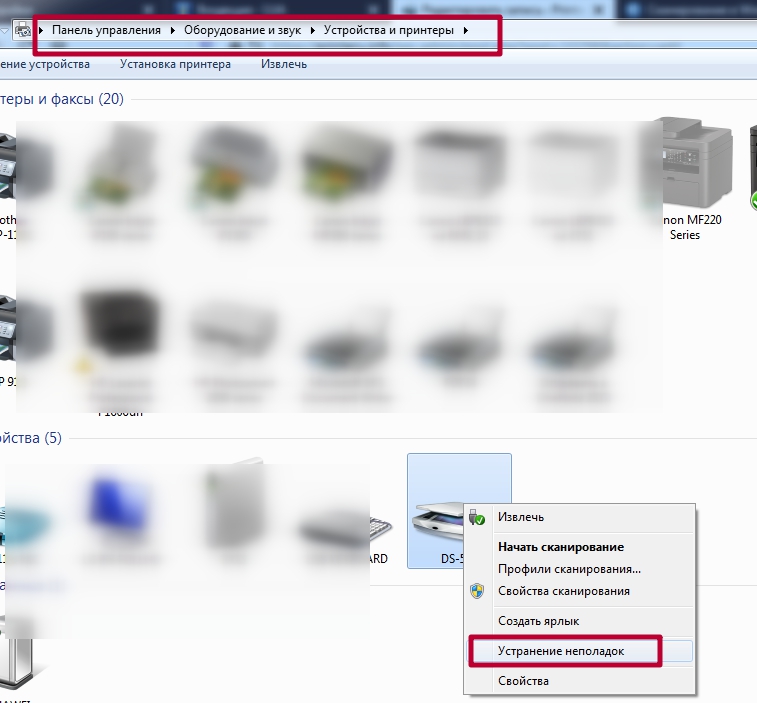
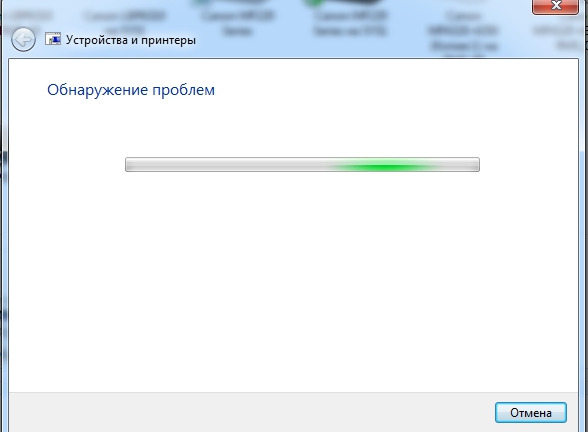
Ждем окончания работы утилиты.
Ручная установка оборудования
Если сканера и вовсе нет среди оборудования в соответствующем разделе, то стоит попробовать его добавить ручным способом. Для этого:
- Через путь «Пуск»-«Параметры»-«Устройства» переходим в раздел «Принтеры и сканеры».
- Теперь, чтобы добавить новую технику нажимаем на кнопку «Плюс».
- Кликаем по ярлыку «Необходимый принтер отсутствует в списке».
- Дальше в конце выбираем вариант «У принтера большой возраст» или «Мой принтер очень старый».
- Упоминание «принтера» неошибочное.
Конфликты
Но также проблема может возникать из-за автоматической установки встроенного ПО для сканирования от производителя вместе с драйверами. В таком случае его следует удалить (по возможности). Или можно отключить стандартную утилиту операционной системы Windows. Выполнить то и другое можно через оснастку «Программы и компоненты». Она находится в «Панели управления».
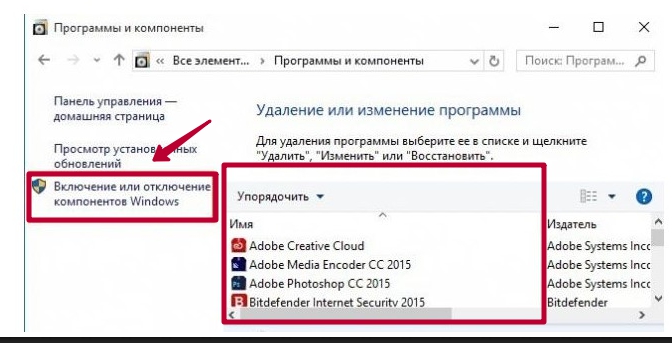
Приложение от сканера найдите в списке справа, а затем нажмите кнопку удалить. Для встроенного в Виндовс воспользуйтесь включением и отключением компонентов. Ярлык слева.
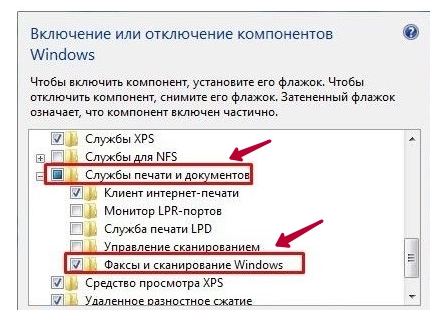
Найдите раздел «Службы печати документов», а в нем «Факсы и сканирование Windows». И напротив него уберите галочку. После перезагрузите компьютер, чтобы изменения вступили в силу.


