- How to Change the Recycle Bin Icon on Windows 7, 8, 8.1 and 10
- On Windows 7
- On Windows 8 and 8.1
- On Windows 10
- How to change Recycle Bin icon in Windows 10
- Change Recycle Bin icon in Windows 10
- How to fix Windows 10 Recycle Bin icons not refreshing
- How Can Users Fix Recycle Bin Icons not Refreshing?
- 1. Edit the Registry
- 2. Rebuild the Thumbnail Cache
- 3. Select Empty and Full Recycle Bin Icons
- 4. Reset the Recycle Bin
- How To Add Recycle Bin Icon To Desktop In Windows 10
- Adding or restoring Recycle Bin icon
- Add or restore Recycle Bin icon to Windows 10 desktop
How to Change the Recycle Bin Icon on Windows 7, 8, 8.1 and 10
The Windows Operating System prides itself with offering a multitude of customization and personalization options to its users. From the wallpaper they see on their Desktop to the icon of a file or folder in Windows Explorer, there is a lot a Windows user can change and customize to their liking on their computer. Among the many personalization options Windows users have is the ability to change the icons of all the elements they see on their Desktop – this includes the Computer, Documents, and, yes, the Recycle Bin.
Changing the Recycle Bin icon is possible on all versions of the Windows Operating System that are currently supported by Microsoft, and was also a feature on much older versions of Windows. In addition, Microsoft made a point of making sure customization on the Windows Operating System is a breeze, which is why changing the icon of your Recycle Bin on your Desktop is also pretty easy regardless of what version of Windows you have on your computer. However, it should be noted that the steps you need to go through in order to change the icon of the Recycle Bin on your Desktop vary slightly depending on what version of Windows you have.
Without further ado, here’s what you need to do in order to change the Recycle Bin icon on your Desktop on a Windows computer:
On Windows 7
If you’re using Windows 7, all you need to do to change the icon of the Recycle Bin on your Desktop is:
- Navigate to your Desktop.
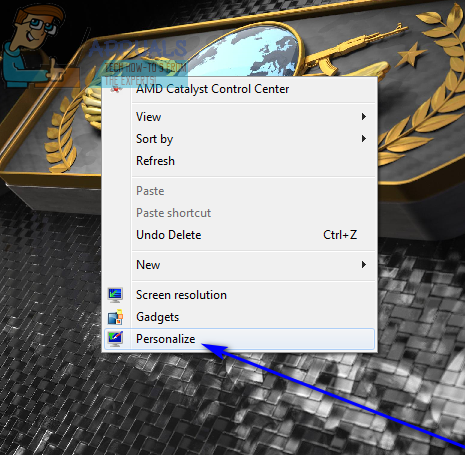
- Right-click on an empty space on your Desktop, and click on Personalize.

- In the left pane of the Personalization window, locate and click on Change desktop icons. This will cause the Desktop Icon Settings window to appear.
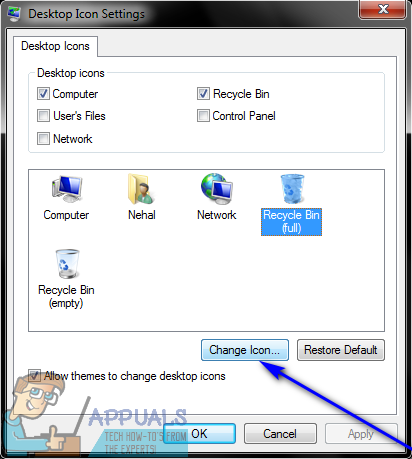
- Click on whichever Recycle Bin icon you want to change to select it (you have recycle (full) and recycle (empty) to choose from – these are the icons that your Recycle Bin is displayed as when it is full or when it is empty, respectively).
- Click on Change Icon….
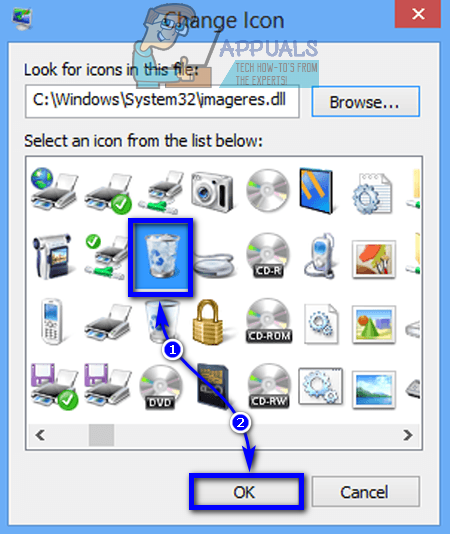
- Look through all of the available icons, locate whichever icon you want your Recycle Bin‘s icon changed to, click on it to select it, and click on OK. Alternatively, if you want to use a custom icon for your Recycle Bin, click on Browse…, navigate to the location on your computer where the custom icon is saved, click on the custom icon to select it, click on Open, click on the custom icon in the Change Icon dialog to select it and click on OK.
- Click on Apply and then on OK.

On Windows 8 and 8.1
If you are using Windows 8 or Windows 8.1, to change the Recycle Bin icon, you will need to:
- Press the Windows Logo key + F to open the Search panel.
- Type “recycle bin” into the Search field, click on Settings and click on the search result titled Show or hide common icons on the Desktop. Doing so will cause the Desktop Icon Settings window to pop up.
- Click on recycle (full) or recycle (empty) depending on which state of the Recycle Bin you want to change the icon of to select it, and click on Change Icon….
- Look through all of the available icons, locate whichever icon you want your Recycle Bin‘s icon changed to, click on it to select it, and click on OK. Alternatively, if you want to use a custom icon for your Recycle Bin, click on Browse…, navigate to the location on your computer where the custom icon is saved, click on the custom icon to select it, click on Open, click on the custom icon in the Change Icon dialog to select it and click on OK.
- Click on Apply and then on OK.


On Windows 10
If your computer is running on the latest and greatest iteration of the Windows Operating System and you want to change the Recycle Bin icon, you will have to:
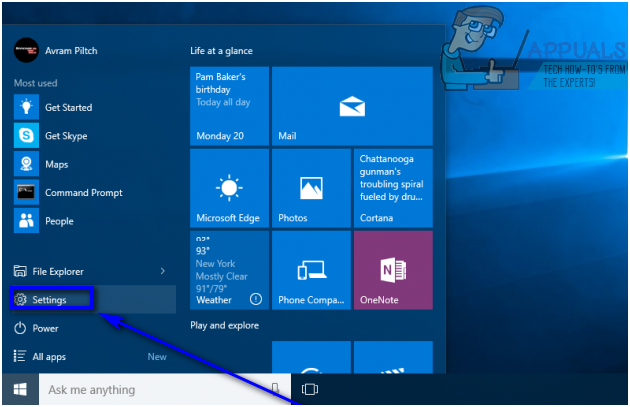
- Open the Start Menu.
- Click on Settings.
- Click on Personalization.
- In the left pane of the window, click on Themes.
- In the right pane of the window, locate and click on Desktop icon settings under the Related Settings section.
- Click on recycle (full) or recycle (empty) depending on which state of the Recycle Bin you want to change the icon of to select it.
- Click on Change Icon….
- Look through all of the available icons, locate whichever icon you want your Recycle Bin‘s icon changed to, click on it to select it, and click on OK. Alternatively, if you want to use a custom icon for your Recycle Bin, click on Browse…, navigate to the location on your computer where the custom icon is saved, click on the custom icon to select it, click on Open, click on the custom icon in the Change Icon dialog to select it and click on OK.
- Click on Apply and then on OK.


How to change Recycle Bin icon in Windows 10
There are two states of the Recycle Bin – one is Recycle Bin with deleted items and the other one is empty Recycle Bin. Both states of Recycle Bin have a different set of icons. In this post, we will show you the steps you can take to change the Recycle Bin icon in Windows 10. You can make the icon dark or black or set any other icon of choice. The dark icons would blend well, with the dark theme you have set for your PC.
The Recycle Bin is a location where all the deleted files and folders are temporarily stored in every version of the Windows operating system. The Recycle Bin can be used to recover deleted files. Mostly you can find the Recycle Bin icon on the desktop.
Change Recycle Bin icon in Windows 10
To change the Recycle Bin icon in Windows 10, carry out these steps:
- Open Settings > Personalization > Themes
- Click on the Desktop Icon Settings link you see
- Select the Recycle Bin (full) icon
- Press Change icon
- Choose the icon and set it
- Repeat the process for Recycle Bin (empty) icon.
You can set a dark or any icon of your choice – but the images have to me in the .ico format.
As an example, let us change the icon to a dark one. Before changing the Recycle Bin icon, you first need to download the Recycle Bin dark icons. There are many websites that can offer a lot of decorative icons in the ico format.
Let’s begin.
- First, head over to DeviantArt and download the Recycle Bin dark icons.
- Next, right-click on the desktop and choose Personalize >Themes.
- On the right pane, scroll down and under Related Settings, click Desktop icon settings.
- In Desktop icon settings window, choose the Recycle Bin(full) icon.
- Click on Change icon and browse the location where you downloaded the Recycle Bin icons.
- Choose the icon and click OK.
- Now repeat the same steps for Recycle Bin (empty) icon.
- Click Apply >OK.
Note: If you constantly switch themes, then make sure the Allow themes to change desktop icons option is unchecked, to avoid themes to change the desktop icons.
If you wish to restore the native icons, right-click on the desktop and choose Personalize > Themes > Desktop icon settings > Restore Default to change the Recycle Bin icons to default.
Date: June 11, 2020 Tags: Icons, Recycle Bin
How to fix Windows 10 Recycle Bin icons not refreshing


The Recycle Bin’s desktop shortcut usually automatically changes to alternative full or empty icons when users delete files or clear the bin. However, some users have posted on Microsoft’s forum about their Recycle Bins not refreshing to empty or full icons. When they clear their Windows Recycle Bins, the desktop shortcuts for them don’t refresh to the empty bin icons. That bug can arise for Recycle Bins with custom or default icon sets.
How Can Users Fix Recycle Bin Icons not Refreshing?
1. Edit the Registry
- Users have fixed Recycle Bins with custom icons not refreshing by editing the DefaultIcon key. To do that, launch Run by pressing the Windows key + R hotkey.
- Input ‘regedit’ and click OK in Run to open the Registry Editor.
- Next, open this registry key path: HKEY_CURRENT_USER\Software\Microsoft\Windows\CurrentVersion\Explorer\CLSID\<645ff040-5081-101b-9f08-00aa002f954e>\DefaultIcon. Users can copy and paste that path into the Registry Editor’s address bar with the Ctrl + C and Ctrl + Vhotkeys.
- Select the DefaultIcon key.
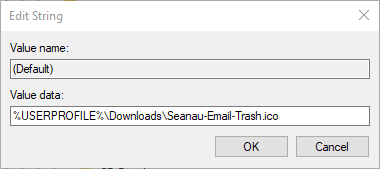
- Next, double-click the (Default) string on the right of the Registry Editor to open the window below.
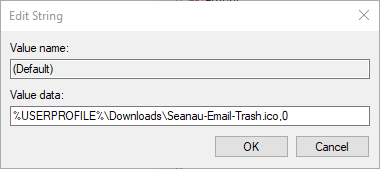
- Enter ‘,0’ after the icon file path as shown in the snapshot directly below. For example, %USERPROFILE%\Downloads\Seanau-Email-Trash.ico would become: %USERPROFILE%\Downloads\Seanau-Email-Trash.ico,0.
- Then repeat the above steps for the empty and full strings in the DefaultIcons key. Then the empty and full strings should also include ‘,0’ at the end of their value data paths much the same as the (Default) string as in the image directly below.
2. Rebuild the Thumbnail Cache
- Rebuilding the thumbnail cache might fix Recycle Bin icons not refreshing. To do that, open File Explorer by pressing the Windows key + E hotkey.
- Then open this folder path in File Explorer: C:\Users\%username%\AppData\Local\Microsoft\Windows\Explorer.
- Select all the .db files in the folder.
- Click the Delete button.
- Restart Windows after deleting the .db files in the Explorer folder.

3. Select Empty and Full Recycle Bin Icons
- This is a resolution more specifically for fixing default Recycle Bin icons that aren’t refreshing. Right-click the Windows 10 desktop and select Personalize.
- Click Themes on the left of the window, and scroll down to the Desktop icon settings option.
- Click Desktop icon settings to open the window shown directly below.
- Select Recycle Bin (full), and press the Change Icon button.
- Select the empty Recycle Bin icon in the Change Icon window, and click the OK button.
- Select Recycle Bin (empty), click Change Icon, and choose the full Recycle Bin icon. Click the OK button to exit the window.
- Click the Apply button.
- Then try deleting something to the Recycle Bin to see if the icon changes to empty, or empty the bin to see if it refreshes to the full icon. If it does, return to the Desktop Icons tab and change Recycle Bin full and empty so they show their correct icons.
4. Reset the Recycle Bin
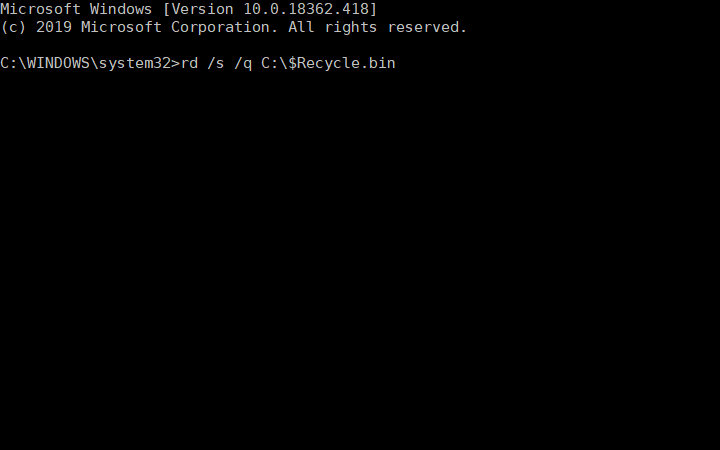
Resetting the Recycle Bin via the Command Prompt might also fix its icons. Enter ‘cmd’ in Run’s Open box, and press the Ctrl + Shift + Enter hotkey. Input ‘rd /s /q C:\$Recycle.bin’ in the Command Prompt, and press the Return key.
So, that’s how users can fix Recycle Bin icons that don’t refresh. Then the Recycle Bin’s desktop icon will refresh when users delete files to or clear their bins in Windows.
RELATED ARTICLES TO CHECK OUT:
How To Add Recycle Bin Icon To Desktop In Windows 10
Last Updated on February 22, 2020 by admin 6 Comments
When you perform a clean install of Windows 10 or create a new user account, the Recycle Bin icon appears on the desktop by default.
Not all users use the Recycle Bin as many prefer to use the Shift + Del hotkey to permanently delete files instead of moving them to Recycle Bin. That said, many users often use the Recycle Bin to restore deleted files, and it’s a wise idea to delete files to Recycle Bin as recovering permanently deleted files can’t be done without the help of third-party tools.
Users often complain about missing the Recycle Bin icon from the Windows 10 desktop. Recycle Bin icon can’t be easily deleted, unlike other icons and files. But if the Recycle Bin icon is not appearing on the desktop, you can restore the icon with ease.
Adding or restoring Recycle Bin icon
Unlike previous Windows versions, adding or removing the Recycle Bin icon from the desktop is not very straight-forward in Windows 10 thanks to the omission of classic Personalization window. Users need to perform a couple of more steps in order to add the Recycle Bin to the desktop or completely remove it from the desktop.
Whether you have deleted the Recycle Bin icon from the desktop or it does not appear on the desktop for any other reason, follow the given below directions to add or restore the Recycle Bin icon to the desktop in Windows 10.
Add or restore Recycle Bin icon to Windows 10 desktop
Step 1: Right-click on desktop, click Personalize. This will open the Personalization section of the Settings app.
Step 2: Click Themes. In the Related settings section, click Desktop icon settings link to open the same.

Step 3: Here, under the Desktop Icons section, check the option labeled Recycle Bin. Click the Apply button to add the Recycle Bin to your Windows 10 desktop.
As you can see in the picture above, here you can also change the default icon of Recycle Bin, This PC, Network, and profile folder.
To change an icon, select the icon, click Change icon button, browse to the icon file (must be in .ico format), and then select the same. Refer to our how to change the default icon of Recycle Bin in Windows 10 guide for step-by-step instructions.


