- Install Windows on your older Mac using Boot Camp
- What you need
- Before you begin
- Perform the installation
- Step 1: Check for software updates
- Step 2: Prepare your Mac for Windows
- Step 3: Install Windows
- Step 4: Install Boot Camp on Windows
- Install Windows on your newer Mac using Boot Camp
- What you need
- Before you begin
- Perform the installation
- Step 1: Check for software updates
- Step 2: Prepare your Mac for Windows
- Step 3: Install Windows
- Step 4: Install Boot Camp on Windows
- Как правильно установить Windows 10 на Mac
- На какие компьютеры Mac можно установить Windows 10
- Что нам понадобится
- Как установить Windows 10 по шагам
- Как запускать macOS или Windows
- Как удалить Windows с Mac
Install Windows on your older Mac using Boot Camp
You can use Boot Camp Assistant to install Windows 10 on your Intel-based Mac.
You need an external USB drive to install Windows on older Mac computers. To find out whether you have a Mac that requires an external USB drive, see the “Learn more” section in the Apple Support article Install Windows 10 on your Mac with Boot Camp Assistant. If your Mac is a newer model that doesn’t require a USB drive, follow the instructions in Install Windows on your newer Mac using Boot Camp instead.
What you need
The keyboard and mouse or trackpad that came with your Mac. (If they aren’t available, use a USB keyboard and mouse.)
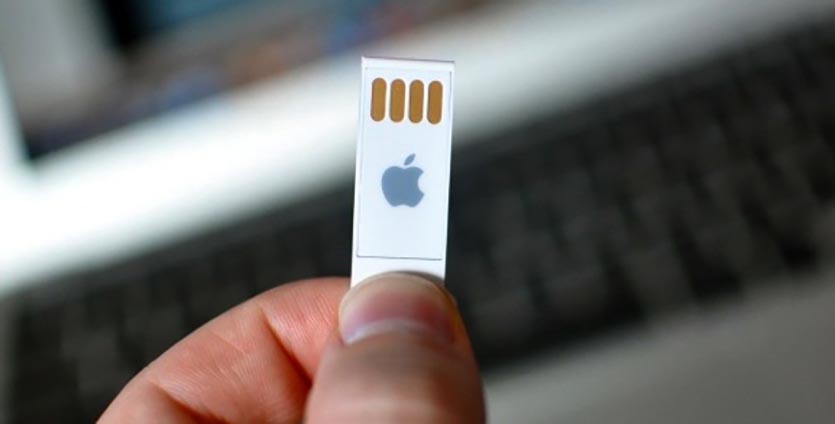
A blank 16 GB or larger external USB 2 flash drive, formatted as MS-DOS (FAT).
To format an external USB drive as MS-DOS (FAT), use Disk Utility, located in /Applications/Utilities. In Disk Utility, choose View > Show All Devices, select the USB drive in the sidebar, then click Erase in the toolbar. In the dialog, enter a name for the drive, choose MS-DOS (FAT) from the Format pop-up menu, choose Master Boot Record from the Scheme pop-up menu, then click Erase.
A full-installation, 64-bit version of Windows 10 on a disk image (ISO file) or other installation media.
Sufficient free storage space on your startup drive. For information about the amount of free space needed, see the Apple Support Article Install Windows 10 on your Mac with Boot Camp Assistant.
Before you begin
Before you install Windows, make sure you back up important files.
You can use Time Machine or any other method to back up your files. For information about backing up files, see Back up your files with Time Machine and Ways to back up or protect your files.
Perform the installation
Do the following steps in order.
Step 1: Check for software updates
Before you install Windows, install all macOS updates.
On your Mac, log in as an administrator, quit all open apps, then log out any other users.
Choose Apple menu  > System Preferences, click Software Update, then install all available updates.
If your Mac restarts after installing an update, open Software Update again to install any additional updates.
Step 2: Prepare your Mac for Windows
Boot Camp Assistant prepares your Mac by creating a new partition for Windows named BOOTCAMP and downloading the Boot Camp support software.
Important: If you’re using a Mac notebook computer, connect it to a power source before continuing.
Connect an external USB drive or insert a flash drive into the USB port on your Mac; keep it connected or inserted while you install Windows and the Windows support software.
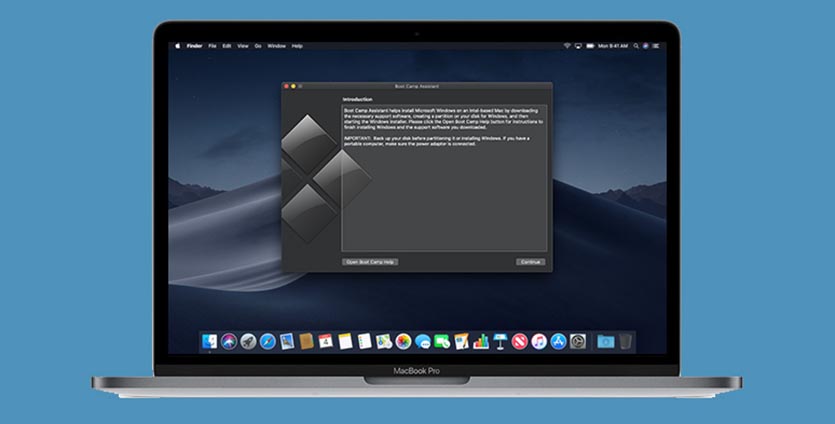
On your Mac, open Boot Camp Assistant  , located in /Applications/Utilities.
At the introduction screen, click Continue.
The system is checked for total available disk space. Older Time Machine snapshots and cached iCloud files are removed to make space for Boot Camp. This process may take a long time to complete (you can click the Stop button to skip this process).
At the Select Tasks step, select all the tasks, then click Continue.
At the Create Bootable USB Drive for Windows Installation step, choose the Windows ISO image and the USB drive, then click Continue.
The Windows files are copied to the USB drive. This process may take a long time to complete (you can click the Stop button to interrupt this process).
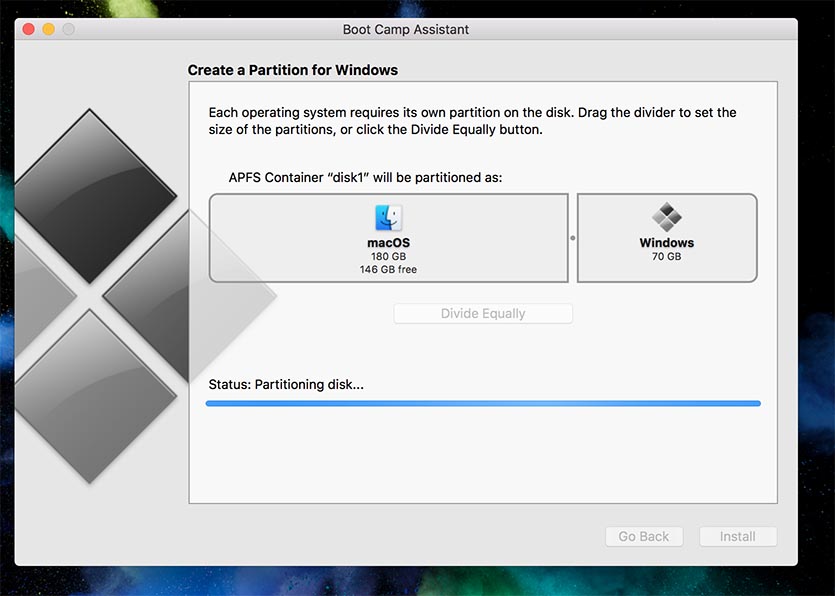
At the Create a Partition for Windows step, specify a partition size by dragging the divider between the macOS and Windows partitions. If you have multiple internal hard drives, you can select a different hard drive from the one running macOS and create a single partition on that drive to use solely for Windows.
Important: You can’t resize the partition later.
When this step is complete, the Windows installer starts.
Step 3: Install Windows
In the Windows installer, follow the onscreen instructions.
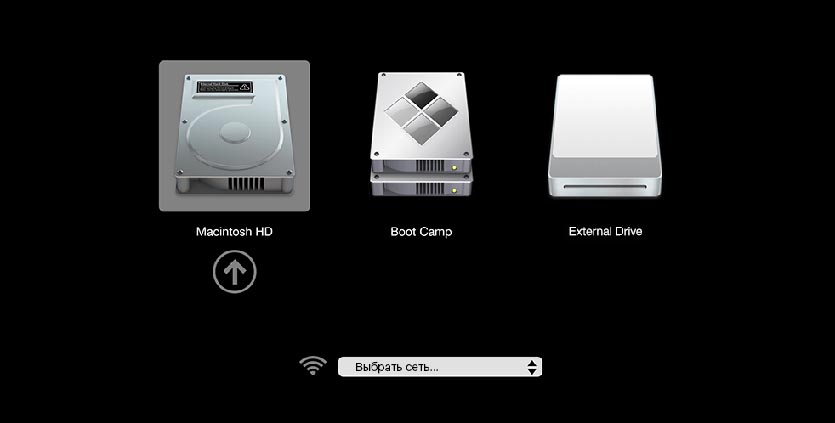
When you’re asked where to install Windows, select the BOOTCAMP partition (you may need to scroll through the list of partitions to see it), then click Next.
WARNING: Do not create or delete a partition, or select any other partition. Doing so may delete the entire contents of your macOS partition.
Continue following the onscreen instructions to finish installing Windows.
After you install the Windows software, your Mac automatically restarts using Windows.
Follow the onscreen instructions to set up Windows.
Step 4: Install Boot Camp on Windows
After installing Windows, Boot Camp drivers that support your Mac hardware start installing.
Note: If the support software doesn’t install automatically, you need to install it manually. For instructions, see the Apple Support article If the Boot Camp installer doesn’t open after using Boot Camp Assistant.
In the Boot Camp installer in Windows, follow the onscreen instructions.
Important: Do not click the Cancel button in any of the installer dialogs.
If a message appears that says the software you’re installing has not passed Windows Logo testing, click Continue Anyway.
You don’t need to respond to installer dialogs that appear only briefly during installation, but if a dialog asks you to install device software, click Install.
If nothing appears to be happening, there may be a hidden window that you must respond to. Look behind open windows.
When the installation is complete, click Finish, then click Yes to restart your Mac.
After your Mac restarts, follow the instructions for any other installers that appear.
Install Windows on your newer Mac using Boot Camp
You can use Boot Camp Assistant to install Windows 10 on your Intel-based Mac.
Newer Mac computers use a streamlined method to install Windows on your Mac. To find out whether your Mac uses this method, see the “Learn more” section in the Apple Support article Install Windows 10 on your Mac with Boot Camp Assistant. If your Mac is an older model that requires an external USB drive, follow the instructions in Install Windows on your older Mac using Boot Camp instead.
What you need
The keyboard and mouse or trackpad that came with your Mac. If they aren’t available, use a USB keyboard and mouse.
A full-installation, 64-bit version of Windows 10 on a disk image (ISO file) or other installation media.
Sufficient free storage space on your startup drive. For information about the amount of free space needed, see the Apple Support Article Install Windows 10 on your Mac with Boot Camp Assistant.
Before you begin
Before you install Windows, make sure you back up important files.
You can use Time Machine or any other method to back up your files. For information about backing up files, see Back up your files with Time Machine and Ways to back up or protect your files.
Perform the installation
On your Mac, do the following steps in order.
Step 1: Check for software updates
Before you install Windows, install all macOS updates.
On your Mac, log in as an administrator, quit all open apps, then log out any other users.
Choose Apple menu > System Preferences, click Software Update, then install all available macOS updates.
If your Mac restarts after installing an update, open Software Update again to install any additional updates.
Step 2: Prepare your Mac for Windows
Boot Camp Assistant prepares your Mac by creating a new partition for Windows named BOOTCAMP and downloading the Boot Camp support software.
Important: If you’re using a Mac notebook computer, connect it to a power source before continuing.
On your Mac, open Boot Camp Assistant , located in /Applications/Utilities.
At the Introduction screen, click Continue.
The system is checked for total available disk space. Older Time Machine snapshots and cached iCloud files are removed to make space for Boot Camp. This process may take a long time to complete (you can click the Stop button to skip this process).
If you have only one internal disk, choose the Windows ISO image, specify the partition size by dragging the divider between the macOS and Windows partitions, then click Install.
Important: You can’t resize the partition later.
If you have multiple internal disks, follow the onscreen instructions to select and format the disk you want to install Windows on and to choose the Windows ISO image.
If you select your startup disk: You can create an additional partition for Windows. Specify the partition size by dragging the divider between the macOS and Windows partitions.
If you select an APFS-formatted disk: You can either create an additional partition on the disk for Windows, or erase the entire disk and create a partition for Windows. If you choose to create an additional partition, specify the partition size by dragging the divider between the macOS and Windows partitions.
If you select a non-APFS-formatted disk: You can erase the entire disk and create a partition for Windows.
If Boot Camp is already present on the disk you select, you also have the option to uninstall it.
Important: You can’t resize the partition later.
When this step is complete, the Windows installer starts.
Step 3: Install Windows
In the Windows installer, follow the onscreen instructions.
When the installation is finished, your Mac automatically restarts using Windows.
Follow the onscreen instructions to set up Windows.
Step 4: Install Boot Camp on Windows
After installing Windows, Boot Camp drivers that support your Mac hardware start installing.
Note: If the support software doesn’t install automatically, you need to install it manually. For instructions, see the Apple Support article If the Boot Camp installer doesn’t open after using Boot Camp Assistant.
In the Boot Camp installer in Windows, follow the onscreen instructions.
Important: Do not click the Cancel button in any of the installer dialogs.
If a message appears that says the software you’re installing has not passed Windows Logo testing, click Continue Anyway.
You don’t need to respond to installer dialogs that appear only briefly during installation, but if a dialog asks you to install device software, click Install.
If nothing appears to be happening, there may be a hidden window that you must respond to. Look behind open windows.
When the installation is complete, click Finish.
After your Mac restarts, follow the instructions for any other installers that appear.
Как правильно установить Windows 10 на Mac

У многих владельцев Mac часто возникает необходимость в операционной системе Windows. Одним она нужна для запуска любимых игр, вторым – для работы специализированного ПО, а третьим просто для разнообразия.
Мы решили напомнить, как правильно и быстро произвести установку Windows 10 на Mac, чтобы не связываться с виртуальными машинами и подобными решениями, которые не позволяют стабильно работать в Windows и выжимать максимум из возможностей компьютера.
На какие компьютеры Mac можно установить Windows 10
Официально 64-разрядную Windows 10 Home или Pro при помощи утилиты Boot Camp можно установить на следующие модели:
- MacBook Pro/Air (2012 и новее)
- MacBook (2015 и новее)
- iMac/Mac mini (2012 и новее)
- iMac Pro (2017)
- Mac Pro (конец 2013 г.)
Существует лишь одно ограничение: при использовании macOS Mojave не получится установить ОС Windows через Boot Camp на iMac с жестким диском емкостью 3 ТБ.
Это обусловлено особенностями совмещения разных файловых систем APFS и NTFS на накопителях такой емкости. Подробнее об этом можно узнать на сайте Apple.
Остальные модели без проблем поддерживают установку Windows 10 прямо из коробки.
Что нам понадобится
1. Свободное место на накопителе. Минимальный объем для установки 64 ГБ, а рекомендуемый – 128 ГБ.
На практике можно обойтись и меньшим объемом, но всегда есть вероятность нехватки пространства для нормальной работы системы или установки необходимого ПО.
2. Для настольных компьютеров потребуется клавиатура и манипулятор, чтобы постоянно не переподключать их в разных ОС. Это может быть как проводное решение, так и сторонние модели, которые имеют несколько каналов для сопряжения с несколькими девайсами.
3. USB-накопитель на 16 Гб или более емкий. Такой диск не потребуется владельцам компьютеров 2015 года выпуска либо более новым.
4. Образ установочного диска Microsoft Windows (ISO) или установочный носитель данной операционной системой. Скачать образ можно на сайте Microsoft.
5. Пользоваться Windows 10 можно бесплатно в течение 30 дней с момента установки. После этого понадобится купить ключ активации. Сделать это можно в практически любом российском магазине, либо в интернете. На официальном сайте Microsoft он стоит приличные $199 или 13 тыс. рублей.
Средняя цена ключа в России – около 3 тыс. рублей, хотя попадаются предложения и дешевле на свой страх и риск.
Как установить Windows 10 по шагам
1. Запустите утилиту Boot Camp через поиск Spotlight, Finder или Launchpad.
2. Укажите программе путь к загруженному образу и выберите, сколько места на установленном накопителе выделить для установки Windows.
Хорошенько подумайте на данном этапе, ведь изменить используемый раздел без переустановки Widows не получится. Если планируете играть в игры или запускать тяжелые приложения, лучше сразу выделите больше места.
3. Дождитесь загрузки необходимых драйверов и данных из сети. После скачивания и перезагрузки компьютера начнется установка Windows 10.
4. Мастер установки попросит произвести базовые настройки и указать раздел, на который следует поставить Windows. Он уже будут назван BOOTCAMP.
5. После окончания установки потребуется произвести окончательную настройку параметров системы.
6. Оказавшись на рабочем столе Windows потребуется запустить утилиту Boot Camp. Она будет храниться на системном диске либо на съемном накопителе, который был создан на этапе подготовки.
7. После установки всех компонентов и перезагрузки Windows нужно подключиться к сети через Wi-Fi или по кабелю и запустить Apple Software Update из панели Пуск.
8. В программе следует указать все доступные обновления. Установить из и перезапустить компьютер.
Как запускать macOS или Windows
Теперь при запуске компьютера автоматически будет стартовать операционная система macOS, а при удержании клавиши Alt/Option увидите меню с выбором раздела для загрузки.
Для быстрого перехода из Windows в macOS можно воспользоваться утилитой в трее (правом нижнем углу), которая позволяет в одно нажатие перезапустить компьютер с другой ОС.
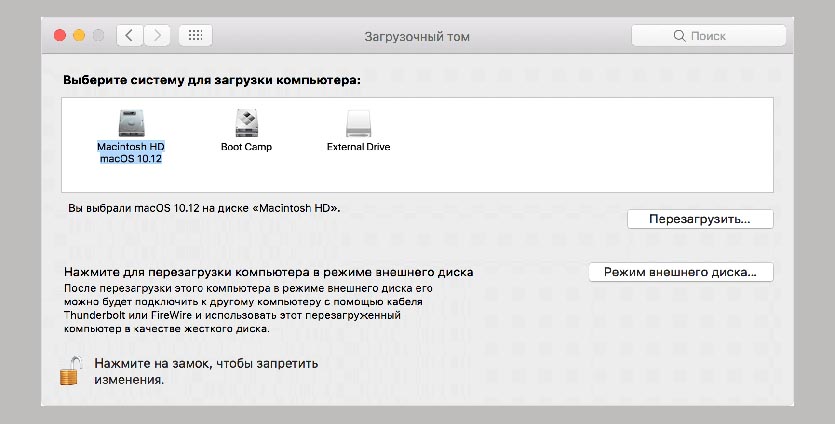
Для обратного перехода следует перейти в Системные настройки – Загрузочный том, ввести пароль разблокировки настроек и выбрать раздел с Windows для загрузки.
Как удалить Windows с Mac
Для удаления достаточно запустить Дисковую утилиту и стереть в ней раздел, который был отведен для Boot Camp с Windows. Затем расширьте основной раздел за счет освободившегося пространства.


