- How to extend partition for Windows 10 computer
- 1. How to extend partition in Windows 10 using DiskPart cmd
- 2. How to extend volume with Windows 10 Disk Management
- 3. How to extend Windows 10 volume with free partition editor
- In Summary
- Extend (microsoft-windows-setup-diskconfiguration-disk-modifypartitions-modifypartition-extend)
- Values
- Valid Configuration Passes
- Parent Hierarchy
- Applies To
- XML Example
- Specify a Logical Partition to Fill the Remainder of an Extended Partition
- Easiest Way to Extend System Partition in Windows 7 without Formatting
- Why do you want to extend Windows 7 system partition?
- How to free extend Windows 7 system partition with built-in tools?
- Method 1. Windows 7 Disk Management extend system partition
- Method 2. Extend system partition in Windows 7 via DiskPart
- Expand Windows 7 system partition via free partition software
- In summary
How to extend partition for Windows 10 computer
by John, Updated on: January 26, 2021
This article introduces how to extend volume in Windows 10 32/64 bit with native Disk Management, diskpart command and free partition editor software.

Many people have installed or upgraded to Windows 10, from the feedback of Windows 10 users, there are many wonderful features and improvement. However, the same with previous versions, the common disk space issue still exists: system C drive runs out of space and getting full after running Windows 10 laptop or desktop for a period of time. Low disk space issue could also occur in the volume for applications and backup.
No matter on system partition or data volume, the fastest way to solve this problem is by extending volume with existing Unallocated space or free space in other volumes. In this article I’ll introduce how to extend Windows 10 volume with 3 different tools.
1. How to extend partition in Windows 10 using DiskPart cmd
DiskPart is a text-mode command interpreter in Windows 10 and previous versions. This tool enables you to manage objects (disks, partitions, or volumes) by using scripts or direct input at a command prompt. Before extending Windows 10 partition with diskpart, there are several points you should know:
- Diskpart can only extend NTFS partition, another common FAT32 partitions are not supported.
- There must be other partition(s) on the same disk.
- Before extending a partition, you must delete its contiguous partition on the right. If you cannot delete it, do not run diskpart. If you can delete it, remember to transfer all files in advance.
- Diskpart cannot extend a partition with Unallocated space that is on the left or nonadjacent.
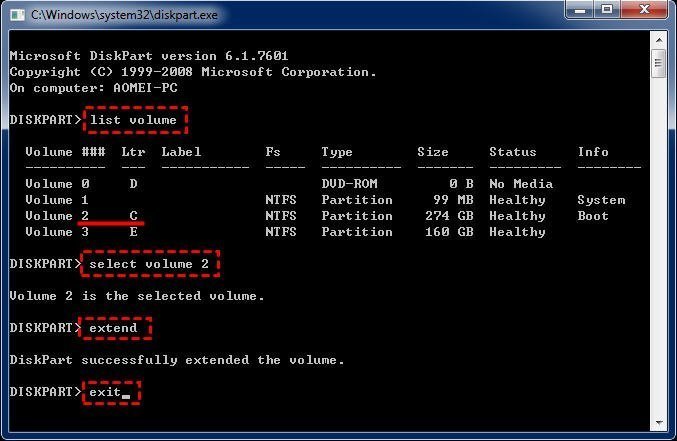
Steps to extend Windows 10 partition using DiskPart cmd:
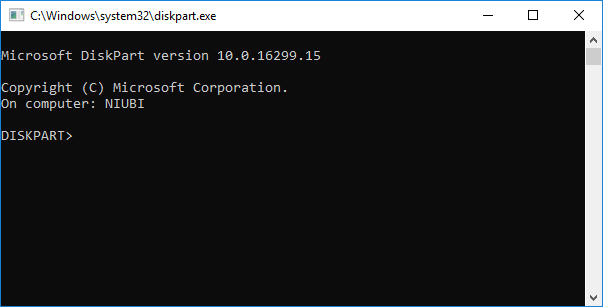
① Press Windows and R together on your keyboard, input diskpart and press Enter.
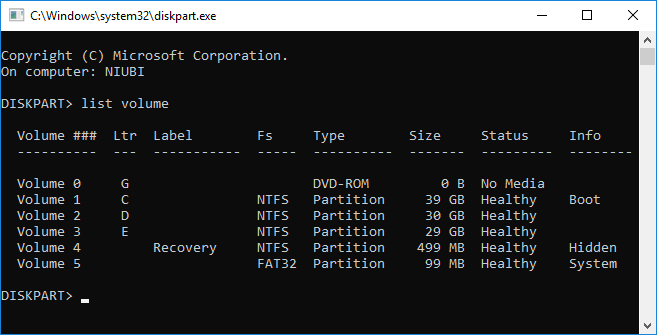
② Input list volume and you’ll see all partitions in a list (Unallocated space is not shown).
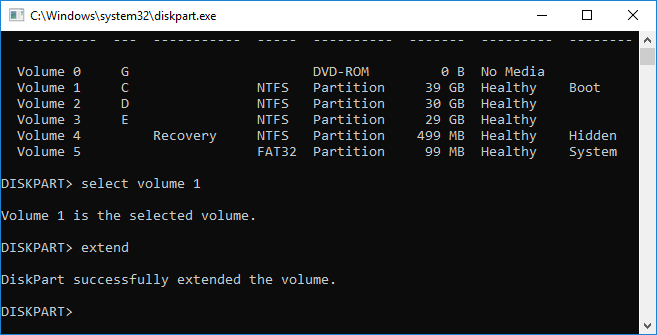
③ Input select volume 1 to give focus to the system C: drive.

④ Input extend to proceed extending.
If there’s no Unallocated space next to C drive, you’ll receive error message ‘There is not enough usable free space on specified disk(s) to extend the volume.‘
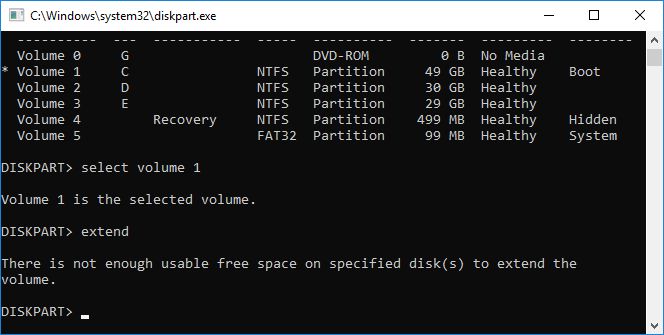
To get such required Unallocated space, you must delete the contiguous D drive. To do this, run select volume D and delete volume commands one by one before step 3.
2. How to extend volume with Windows 10 Disk Management
If you think it’s too difficult to extend Windows 10 partition with diskpart command, there’s another native tool — Disk Management, which has graphic interface. It has Extend Volume Wizard, so you just need to click in the dialog box.
However, the same with Diskpart, there must be adjacent Unallocated space on the right side of the partition that you want to expand. That means, you must delete the right coniguous partition, too. The partition to be extended must be formatted with NTFS file system, too, otherwise Extend Volume is grayed out.
Steps to extend partition in Windows 10 using Disk Management:
- Press Windows and X together on your keyboard and click Disk Management in the list.
- Right click the right contiguous partition (such as D:) and select Delete Volume.
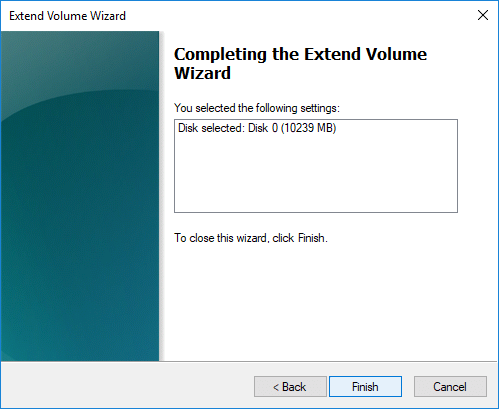
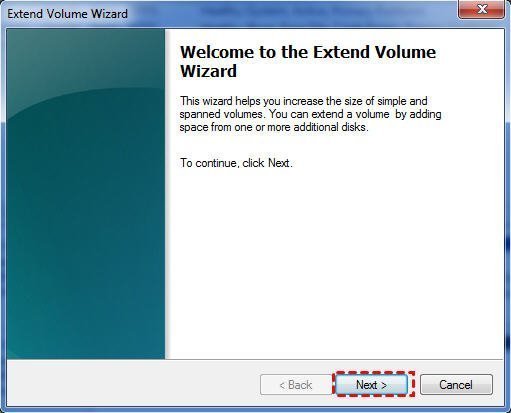
- Right click C drive and select Extend Volume.
- Simply click Next till Finish in the pop-up Extend Volume Wizard windows.
Unlike diskpart command, Disk Management cannot extend C drive after deleting D if D is a Logical drive. Remind again, do not delete D if you installed programs or any Windows services in it. Otherwise, the programs/services will stop working even if you move all files to other partition.
3. How to extend Windows 10 volume with free partition editor
Comparing with Windows native tools, NIUBI Partition Editor has advantages while extending partition for Windows 10 computer:
- Support shrinking and extending both NTFS and FAT32 partitions.
- Make Unallocated space on either left or right while shrinking partition.
- Extend partition with either contiguous Unallocated space in 1 step.
- Move and extend Unallocated space to any nonadjacent partition on the same disk.
There are many free and commercial partition extender for Windows 10 laptop/desktop. But better than other software, NIUBI Partition Editor has unique 1-Second Rollback, Cancel-at-well and Virtual Mode technologies to protect system and data. It is 30% to 300% faster because of its advanced file-moving algorithm. It has free edition for Windows 10/8/7/Vista/XP (32/64 bit) home users. (Free edition is the same with professional edition except lacking of 1-Second Rollback and bootable media builder.)
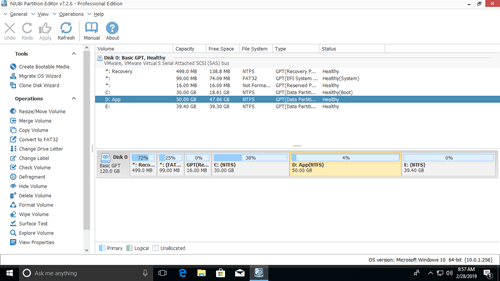
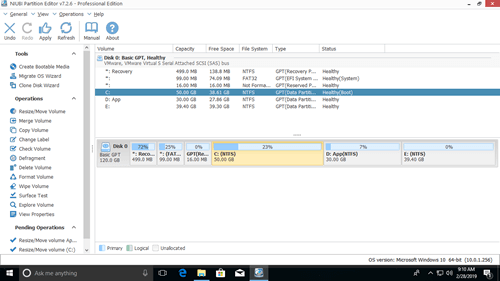
Download this program, you’ll see the main window with disk partition structure and other information on the right, available operations are listed on the left and by right clicking.
Steps to extend volume in Windows 10 laptop/desktop with NIUBI:
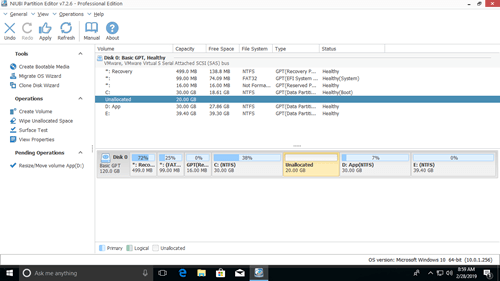
Step 1: Right click D: drive and select «Resize/Move Volume«, drag left border towards right in the pop-up window, or enter an amount in the box of Unallocated space before .
Then D drive is shrunk and Unallocated space is made on the left.
Step 2: Right click C: drive and select «Resize/Move Volume» again, drag right border towards right in the pop-up window.
Then C drive is extended by merging this Unallocated space.
Step 3: Click Apply on top left to execute. (Real disk partitions won’t be changed until click Apply to confirm).
Watch the videos how to extend system and data partition in Windows 10 laptop/desktop:
How to extend system partition C:
How to extend data partition D:
In Summary
Windows built-in Diskpart and Disk Management can only extend NTFS partition by deleting the right contiguous one. To extend volume in Windows 10/8/7/Vista/XP, NIUBI Partition Editor is better choice. Besides shrinking and extending partitions, it helps you do many other disk partition management operations such as merge, copy, convert, defrag, hide, wipe, scan bad sectors, etc.
Extend (microsoft-windows-setup-diskconfiguration-disk-modifypartitions-modifypartition-extend)
Extend can be used to modify existing partitions. You can use Extend on BIOS/MBR-based systems to:
Specify a new or existing logical partition to fill the remainder of an extended partition.
Specify a partition within an existing partition structure to fill the remainder of the disk.
NoteВ В UEFI/GPT-based disks do not support the Extend setting.
Values
true
Specifies that the selected partition is extended to fill the remainder of the disk.
false
Specifies that the selected partition is not extended to fill the remainder of the disk. This is the default value.
To use extended and logical partitions
To create a logical partition that uses the remainder of the extended partition through WindowsВ Setup, create a partition that has an initial fixed size. For example: CreatePartition:Size=100 . Then, modify the partition by setting ModifyPartition:Extend=true .Do not set both CreatePartition:Extend and ModifyPartition:Extend to true. For more information, see How to Configure More Than Four Partitions on a BIOS-Based Hard Disk.
To modify a partition within an existing partition structure to extend to the remainder of the disk
Set ModifyPartitions:Extend to true .
To specify a newly-created partition to fill the remainder of the hard disk
Set CreatePartitions: Extend to true , and leave ModifyPartitions:Extend empty.
Valid Configuration Passes
Parent Hierarchy
Applies To
For a list of the Windows editions and architectures that this component supports, see microsoft-windows-setup-.
XML Example
Specify a Logical Partition to Fill the Remainder of an Extended Partition
The following XML output for the DiskConfiguration setting shows partition modifications for a BIOS-based computer with two logical partitions. This XML example includes the creation of an extended partition that is set to extend to the end of the hard disk. The second logical partition, labeled Logical2, is set to extend to the end of the extended partition.
0 true 1 Primary 3000 2 Primary 250 3 Primary 100 4 Extended true 5 Logical 15000 6 Logical2 100 1
Easiest Way to Extend System Partition in Windows 7 without Formatting
Learn how to extend Windows 7 system partition using Disk Management and free AOMEI Partition Assistant when the Extend Volume greyed out.
![]()
By Teresa  / Last Updated May 28, 2020
Why do you want to extend Windows 7 system partition?
“It is quite annoying when getting low disk space warning while working with my computer. It is like a threat that pushes me to delete files to free up disk space, or it will damage my system so that I cannot use it any more. Help please.”
Have you got such trouble on your Windows 7? Apparently, to extend Windows 7 boot partition mostly is to give sufficient space for the operating system as well as installed applications. Deleting useless files or uninstalling programs fix this trouble temporarily yet the same situation comes in the near future.
Another motivation for this behavior could be making full use of hard drive space. For example, you may want to extend C drive in Windows 7 with unallocated space or free space on the system hard drive. Surely, you can have another intention for system partition extending in Windows 7. For instance, extend system partition size to make partition size reasonable. Well, let’s find out how to extend system partition in Windows 7.
How to free extend Windows 7 system partition with built-in tools?
Windows 7 provides two disk partition managers that allow you to extend system partition in Windows 7 free, GUI Disk Management and CUI Diskpart. Let’s get to know them one by one.
Method 1. Windows 7 Disk Management extend system partition
Disk Management in Windows 7 adds two new functions named “Shrink Volume” and “Extend Volume”. «Shrink Volume» only creates unallocated space behind the partition, and «Extend Volume» can only work when there is contiguous unallocated space. Make sure you have unallocated space next to system partition.
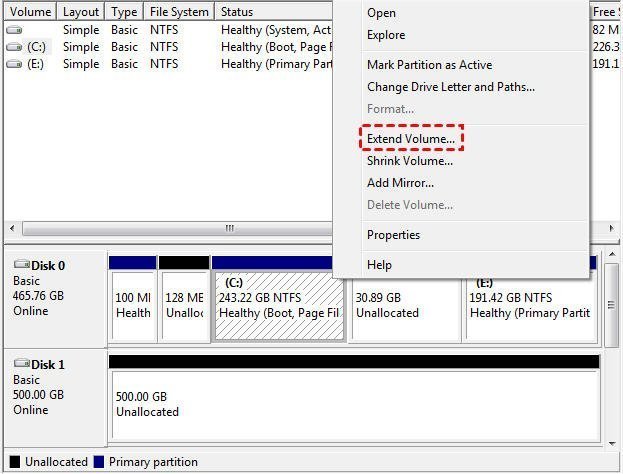
1. Open Disk Management [Computer > Manage > Storage] and right click Windows 7 system partition. Select “Extend Volume” from the given menu.
2. Follow the Extend Volume Wizard and click “Next” several times to complete.
Nevertheless, there are some limits you may want to know. To extend C drive to non-adjacent space, you need to delete the partition between system drive and free space. Otherwise, you’ll get into Windows 7 extend system partition grayed out trouble.
Method 2. Extend system partition in Windows 7 via DiskPart
Another helpful tool is Diskpart.exe in Windows 7. It is a more advanced operating method with which operations cannot be returned. Therefore, use this program with caution.
1. Open Run [press Windows key and R key simultaneously] and type “diskpart” and press Enter. Run as administrator.

2. Input commands below in order and each command has an “Enter” followed by.
select volume n [n is the number of your system C drive]
Go check in Disk Management and you’ll find system partition has been extended. However, same as Disk Management, when the unallocated space or free space is not adjacent to system drive, Diskpart cannot extend system drive in Windows 7, and it will give you error message saying: There is not enough usable free space on specified disk(s) to extend the volume.
Expand Windows 7 system partition via free partition software
When there is no adjacent unallocated space behind the system drive and you don’t want to delete any other partition, either, you can turn to the free manager software: AOMEI Partition Assistant Standard. It allows you to extend C drive in Windows 7 without formatting, both 32-bit and 64-bit. Its «Merge Partition» function can directly merge non-adjacent unallocated space into C drive or other partitions. Just to be on the safe side, backup important data beforehand. Then you can download the freeware and see how it extend Win7 boot drive.
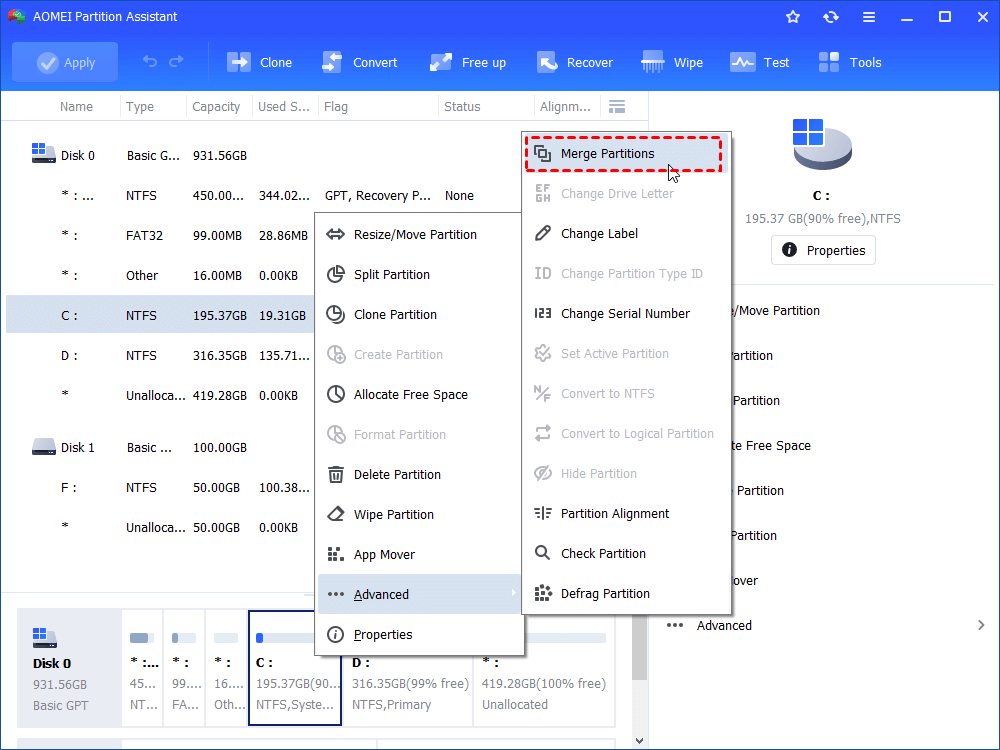
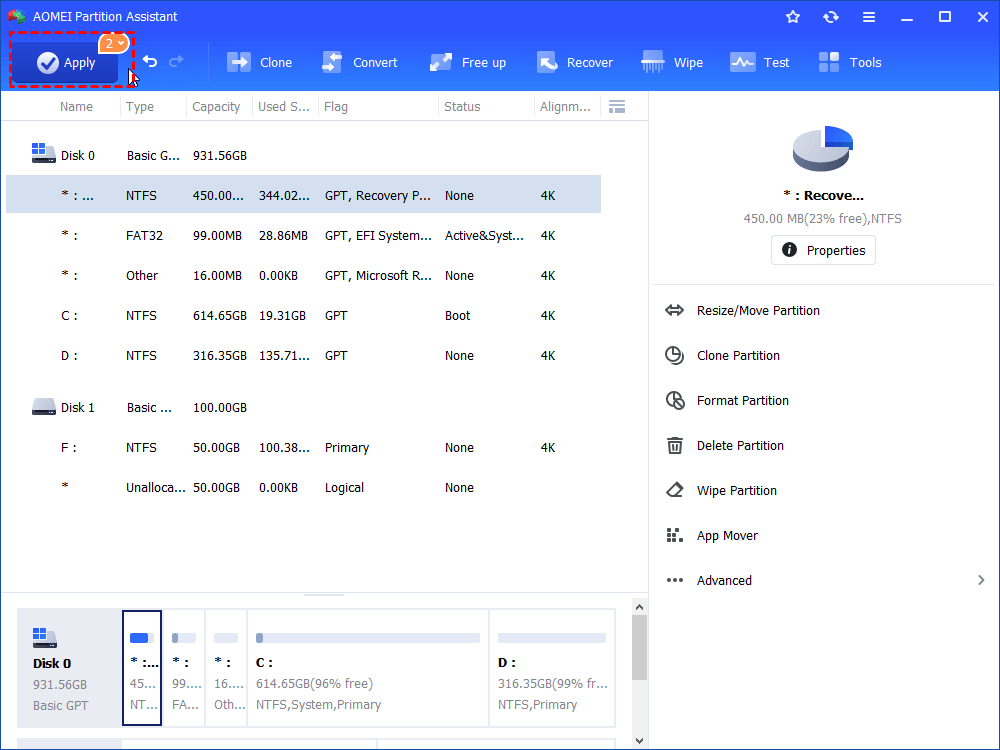
Step 1. Installl and run this software. Clearly, behind D drive there has a large size of unallocated space. Right click C drive and choose «Merge Partitions».
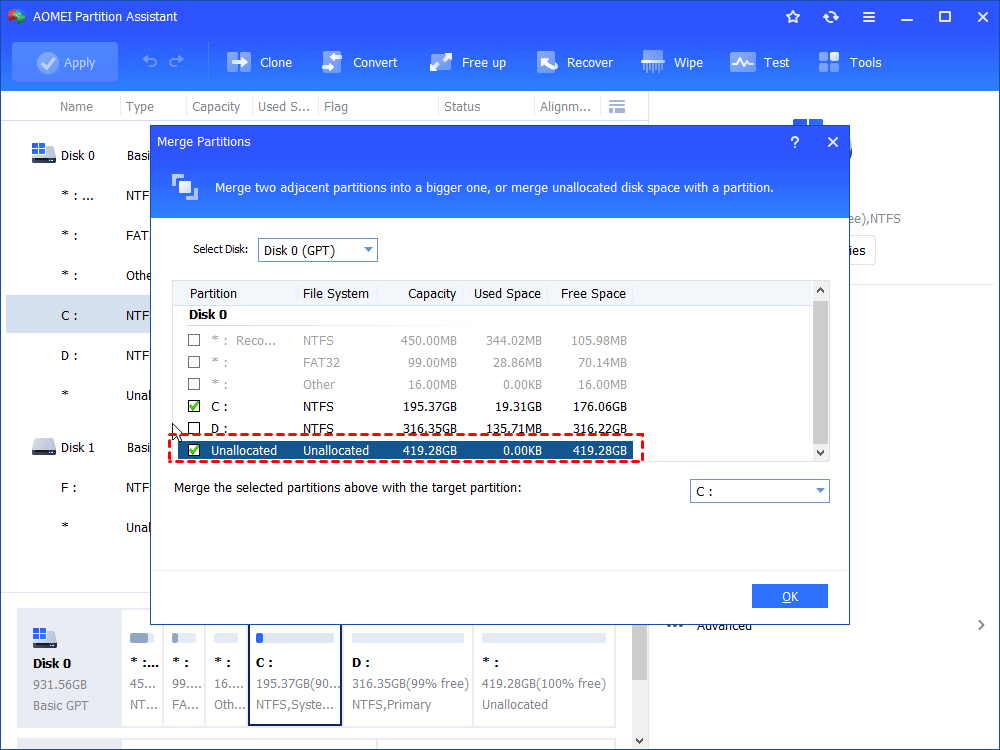
Step 2. In the following window, check system drive and all unallocated space and click «OK».
Step 3. Remember to click «Apply» to commit the task.
Tips:
в–ё If there is no free space or unallocated space on your hard drive, to extend system drive you can allocate Free Space from other redundant partitions after upgrade to Professional edition.
в–ё To avoid low disk space warning appears on the system partition, you can also install applications and third-party software separately to the system drive, data partition for example.
In summary
It is not so hard to extend Windows 7 system partition using either Disk Management or DiskPart. However, for the safety of your data, it is recommended to use the recommended freeware. Apart from extending Windows system partition in Windows 7, this method also applies to Windows 10/8/XP/Vista. AOMEI Partition Assistant is all-around software, for example, you can move partition to make unallocated space adjacent to the target partition you wish to extend, shrink C drive beyond half with it when C drive is too large, clone partition and more.


