- Install Windows 7 Service Pack 1 (SP1)
- Before you begin
- Check if your PC is 32-bit or 64-bit
- Disk space requirements
- Back up important files
- Plug in and connect to the Internet
- Disable antivirus software
- Installing Windows 7 SP1 using Windows Update (recommended)
- Downloading and installing Windows SP1 from the Microsoft Download Center
- Troubleshoot problems installing Windows SP1
- Download and run the System Update Readiness Tool
- Run the Windows Update troubleshooter
- Скачать InstallPack
- Интерфейс
- Особенности
- Преимущества
- Недостатки
- Вывод
- Download Windows 10
- Windows 10 October 2020 Update
- Create Windows 10 installation media
Install Windows 7 Service Pack 1 (SP1)
Support for Windows 7 ended on January 14, 2020
We recommend you move to a Windows 10 PC to continue to receive security updates from Microsoft.
The recommended (and easiest) way to get SP1 is to turn on automatic updating in Windows Update in Control Panel and wait for Windows 7 to notify you that SP1 is ready to install. It takes about 30 minutes to install, and you’ll need to restart your computer about halfway through the installation.
To check if Windows 7 SP1 is already installed on your PC, select the Start button, right-click Computer, and then select Properties.
If Service Pack 1 is listed under Windows edition, SP1 is already installed on your PC.
Before you begin
Check if your PC is 32-bit or 64-bit
You’ll need to know if your PC is running a 32-bit (x86) or 64-bit (x64) version of Windows 7. Select the Start button, right-click Computer, and then select Properties. The version of Windows 7 is displayed next to System type.
Disk space requirements
Check to make sure your PC has enough free disk space to install SP1.
Estimated amount of free disk space needed
x86-based (32-bit): 750 MB
x64-based (64-bit): 1050 MB
Downloading SP1 from the Microsoft website
x86-based (32-bit): 4100 MB
x64-based (64-bit): 7400 MB
Back up important files
It’s a good idea to back up your important files, photos, and videos to an external hard disk, USB flash drive, or the cloud before installing the update.
Plug in and connect to the Internet
Make sure your PC is plugged in to power and you’re connected to the Internet.
Disable antivirus software
Some antivirus software might prevent SP1 from installing or slow down the installation. You can temporarily disable your antivirus software before the installation. If you do so, make sure you’re aware of the risks that might be involved and re-enable the antivirus software as soon as SP1 is done installing.
Installing Windows 7 SP1 using Windows Update (recommended)
If your PC is set to automatically install updates, you’ll be prompted by Windows Update to install SP1. Follow the instructions to install the update.
To manually install SP1 from Windows Update:
Select the Start button > All programs > Windows Update.
In the left pane, select Check for updates.
If any important updates are found, select the link to view available updates. In the list of updates, select Service Pack for Microsoft Windows (KB976932) and then select OK.
Note: If SP1 isn’t listed, you might need to install some other updates before installing SP1. Install any important updates and then follow these steps again to check for SP1.
Select Install updates.  You might be asked for an admin password or to confirm your choice.
Follow the instructions to install SP1.
After SP1 is installed, sign in to your PC. You might see a notification indicating whether the update was successful. If you disabled your antivirus software before the installation, make sure you turn it back on.
Downloading and installing Windows SP1 from the Microsoft Download Center
If you’re unable to install SP1 from Windows Update, you can download the installation package from the Microsoft Download Center and then install SP1 manually.
Go to the Windows 7 Service Pack 1 download page on the Microsoft website.
Select Install Instructions to see which packages are available for download, and make note of the one that you need.
Select the appropriate language from the drop-down list, and then select Download.
Select the packages you need to install, select Next, and then follow the instructions to install SP1. Your PC might restart a few times during the installation.
After SP1 is installed, sign in to your PC. You might see a notification indicating whether the update was successful. If you disabled your antivirus software before the installation, make sure you turn it back on.
Troubleshoot problems installing Windows SP1
If you try to install SP1 and see an error message that the installation wasn’t successful, this might be because there’s a problem with the Windows Servicing Store that is used to install updates or because your antivirus software is preventing the update from being installed.
To try and fix the problem, follow these steps and then try to install SP1 again.
Download and run the System Update Readiness Tool
Select the link in the table that corresponds with the version of Windows running on your PC.
Link to Microsoft Download Center
Windows 7 32-bit (x86)
Windows 7 64-bit (x64)
On the Microsoft Download Center page, select your language and then select Download. It might take a few minutes for the tool to download and install.
To install the tool immediately, select Open or Run and then follow the instructions. To use the tool later, select Save and download the installation files to your PC.
On the Windows Update Standalone Installer screen, select Yes or OK.
On the Installation complete screen, select Close.
Try installing the service pack again.
Run the Windows Update troubleshooter
If your PC isn’t able to find or install updates, the Windows Update troubleshooter might be able to fix the problem.
Select the Start button, and then select Control Panel.
In the search box, enter troubleshooter and then select Troubleshooting from the list of results.
Under System and Security, select Fix problems with Windows Update and then follow the instructions.
After the troubleshooter is done, try installing the service pack again.
Скачать InstallPack

InstallPack (рус. «Инстал Пак») — это портативный мультиустановщик необходимого ПО для ОС Windows, позволяющий быстро скачать и установить необходимые программы. Как утверждает разработчик, данная утилита вмещает в себя более 700 программ в одном инсталляторе и не засоряет реестр компьютера.
В InstallPack для Windows собраны самое разнообразное ПО, начиная от клиента uTorrent и заканчивая Яндекс Браузером.
Интерфейс
Окно инсталлятора на русском языке и выглядит как список программного обеспечения, доступного для установки. Справа от названия находится краткое описание утилиты, ее рейтинг, размер и статус (бесплатная, условно-бесплатная или платная).
Слева от списка пользователь может выставить необходимые галочки, после чего отмеченные программы из общего списка переместятся в раздел выбранных.
Выбор программ для установки
Вверху окна расположен поиск, если необходимо скачать что-то конкретное, а также разделы: например, Must have, мультимедиа или драйвера. Здесь же можно выбрать режим «тихой установки». В правом верхнем углу окна указано количество выбранных утилит и свободное место на диске.
Особенности
Преимущества
- Приложение портативно и не засоряет реестр;
- InstallPack скачивает на ПК новейшие версии программ;
- В установщик не входит пиратское ПО, а значит, отсутствуют вирусы;
- Возможность поиска необходимого программного обеспечения;
- Утилиты рассортированы по группам: на случай, если вам необходимо скачать только драйвера или антивирус.
Недостатки
- Отсутствует кнопка «выбрать все»;
- Не совсем понятно, откуда берется рейтинг программ, так как сам пользователь оценку поставить не может;
- Утилита не разворачивается на полный экран, из-за чего описание видно не полностью.
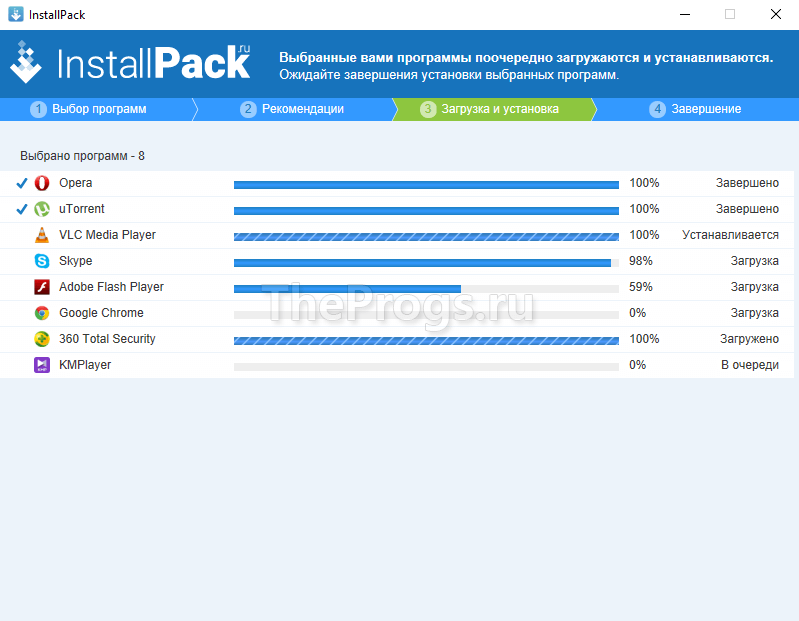 Процесс инсталляции
Вывод
InstallPack не вызывает никаких подозрений: новейшие версии ПО качаются с официальных сайтов, что исключает возможность заражения ПК. При установке предлагается установить программы от партнеров, но галочки для снятия полностью исправны. Помимо всего этого инсталпак имеет функцию «тихой установки», из-за чего им удобно пользоваться при переустановке Windows.
Таким образом, программа существенно экономит время, потраченное на скачивание и установку нового ПО, поэтому мы рекомендуем скачать InstallPack для Windows 7 или 10.
Download Windows 10
Before updating, please refer to the Windows release information status for known issues to confirm your device is not impacted.
Windows 10 October 2020 Update
The Update Assistant can help you update to the latest version of Windows 10. To get started, click Update now.
Create Windows 10 installation media
To get started, you will first need to have a license to install Windows 10. You can then download and run the media creation tool. For more information on how to use the tool, see the instructions below.

Here’s when to use these instructions:
- You have a license to install Windows 10 and are upgrading this PC from Windows 7 or Windows 8.1.
- You need to reinstall Windows 10 on a PC you’ve already successfully activated Windows 10.
If you are installing Windows 10 on a PC running Windows XP or Windows Vista, or if you need to create installation media to install Windows 10 on a different PC, see Using the tool to create installation media (USB flash drive, DVD, or ISO file) to install Windows 10 on a different PC section below.
Note: Before you install Windows 10, check to make sure your PC meets the system requirements for Windows 10. We also recommend going to the PC manufacturer’s website for any additional info about updated drivers and hardware compatibility.
- Select Download tool, and select Run. You need to be an administrator to run this tool.
- On the License terms page, if you accept the license terms, select Accept.
- On the What do you want to do? page, select Upgrade this PC now, and then select Next.
After downloading and installing, the tool will walk you through how to set up Windows 10 on your PC. All Windows 10 editions are available when you select Windows 10, except for Enterprise edition. For more information on Enterprise edition, go to the Volume Licensing Service Center.
- If you don’t have a license to install Windows 10 and have not yet previously upgraded to it, you can purchase a copy here: https://www.microsoft.com/en-us/windows/get-windows-10.
- If you previously upgraded to Windows 10 on this PC and you’re reinstalling it, you don’t need to enter a product key. Your copy of Windows 10 will automatically activate later using your digital license.
Follow these steps to create installation media (USB flash drive or DVD) you can use to install a new copy of Windows 10, perform a clean installation, or reinstall Windows 10.
Before you download the tool make sure you have:
- An internet connection (internet service provider fees may apply).
- Sufficient data storage available on a computer, USB or external drive for the download.
- A blank USB flash drive with at least 8GB of space or blank DVD (and DVD burner) if you want to create media. We recommend using a blank USB or blank DVD, because any content on it will be deleted.
- When burning a DVD from an ISO file, if you are told the disc image file is too large you will need to use Dual Layer (DL) DVD Media.
Check a few things on the PC where you want to install Windows 10:
- 64-bit or 32-bit processor (CPU). You’ll create either a 64-bit or 32-bit version of Windows 10. To check this on your PC, go to PC info in PC settings or System in Control Panel, and look for System type.
- System requirements. Make sure the PC meets the system requirements for Windows 10. We also recommend going to the PC manufacturer’s website for additional info about updated drivers and hardware compatibility.
- Language in Windows. You’ll need to choose the same language when you install Windows 10. To see what language you’re currently using, go to Time and language in PC settings or Region in Control Panel.
- Edition of Windows. You should also choose the same edition of Windows. To check what edition you’re currently running, go to PC info in PC settings or System in Control Panel, and look for Windows edition. Windows 10 Enterprise isn’t available in the media creation tool. For more info, go to the Volume Licensing Service Center.
- Microsoft Office products. If you just purchased a new device that includes Office 365, we recommend redeeming (installing) Office before upgrading to Windows 10. To redeem your copy of Office, please see Download and install Office 365 Home, Personal, or University on your PC. For more information, check How to upgrade to Windows 10 on new devices that include Office 365.
If you have Office 2010 or earlier and choose to perform a clean install of Windows 10, you will need to locate your Office product key. For tips on locating your product key, check Find your Office 2010 product key or Enter the product key for your Office 2007 program.
Using the tool to create installation media:
- Select Download tool now, and select Run. You need to be an administrator to run this tool.
- If you agree to the license terms, select Accept.
- On the What do you want to do? page, select Create installation media for another PC, and then select Next.
Select the language, edition, and architecture (64-bit or 32-bit) for Windows 10. This table will help you decide which edition of Windows 10 you’ll choose:
| Your current edition of Windows | Windows 10 edition |
|---|---|
| Windows 7 Starter Windows 7 Home Basic Windows 7 Home Premium Windows 7 Professional Windows 7 Ultimate Windows 8/8.1 Windows 8.1 with Bing Windows 8 Pro Windows 8.1 Pro Windows 8/8.1 Professional with Media Center Windows 8/8.1 Single Language Windows 8 Single Language with Bing Windows 10 Home Windows 10 Pro | Windows 10 |
| Windows 8/8.1 Chinese Language Edition Windows 8 Chinese Language Edition with Bing | Windows 10 Home China |
- USB flash drive. Attach a blank USB flash drive with at least 8GB of space. Any content on the flash drive will be deleted.
- ISO file. Save an ISO file to your PC, which you can use to create a DVD. After the file is downloaded, you can go to location where the file is saved, or select Open DVD burner, and follow the instructions to burn the file to a DVD. For more info about using an ISO file, see Additional methods for using the ISO file to install Windows 10 section below.
After completing the steps to install Windows 10, please check that you have all the necessary device drivers installed. To check for updates now, select the Start button, and then go to Settings > Update & Security > Windows Update, and select Check for updates. You may also wish to visit your device manufacturer’s support site for any additional drivers that may be needed.
Note: Drivers for Surface devices may be found on the Download drivers and firmware for Surface page.
Before you install Windows 10, it’s a good idea to save any work and back up your PC before you start. If you used the media creation tool to download an ISO file for Windows 10, you’ll need to burn it to a DVD before following these steps.
- Attach the USB flash drive or insert the DVD on the PC where you want to install Windows 10.
- Restart your PC.
If your PC does not automatically boot to the USB or DVD media, you might have to open a boot menu or change the boot order in your PC’s BIOS or UEFI settings. To open a boot menu or change the boot order, you’ll typically need to press a key (such as F2, F12, Delete, or Esc) immediately after you turn on your PC. For instructions on accessing the boot menu or changing the boot order for your PC, check the documentation that came with your PC or go to the manufacturer’s website. If you do not see the USB or DVD media device listed within the boot options, you may need to reach out to the PC manufacturer for instructions for temporarily disabling Secure Boot in your BIOS settings.
If changing the boot menu or order doesn’t work, and your PC immediately boots into the OS you want to replace, it is possible the PC had not fully shut down. To ensure the PC fully shuts down, select the power button on the sign-in screen or on the Start menu and select Shut down.
If you downloaded an ISO file for Windows 10, the file is saved locally at the location you selected. If you have a third-party DVD burning program installed on your computer that you prefer to use for creating the installation DVD, that program might open by going to the location where the file is saved and double-clicking the ISO file, or right-click the ISO file, select Open with and choose your preferred DVD burning software.
If you want to use the Windows Disk Image Burner to create an installation DVD, go to the location where the ISO file is saved. Right-click the ISO file and select Properties. On the General tab, click Change and select Windows Explorer for the program you would like to use to open ISO files and select Apply. Then right-click the ISO file and select Burn disc image.
If you want to install Windows 10 directly from the ISO file without using a DVD or flash drive, you can do so by mounting the ISO file. This will perform an upgrade of your current operating system to Windows 10.


