- Создание keytab-файла, содержащего несколько разных Kerberos Principal
- How to Enable and Disable the Windows Key
- Method 1: Press Fn + F6 or Fn + Windows Keys
- Method 2: Press Win Lock
- Method 3: Change Registry settings
- Method 4: Clean the keyboard
- For Computer:
- For notebook:
- Method 5: Replace the keyboard
- Fix: Windows Button or Key not Working
- Reasons why your Windows Key does not Work
- Method 1: Disable Gaming Mode on your Keyboard
- Method 2: Enable Windows Key using Registry Edit
- Method 3: Re-Register all Apps
- Method 4: Enable the Start Menu
- Method 5: Restart Windows / File Explorer
- Method 6: Turn off Filter Keys
- Method 7: Uninstall and reinstall your keyboard drivers
- Method 8: Unplug your game controller
Создание keytab-файла, содержащего несколько разных Kerberos Principal
 Разные службы и приложения, работающие в Linux и использующие аутентификацию Kerberos, например в связке с контроллерами домена Active Directory (AD), используют для механизмов этой самой аутентификации специальный keytab-файл, который содержит хеши пароля доменной учётной записи пользователя, с которым ассоциирована та или иная служба в Linux-системе (как с Kerberos Principal). И вполне типичной и распространённой практикой является создание отдельного keytab-файла для каждого принципала Kerberos. То есть, как правило, прослеживается такая логика: отдельная учётная запись служебного пользователя в AD, для которого зарегистрировано конкретное имя службы ServicePrincipalName (SPN) => отдельный keytab-файл, сопоставимый с записью SPN в AD.
А теперь представьте ситуацию, когда, например, на веб-сервере Apache настроена и успешно работает Kerberos-аутентификация с помощью keytab-файла, содержащего имя принципала Kerberos, равное HTTP/web.holding.com@HOLDING.COM , сопоставимое с SPN HTTP/web.holding.com в свойствах некоторой учётной записи служебного пользователя в домене AD (примеры такой настройки мы рассматривали ранее: здесь , здесь и здесь ). В таком случае аутентификация Kerberos будет успешно работать только при обращении к веб-сайту Apache по имени http://web.holding.com . Однако, в один прекрасный момент возникает необходимость использовать другое имя FQDN сервера в URL, так как в Apache создан дополнительный виртуальный хост, а в DNS создана A-запись, имеющая имя этого виртуального хоста и ведущая к IP адресу этого же веб-сервера. Например, пусть это будет имя web2.holding.com .
В этом случае, если мы попытаемся использовать старый keytab-файл файл для настройки конфигурации нового виртуального хоста Apache, то при попытке обращения к URL http://web2.holding.com , клиенты получат от веб-сервера ошибку 500 Internal Server Error .

В логе при этом будут регистрироваться события типа:
И это справедливо, ведь имеющийся у нас на веб-сервер keytab-файл содержит записи только для принципала HTTP/web.holding.com , и никакого HTTP/web2.holding.com там нет и в помине.
Как же быть в таком случае? Можно по классической схеме сделать в домене AD новую учётную запись служебного пользователя, зарегистрировать для неё SPN HTTP/web2.holding.com и сгенерировать отдельный keytab-файл.
С точки зрения информационной безопасности — это более правильный подход, то есть отдельное веб-приложение = отдельный служебный пользователь в домене.
Но как быть, если на сервере много небольших однотипных веб-сайтов, которым нужны разные имена, а плодить в домене AD под каждый такой сайт учётную запись не очень хочется.
В этом случае нам на помощь придут небольшие советы, которые я подсмотрел в статье Ricky’s Hodgepodge — Two Tips about Kerberos .
Итак, имеем задачу — получить комплексный keytab-файл, содержащий в себе некоторое множество разных имён Kerberos Principal, сопряжённых с записями ServicePrincipalName в свойствах одной конкретной учётной записи служебного пользователя в AD. Приступим.
Подготовка учётной записи пользователя в AD
Для начала, необходимо обеспечить наличие всех нужных SPN-записей в свойствах учётной записи служебного пользователя в домене AD. В нашем примере это будет пользователь DOM\web-srv-user , для которого ранее на нашем веб-сервере Apache уже была настроена аутентификация Kerberos по имени сайта web.holding.com . Посмотрим текущее состояние SPN-записей для этого пользователя на Windows-системе (для просмотра SPN достаточно прав рядового пользователя домена):
Зарегистрируем для пользователя новую SPN-запись, которая будут содержать имя нужных нам дополнительной службы, например HTTP/web2.holding.com , следующим образом (для изменения SPN требуются права администратора домена):
Теперь можно переходить с манипуляциями с keytab-файлом.
Генерация и обновление keytab-файла на контроллере домена AD
Для начала, напомню о том, как мы создавали исходный keytab-файл, уже имеющийся на нашем веб-сервере Apache.
Для настроенной учетной записи был сгенерирован keytab-файл на контроллере домена AD (в нашем случае на базе Windows Server 2012 R2) с помощью утилиты ktpass в следующем порядке:
В нашем примере команда выглядела так:
В результате выполнения команды мы увидим исчерпывающую информацию о том, что попало в keytab-файл:
При выполнении утилиты ktpass в указанном порядке значение номера Key Version Number (KVNO) будет обновлено в свойствах учётной записи в AD (атрибут msDS-KeyVersionNumber), с последующей записью номера в keytab-файл. 
А все keytab-файлы, которые генерировались ранее для этой учётной записи (где номер KVNO меньше текущего) станут недействительными.
Здесь хочу немного отвлечься и сделать небольшую ремарку о том, как посмотреть содержимое keytab-файла на Windows. Стандартных инструментов в составе Windows для этой задачи я найти не смог (возможно плохо искал). Однако если в вашей Windows-системе установлен стандартный клиент Java (JRE), то в его составе есть утилита klist.exe, которая работает с опциями, схожими с теми, что используются в утилите klist под Linux. Например, чтобы получить полную информацию о содержимом нашего keytab-файла нужно будет вызвать эту утилиту следующим образом:
Теперь мы подошли к самому интересному. Второе и последующие имена нужные нам имена принципалов Kerberos добавляем в уже имеющийся keytab-файл с применением дополнительных параметров ( —in, — setupn, —setpass ) утилиты ktpass, которые позволят сохранить текущий номер KVNO в файле и AD:
Из вывода утилиты будет понятно, что номер keytab-файла, и KVNO остались неизменными:
Ещё раз заглянем для убедительности в новый keytab-файл web_refreshed.keytab с помощью утилиты klist:
И действительно, мы видим, что в файле появилось 5 новых записей, а номер KVNO при этом у всех записей остался прежним (в нашем примере это 4 ). Заменим keytab-файл на веб-сервере Apache и убедимся в том, что теперь с Kerberos аутентификацией успешно работает и основное имя и альтернативное. Таким образом мы можем добавить в keytab-файл столько имён принципалов сколько необходимо, при условии, что все эти имена в виде SPN-записей есть в свойствах учётной записи соответствующего доменного пользователя в атрибуте servicePrincipalName. При проверках с Windows-клиентов перед проверкой не забываем очищать локальный клиентский кэш билетов Kerberos командой (выполнять в контексте того пользователя, от имени которого делается проверка доступности веб-сайтов на Windows-системе):
Обновление keytab-файла на Linux-сервере
Есть ещё одна хитрость, которая позволит нам менять содержимое keytab-файла непосредственно на Linux-сервере без манипуляций по обновлению файла на контроллере домена и копированию его туда-сюда по сети. Если нам известен пароль от учётной записи сервисного пользователя (а он нам конечно известен:)) и текущий номер KVNO (подсмотреть его можно как в keytab-файле, так и в AD), то с помощью утилиты ktutil, мы сможем добавить в существующий keytab-файл нужную нам дополнительную запись с новым именем принципала Kerberos. Для этого войдём в режим интерактивного взаимодействия утилиты ktutil:
Выполним команду list, которая покажет, какими данными оперирует утилита (пока там пусто):
Выполним команду чтения содержимого из нашего keytab-файла (read_kt), который мы хотим использовать, как исходный, затем команду list:
Следующей командой add_entry добавим в массив данных, с которыми оперирует утилита, нужную нам дополнительную запись принципала Kerberos. При этом нужно будет указать имя принципала Kerberos (ключ -p), текущий номер KVNO (ключ -k) и тип шифрования (ключ -e). Правильный формат типов шифрования можно посмотреть в самом keytab-файле утилитой klist с ключом -e, как было показано ранее. После ввода команды будет запрошен пароль пользователя, с которым связан данный принципал Kerberos (у нас это DOM\web-srv-user ).
Таким образом мы можем добавить аналогичные записи для всех необходимых типов шифрования:
По завершению добавления записей командой write_kt сохраняем получившийся массив данных в новый keytab-файл и выходим из интерактивного режима работы утилиты:
Разумеется, для того, чтобы обновлённый на Linux-системе keytab-файл работал, нужно обеспечить наличие соответствующей дополнительной SPN-записей в свойствах учётной записи в домене AD. Осталось подключить обновлённый keytab-файл к конфигурации Apache и проверить результат.
В качестве заключения хочется напомнить о паре простых правил безопасности, про которые всегда стоит помнить при работе с keytab-файлами:
- Не оставлять keytab-файлы во всяких временных каталогах после операций над этими файлами и всевозможных тестов. Keytab-файл должен лежать только в том месте, где он реально используется.
- Жёстко ограничивать на Linux-системе доступ к keytab-файлу, оставляя право на чтение лишь тем Linux-пользователям, от имени которых работает служба использующая для Kerberos-аутентификации данный keytab-файл.
Дополнительные источники информации:
How to Enable and Disable the Windows Key
Windows key is located on every keyboard, and we are using this key for various actions. If you press Windows key, you will open the Start menu. Also, you can use Windows key in combination with another key. For example, if you press Windows key + E you will open Windows Explorer or File Explorer, if you press Windows key + R, you will open a Run dialog box and many others combination keys. If Windows key is not working properly, you will not be able to to this actions. So, why this problem occurs?
There are different reasons why Windows key is not working, including keyboard issue, system settings, game settings or application settings.
We will show you how to solve the issue by using 5 different methods. These methods are compatible with operating systems from Windows XP to Windows 10. I hope you are using minimum Windows 7 because previous operating systems are not anymore supported by Microsoft. If you are one of the users who want to disable Windows key when playing games, you will be able to do it after reading this article.
Method 1: Press Fn + F6 or Fn + Windows Keys
In the first method, we will use combination keys to activate or deactivate Windows key. Please, press Fn + F6 to activate or deactivate Windows key. This procedure is compatible with computers and notebooks, regardless which brand are you using. Also, try pressing “Fn + Windows” key which can sometimes get it working again.
Method 2: Press Win Lock
Are you using gaming keyboard? If not, you should read next method. If you are using gaming keyboard, please check is there Win Lock key located on your keyboard. If yes, you should press this key to enable or disable Windows key. Few users solved their problem by pressing Win Lock key on their gaming keyboard, including keyboard model Logitech G15. If you can not find Win Lock key, please read the technical documentation of your gaming keyboard.

Method 3: Change Registry settings
If combination keys are not working well, you will need to enable Windows key through Registry Editor. Before you do any registry configuration, we are recommending you to backup registry database. Why do you need to do registry backup? In the case of some misconfiguration, you can revert registry database to the previous state when everything worked without any problems. For this method, you will need to use a user account with Administrator privilege, because Standard user account is not allowed to do any system changes. How to do registry backup? Please read instructions on this LINK, and follow the procedure of on the method 4, from step 1 to step 7. After that, you will need to download and run registry file from this LINK. Also, if you want to disable Windows key, you will need to download and run registry key from this LINK.
Method 4: Clean the keyboard
If your keyboard is dirty and if there is dust between your keys, you should clean your keyboard. Sometimes, dust can block some of your keys, including Windows key. Based on that, we are recommending you to clean your keyboard. Please follow the procedure below.
For Computer:
- Unplug keyboard from computer
- Clean the keyboard
- Plug keyboard back
- Test Windows key
For notebook:
- Turn off your notebook
- Unplug AC DC adapter from notebook
- Unplug battery from notebook
- Clean the keyboard
- Plug battery back
- Plug the AC DC back
- Turn on your notebook
- Test Windows key
Method 5: Replace the keyboard
If cleaning your keyboard did not solve your problem, we are recommending you to replace your keyboard with the new one. Before purchasing new keyboard you should test your computer keyboard on another machine or plug another keyboard to your current computer or notebook. If you are using a notebook, please plug USB keyboard on your notebook and check is working properly. If another keyboard is working properly on your machine, you will need to purchase a new keyboard. Before purchasing a new keyboard, please check is your brand name computer, keyboard or notebook under warranty. If yes, the vendor will replace your keyboard for free.
Fix: Windows Button or Key not Working
Since the invention of the start menu, keyboards have had the Windows key (also known as the Winkey). This is a physical key with the Microsoft Windows logo embedded on keyboards usually on the left of the keyboard which is linked to the Start Menu, so when you press this key Start menu opens and if it doesn’t open the either the Start Menu or the Windows button is not working. Some keyboards also have two; on the right and on the left of the keyboard. The Windows key quickly brings up the start menu; which is the most common procedure on a Windows computer. This saves time on dragging the mouse to the Start menu button on your screen.
 Windows button
However, for some users, this button has caused nothing but frustration. Whenever they press the Windows Key on the laptop, it does not seem to do its dedicated work of bringing up the start menu. This means Windows key shortcuts will also not work. Shortcuts like Winkey + L to log out, Winkey + D to bring up the desktop, Winkey + R to open run, Windows Key + I to open Settings, or Windows Key + Tab to sweep through tasks will not work. However, the start menu still works fine when you use the mouse. Others however cannot get this to work either. This article will help in explaining this problem and give you fixes to it.
Reasons why your Windows Key does not Work
This problem is related to either your PC settings including the software you have installed, or it could be tied to your keyboard itself. Your best bet is to try another keyboard if you have one. If the problem disappears that suggests you have a suspect key on the original keyboard. If the problem doesn’t go away you can assume it’s a Windows problem. Press Ctrl + Shift + Esc to bring up task manager. If the task manager does not come up, then you might have a malware problem.
A common reason for this problem is as seen on gaming keyboards. These keyboards have two modes; a standard mode and a gaming mode. There is a switch to change between these modes. You might flip a switch, press a button, use the software, or use a combination to toggle between the modes. The gaming mode stops the Windows key from working to prevent your game from exiting when the Windows key is accidentally pressed.
There is also a possibility that your Windows key is disabled within the Windows OS registry editor itself, hence Windows is not able to accept a request by this key. A disabled start menu will also show this problem. This could have been done by some software, game, or malware.
Bad drivers, incompatible drivers, or outdated drivers can also cause your keyboard to freeze your Windows key. These symptoms can also be manifested if File Explorer/Windows Explorer, which drives your user interface, did not start correctly. There could also be a conflict between devices as seen when the game controller is plugged in.
In the worst cases, your keyboard could be mechanically or electrically damaged hence needing replacement. Here are solutions that could get you back on track.
Note: Since Windows Shortcuts will not work because of this error, we are going to use longer methods instead of windows shortcuts that require the Windows Key.
Method 1: Disable Gaming Mode on your Keyboard
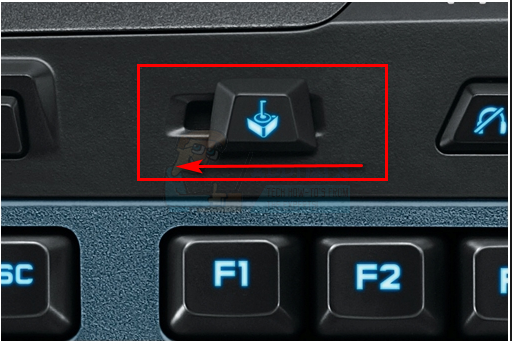
Some keyboards, usually marketed as “gaming”, have the ability to turn off Windows keys via some hardware switch or Fn key combination in order to prevent pressing this key which usually exits your game. The gaming mode key is usually marked with a joystick drawing. Here is how to disable gaming mode on some of the popular gaming keyboards.
- On Logitech keyboards, there is a switch above the F1, F2 & F3 function keys that you can flip to the right for gaming mode and to the left for regular use. Flip it to the left. Other versions have a gaming mode button above F4, press the button to toggle in between gaming and standard modes.

- In some keyboards, beside the right Ctrl button, instead of a second Windows button, there is a “Win Lock” button (not the menu button). Press it to enable the Windows key.
- Corsair keyboards have their own software to adjust lighting, functionality, etc. Run the Corsair software (which has an option to enable/disable the windows key) and enable your Windows key.
- The Azio keyboard also has such a switch in the MGK1 series. MGK1 & MGK1-K: Press FN and F9 at the same time. For MGK1-RGB: Press FN and Windows Start Key at the same time.
- For the MSI computer/laptop keyboards, you can switch turn on the Windows key from the Dragon Gaming Center > System Tuner.
- For the ibuypower keyboard, press fn + ibuypower (aka windows key) to toggle Windows key on and off
- For Alienware gaming keyboard, press Fn + F6 to toggle gaming mode on and off
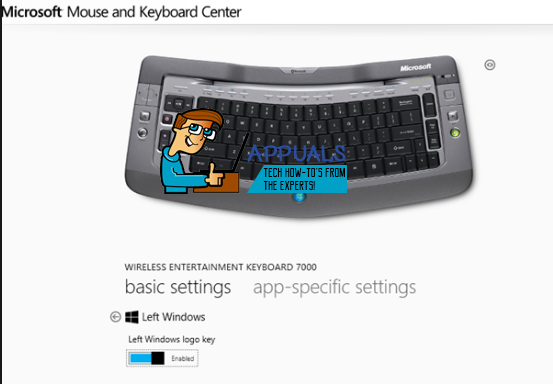
- For MS Sidewinder keyboard, go into MS Keyboard & Mouse Center and you can click the Windows key in the dashboard and set it to enabled/disabled

Method 2: Enable Windows Key using Registry Edit
The registry can allow or restrict a lot including keyboard keys and menu items. To enable your Windows key:
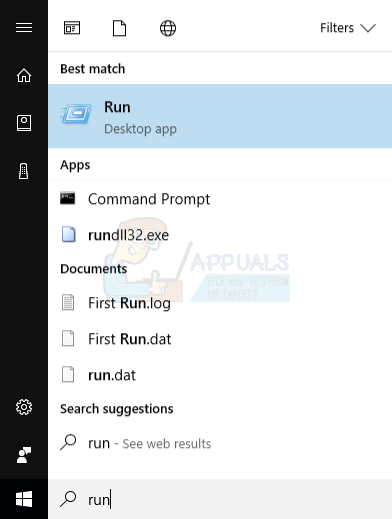
- Click Start, type ‘Run’ and click Run, or in Windows 8/10 right click on the start button and click run
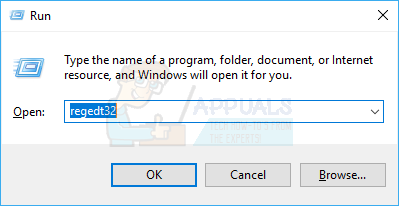
- Type ‘regedt32’, and then click OK. Click Yes if you get any EULA message asking for confirmation.
- On the Windows menu, click HKEY_LOCAL_ MACHINE on Local Machine.
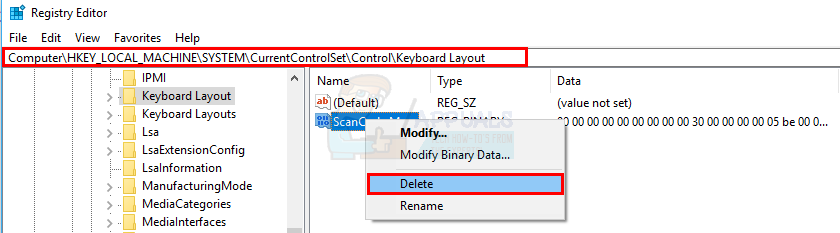
- Double-click the System\CurrentControlSet\Control folder, and then click the Keyboard Layout folder.
- Right-click the Scancode Map registry entry, and then click Delete.
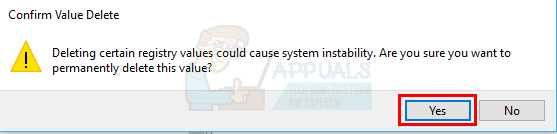
- Click Yes on the confirmation/warning message.
- Close Registry Editor and restart the computer.
If you need to disable Windows key again, go to the Microsoft page here and follow the instructions for disabling windows key. You can also use the easy fix tool from here to enable and disable the Windows Key.
Method 3: Re-Register all Apps
This will clear any software conflict with your keyboard
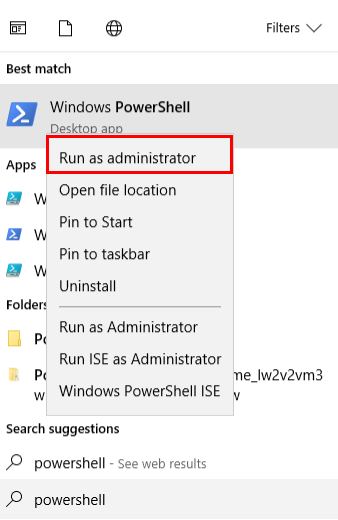
- Click on the Windows button.
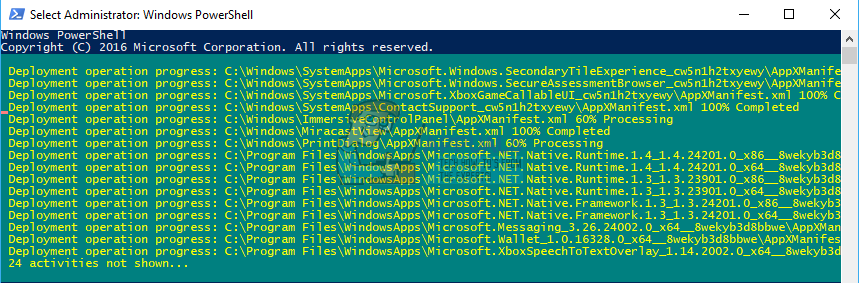
- Type ‘PowerShell‘ and then right click on ‘Windows PowerShell’ and run as an administrator.
- If your start button doesn’t work when you click on it, go to this location:
and right click on “Windows PowerShell” and run as administrator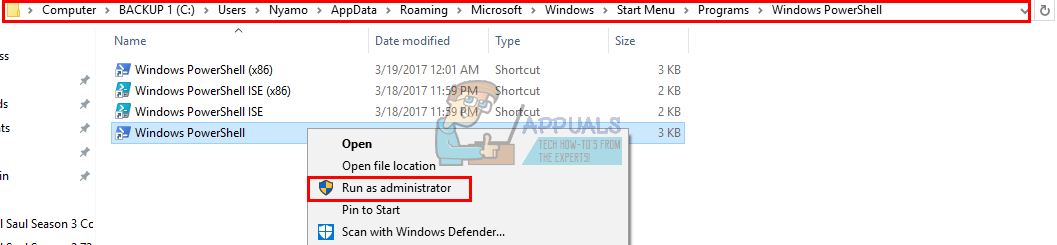
Type or copy and paste the script below into the PowerShell window and press enter

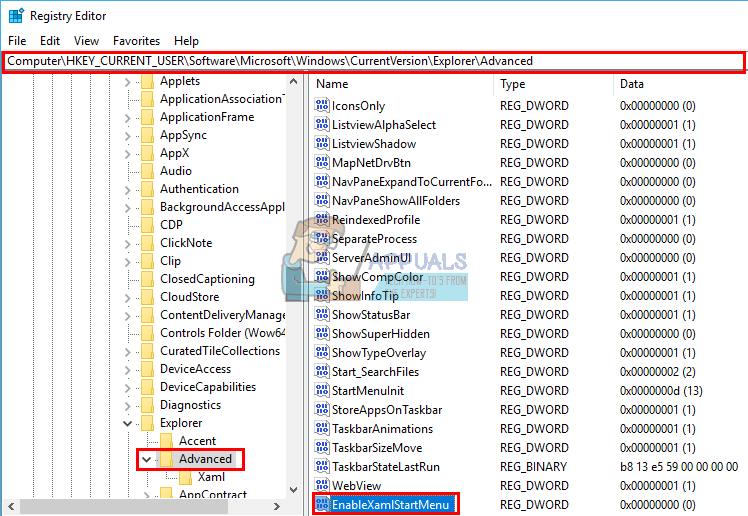
Method 4: Enable the Start Menu
In cases where your start key does not bring up the start menu, there is a possibility the start menu was disabled. To enable it, follow the steps below.
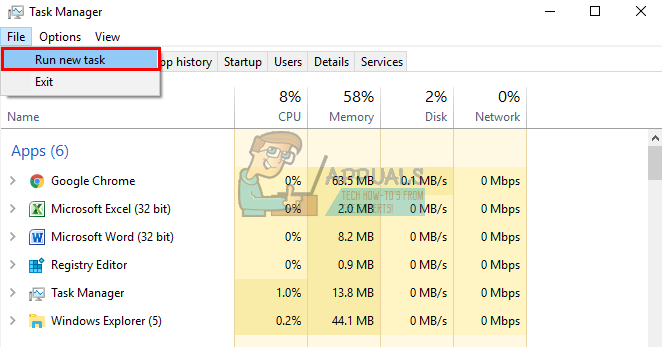
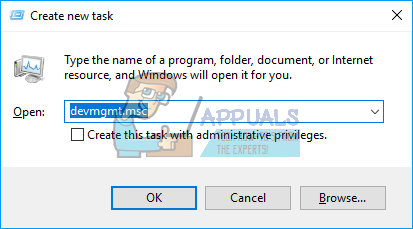
- Right click on the Start Button and select “Run” or press Ctrl + Shift + Esc and go to File > click run a new task from task manager.
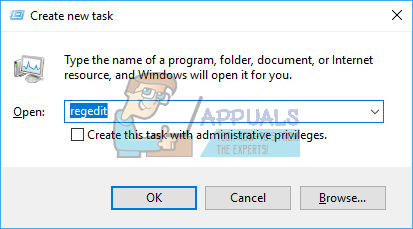
- Type “regedit” (without the quotes)
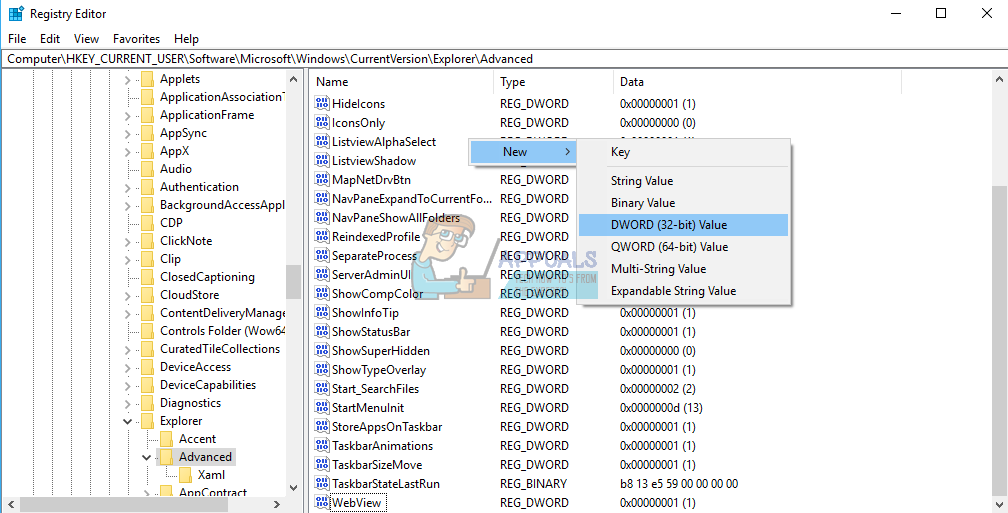
- Navigate to this key
- Right click on the right hand side panel and create a new DWORD (32-bit) value
- Call the new key “EnableXamlStartMenu“
- Restart your PC or restart Explorer using task manager as explained in method 5 below.
Method 5: Restart Windows / File Explorer
Explorer controls your Windows user interface. This method will restart Windows/File Explorer and clear any errors that prevented it from starting correctly.
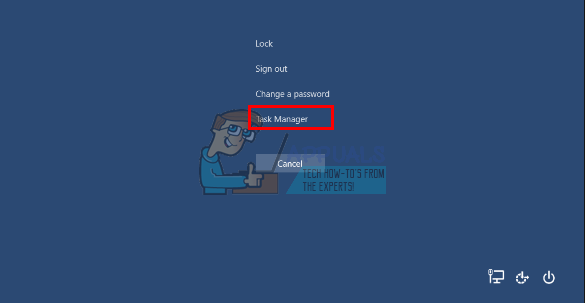
- Press Ctrl + Alt + Del on the keyboard and click on task manager.
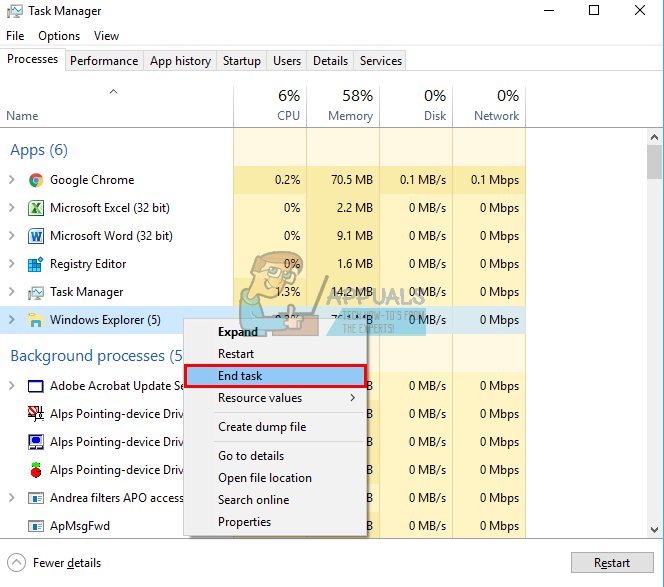
- Click on the Process tab and locate Explorer in the windows and right click on it and select end task.
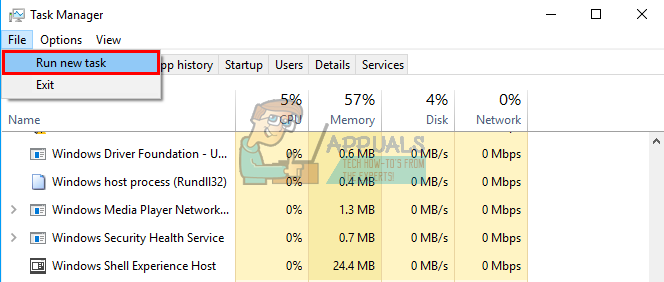
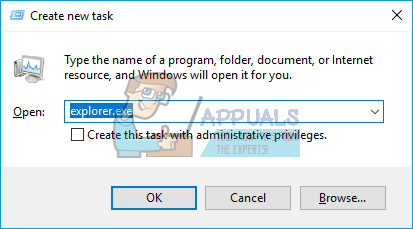
- Click on File and then click on Run New Task.
- Type ‘explorer.exe’ and press enter.
Method 6: Turn off Filter Keys
This has been seen as one of the culprits in Windows 8 and Windows 10 issues. Turning on filterkeys ignores or slows down repeated key strokes and adjusts repeat rates. Somehow, the windows key is also affected on some keyboards. To turn off filter keys:
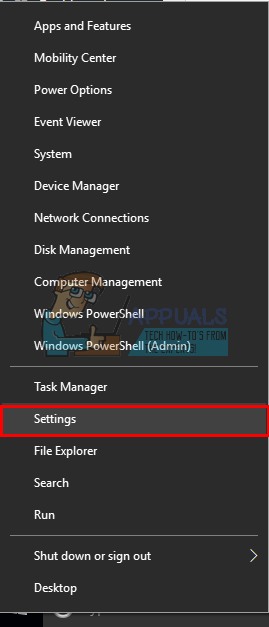
- Drag your mouse to the right edge of your Windows 8 PC and click settings. In windows 10, right click on your start menu and select settings.
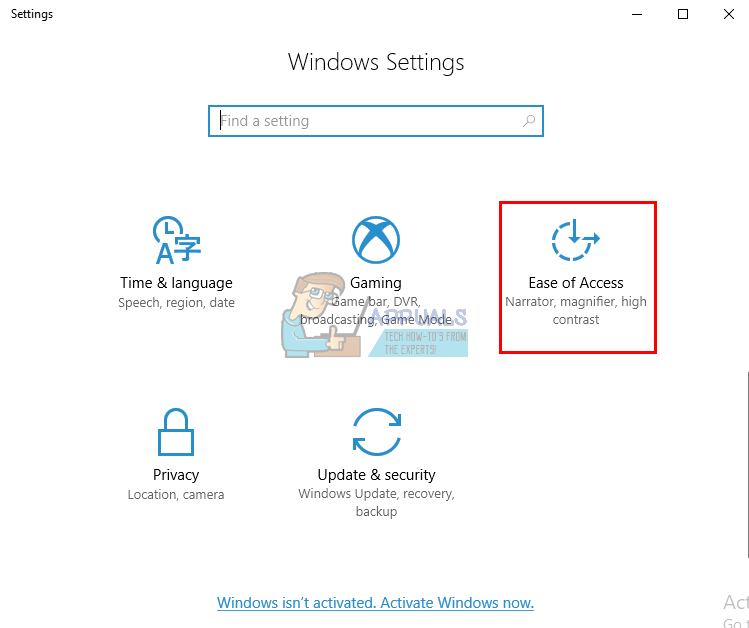
- From the Windows settings page, scroll down and click on Ease of Access
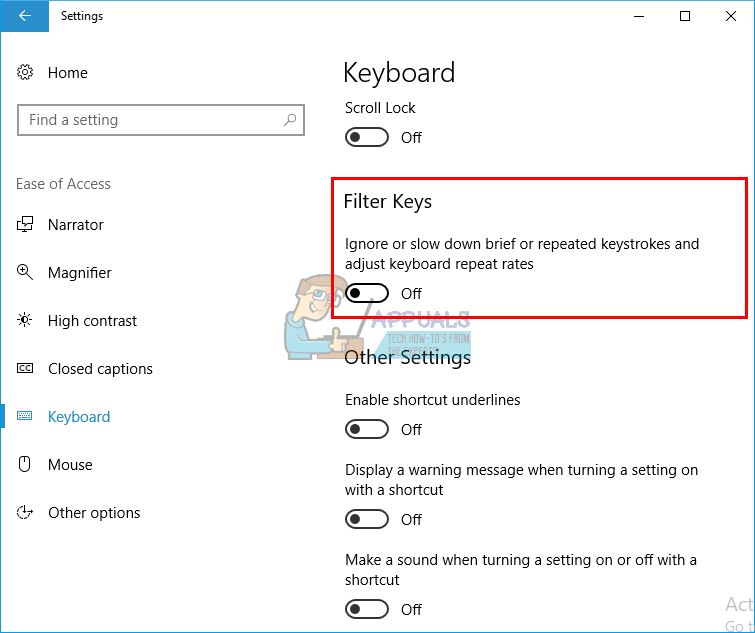
- Click on the keyboard tab on the left hand pane
- Scroll down to ‘filter keys’ and turn it off
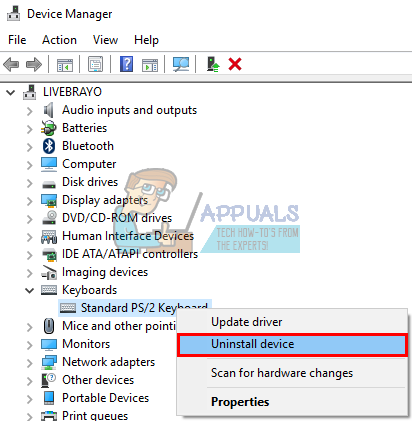
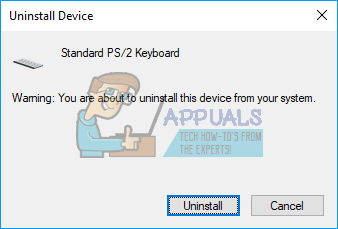
Method 7: Uninstall and reinstall your keyboard drivers
Uninstalling the bad keyboard drivers will reinstall the correct drivers for your keyboard.
- Right click on the Start Button and select “Run” or press Ctrl + Shift + Esc to open task manager and go to File > run a new task.
- Type devmgmt.msc and hit enter to open device manager
Expand the ‘Keyboards’ section
Method 8: Unplug your game controller
Your Windows key might not function some times when your game pad is plugged in and a button is pressed down on the gaming pad. This could be caused by conflicting drivers. It is rear however, but all you need to do is unplug your gamepad or make sure no button is pressed down on your gaming pad or keyboard. Updating your gamepad or keyboard drivers might permanently solve this problem.
NB: Remember that this could also be a hardware/mechanical/electric problem on your keyboard that would warrant repair or replacement.


