Windows Live Updater is a freeware software download filed under components and made available by Microsoft for Windows.
The review for Windows Live Updater has not been completed yet, but it was tested by an editor here on a PC and a list of features has been compiled; see below.
Updates all of Windows Live services on Windows
Windows Live Updater is a program which updates Windows Live Essentials (previously Windows Live Installer). It is a suite of freeware applications by Microsoft which aims to offer integrated and bundled e-mail, instant messaging, photo-sharing, blog publishing, security services and other Windows Live entities.
Essentials programs are designed to integrate well with each other, with the Windows operating system, and with other Windows Live web-based services such as Windows Live Photos and Windows Live Hotmail, so that they operate as a seamless whole.
Windows Live Essentials integrates perfectly with Windows 7, but isn’t included in the installation by default. If you use Windows Live Messenger or other programs with the «Live» trademark, this program should be installed to provide additional online-based functionality with Windows.
Features and highlights
Provides updates for the following programs:
Windows Live Family Safety
Windows Live Mail
Windows Live Messenger
Windows Live Movie Maker (Windows Vista and Windows 7 only)
Windows Live Photo Gallery
Windows Live Sync (integrated with Toolbar and Photo Gallery)
Windows Live Toolbar
Windows Live Updater 16.4.3528.0331 on 32-bit and 64-bit PCs
This download is licensed as freeware for the Windows (32-bit and 64-bit) operating system on a laptop or desktop PC from components without restrictions. Windows Live Updater 16.4.3528.0331 is available to all software users as a free download for Windows. Filed under:
Windows Live Updater Download
Freeware Components
Major release: Windows Live Updater 16.4
Как обновить Киностудию Windows Live для Windows 7
Как обновить Киностудию Windows Live для Windows 7? Скачать обновленную версию вместе с базовыми компонентами Windows можно через сайт Media Player. Данная версия не содержит вирусов и вредоносного ПО, в отличие от аналогичных установочных файлов в интернете.
Основные функции Movie Maker
Программа Movie Maker рассчитана под базовое редактирование видео и создание любительских роликов. Благодаря простому интерфейсу работать в программе может любой новичок, не владеющий азами видеомонтажа.
Помимо видеороликов, в Киностудии можно использовать изображения и аудио. Редактор поддерживает следующие форматы:
Фото и картинки: JPEG, PNG, GIF, WMF, TIFF, DIB, BMP.
Как видно из перечня, Киностудия позволяет работать практически с любым базовым форматом. С помощью основных функций видеоредактора пользователь может:
Обрезать видео;
Сделать склейку разных кадров;
Добавить фоновую музыку;
Создать фотоальбом;
Отрегулировать громкость звука и скорость видео;
Наложить визуальный эффект;
Применить анимацию.
Готовый ролик можно сохранить в разном разрешении, подходящем под конкретное цифровое устройство. Качество ролика будет зависеть от выбранного разрешения. Чаще всего пользователи выбирают полноценный Full HD формат, чтобы иметь возможность делиться видео в социальных сетях.
Фильм по умолчанию сохраняется в формате MPEG-4.
Как обновить Киностудию до последней версии?
C 2018 года Microsoft официально прекратил поддержку программы Movie Maker. На последнюю ОС Windows 10 предлагается к установке новое приложение «Киностудия», которое можно скачать через Microsoft Store. Однако у данного приложения есть существенные минусы:
Нестабильная работа на ПК;
Отсутствие многих базовых функций, которые были в старой версии редактора;
Нет возможности выбрать подходящее разрешение для сохранения видео.
Cтарая версия Киностудии гораздо более удобна и практична по сравнению с приложением. В связи с этим у многих пользователей, имеющих операционную систему Windows 7, до сих пор стоит не обновленная программа Movie Maker.
Если на ПК установлена операционная система Windows 8 и выше, обновление может не потребоваться, так как последняя версия программы была выпущена в 2012 году. Однако тем, у кого стоит ОС Windows 7, рекомендуется проверить наличие обновлений для видеоредактора.
На сайте Media Player находится последняя версия Movie Maker. Чтобы бесплатно загрузить ее на Windows 7, достаточно открыть главную страницу сайта и найти нужную программу в таблице.
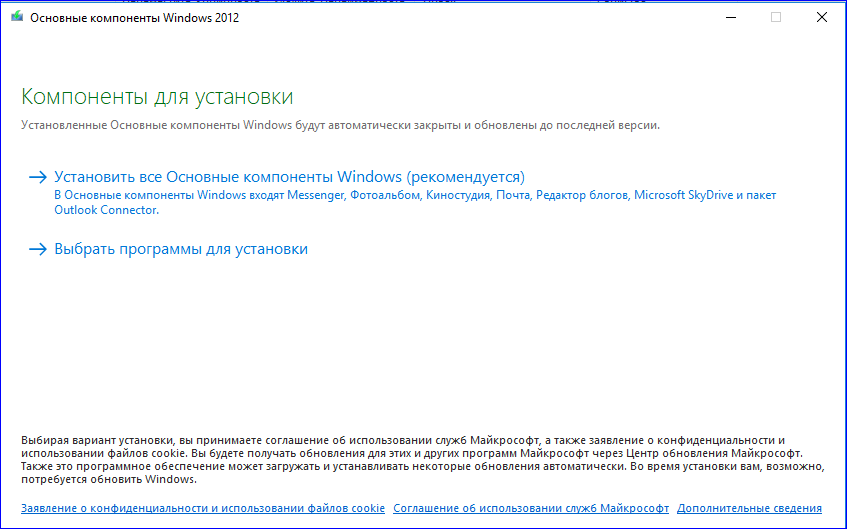
Movie Maker автоматически загрузится в папку, привязанную к браузеру. Далее следует открыть установочный файл и выбрать подходящий вариант установки — с базовыми компонентами Windows или без них.
Примечание: Для загрузки только одного Movie Maker следует указать пункт «Выбрать программы для установки» и поставить галочку напротив видеоредактора.
Если на ПК была установлена очень старая версия Киностудии, она автоматически обновится до версии 2012 года.
По завершению процесса установки на рабочем столе появится значок Windows Live. Теперь самое время приступить к созданию первого собственного фильма.
Как удалить Киностудию?
Для удаления программы Movie Maker и всех дополнительных компонентов Windows нужно выполнить следующие действия:
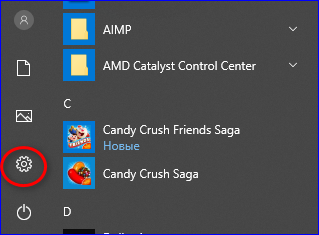
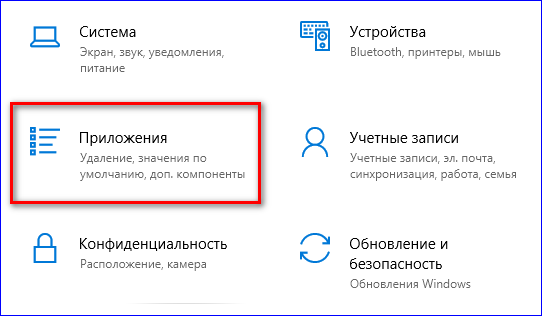
Открыть меню «Пуск» и найти раздел «Параметры«;
Далее открыть пункт «Приложения«, где находятся все установленные программы;
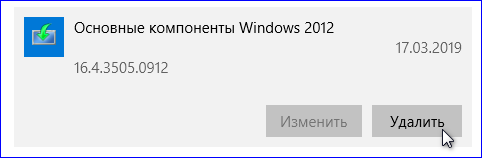
В перечне всех приложений, установленных на ПК, найти приложение под названием «Основные компоненты Windows 2012» и нажать кнопку «Удалить«.
Киностудия вместе с базовыми компонентами будет полностью удалена с компьютера.
Для обновления Киностудии на операционной системе Windows 7 достаточно скачать проверенный файл через сайт Media Player и установить его на ПК. Вместе с видеоредактором также можно установить базовые компоненты Windows: Почту Microsoft Outlook, Фотоальбом, облачное хранилище SkyDrive, Редактор блогов и Messenger.
Скачать Windows Live
Разработчик
Microsoft
Лицензия
Free
Версия
V2012 Build 16.4.3528.0331
Обновлено
01.2020
Совместимость
Windows 10, Windows 8, Windows 7
Языки
русский / английский
Размер
30.8 Мб
В самой популярной операционной системе от Microsoft есть очень полезная утилита, которая вполне может заменить Movie Maker. Ее создавали специально в упрощенном виде для новичков и пользователей начального уровня. Пред нами не мощный комбайн, требующий ресурсов, а наоборот – урезанная версия с ограниченным функционалом.
В этом редакторе доступны функции редактирования видео, создания нового ролика, добавления аудио эффектов. Пользователь может изменить звуковую дорожку, чтобы сделать проект более привлекательным для видеохостингов. Из материала на цифровых носителях можно также сделать фильм высокого качества. Если не требуется сложных профессиональных манипуляций, то Windows Live на русском языке – это идеальный компонент для компьютера или ноутбука.
Как зарегистрироваться в программе?
Программа является бесплатной, но вводить регистрационные данные все-таки придется. Для получения доступа к функционалу достаточно зарегистрировать учетную запись в системе Live ID. У пользователей Windows 8 и 10 по умолчанию уже имеется учетная запись для входа в программу.
Это ПО можно успешно использовать и без регистрации. Но зарегистрировавшись, предоставляется дополнительный доступ к мессенджеру, почтовой переписке, облачному хранилищу. Регистрационные данные также можно использовать в игровом сервисе и для доступа к официальному офисному пакету. Пользователи Windows 7 должны пройти эту процедуру по следующей инструкции:
посетить страничку login.live.com;
ввести регистрационные данные;
внести свой номер телефона;
в конце ввести капчу и принять условия использования.
Инструменты Windows Live
В этот пакет входит ряд бесплатных инструментов, которые облегчают переписку, создание текста, редактирование видео. Программа также соединяет ПК с облачным хранилищем, чтобы дать доступ к документам из любой точки мира. Рядовому пользователю все эти утилиты будут полезны, если нет особой нужды в профессиональных программах.
Киностудия, например, умеет работать с популярными форматами видео, такими как WMV, M1V, WM, MTS, MOV, AVI, MP4, 3GP, K3G, MPEG, MPV2, MOD, M4V, MP2 и VOB. А также есть обработка аудиозаписей с расширением WM, ASF, M4A WMA, AIF, WAV, MP3.
В состав пакета входят:
мессенджер – программа для быстрого доступа ко всем контактам пользователя; киностудия – утилита для монтажа видео, в седьмой версии операционной системы вместо нее входил Movie Maker. Sky Drive – облачное хранилище с бесплатной вместимостью до 25 ГБ; Office Web App – онлайн служба для создания офисных документов.
Установка windows live – простые шаги
Обычному юзеру полный состав пакета редко нужен – при инсталляции его на свой компьютер, необходимо проследить за тем, чтобы были выбраны только важные компоненты. В большинстве случаев это Киностудия и Фотоальбом. Если возникнет желание – выбирайте весь список, иначе лишние составляющие будут зря светиться в меню «Пуск» и занимать место на жестком диске.
Устанавливая инструмент, нужно быть внимательным, проходя следующие шаги:
Скачать установочный файл Windows Live по ссылке ниже и запустить его.
В окне «Компоненты для установки» из двух вариантов выбрать «Выбрать программы для установки».
Поставить галочку только напротив «Фотоальбом» и «Киностудия».
Выждать 5-минутную установку.
Найти в меню «Пуск» Movie Maker или Киностудию.
За что пользователи выбирают Windows Live?
Учитывая некоторые ограничения функционала, пользователь все равно найдет для себя ряд полезных опций. А главное – программа абсолютно не требовательна к характеристикам ПК и очень просто устанавливается. Для использования нужно только скачать файл установки и запустить его.
Основные плюсы Windows Live:
умеет создавать коллажи и слайд-шоу из фотографий;
записывает видео из цифровых камер;
позволяет стабилизировать дергающуюся картинку;
имеет инструмент редактирования аудио и наложения звуковых эффектов;
интерфейс русифицирован.
При установке придется следить за тем, что программа желает по умолчанию загрузить дополнительные ингредиенты – нужно выбрать подходящие. Еще одна особенность — функция нарезки видео реализована слегка непривычно, но проблем вызывать не должна.
Нужна простая программа для обучения редактированию видео? Вы можете скачать и установить бесплатную версию программы по ссылке, указанной ниже.
Windows Update: FAQ
Note: If you’re looking for Microsoft Office update info, see Install Office updates.
In Windows 10, you decide when and how to get the latest updates to keep your device running smoothly and securely. When you update, you’ll get the latest fixes and security improvements, helping your device run efficiently and stay protected. In most cases, restarting your device completes the update. Make sure your device is plugged in when you know updates will be installed.
If other questions come up when you update Windows 10, here are some other areas that might interest you:
When you only want info about updating Windows 10, you’ll find answers to many of your questions here:
When the Windows 10 May 2020 Update is ready for your device, it will be available to download and install from the Windows Update page in Settings. Choose a time that works best for you to download the update. You’ll then need to restart your device and complete the installation. After that, your device will be running Windows 10, version 2004.
To manually check for the latest recommended updates, select Start > Settings > Update & Security > Windows Update > Windows Update .
To get help updating to the latest version of Windows 10, go to the Microsoft software download page and download the Update Assistant.
Some updates may not be available on all devices at the same time—we’re making sure updates are ready and compatible.
To stay up to date, select Start > Settings > Update & Security > Windows Update > Windows Update , and then select Check for updates.
If a feature update is available for your device, it will appear separately on the Windows Update page. To install it, select Download and install now.
Here are a few things you can try if you’re having trouble installing updates:
Make sure that your device is connected to the internet. Downloading updates requires an internet connection.
If you’re connected the internet, try to install the updates manually. Select Start > Settings > Update & Security > Windows Update > Windows Update , and then view available updates. Check for updates
Run the Windows Update Troubleshooter. Select Start > Settings > Update & Security > Troubleshoot . Under Get up and running, select Windows Update.
The time required to download updates primarily depends on internet connection speed, network settings, and update size. Make sure your device is plugged in and connected to the internet to download updates faster.
You can’t stop updates entirely—because they help keep your device safe and secure, updates will eventually need to be installed and downloaded, regardless of your update settings. Here’s how to temporarily pause updates from being downloaded and installed. Note that after the pause limit is reached, you’ll need to install the latest updates before you can pause updates again.
In the Windows 10 November 2019 Update (version 1909) or later, or in Windows version 1809 for Pro or Enterprise, select Start > Settings > Update & Security > Windows Update . Then choose one of the following options:
Select Pause updates for 7 days.
Select Advanced options. Then, in the Pause updates section, select the drop-down menu and specify a date for updates to resume.
To finish installing an update, your device will need to restart. Windows will try to restart your device when you’re not using it. If it can’t, you’ll be asked to schedule the restart for a more convenient time. Or, you can schedule anytime by following these steps:
Select Start > Settings > Update & Security > Windows Update > Windows Update .
Select Schedule the restart and choose a time that’s convenient for you.
You can set active hours to make sure automatic restarts for updates only happen when you’re not using your device. Learn about active hours for Windows 10.
Try deleting files you don’t need, uninstalling apps you don’t use, or moving files to another drive like an external USB drive or OneDrive. For more tips on freeing up disk space, see Free up drive space in Windows 10.
We recommend keeping devices like laptops and tablets plugged in when you’re not using them. This way, if updates are installed outside active hours, your device will have enough power to complete the installation. Windows updates don’t consume more battery than other typical system processes.
An update history is available so you can see which updates were installed, and when. You can also use this list to remove specific updates, although we don’t recommend this unless it’s necessary.
Select Start > Settings > Update & Security > Windows Update > Windows Update > View update history .
For more info about what’s included in updates for Windows 10, see Windows 10 update history.
We don’t recommend that you remove any installed updates. However, if you must remove an update, you can do so in update history.
Select Start > Settings > Update & Security > Windows Update > View update history > Uninstall updates.
Select the update you want to remove, then select Uninstall.
Feature updates are typically released twice per year and include new functionality and capabilities as well as potential fixes and security updates. Quality updates are more frequent and mainly include small fixes and security updates. Windows is designed to deliver both kinds of updates to devices through Windows Update.
To double check that your device is up to date, open Settings > Update & Security > Windows Update and see your update status and available updates.
To find which version of Windows you’re running, see Which version of Windows operating system am I running?
Reserved storage is not automatically turned on by Windows in any update scenarios. It is only turned on for new devices with the Windows 10 May 2019 Update (version 1903) or later preinstalled, or devices on which a clean install was performed.
Note: If you’re looking for Microsoft Office update info, see Install Office updates.
The best way to keep Windows 8.1 up to date is to turn on automatic updates. With automatic updates, you don’t have to search for updates online or worry about missing critical fixes or device drivers for your PC. Instead, Windows Update automatically installs important updates as they become available.
To turn on automatic updates:
Open Windows Update by swiping in from the right edge of the screen (or, if you’re using a mouse, pointing to the lower-right corner of the screen and moving the mouse pointer up), select Settings > Change PC settings > Update and recovery > Windows Update. If you want to check for updates manually, select Check now.
Select Choose how updates get installed, and then, under Important updates, select Install updates automatically (recommended).
Under Recommended updates, select Give me recommended updates the same way I receive important updates.
Under Microsoft Update, select Give me updates for other Microsoft products when I update Windows, and then select Apply.
Click the questions below to see answers about how Windows Update keeps your device up to date.
Note: If your PC is connected to a network where updates are managed by Group Policy, you might not be able to change settings related to Windows Update. For more info, contact your organization’s technical support.
Open Windows Update by swiping in from the right edge of the screen (or, if you’re using a mouse, pointing to the lower-right corner of the screen and moving the mouse pointer up), select Settings > Change PC settings > Update and recovery > Windows Update. To check for updates manually, select Check now.
An update history is available so you can see which updates were installed, and when. You can also use this list to remove specific updates, although we don’t recommend this unless it’s necessary.
To see your PC’s update history, open Windows Update by swiping in from the right edge of the screen (or, if you’re using a mouse, pointing to the lower-right corner of the screen and moving the mouse pointer up), select Settings > Change PC settings > Update and recovery > Windows Update > View your update history.
We don’t recommend that you remove any installed updates. However, if you must remove an update, you can do so in update history.
Open Windows Update by swiping in from the right edge of the screen (or, if you’re using a mouse, pointing to the lower-right corner of the screen and moving the mouse pointer up), select Settings > Change PC settings > Update and recovery > Windows Update > View your update history.
Select the update you want to remove, then select Uninstall.
Here are a few things to try if you’re having problems installing updates:
Make sure that your PC is connected to the internet. Some updates can’t be installed if you’re using a metered internet connection.
If you’re connected the internet and updates aren’t installed automatically, wait a few minutes and then try to install the updates manually.
See the Fix Windows Update errors guided walkthrough to try to fix the problem.
Support for Windows 7 ended on January 14, 2020
We recommend you move to a Windows 10 PC to continue to receive security updates from Microsoft.
Click the questions below to see answers about how Windows Update keeps your device up to date.