- $(document).ready vs $(window).load vs window.onload
- Page: DOMContentLoaded, load, beforeunload, unload
- DOMContentLoaded
- DOMContentLoaded and scripts
- DOMContentLoaded and styles
- Built-in browser autofill
- window.onload
- window.onunload
- window.onbeforeunload
- readyState
- JavaScript onload
- The window’s load event
- The image’s load event
- Страница: DOMContentLoaded, load, beforeunload, unload
- DOMContentLoaded
- DOMContentLoaded и скрипты
- DOMContentLoaded и стили
- Встроенное в браузер автозаполнение
- window.onload
- window.onunload
- window.onbeforeunload
- readyState
$(document).ready vs $(window).load vs window.onload
Данный материал является вольным переводом статьи:
RITURAJ RATAN $(document).ready vs $(window).load vs window.onload
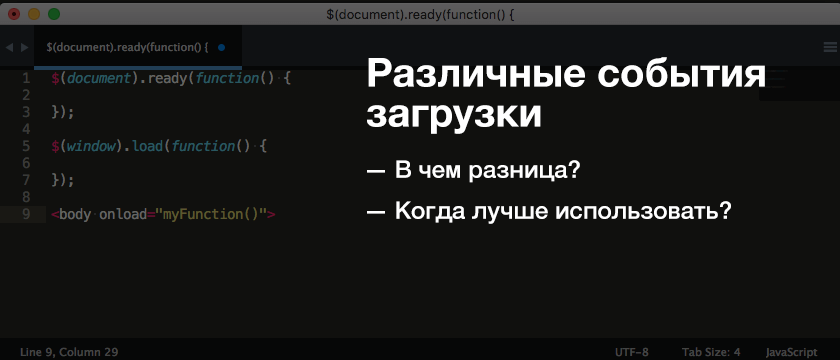
Длительное время мы использовали ‘$(document).ready’ работая с jQuery. Написанный таким образом код начнёт выполняться сразу после того, как будет готов DOM, за исключением картинок. Указанный код будет выполняться непосредственно после готовности DOM, не дожидаясь полной загрузки изображений. Вызов $(document).ready несколько раз приведет к последовательному исполнению вызовов друг за другом. Существуют ещё несколько вариантов записи.
Если мы говорим о $(window).load то код, написанный внутри такой конструкции, начнёт работу когда будет готов весь DOM включая изображения. Такой вызов подойдёт если мы хотим работать с изображениями (расчёт размеров изображения). Данный вызов, как и предыдущий является jQuery событием. Если на нашей странице есть изображения, то сначала мы дождёмся загрузки их всех, а потом будет вызван код.
И ещё кое-что, не путайте событие window load с jQuery методом ajax load.
Событие onload является стандартным событием в DOM, а описанные выше решения работают только при наличии библиотеки jQuery. Данный вариант имеет такую же функциональность как $(window).load , но является встроенным JavaScript событием. Событие onload происходит, когда объект был загружен. Мы можем сделать такой вызов непосредственно из тега. Например, разместив его в теге изображения и как только оно будет загружено произойдёт вызов события.
Такой вызов возможен как в HTML так и в JS.
Alert “вызов после загрузки body” будет вызван сразу после того как загрузится body
Если рассмотреть пример работы onload после загрузки изображения, то выглядеть все будет как показано ниже
Page: DOMContentLoaded, load, beforeunload, unload
The lifecycle of an HTML page has three important events:
- DOMContentLoaded – the browser fully loaded HTML, and the DOM tree is built, but external resources like pictures and stylesheets may not yet have loaded.
- load – not only HTML is loaded, but also all the external resources: images, styles etc.
- beforeunload/unload – the user is leaving the page.
Each event may be useful:
- DOMContentLoaded event – DOM is ready, so the handler can lookup DOM nodes, initialize the interface.
- load event – external resources are loaded, so styles are applied, image sizes are known etc.
- beforeunload event – the user is leaving: we can check if the user saved the changes and ask them whether they really want to leave.
- unload – the user almost left, but we still can initiate some operations, such as sending out statistics.
Let’s explore the details of these events.
DOMContentLoaded
The DOMContentLoaded event happens on the document object.
We must use addEventListener to catch it:
In the example the DOMContentLoaded handler runs when the document is loaded, so it can see all the elements, including below.
But it doesn’t wait for the image to load. So alert shows zero sizes.
At first sight, the DOMContentLoaded event is very simple. The DOM tree is ready – here’s the event. There are few peculiarities though.
DOMContentLoaded and scripts
When the browser processes an HTML-document and comes across a
In the example above, we first see “Library loaded…”, and then “DOM ready!” (all scripts are executed).
There are two exceptions from this rule:
- Scripts with the async attribute, that we’ll cover a bit later, don’t block DOMContentLoaded .
- Scripts that are generated dynamically with document.createElement(‘script’) and then added to the webpage also don’t block this event.
DOMContentLoaded and styles
External style sheets don’t affect DOM, so DOMContentLoaded does not wait for them.
But there’s a pitfall. If we have a script after the style, then that script must wait until the stylesheet loads:
The reason for this is that the script may want to get coordinates and other style-dependent properties of elements, like in the example above. Naturally, it has to wait for styles to load.
As DOMContentLoaded waits for scripts, it now waits for styles before them as well.
Built-in browser autofill
Firefox, Chrome and Opera autofill forms on DOMContentLoaded .
For instance, if the page has a form with login and password, and the browser remembered the values, then on DOMContentLoaded it may try to autofill them (if approved by the user).
So if DOMContentLoaded is postponed by long-loading scripts, then autofill also awaits. You probably saw that on some sites (if you use browser autofill) – the login/password fields don’t get autofilled immediately, but there’s a delay till the page fully loads. That’s actually the delay until the DOMContentLoaded event.
window.onload
The load event on the window object triggers when the whole page is loaded including styles, images and other resources. This event is available via the onload property.
The example below correctly shows image sizes, because window.onload waits for all images:
window.onunload
When a visitor leaves the page, the unload event triggers on window . We can do something there that doesn’t involve a delay, like closing related popup windows.
The notable exception is sending analytics.
Let’s say we gather data about how the page is used: mouse clicks, scrolls, viewed page areas, and so on.
Naturally, unload event is when the user leaves us, and we’d like to save the data on our server.
There exists a special navigator.sendBeacon(url, data) method for such needs, described in the specification https://w3c.github.io/beacon/.
It sends the data in background. The transition to another page is not delayed: the browser leaves the page, but still performs sendBeacon .
Here’s how to use it:
- The request is sent as POST.
- We can send not only a string, but also forms and other formats, as described in the chapter Fetch, but usually it’s a stringified object.
- The data is limited by 64kb.
When the sendBeacon request is finished, the browser probably has already left the document, so there’s no way to get server response (which is usually empty for analytics).
There’s also a keepalive flag for doing such “after-page-left” requests in fetch method for generic network requests. You can find more information in the chapter Fetch API.
If we want to cancel the transition to another page, we can’t do it here. But we can use another event – onbeforeunload .
window.onbeforeunload
If a visitor initiated navigation away from the page or tries to close the window, the beforeunload handler asks for additional confirmation.
If we cancel the event, the browser may ask the visitor if they are sure.
You can try it by running this code and then reloading the page:
For historical reasons, returning a non-empty string also counts as canceling the event. Some time ago browsers used to show it as a message, but as the modern specification says, they shouldn’t.
Here’s an example:
The behavior was changed, because some webmasters abused this event handler by showing misleading and annoying messages. So right now old browsers still may show it as a message, but aside of that – there’s no way to customize the message shown to the user.
readyState
What happens if we set the DOMContentLoaded handler after the document is loaded?
Naturally, it never runs.
There are cases when we are not sure whether the document is ready or not. We’d like our function to execute when the DOM is loaded, be it now or later.
The document.readyState property tells us about the current loading state.
There are 3 possible values:
- «loading» – the document is loading.
- «interactive» – the document was fully read.
- «complete» – the document was fully read and all resources (like images) are loaded too.
So we can check document.readyState and setup a handler or execute the code immediately if it’s ready.
There’s also the readystatechange event that triggers when the state changes, so we can print all these states like this:
The readystatechange event is an alternative mechanics of tracking the document loading state, it appeared long ago. Nowadays, it is rarely used.
Let’s see the full events flow for the completeness.
Here’s a document with , and handlers that log events:
The working example is in the sandbox.
The typical output:
- [1] initial readyState:loading
- [2] readyState:interactive
- [2] DOMContentLoaded
- [3] iframe onload
- [4] img onload
- [4] readyState:complete
- [4] window onload
The numbers in square brackets denote the approximate time of when it happens. Events labeled with the same digit happen approximately at the same time (± a few ms).
JavaScript onload
Summary: in this tutorial, you will learn how to handle the load event that fires on the document, image, and script elements in JavaScript.
The window’s load event
For the window object, the load event is fired when the whole webpage (HTML) has loaded fully, including all dependent resources such as JavaScript files, CSS files, and images.
To handle the load event, you register an event listener using the addEventListener() method:
Or using the onload property of the window object:
If you maintain a legacy system, you may find that the load event handler is registered in of the body element of the HTML document, like this:
It’s a good practice to use the addEventListener() method to assign the onload event handler whenever possible.
The image’s load event
The load event also occurs on images. To handle the load event on the images, you can use the addEventListener() method of the image elements.
The following example uses the load event handler to determine if an image, which exists in the DOM tree, has been completely loaded:
You can assign an onload event handler directly using the onload attribute of the element, like this:
If you create an image element dynamically, you can assign an onload event handler before setting the src property as follows:
- First, create an image element after the document has been fully loaded by place the code inside the event handler of the window’s load event.
- Second, then assign the onload event handler to the image.
- Third, add the image to the document.
- Finally, assign an image URL to the src attribute. The image will be downloaded to the element as soon as the src property is set.
Страница: DOMContentLoaded, load, beforeunload, unload
У жизненного цикла HTML-страницы есть три важных события:
- DOMContentLoaded – браузер полностью загрузил HTML, было построено DOM-дерево, но внешние ресурсы, такие как картинки и стили, могут быть ещё не загружены.
- load – браузер загрузил HTML и внешние ресурсы (картинки, стили и т.д.).
- beforeunload/unload – пользователь покидает страницу.
Каждое из этих событий может быть полезно:
- Событие DOMContentLoaded – DOM готов, так что обработчик может искать DOM-узлы и инициализировать интерфейс.
- Событие load – внешние ресурсы были загружены, стили применены, размеры картинок известны и т.д.
- Событие beforeunload – пользователь покидает страницу. Мы можем проверить, сохранил ли он изменения и спросить, на самом ли деле он хочет уйти.
- unload – пользователь почти ушёл, но мы всё ещё можем запустить некоторые операции, например, отправить статистику.
Давайте рассмотрим эти события подробнее.
DOMContentLoaded
Событие DOMContentLoaded срабатывает на объекте document .
Мы должны использовать addEventListener , чтобы поймать его:
В этом примере обработчик DOMContentLoaded запустится, когда документ загрузится, так что он увидит все элементы, включая расположенный ниже .
Но он не дожидается, пока загрузится изображение. Поэтому alert покажет нулевой размер.
На первый взгляд событие DOMContentLoaded очень простое. DOM-дерево готово – получаем событие. Хотя тут есть несколько особенностей.
DOMContentLoaded и скрипты
Когда браузер обрабатывает HTML-документ и встречает тег
В примере выше мы сначала увидим «Библиотека загружена…», а затем «DOM готов!» (все скрипты выполнены).
Есть два исключения из этого правила:
- Скрипты с атрибутом async , который мы рассмотрим немного позже, не блокируют DOMContentLoaded.
- Скрипты, сгенерированные динамически при помощи document.createElement(‘script’) и затем добавленные на страницу, также не блокируют это событие.
DOMContentLoaded и стили
Внешние таблицы стилей не затрагивают DOM, поэтому DOMContentLoaded их не ждёт.
Но здесь есть подводный камень. Если после стилей у нас есть скрипт, то этот скрипт должен дождаться, пока загрузятся стили:
Причина в том, что скрипту может понадобиться получить координаты или другие свойства элементов, зависящих от стилей, как в примере выше. Естественно, он должен дождаться, пока стили загрузятся.
Так как DOMContentLoaded дожидается скриптов, то теперь он так же дожидается и стилей перед ними.
Встроенное в браузер автозаполнение
Firefox, Chrome и Opera автоматически заполняют поля при наступлении DOMContentLoaded .
Например, если на странице есть форма логина и пароля и браузер запомнил значения, то при наступлении DOMContentLoaded он попытается заполнить их (если получил разрешение от пользователя).
Так что, если DOMContentLoaded откладывается из-за долгой загрузки скриптов, в свою очередь – откладывается автозаполнение. Вы наверняка замечали, что на некоторых сайтах (если вы используете автозаполнение в браузере) поля логина и пароля не заполняются мгновенно, есть некоторая задержка до полной загрузки страницы. Это и есть ожидание события DOMContentLoaded .
window.onload
Событие load на объекте window наступает, когда загрузилась вся страница, включая стили, картинки и другие ресурсы.
В примере ниже правильно показаны размеры картинки, потому что window.onload дожидается всех изображений:
window.onunload
Когда посетитель покидает страницу, на объекте window генерируется событие unload . В этот момент стоит совершать простые действия, не требующие много времени, вроде закрытия связанных всплывающих окон.
Обычно здесь отсылают статистику.
Предположим, мы собрали данные о том, как используется страница: клики, прокрутка, просмотры областей страницы и так далее.
Естественно, событие unload – это тот момент, когда пользователь нас покидает и мы хотим сохранить эти данные.
Для этого существует специальный метод navigator.sendBeacon(url, data) , описанный в спецификации https://w3c.github.io/beacon/.
Он посылает данные в фоне. Переход к другой странице не задерживается: браузер покидает страницу, но всё равно выполняет sendBeacon .
Его можно использовать вот так:
- Отсылается POST-запрос.
- Мы можем послать не только строку, но так же формы и другие форматы, как описано в главе Fetch, но обычно это строковый объект.
- Размер данных ограничен 64 Кб.
К тому моменту, как sendBeacon завершится, браузер наверняка уже покинет страницу, так что возможности обработать ответ сервера не будет (для статистики он обычно пустой).
Для таких запросов с закрывающейся страницей есть специальный флаг keepalive в методе fetch для общих сетевых запросов. Вы можете найти больше информации в главе Fetch API.
Если мы хотим отменить переход на другую страницу, то здесь мы этого сделать не сможем. Но сможем в другом месте – в событии onbeforeunload .
window.onbeforeunload
Если посетитель собирается уйти со страницы или закрыть окно, обработчик beforeunload попросит дополнительное подтверждение.
Если мы отменим это событие, то браузер спросит посетителя, уверен ли он.
Вы можете попробовать это, запустив следующий код и затем перезагрузив страницу:
По историческим причинам возврат непустой строки так же считается отменой события. Когда-то браузеры использовали её в качестве сообщения, но, как указывает современная спецификация, они не должны этого делать.
Поведение было изменено, потому что некоторые веб-разработчики злоупотребляли этим обработчиком события, показывая вводящие в заблуждение и надоедливые сообщения. Так что, прямо сейчас старые браузеры всё ещё могут показывать строку как сообщение, но в остальных – нет возможности настроить показ сообщения пользователям.
readyState
Что произойдёт, если мы установим обработчик DOMContentLoaded после того, как документ загрузился?
Естественно, он никогда не запустится.
Есть случаи, когда мы не уверены, готов документ или нет. Мы бы хотели, чтобы наша функция исполнилась, когда DOM загрузился, будь то сейчас или позже.
Свойство document.readyState показывает нам текущее состояние загрузки.
Есть три возможных значения:
- «loading» – документ загружается.
- «interactive» – документ был полностью прочитан.
- «complete» – документ был полностью прочитан и все ресурсы (такие как изображения) были тоже загружены.
Так что мы можем проверить document.readyState и, либо установить обработчик, либо, если документ готов, выполнить код сразу же.
Например, вот так:
Также есть событие readystatechange , которое генерируется при изменении состояния, так что мы можем вывести все эти состояния таким образом:
Событие readystatechange – альтернативный вариант отслеживания состояния загрузки документа, который появился очень давно. На сегодняшний день он используется редко.
Для полноты картины давайте посмотрим на весь поток событий:
Здесь документ с , и обработчиками, которые логируют события:
Рабочий пример есть в песочнице.
- [1] начальный readyState:loading
- [2] readyState:interactive
- [2] DOMContentLoaded
- [3] iframe onload
- [4] img onload
- [4] readyState:complete
- [4] window onload
Цифры в квадратных скобках обозначают примерное время события. События, отмеченные одинаковой цифрой, произойдут примерно в одно и то же время (± несколько миллисекунд).


