- Настраиваем локальную политику безопасности в Windows 7
- Варианты настройки политики безопасности
- Способ 1: Применение инструмента «Локальная политика безопасности»
- Способ 2: Использование инструмента «Редактор локальной групповой политики»
- Stay protected with Windows Security
- Important security info
- Understand and customize Windows Security features
- Status icons indicate your level of safety:
- Run a malware scan manually
- Run a quick scan in Windows Security
- Run an advanced scan in Windows Security
- Schedule your own scan
- Schedule a scan
- Turn Microsoft Defender Antivirus real-time protection on or off
- Turn real-time protection off temporarily
Настраиваем локальную политику безопасности в Windows 7

Политика безопасности представляет собой набор параметров для регулирования безопасности ПК, путем их применения к конкретному объекту или к группе объектов одного класса. Большинство пользователей редко производят изменения данных настроек, но бывают ситуации, когда это нужно сделать. Давайте разберемся, как выполнить данные действия на компьютерах с Виндовс 7.
Варианты настройки политики безопасности
Прежде всего, нужно отметить, что по умолчанию политика безопасности настроена оптимально для выполнения повседневных задач рядового юзера. Производить манипуляции в ней нужно только в случае возникновения необходимости решить конкретный вопрос, требующий корректировки данных параметров.
Изучаемые нами настройки безопасности регулируются с помощью GPO. В Виндовс 7 сделать это можно, используя инструменты «Локальная политика безопасности» либо «Редактор локальных групповых политик». Обязательным условием является вход в профиль системы с полномочиями администратора. Далее мы рассмотрим оба этих варианта действий.
Способ 1: Применение инструмента «Локальная политика безопасности»
Прежде всего, изучим, как решить поставленную задачу с помощью инструмента «Локальная политика безопасности».
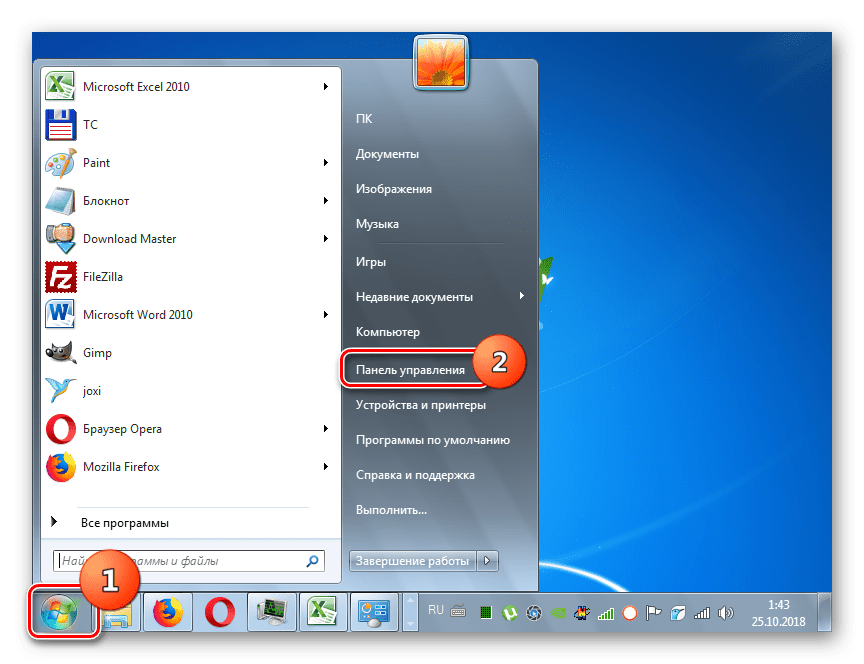
- Чтобы запустить указанную оснастку, щелкните «Пуск» и перейдите в «Панель управления».
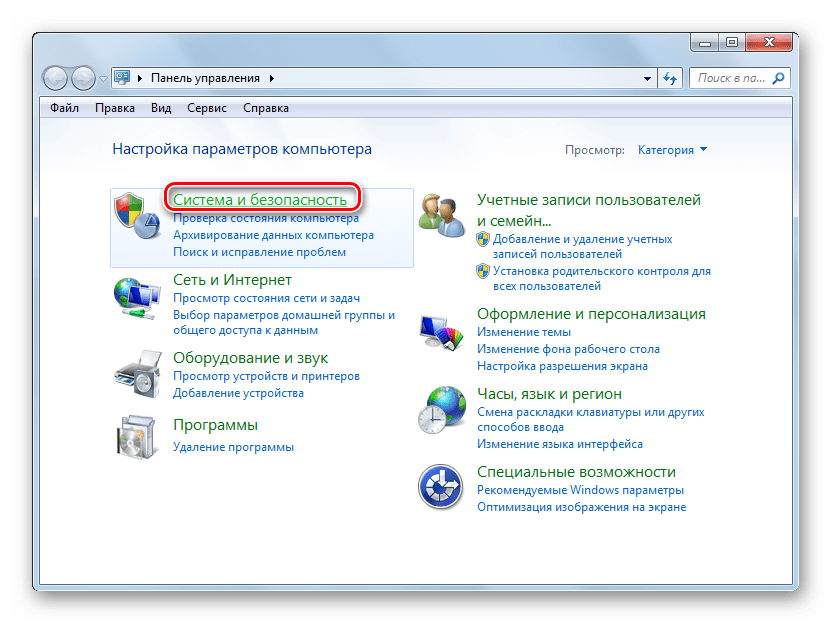
Далее откройте раздел «Система и безопасности».
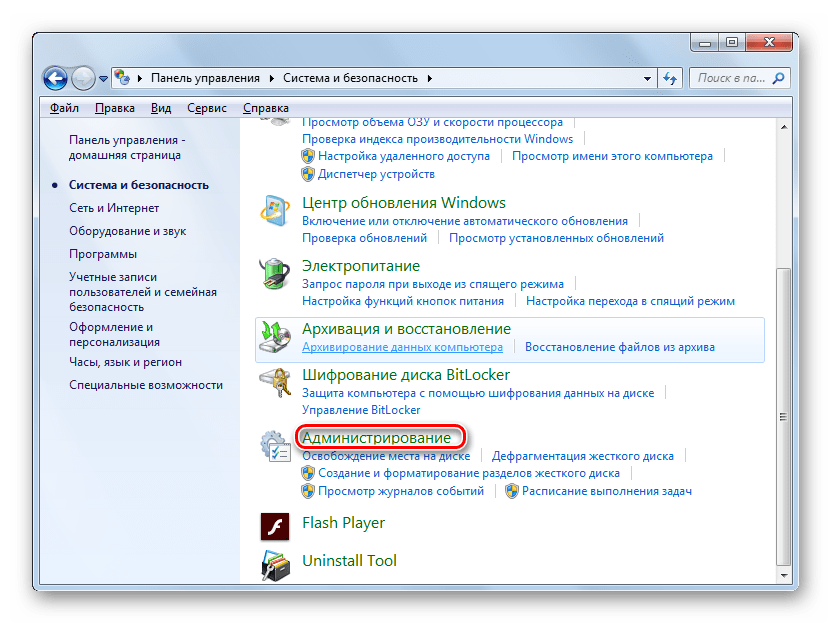
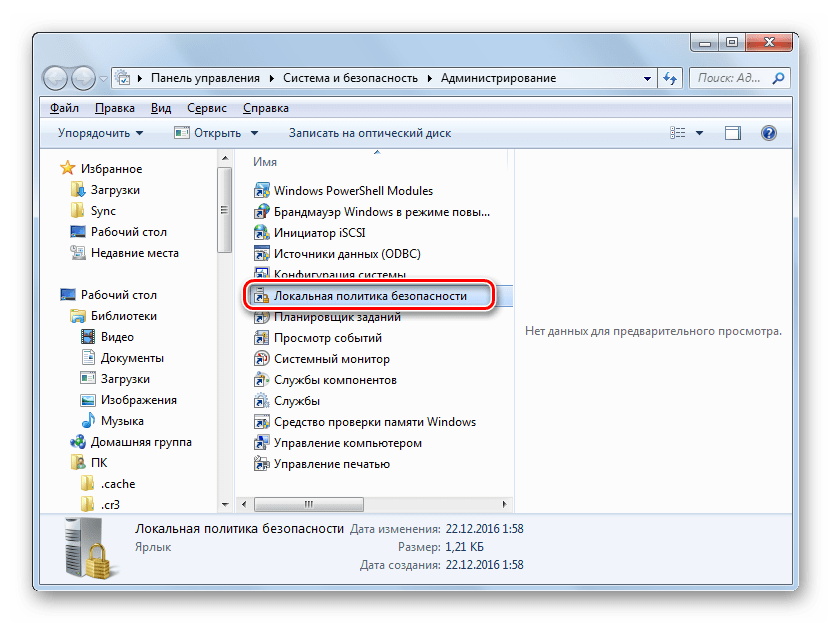
Из предложенного набора системных инструментов выберите вариант «Локальная политика безопасности».
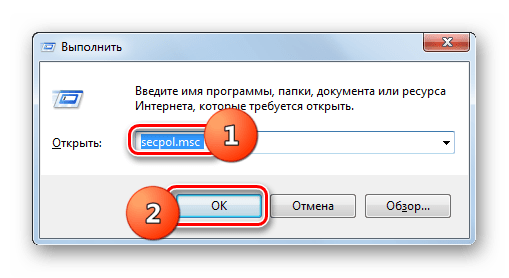
Также оснастку можно запустить и через окно «Выполнить». Для этого наберите Win+R и введите следующую команду:
Затем щелкните «OK».
Указанные выше действия приведут к запуску графического интерфейса искомого инструмента. В подавляющем большинстве случаев возникает необходимость откорректировать параметры в папке «Локальные политики». Тогда нужно щелкнуть по элементу с этим наименованием.
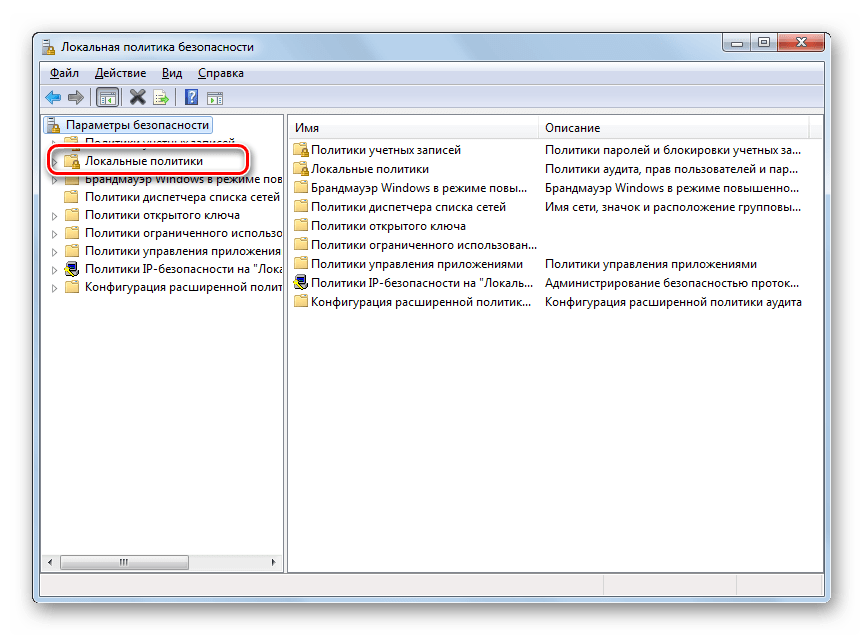
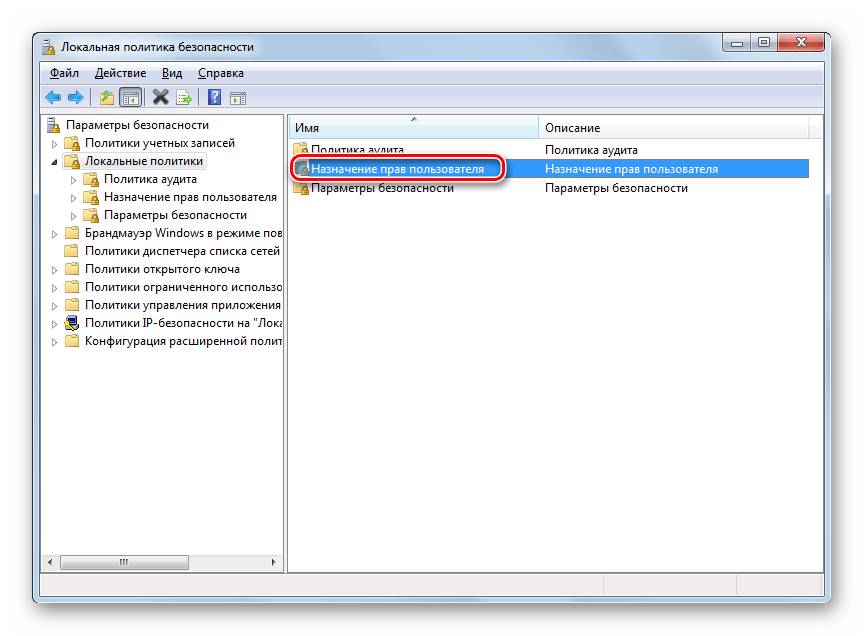
В данном каталоге располагается три папки.
В директории «Назначение прав пользователя» определяются полномочия отдельных пользователей или групп юзеров. Например, можно указать, запрет или разрешение для отдельных лиц или категорий пользователей на выполнение конкретных задач; определить, кому разрешен локальный доступ к ПК, а кому только по сети и т.д.
В каталоге «Политика аудита» указываются события, предназначенные для записи в журнале безопасности.
В папке «Параметры безопасности» указываются разнообразные административные настройки, которые определяют поведение ОС при входе в неё как локально, так и через сеть, а также взаимодействие с различными устройствами. Без особой необходимости данные параметры изменять не стоит, так как большинство соответствующих задач можно решить через стандартную настройку учетных записей, родительский контроль и разрешения NTFS.

Читайте также: Родительский контроль в Windows 7
Для дальнейших действий по решаемой нами задаче щелкните по наименованию одного из указанных выше каталогов.
Откроется перечень политик выбранного каталога. Кликните по той из них, которую желаете изменить.
После этого откроется окошко редактирования политики. Его вид и действия, которые необходимо произвести, существенно отличаются от того, к какой именно категории она принадлежит. Например, для объектов из папки «Назначение прав пользователя» в открывшемся окне необходимо добавить или удалить имя конкретного пользователя либо группы юзеров. Добавление производится путем нажатия кнопки «Добавить пользователя или группу…».
Если же необходимо произвести удаление элемента из выбранной политики, то выделите его и нажмите «Удалить».
Мы описали изменение настроек безопасности на примере действий в папке «Локальные политики», но по такой же аналогии можно производить действия и в других каталогах оснастки, например в директории «Политики учетных записей».
Способ 2: Использование инструмента «Редактор локальной групповой политики»
Настроить локальную политику можно также при помощи оснастки «Редактор локальной групповой политики». Правда, данный вариант доступен не во всех редакциях Windows 7, а только в Ultimate, Professional и Enterprise.
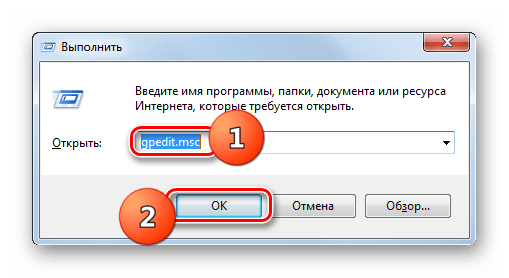
- В отличие от предыдущей оснастки, данный инструмент нельзя запустить через «Панель управления». Его можно активировать только путем введения команды в окно «Выполнить» или в «Командную строку». Наберите Win+R и введите в поле такое выражение:
Затем щелкните «OK».
Читайте также: Как исправить ошибку «gpedit.msc не найден» в Windows 7
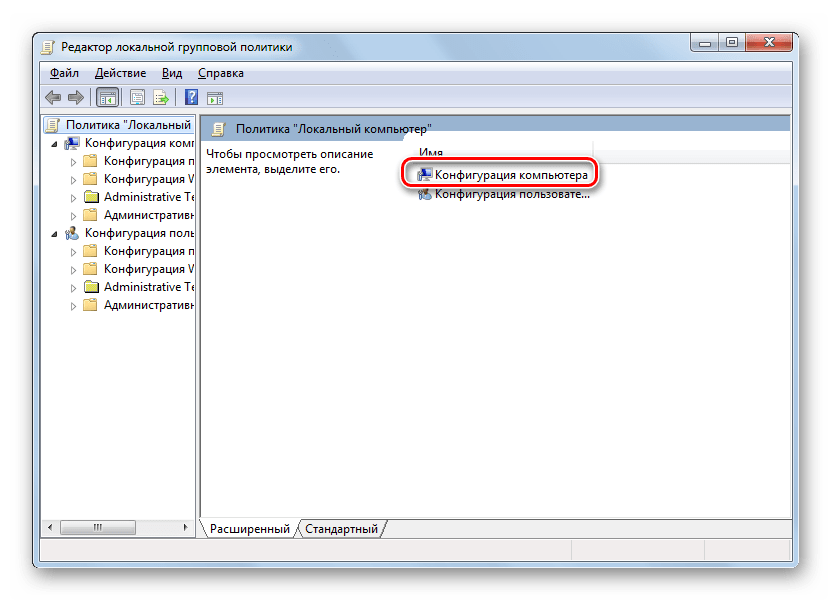
Откроется интерфейс оснастки. Перейдите в раздел «Конфигурация компьютера».
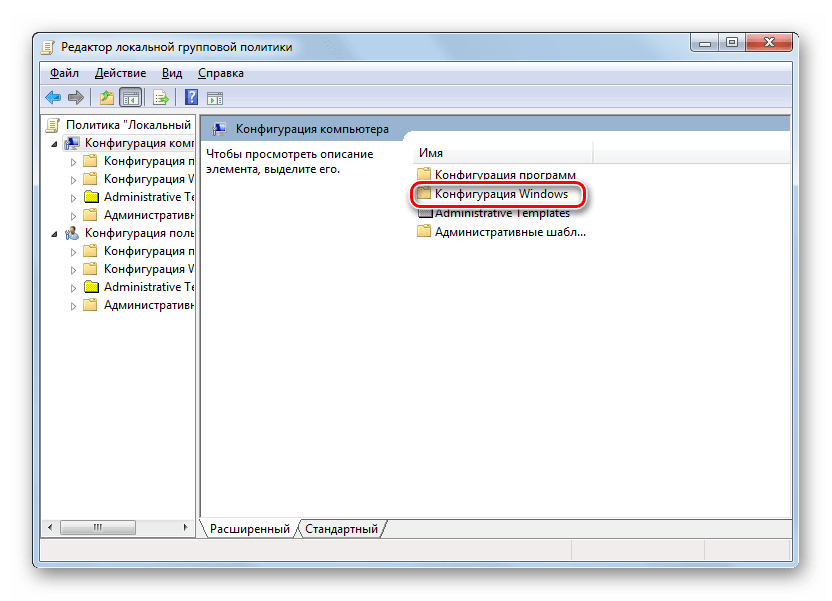
Далее щелкните по папке «Конфигурация Windows».
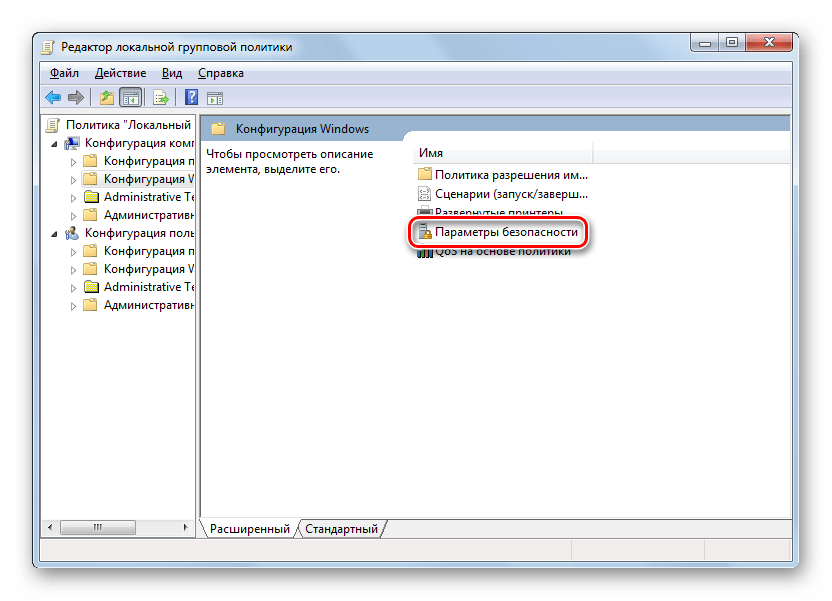
Теперь щелкните по элементу «Параметры безопасности».
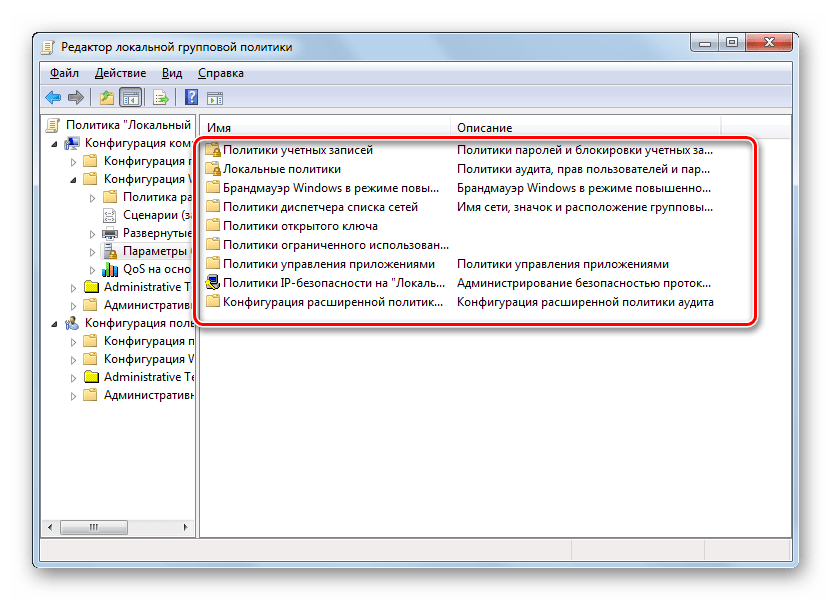
Откроется директория с уже знакомыми нам по предыдущему методу папками: «Политики учетных записей», «Локальные политики» и т.д. Все дальнейшие действия проводятся по точно такому же алгоритму, который указан при описании Способа 1, начиная с пункта 5. Единственное отличие состоит в том, что манипуляции будут выполняться в оболочке другого инструмента.
Настроить локальную политику в Виндовс 7 можно путем использования одной из двух системных оснасток. Порядок действий в них довольно схожий, отличие заключается в алгоритме доступа к открытию данных инструментов. Но изменять указанные настройки рекомендуем только тогда, когда вы полностью уверены, что это нужно сделать для выполнения определенной задачи. Если же таковой нет, эти параметры лучше не корректировать, так как они отрегулированы на оптимальный вариант повседневного использования.
Stay protected with Windows Security
Windows 10 includes Windows Security, which provides the latest antivirus protection. Your device will be actively protected from the moment you start Windows 10. Windows Security continually scans for malware (malicious software), viruses, and security threats. In addition to this real-time protection, updates are downloaded automatically to help keep your device safe and protect it from threats.
Windows 10 in S mode
Some features will be a little different if you’re running Windows 10 in S mode. Because this mode is streamlined for tighter security, the Virus & threat protection area has fewer options. But don’t worry—the built-in security of this mode automatically prevents viruses and other threats from running on your device, and you’ll receive security updates automatically. For more info, see Windows 10 in S mode FAQ.
Important security info
Windows Security is built-in to Windows 10 and includes an antirvirus program called Microsoft Defender Antivirus. (In previous versions of Windows 10, Windows Security is called Windows Defender Security Center).
If you have another antivirus app installed and turned on, Microsoft Defender Antivirus will turn off automatically. If you uninstall the other app, Microsoft Defender Antivirus will turn back on automatically.
If you’re having problems receiving Windows Security updates, see Fix Windows Update errors and the Windows Update FAQ.
For info on how to uninstall an app, see Repair or remove an app in Windows 10.
To change your user account to an admin account, see Create a local user or administrator account in Windows 10.
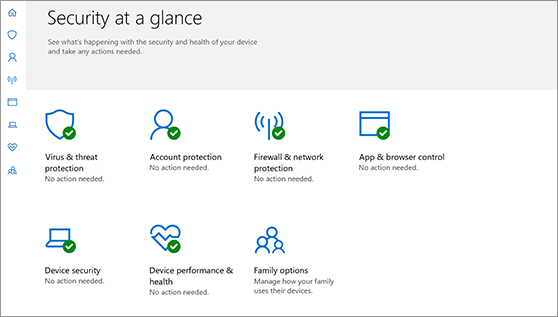
Understand and customize Windows Security features
Windows Security is your home to manage the tools that protect your device and your data:
Virus & threat protection. Monitor threats to your device, run scans, and get updates to help detect the latest threats. (Some of these options are unavailable if you’re running Windows 10 in S mode.)
Account protection. Access sign-in options and account settings, including Windows Hello and dynamic lock.
Firewall & network protection. Manage firewall settings and monitor what’s happening with your networks and internet connections.
App & browser control. Update settings for Microsoft Defender SmartScreen to help protect your device against potentially dangerous apps, files, sites, and downloads. You’ll have exploit protection and you can customize protection settings for your devices.
Device security. Review built-in security options to help protect your device from attacks by malicious software.
Device performance & health. View status info about your device’s performance health, and keep your device clean and up to date with the latest version of Windows 10.
Family options. Keep track of your kids’ online activity and the devices in your household.
You can customize how your device is protected with these Windows Security features. To access them, select Start > Settings > Update & Security > Windows Security . Then select the feature you want to explore.
Open Windows Security settings
Status icons indicate your level of safety:
Green means your device is sufficiently protected and there aren’t any recommended actions.
Yellow means there is a safety recommendation for you.
Red is a warning that something needs your immediate attention.
Run a malware scan manually
When you’re concerned about risks to a specific file or folder, you can right-click the file or folder in File Explorer, then select Scan with Microsoft Defender.
If you suspect there’s malware or a virus on your device, you should immediately run a quick scan. This is much faster than running a full scan on all your files and folders.
Run a quick scan in Windows Security
Select Start > Settings > Update & Security > Windows Security and then Virus & threat protection.
Open Windows Security settings
Under Current threats, select Quick scan (or in previous versions of Windows 10, under Threat history, select Scan now).
If the scan doesn’t find any issues, but you’re still concerned, you may want to check your device more thoroughly.
Run an advanced scan in Windows Security
Select Start > Settings > Update & Security > Windows Security and then Virus & threat protection.
Under Current threats, select Scan options (or in previous versions of Windows 10, under Threat history, select Run a new advanced scan).
Select one of the scan options:
Full scan (check files and programs currently running on your device)
Custom scan (scan specific files or folders)
Microsoft Defender Offline scan (run this scan if your device has been, or could potentially be, infected by a virus or malware). Learn more about Microsoft Defender Offline
Select Scan now.
Note: Because of streamlined security, this process isn’t available if you’re running Windows 10 in S mode.
Schedule your own scan
Even though Windows Security is regularly scanning your device to keep it safe, you can also set when and how often the scans occur.
Schedule a scan
Select the Start button, type schedule tasks in the Search box, and in the list of results, select Task Scheduler.
In the left pane, select the arrow (>) next to Task Scheduler Library to expand it, do the same with Microsoft > Windows, and then scroll down and select the Windows Defender folder.
In the top-center pane, select Windows Defender Scheduled Scan. (Point to the choices to see the full names.)
In the Actions pane on the right, scroll down and then select Properties.
In the window that opens, select the Triggers tab, and then select New.
Set your preferred time and frequency, and then select OK.
Review the schedule and select OK.
Note: Because of streamlined security, this process isn’t available if you’re running Windows 10 in S mode.
Turn Microsoft Defender Antivirus real-time protection on or off
Sometimes you may need to briefly stop running real-time protection. While real-time protection is off, files you open or download won’t be scanned for threats. However, real-time protection will soon turn on automatically again to protect your device.
Turn real-time protection off temporarily
Select Start > Settings > Update & Security > Windows Security and then Virus & threat protection > Manage settings. (In previous versions of Windows 10, select Virus & threat protection > Virus & threat protection settings.)
Open Windows Security settings
Switch the Real-time protection setting to Off and choose Yes to verify.
Note: Because of streamlined security, this process isn’t available if you’re running Windows 10 in S mode.


