- Как отобразить/скрыть имена пользователей с экрана приветствия Windows 10?
- Как убрать имя пользователя с экрана приветствия Windows?
- Как показать всех локальных пользователей на экране входа в Windows 10?
- Отобразить список активных доменных пользователей на экране входа в Windows
- Как скрыть определенного пользователя на экране приветствия Windows?
- Как изменить имя пользователя и компьютера в Windows 10
- Как изменить имя пользователя в Windows 10
- 1. Использование учетной записи Microsoft
- Убрать свой адрес электронной почты на экране входа в систему
- 2. Использование локальной учетной записи
- Как изменить имя компьютера в Windows 10
- Как изменить имя администратора в Windows 10
- Windows Logon Scenarios
- Interactive logon
- Local and domain logon
- Remote logon
- Network logon
- Smart card logon
- Biometric logon
- Additional resources
Как отобразить/скрыть имена пользователей с экрана приветствия Windows 10?
В Windows 10/8.1 и Windows Server 2016/2012R2 на экране входа в систему (экране приветствия) по-умолчанию отображается учетная запись последнего пользователя, который авторизовался на компьютере (если у пользователя не задан пароль, будет выполнен автоматический вход систему под этим пользователем, даже если не задана функция автологона). Вы можете настроить различное поведение этой функции на экране приветствия (logon screen): можно показать имя пользователя, скрыть его или даже вывести список всех локальных или активных доменных пользователей компьютера (сервера).
Как убрать имя пользователя с экрана приветствия Windows?
Отображение имени учетной записи на экране входа в Windows удобно конечным пользователям, но снижает безопасность компьютера. Ведь злоумышленнику, получившему доступ к компьютеру, остается только подобрать пароль (для этого есть различные способы социальной инженерии, брутфорса или банального приклееного листочка с паролем на мониторе).
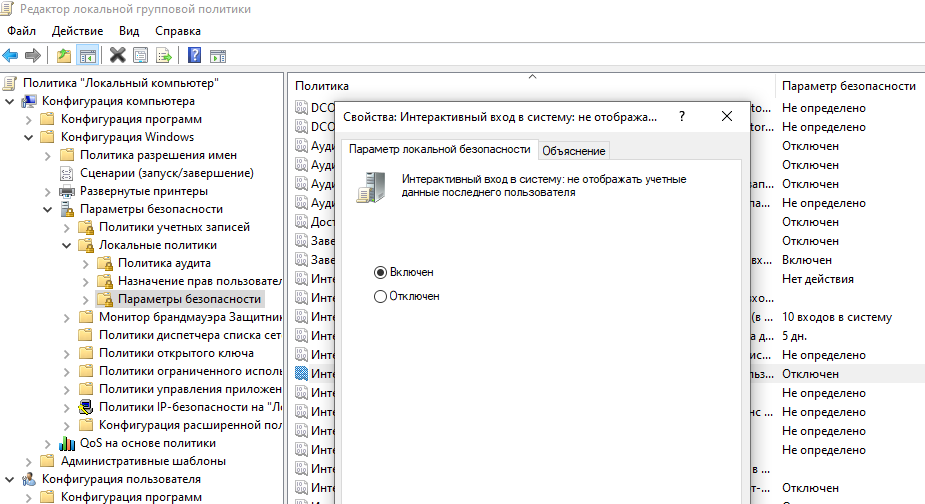
Вы можете отключить отображение имени последнего пользователя через GPO. Откройте редактор доменных (gpmc.msc) или локальных политик (gpedit.msc) и перейдите в раздел Конфигурация компьютера -> Конфигурация Windows -> Параметры безопасности -> Локальные политики -> Параметры безопасности (Computer Configuration -> Windows Settings -> Security Settings -> Local Policies -> Security Options). Включите политику “Интерактивный вход в систему: Не отображать учетные данные последнего пользователя” (Interactive logon: Do not display last user name). По умолчанию эта политика отключена.
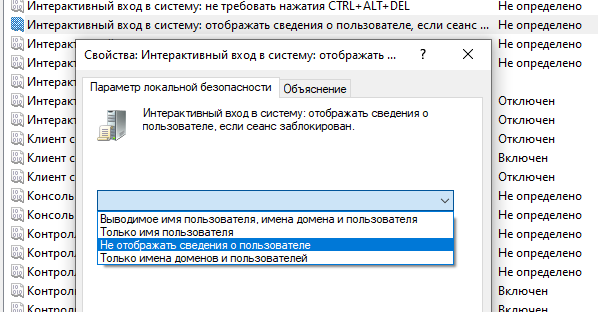
Дополнительно вы можете скрыть имя пользователя на заблокированном компьютере. Для этого в этом же разделе нужно включить политику “Интерактивный вход в систему: отображать сведения о пользователе, если сеанс заблокирован” (Interactive logon: Display user information when the session is locked) и выбрать значение “Не отображать сведения о пользователе” (Do not display user information).
Этой политике соответствует ключ реестра в той же ветке DontDisplayLockedUserId со значением 3.
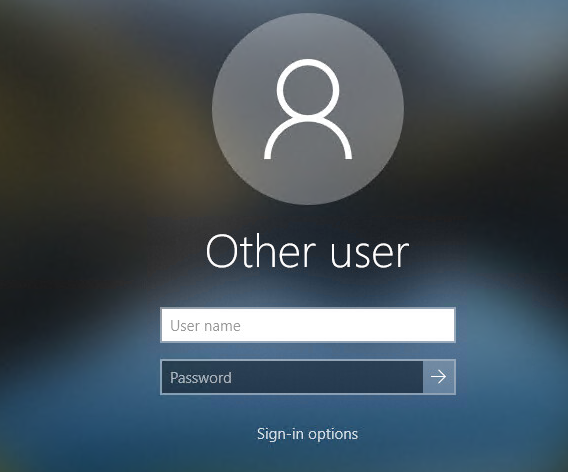
Теперь на экране входа в компьютер и на экране блокировки Windows отображаются пустые поля для ввода имени пользователя и пароля.
Как показать всех локальных пользователей на экране входа в Windows 10?
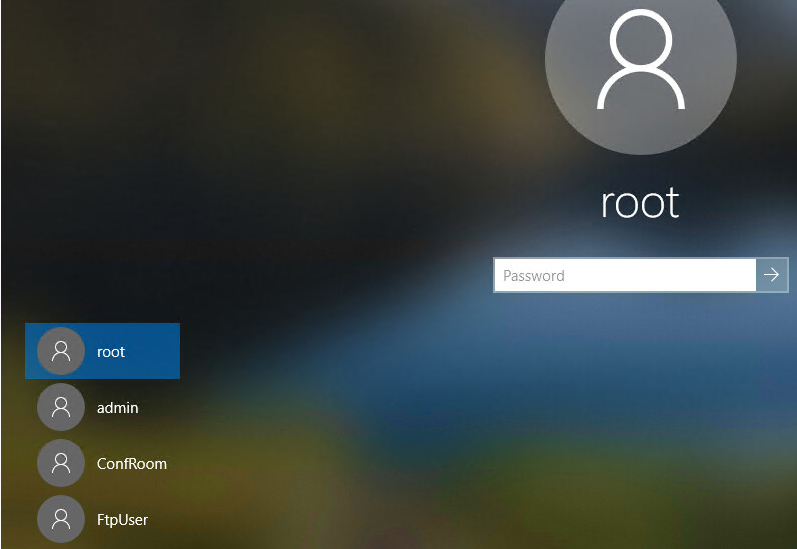
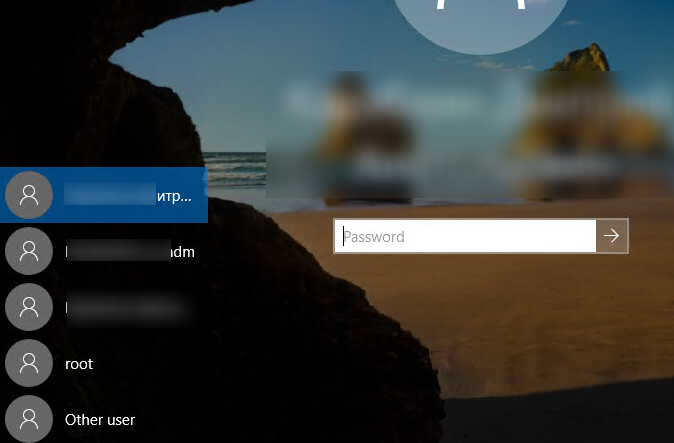
В Windows 10/8.1 вы можете вывести список имеющихся локальных учетных записей на экране приветствия системы. Чтобы авторизоваться на компьютере, пользователю достаточно лишь щелкнуть по нужной учетной записи и указать ее пароль.
Чтобы Windows отображала всех локальных пользователей на экране входа, нужно в ветке реестра HKEY_LOCAL_MACHINE\SOFTWARE\Microsoft\Windows\CurrentVersion\Authentication\LogonUI\UserSwitch изменить значение параметра Enabled на 1. Вы можете изменить этот параметр через графический интерфейс редактора Regedit, с помощью консольной команды“Reg Add” или командлетом PowerShell Set-ItemProperty.
Reg Add HKLM\SOFTWARE\Microsoft\Windows\CurrentVersion\Authentication\LogonUI\UserSwitch /v Enabled /t REG_DWORD /d 1 /f
или
Set-ItemProperty -Path ‘HKLM:\SOFTWARE\Microsoft\Windows\CurrentVersion\Authentication\LogonUI\UserSwitch’ -Name Enabled -Value 1
Однако Windows при каждой входе пользователя автоматически сбрасывает значение параметра Enabled на 0. Чтобы значение ключа всегда менялось на 1, проще всего создать новое задание планировщика, которое будет отрабатывать при входе пользователя в систему.
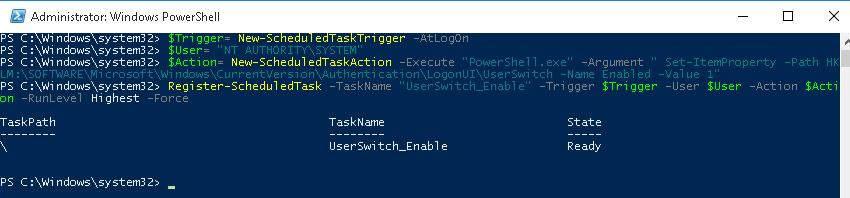
Задание планировщика должно запускать одну из указанных выше команд. Такое задание можно создать вручную с помощью графической консоли taskschd.msc. Но мне кажется, что гораздо проще создать задание планировщика с помощью PowerShell. В нашем случае команды для создания нового задания могут выглядеть так:
$Trigger= New-ScheduledTaskTrigger -AtLogOn
$User= «NT AUTHORITY\SYSTEM»
$Action= New-ScheduledTaskAction -Execute «PowerShell.exe» -Argument «Set-ItemProperty -Path HKLM:\SOFTWARE\Microsoft\Windows\CurrentVersion\Authentication\LogonUI\UserSwitch -Name Enabled -Value 1»
Register-ScheduledTask -TaskName «UserSwitch_Enable» -Trigger $Trigger -User $User -Action $Action -RunLevel Highest –Force
 Убедимся, что задание появилось в планировщике Windows (taskschd.msc).
Выполните логофф и логон пользователя. Задание должно автоматически запуститься и изменить значение параметра реестра Enabled на 1. Проверьте текущее значение параметра. Как вы видите оно равно единице:
get-ItemProperty -Path ‘HKLM:\SOFTWARE\Microsoft\Windows\CurrentVersion\Authentication\LogonUI\UserSwitch’ -Name Enabled
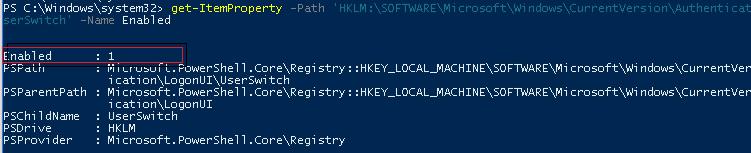
После следующей перезагрузки системы на экране приветствия Windows 10 и 8.1 будут отображаться все локальные учетные записи пользователей компьютера, а не только имя последнего пользовтеля.
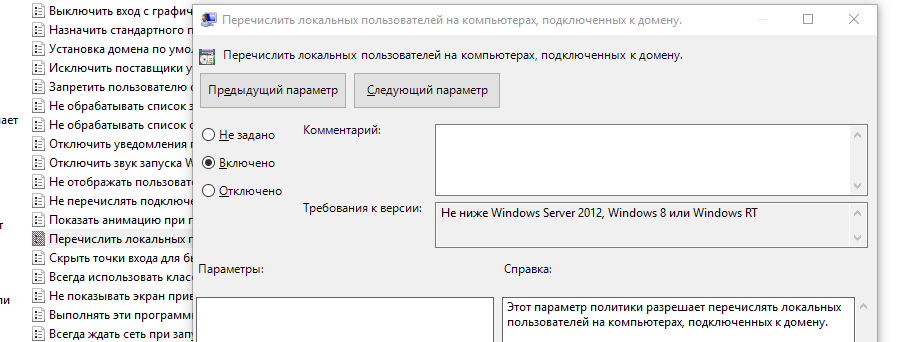
Есть отдельная политика, позволяющая гораздо проще вывести список локальных пользователей на доменных компьютерах. Перейдите в раздел Computer Configuration -> Administrative Templates -> System -> Logon (Конфигурация компьютера -> Администартиыне шаблоны -> Вход в систему) и включите политику «Enumerate local users on domain-joined computers» (Перечислить локальных пользователей на компьютерах, подключенных к домену).
Отобразить список активных доменных пользователей на экране входа в Windows
Если одним компьютером пользуется несколько пользователей, вы можете отобразить на экране приветствия список пользователей, у которых есть неотключение сессии (пользователи будут отображаться только в том случае, если они залогинены, например при использования общежоступных компьютеров, касс, киосков, RDS сервера или его аналога на Windows 10).
Для этого проверьте, что в разделе Computer Configuration -> Windows Settings -> Security Settings -> Local Policies -> Security Options отключены политики:
- Interactive logon: Don’t display last signed-in: Disabled
- Interactive logon: Don’t display username at sign in: Disabled
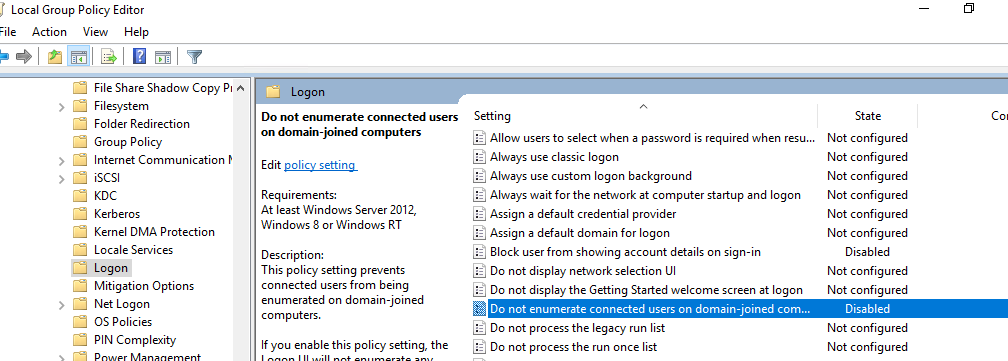
Затем отключите политики в разделе Computer Configuration -> Administrative Templates -> System -> Logon:
- Block user from showing account details on sign-in: Disabled
- Do not enumerate connected users on domain-joined computer: Disabled
После этого на экране приветствия будет отображаться список учетных записей с активными сессиями, которые выполнили вход в систему, но были отключены. Пользователю достаточно один раз выполнить вход, а после этого просто выбирать учетную запись из списка и вводить пароль.
Как скрыть определенного пользователя на экране приветствия Windows?
На экране приветствия Windows отображаются пользователи, которые входят в одну из следующих локальных групп: Администраторы, Пользователи, Опытные пользователи, Гости.
Вы можете скрыть любого пользователя из списка на экрана приветствия Windows 10, выполнив команду:
reg add «HKLM\SOFTWARE\Microsoft\Windows NT\CurrentVersion\Winlogon\SpecialAccounts\UserList» /t REG_DWORD /f /d 0 /v UserName
Как изменить имя пользователя и компьютера в Windows 10
Некоторые пользователи хотят переименовать свои существующие локальные учетные записи пользователей по разным причинам, без удаления существующей или создания новой. Для некоторых людей имя на экране входа, создает проблему конфиденциальности, если компьютер используется в общедоступных местах. К сожалению, Windows не позволяет вам устанавливать имя пользователя или псевдоним, сохраняя настоящее имя на своей учетной записи Microsoft, но мы пойдем обходным путем. Учетная запись Microsoft не является учетной записью локального пользователя, Windows 10 будет продолжать показывать ваше фактическое имя учетной записи Microsoft на экране входа в систему и в других областях операционной системы даже после переименования учетной записи в «Управление компьютером». Рассмотрим все в одном руководстве, как изменить имя пользователя, изменить имя администратора, убрать адрес почты с экрана входа в систему и изменить имя компьютера в Windows 10.
Как изменить имя пользователя в Windows 10
Теперь определимся, что вы используете. Это может быть учетная запись Microsoft или простая локальная. Разберем два варианта.
1. Использование учетной записи Microsoft
Единственный способ изменить имя, которое вы видите на экране входа в систему, если вы используете учетную запись Microsoft, — это изменить имя самой учетной записи.
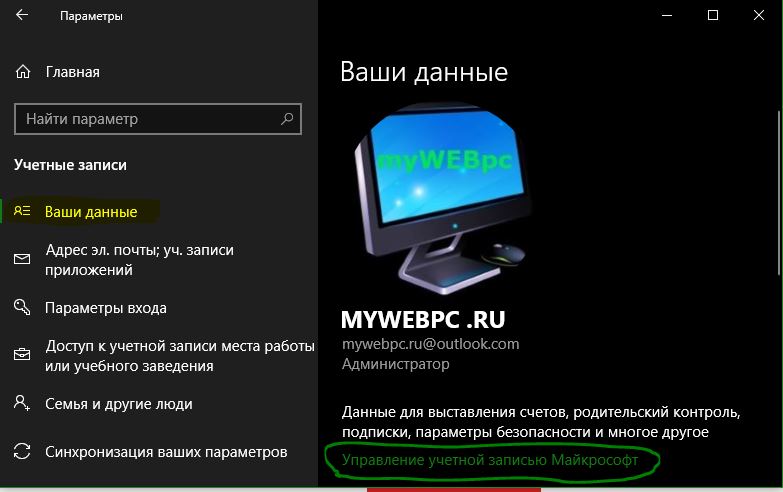
- Откройте Параметры >Учетные записи >Ваши данные > и справа выберите Управление учетной записью Майкрософт.
- Далее вас перекинет в браузер на сайт Microsoft. Вы должны быть там авторизированы атвоматически, если используете браузер Edge по умолчанию. Если нет, то войдите в свой аккаунт. Есть один ньюанс, пишите имя для входа правильно — ваше_имя@outlook.com.
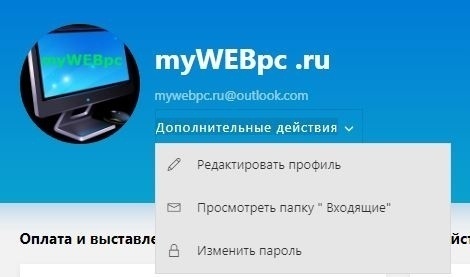
- Когда вошли в аккаунт, нажмите на Дополнительные действия, сверху под вашим нынешним именем и выберите Редактировать профиль.
- Далее нажмите на Изменить имя и напишите свое. Помните, что изменение вашего имени влияет на ваш профиль во всех службах Microsoft.
Убрать свой адрес электронной почты на экране входа в систему
Если вы используете учетную запись Microsoft и хотите скрыть или убрать свой электронный адрес на экране входа в систему, то быстро рассмотрим, как это сделать.
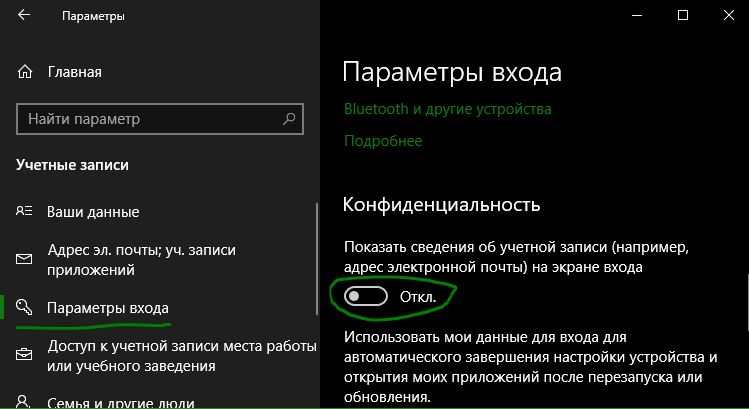
- Откройте Параметры >Учетные записи >Параметры входа > и отключите ползунок «Показать сведения об учетной записи на экране входа» в графе конфиденциальность.
2. Использование локальной учетной записи
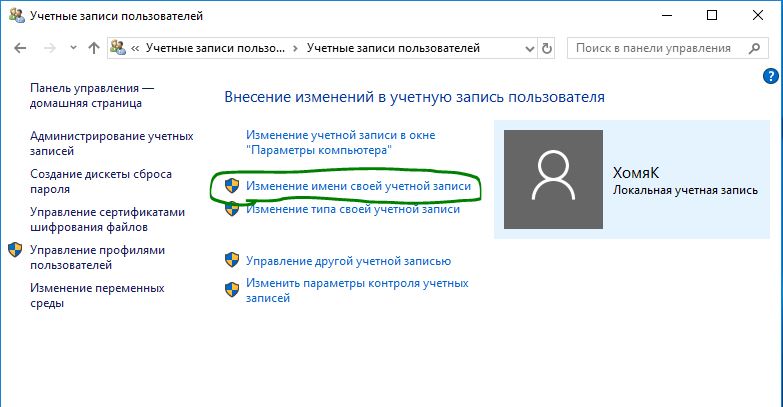
Если у вас есть локальная учетная запись, процесс намного проще и быстрее.
- Нажмите пуск и наберите в поиске Панель управления и откройте ее, далее нажмите на Учетные записи пользователей и выберите Изменение имени своей учетной записи.
Как изменить имя компьютера в Windows 10
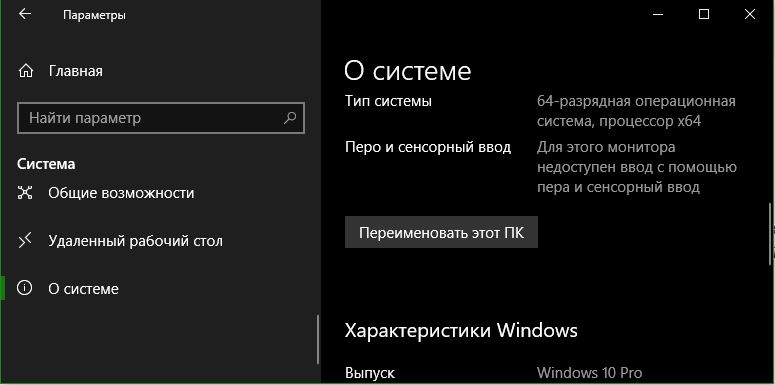
Новый компьютер с предварительно загруженной операционной системой поставляется с именем по умолчанию, которое состоит из вашей сборки и модели вашего ПК. Пользователи часто меняют имя своего компьютера на что-то приятное или интересное. Согласитесь, что имя компьютера myWEBpc куда приятнее будет чем DESKTOP-28L5FKH.
- Откройте Параметры >Система >О системе > справа пролистайте ниже и нажмите на Переименовать этот ПК.
- Если у вас Windows 7, то нажмите Win + R и введите Sysdm.cpl. Далее нажмите Изменить.
Как изменить имя администратора в Windows 10
Windows 10 включает в себя встроенную учетную запись администратора на которую часто ссылаются компьютерные хакеры и вредоносные программы с вредоносными намерениями. Поэтому может быть хорошей идеей переименовать администратора в вашей системе Windows. Также будет полезно системным администраторам, когда их в компании несколько и работают по сменно и рангово, т.е. есть эникейщик, стажер, которым нужно дать права админа, но при этом ограничить немного.
- Нажмите Win + R и введите gpedit.msc
- Далее перейдите Конфигурация компьютера > Конфигурация Windows > Локальные политики > Параметры безопасности > и справа найдите пункт Учетные записи: переименование учетной записи Администратор. Нажмите по ней два раза и переименуйте имя в появившимся новом окне.

Windows Logon Scenarios
Applies To: Windows Server (Semi-Annual Channel), Windows Server 2016
This reference topic for the IT professional summarizes common Windows logon and sign-in scenarios.
The Windows operating systems require all users to log on to the computer with a valid account to access local and network resources. Windows-based computers secure resources by implementing the logon process, in which users are authenticated. After a user is authenticated, authorization and access control technologies implement the second phase of protecting resources: determining if the authenticated user is authorized to access a resource.
The contents of this topic apply to versions of Windows designated in the Applies to list at the beginning of this topic.
In addition, applications and services can require users to sign in to access those resources that are offered by the application or service. The sign-in process is similar to the logon process, in that a valid account and correct credentials are required, but logon information is stored in the Security Account Manager (SAM) database on the local computer and in Active Directory where applicable. Sign-in account and credential information is managed by the application or service, and optionally can be stored locally in Credential Locker.
To understand how authentication works, see Windows Authentication Concepts.
This topic describes the following scenarios:
Interactive logon
The logon process begins either when a user enters credentials in the credentials entry dialog box, or when the user inserts a smart card into the smart card reader, or when the user interacts with a biometric device. Users can perform an interactive logon by using a local user account or a domain account to log on to a computer.
The following diagram shows the interactive logon elements and logon process.
Windows Client Authentication Architecture
Local and domain logon
Credentials that the user presents for a domain logon contain all the elements necessary for a local logon, such as account name and password or certificate, and Active Directory domain information. The process confirms the user’s identification to the security database on the user’s local computer or to an Active Directory domain. This mandatory logon process cannot be turned off for users in a domain.
Users can perform an interactive logon to a computer in either of two ways:
Locally, when the user has direct physical access to the computer, or when the computer is part of a network of computers.
A local logon grants a user permission to access Windows resources on the local computer. A local logon requires that the user has a user account in the Security Accounts Manager (SAM) on the local computer. The SAM protects and manages user and group information in the form of security accounts stored in the local computer registry. The computer can have network access, but it is not required. Local user account and group membership information is used to manage access to local resources.
A network logon grants a user permission to access Windows resources on the local computer in addition to any resources on networked computers as defined by the credential’s access token. Both a local logon and a network logon require that the user has a user account in the Security Accounts Manager (SAM) on the local computer. Local user account and group membership information is used to manage access to local resources, and the access token for the user defines what resources can be accessed on networked computers.
A local logon and a network logon are not sufficient to grant the user and computer permission to access and to use domain resources.
Remotely, through Terminal Services or Remote Desktop Services (RDS), in which case the logon is further qualified as remote interactive.
After an interactive logon, Windows runs applications on behalf of the user, and the user can interact with those applications.
A local logon grants a user permission to access resources on the local computer or resources on networked computers. If the computer is joined to a domain, then the Winlogon functionality attempts to log on to that domain.
A domain logon grants a user permission to access local and domain resources. A domain logon requires that the user has a user account in Active Directory. The computer must have an account in the Active Directory domain and be physically connected to the network. Users must also have the user rights to log on to a local computer or a domain. Domain user account information and group membership information are used to manage access to domain and local resources.
Remote logon
In Windows, accessing another computer through remote logon relies on the Remote Desktop Protocol (RDP). Because the user must already have successfully logged on to the client computer before attempting a remote connection, interactive logon processes have successfully finished.
RDP manages the credentials that the user enters by using the Remote Desktop Client. Those credentials are intended for the target computer, and the user must have an account on that target computer. In addition, the target computer must be configured to accept a remote connection. The target computer credentials are sent to attempt to perform the authentication process. If authentication is successful, the user is connected to local and network resources that are accessible by using the supplied credentials.
Network logon
A network logon can only be used after user, service, or computer authentication has taken place. During network logon, the process does not use the credentials entry dialog boxes to collect data. Instead, previously established credentials or another method to collect credentials is used. This process confirms the user’s identity to any network service that the user is attempting to access. This process is typically invisible to the user unless alternate credentials have to be provided.
To provide this type of authentication, the security system includes these authentication mechanisms:
Kerberos version 5 protocol
Public key certificates
Secure Sockets Layer/Transport Layer Security (SSL/TLS)
NTLM, for compatibility with Microsoft Windows NT 4.0-based systems
For information about the elements and processes, see the interactive logon diagram above.
Smart card logon
Smart cards can be used to log on only to domain accounts, not local accounts. Smart card authentication requires the use of the Kerberos authentication protocol. Introduced in Windows 2000 Server, in Windows-based operating systems a public key extension to the Kerberos protocol’s initial authentication request is implemented. In contrast to shared secret key cryptography, public key cryptography is asymmetric, that is, two different keys are needed: one to encrypt, another to decrypt. Together, the keys that are required to perform both operations make up a private/public key pair.
To initiate a typical logon session, a user must prove his or her identity by providing information known only to the user and the underlying Kerberos protocol infrastructure. The secret information is a cryptographic shared key derived from the user’s password. A shared secret key is symmetric, which means that the same key is used for both encryption and decryption.
The following diagram shows the elements and processes required for smart card logon.
Smart Card credential provider architecture
When a smart card is used instead of a password, a private/public key pair stored on the user’s smart card is substituted for the shared secret key, which is derived from the user’s password. The private key is stored only on the smart card. The public key can be made available to anyone with whom the owner wants to exchange confidential information.
For more information about the smart card logon process in Windows, see How smart card sign-in works in Windows.
Biometric logon
A device is used to capture and build a digital characteristic of an artifact, such as a fingerprint. This digital representation is then compared to a sample of the same artifact, and when the two are successfully compared, authentication can occur. Computers running any of the operating systems designated in the Applies to list at the beginning of this topic can be configured to accept this form of logon. However, if biometric logon is only configured for local logon, the user needs to present domain credentials when accessing an Active Directory domain.
Additional resources
For information about how Windows manages credentials submitted during the logon process, see Credentials Management in Windows Authentication.


