Как узнать характеристики оперативной памяти в командной строке

В данной статье показаны действия, с помощью которых можно узнать характеристики оперативной памяти в командной строке.
Чтобы узнать характеристики оперативной памяти установленной в компьютере существуют различные способы, например утилиты сторонних разработчиков. Также некоторая информация представлена в графическом интерфейсе операционной системы Windows, а именно в диспетчере задач на вкладке Производительность.
Ниже будет рассмотрен способ как узнать характеристики оперативной памяти с помощью утилиты командной строки WMIC.exe (Windows Management Instrumentation Command — Инструментарий управления Windows). .
Данная статья носит информационно познавательный характер и будет полезна для всех пользователей компьютеров с установленной операционной системой Windows.
Как узнать характеристики оперативной памяти в командной строке
Чтобы узнать основные характеристики оперативной памяти, запустите командную строку от имени администратора и выполните следующую команду:
wmic memorychip get Manufacturer,Capacity,PartNumber,Speed,DeviceLocator

Теперь разберём результат выполненной команды.
Столбец Capacity (с англ. Capacity — Вместительность, Ёмкость, Объём) показывает нам объём установленных модулей памяти в байтах для каждого отдельно (в данном примере установлено два модуля памяти). Минусом является то, что объём модулей указывается в байтах, однако все же узнать его в привычном виде нетрудно (в гигабайтах нужно брать первую или две первых цифры).
Столбец DeviceLocator показывает список слотов в которые установлены модули памяти. В зависимомти от материнской платы, маркировка слотов может быть разная, например: ( DIMM_A , DIMM_B ), ( DIMM_A1 , DIMM_A2 , DIMM_B1 , DIMM_B2 ), ( DIMM0 , DIMM1 ), ( DIMM0 , DIMM1 , DIMM2 , DIMM3 ).
Столбец Manufacturer отображает производителя модуля памяти. В зависимомти от модели и производителя модуля памяти параметр Manufacturer может быть пустым.
Столбец PartNumber отображает номер детали, присвоенный организацией, ответственной за создание или производство физического элемента.
Параметр PartNumber очень интересный и полезный.
Немного разберём параметр данного примера KHX2400C15D4/8G.
Цифры 2400 говорят о том что частота модуля памяти равна 2400 MHz.
C15 это так называемые тайминги или CAS Latency, если вам будет интересно то можно почитать статью Тайминги_(оперативная_память).
D4 могу предположить что это стандарт (поколение) оперативной памяти DDR4 (в данном примере как раз и есть DDR4, но об этом немного позже).
Ну и осталась маркировка 8G — здесь без комментариев.
Хочу отметить что параметр PartNumber от других производителей может не так наглядно выглядеть.
О интересностях всё, теперь о полезности данного параметра. А полезность заключается в том, что Вы можете скопировать параметр PartNumber вашей планки памяти и загуглить его в интернете, помимо характеристик вашего модуля памяти, Вы можете также узнать и его цену, ну только если память не слишком древняя или планка не от какого-нибудь очень китайского noname производителя.
Теперь рассмотрим ещё несколько примеров интересных команд.
Чтобы узнать общее количество слотов для модулей памяти, выполните следующую команду:
wmic memphysical get MemoryDevices

Чтобы узнать какой максимально возможный объём оперативной памяти можно установить, выполните следующую команду:
wmic memphysical get MaxCapacity
Значение указано в килобайтах.

Полный объем установленной физической памяти в русской версии Windows, можно узнать при помощи следующей команды:
systeminfo | find «Полный объем физической памяти»
Значение указано в мегабайтах.

Полный объем установленной физической памяти для системы с английской локализацией, можно узнать выполнив команду:
systeminfo | find «Total Physical Memory»

Для того чтобы узнать форм-фактор модулей памяти, выполните команду:
wmic memorychip get FormFactor
На скриншоте показан результат выполненной команды, цифра 8 говорит о том что модули памяти соответствуют форм-фактору DIMM , стандартный форм-фактор десктопных компьютеров.

На скриншоте ниже показан результат выполненной команды wmic memorychip get FormFactor, цифра 12 говорит о том что модули памяти соответствуют форм-фактору SODIMM , которые обычно устанавливают в ноутбуки.

Немного информации о форм-факторе модулей оперативной памяти.
Форм-фактор (от англ. form factor) или типоразмер — стандарт, задающий габаритные размеры технического изделия, а также описывающий дополнительные совокупности его технических параметров, например форму.
Существуют следующие конструктивно и электрически несовместимые друг с другом типы DIMM , в том числе SO-DIMM (от англ. Small Outline, компактные модули, используемые, в частности, в ноутбуках):
- 184-pin DIMM — используется для DDR SDRAM
- 200-pin SO-DIMM — используется для DDR SDRAM и DDR2 SDRAM
- 214-pin MicroDIMM — используется для DDR2 SDRAM
- 204-pin SO-DIMM — используется для DDR3 SDRAM
- 240-pin DIMM — используется для DDR2 SDRAM, DDR3 SDRAM и FB-DIMM DRAM
- 260-pin SO-DIMM — используется для DDR4 SDRAM
- 288-pin DIMM — используется для DDR4 SDRAM
Ниже представлены изображения честно позаимствованные с википедии для основных форм-факторов модулей памяти.


Идём далее, при помощи следующей команды, Вы можете узнать тип (поколение) оперативной памяти:
wmic memorychip get MemoryType
В данном примере цифры 24 говорят о том что установлены модули памяти типа DDR3 .

Также параметр MemoryType может отображать нули, как показано на скрине ниже, это говорит о том что утилита wmic.exe не может определить тип памяти (в этом примере тип памяти DDR4), так как в спецификации нет значений для DDR4.

Ниже представлены некоторые значения параметра MemoryType :
- 20 = DDR
- 21 = DDR2
- 22 = DDR2 FB=DIMM
- 24 = DDR3
- 25 = FBD2
И ещё одна команда, с её помощью Вы можете узнать напряжение модуля памяти:
wmic memorychip get ConfiguredVoltage
Значение параметра отображается в милливольтах. Если значение 0 или не отображается, то напряжение неизвестно.

Для справки ниже представлены напряжения для разных типов памяти:
- DDR2.5V2500mV
- DDR21.8V1800mV
- DDR31.5V1500mV
- DDR41.2V1200mV
Find memory size
In Windows, we can find the physical memory size from command line. We can do this either using systeminfo or wmic commands. Both the commands are given below.
1. Using systeminfo command
2. Using WMIC command
This command gives the size in bytes.
Example:
The example commands are run on the same computer. As you might have noticed, the value showed by systeminfo command is less than what wmic command shows.
This discrepancy can be understood as follows. Wmic command shows the total installed memory on the system where as systeminfo command shows usable memory(which is total mermory – hardware reserved memory). For more information, check this outВ http://support.microsoft.com/kb/978610
My pc is windows 7 ultimate 32-bit.How can i increase my ram size from 1GB to 2.5GB using cmd?i tried to change i t using advanced system settings but when i restarted it showed 1 GB.I tried many other ways like patching but it was of no use.Can u send me any possible way to increase my ram size by patching from the space from other drives.?i would be thankful if i get a solution as soon as possible.
Your ram size is determined by the amount of ram built into your pc. Other than opening your pc case, buying bigger ones and inserting them into the pc’s ram sockets you will not be able to increase the size.
Hi, I would like to find out “Free RAM Space” without using ‘systeminfo’ command. Could u pls help me.
Thanks..for this information..it also gives information @ ram frequency
The wmic command in your article doesn’t give the total amount of physical memory, it only gives the capacity for 1 memory module. On this PC I have 2 4gb RAM modules, and “wmic memorychip get capacity” returns “4294967296” (ie 4gb)
On windows 7 use the following command to get the total physical memory in bytes:
wmic ComputerSystem get TotalPhysicalMemory
which for me returns:
8575811584
The command `wmic memorychip get capacity` give the capacity for each chip.
You can improve the result by using the command line `wmic memorychip get BankLabel,capacity`.
Your command `wmic ComputerSystem get TotalPhysicalMemory` is also very useful.
OK, I can see how to find the physical memsize, but can that value be passed into a variable so I can use it later in a batch file? i.e. get the physical memory then use that number to calculate what appropriate pagefile size…
While systeminfo | findstr /C:”Total Physical Memory” provides “Total Physical Memory: 3,794 MB”
How can i get JUST 3794
parsing Total Physical Memory: , the comma, spaces and MB?
Hi, I work on win10, and i want fix virtual memorie at 2x the RAM if it ‘s under 8Go of RAM,
and 1x RAM if it ‘s egal or highter than 8Go of RAM.
how can i make that?
It doesn’t work on my device…”wmic is not recognized as an internal or external command”. Help me please!
Viewing and Editing Memory in WinDbg
In WinDbg, you can view and edit memory by entering commands or by using a Memory window.
Debugger Command Window
You can view memory by entering one of the Display Memory commands in the Debugger Command window. You can edit memory by entering one of the Enter Values commands in the Debugger Command window. For more information, see Accessing Memory by Virtual Address and Accessing Memory by Physical Address.
Opening a Memory Window
To open a Memory window, choose Memory from the View menu. (You can also press ALT+5 or select the Memory button ( ) on the toolbar. ALT+SHIFT+5 closes the active Memory window.)
The following screen shot shows an example of a Memory window.
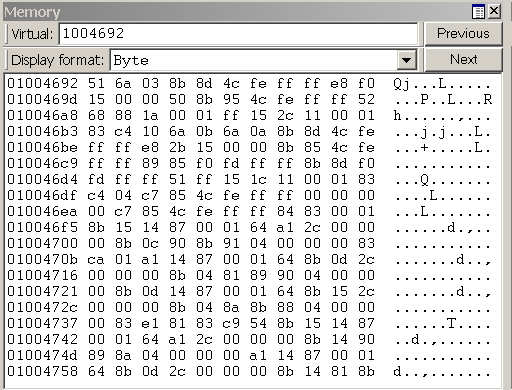
Using a Memory Window
The Memory window displays data in several columns. The column on the left side of the window shows the beginning address of each line. The remaining columns display the requested information, from left to right. If you select Bytes in the Display format menu, the ASCII characters that correspond to these bytes are displayed in the right side of the window.
NoteВ В By default, the Memory window displays virtual memory. This type of memory is the only type of memory that is available in user mode. In kernel mode, you can use the Memory Options dialog box to display physical memory and other data spaces. The Memory Options dialog box is described later in this topic.
In the Memory window, you can do the following:
To write to memory, select inside the Memory window and type new data. You can edit only hexadecimal data—you cannot directly edit ASCII and Unicode characters. Changes take effect as soon as you type new information.
To see other sections of memory, use the Previous and Next buttons on the Memory window toolbar, or press the PAGE UP or PAGE DOWN keys. These buttons and keys display the immediately preceding or following sections of memory. If you request an invalid page, an error message appears.
To navigate within the window, use the RIGHT ARROW, LEFT ARROW, UP ARROW, and DOWN ARROW keys. If you use these keys to move off of the page, a new page is displayed. Before you use these keys, you should resize the Memory window so that it does not have scroll bars. This sizing enables you to distinguish between the actual page edge and the window cutoff.
To change the memory location that is being viewed, enter a new address into the address box at the top of the Memory window. Note that the Memory window refreshes its display while you enter an address, so you could get error messages before you have completed typing the address. NoteВ В The address that you enter into the box is interpreted in the current radix. If the current radix is not 16, you should prefix a hexadecimal address with 0x. To change the default radix, use the n (Set Number Base) command in the Debugger Command window. The display within the Memory window itself is not affected by the current radix.
To change the data type that the window uses to display memory, use the Display format menu in the Memory window toolbar. Supported data types include short words, double words, and quad-words; short, long, and quad integers and unsigned integers; 10-byte, 16-byte, 32-byte, and 64-byte real numbers; ASCII characters; Unicode characters; and hexadecimal bytes. The display of hexadecimal bytes includes ASCII characters as well.
The Memory window has a toolbar that contains two buttons, a menu, and a box and has a shortcut menu with additional commands. To access the menu, select and hold (or right-click) the title bar or select the icon near the upper-right corner of the window (). The toolbar and shortcut menu contain the following choices:
(Toolbar only) The address box enables you to specify a new address or offset. The exact meaning of this box depends on the memory type you are viewing. For example, if you are viewing virtual memory, the box enables you to specify a new virtual address or offset.
(Toolbar only) Display format enables you to select a new display format.
(Toolbar and menu) Previous (on the toolbar) and Previous page (on the shortcut menu) cause the previous section of memory to be displayed.
(Toolbar and menu) Next (on the toolbar) and Next page (on the shortcut menu) cause the next section of memory to be displayed.
(Menu only) Toolbar turns the toolbar on and off.
(Menu only) Auto-fit columns ensures that the number of columns displayed in the Memory window fits the width of the Memory window.
(Menu only) Dock or Undock causes the window to enter or leave the docked state.
(Menu only) Move to new dock closes the Memory window and opens it in a new dock.
(Menu only) Set as tab-dock target for window type sets the selected Memory window as the tab-dock target for other Memory windows. All Memory windows that are opened after one is chosen as the tab-dock target are automatically grouped with that window in a tabbed collection.
(Menu only) Always floating causes the window to remain undocked even if it is dragged to a docking location.
(Menu only) Move with frame causes the window to move when the WinDbg frame is moved, even if the window is undocked. For more information about docked, tabbed, and floating windows, see Positioning the Windows.
(Menu only) Properties opens the Memory Options dialog box, which is described in the following section within this topic.
(Menu only) Help opens this topic in the Debugging Tools for Windows documentation.
(Menu only) Close closes this window.
Memory Options Dialog Box
When you select Properties on the shortcut menu, the Memory Options dialog box appears.
In kernel mode, there are six memory types available as tabs in this dialog box: Virtual Memory, Physical Memory, Bus Data, Control Data, I/O (I/O port information), and MSR (model-specific register information). Select the tab that corresponds to the information that you want to access.
In user mode, only the Virtual Memory tab is available.
Each tab enables you to specify the memory that you want to display:
In the Virtual Memory tab, in the Offset box, specify the address or offset of the beginning of the memory range that you want to view.
In the Physical Memory tab, in the Offset box, specify the physical address of the beginning of the memory range that you want to view. The Memory window can display only described, cacheable physical memory. If you want to display physical memory that has other attributes, use the d* (Display Memory) command or the !d\* extension.
In the Bus Data tab, in the Bus Data Type menu, specify the bus data type. Then, use the Bus number, Slot number, and Offset boxes to specify the bus data that you want to view.
In the Control Data tab, use the Processor and Offset text boxes to specify the control data that you want to view.
In the I/O tab, in the Interface Type menu, specify the I/O interface type. Use the Bus number, Address space, and Offset boxes to specify the data that you want to view.
In the MSR tab, in the MSR box, specify the model-specific register that you want to view.
Each tab also includes a Display format menu. This menu has the same effect as the Display format menu in the Memory window.
Select OK in the Memory Options dialog box to cause your changes to take effect.
Additional Information
For more information about memory manipulation and a description of other memory-related commands, see Reading and Writing Memory.


