- Mouse Pointer Changes Itself
- Replies (4)
- 3 Ways to Change Mouse Pointer Size and Color in Windows 10
- 3 ways to change Mouse Pointer size and color in Windows 10:
- How to Change the Look of Mouse Pointer in Windows 7
- Ashish Mundhra
- Changing the Pointer Look
- Get Colorful Animated Mouse Cursors
- Read Next
- What are Snap Windows in Windows 10 and How to Use Them Optimally
- 7 Best Ways to Fix Mouse Wheel Scrolls Up When Scrolling Down Issue
- Top 7 Wireless Mice With Programmable Buttons
- How to Add Text to Video in Microsoft Photos on Windows 10
- How to Crop an Image in Circle Shape in Paint 3D
- How to Show Admin Settings in Windows 8 Start Screen and Group Them
- How to Delete and Disable Search History in Windows 8
- How to Get Mac Like Mission Control in Windows
- Did You Know
- How to Customize Mouse Pointer on Windows 10 and Change Scheme
- How to Customize Mouse Pointer on Windows 10
- How to Change Scheme of Mouse Pointer in Windows 10
- How to Customize Individual Mouse Pointers in Windows 10
- How to Delete Mouse Pointer Scheme in Windows 10
- How to Customize Mouse Pointer on Windows 10 through Settings app
- How to Change mouse pointer size in Windows 10
- How to Change mouse pointer color in Windows 10
- How to change mouse pointer thickness in Windows 1o
- Customize Mouse on Windows 10 from Settings application
- How to Set Right or Left handed mouse and switch in Windows 10
- How to Customize Roll the mouse wheel to Scroll in Windows 10
- How to customize Scroll Inactive Windows Setting in Windows 10
Mouse Pointer Changes Itself
my mouse pointer changes itself to some odd vertical pattern. By restarting it corrects to the arrow pointer. Going to the control panel and selecting the pointer there does not correct the problem.
This only seems to happen on one of my four computers all running latest Windows 10 version.
What can cause this and how to prevent it.
Replies (4)
We would like to know more about this concern. Please provide the following information:
- Is this your first time to encounter this error?
- Did you make any changes to your computer’s configuration prior to the issue?
In the mean time, let’s run Hardware and Device Troubleshooter. This troubleshooter will automatically detect and fix problem with devices. Follow these steps to run Hardware and Devices Troubleshooter:
- Open Control Panel.
- Select View by: Small icons.
- Open Troubleshooting.
- Under Hardware and Sound, run the Hardware and Devices Troubleshooter.
- Follow the on-screen instructions.
Looking forward to your response.
1 person found this reply helpful
Was this reply helpful?
Sorry this didn’t help.
Great! Thanks for your feedback.
How satisfied are you with this reply?
Thanks for your feedback, it helps us improve the site.
3 Ways to Change Mouse Pointer Size and Color in Windows 10
There are three methods you can use to change Mouse Pointer size and color in your Windows 10 computer. Just continue reading and you will find detailed introduction below.
Video guide on how to change mouse pointer size and color in Windows 10:
3 ways to change Mouse Pointer size and color in Windows 10:
Way 1: Change them in PC settings.
Step 2: Choose Ease of Access to enter its settings.
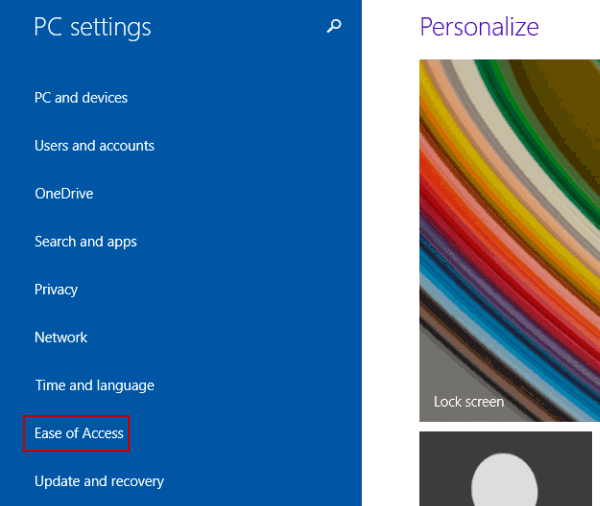
Step 3: Click Mouse, and choose new pointer size and color in the options.
Way 2: Change Mouse Pointer size and color in Mouse Properties.
Step 1: Click the lower-right Start button, type mouse in the search box and select Mouse in the results to open Mouse Properties.
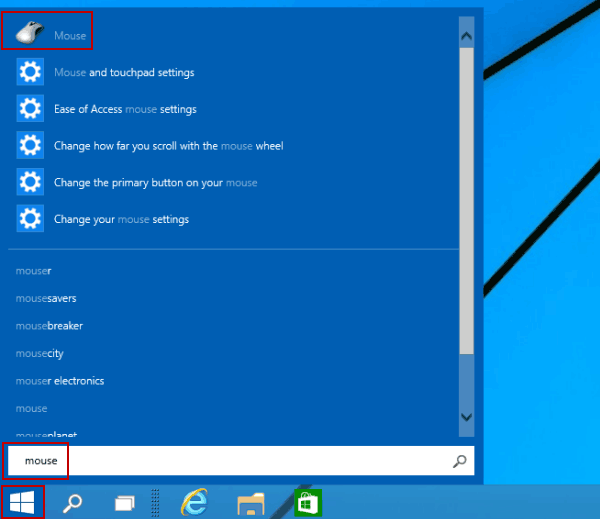
Step 2: Tap Pointers, click down arrow, choose a scheme from the list and select OK.

Way 3: Change size and color of Mouse Pointer in Control Panel.
Step 2: Enter Ease of Access.
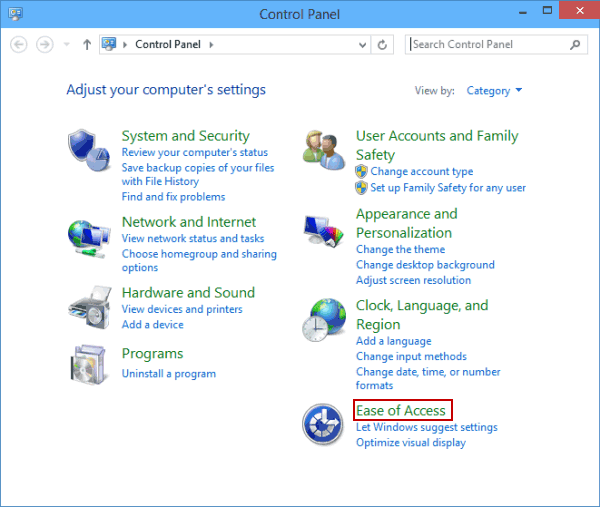
Step 3: Tap Change how your mouse works.

Step 4: Choose new mouse pointer in the options provided, and tap OK.
How to Change the Look of Mouse Pointer in Windows 7
Ashish Mundhra
27 Feb 2012
Most of us change the desktop wallpaper, themes, logon screen etc on Windows from time to time to give a new makeover to our computer, but what about the old, conventional (and, probably, boring!) mouse pointer? Do we ever realize that it probably needs a change? Even though it’s the most-used stuff on the computer (come on, you can’t disagree with that can you), I have hardly come across computers where the mouse pointer isn’t the same.
If I have poked your conscience enough, and you feel guilty of doing injustice to your mouse pointer then it’s time to give it a new look!
This post will talk about all the grooving up you could do on the mouse pointer. We’ll talk about the default way in Windows and also about some third-party software/web apps to give it a fun, colorful and animated look.
Changing the Pointer Look
Step 1: Click on the Start Orb in Windows 7 and type Mouse in the search box. Once the search is over, Windows will return mouse application as one of the results. Click on it to open the Mouse settings for Windows.

Step 2: In the Mouse Properties window, navigate to the Pointers tab to customize the mouse pointers. Here, you can see that Windows already has some pre-configured schemes using which you can apply some new looks to the mouse pointer.

Step 3: If you don’t like the default schemes, you can click on individual pointer type and click on the browse button to apply a custom cursor.

Get Colorful Animated Mouse Cursors
Now, you can either search and apply from the default cursors provided by Windows or you can download some fabulous animated ones from many of the free online services available.
I personally use FunUtilities and AniCursor to download some interesting animated cursors for Windows.

Once you download the cursor files you can apply them manually using the browse button.
Step 4: After you have made the changes, save the scheme and apply the settings.
You can save multiple schemes and make them theme based, like animals, flowers, insects or whatever your creative mind can think of.
So how are you going to redesign your Windows cursor? We would love to hear.
Last updated on 8 Feb, 2018
The above article may contain affiliate links which help support Guiding Tech. However, it does not affect our editorial integrity. The content remains unbiased and authentic.
Read Next

What are Snap Windows in Windows 10 and How to Use Them Optimally
Of the new features expected in # Windows 10 are the Snap Windows and Snap Assist, which we have covered here, with the optimal way to use them explained too.

7 Best Ways to Fix Mouse Wheel Scrolls Up When Scrolling Down Issue
Is your # mouse scrolling the wrong way or keeps jumping up and down? Find out how to fix the mouse scroll keeps jumping issue.
Top 7 Wireless Mice With Programmable Buttons
Looking for a # mouse that has more buttons for you to repeat simple tasks? Up your productivity or gaming skills by picking one of the cool # wireless mice with programmable buttons from our curated list.

How to Add Text to Video in Microsoft Photos on Windows 10
Want to add title or caption to a # video on # Windows 10? Know how to do with the help of the # video editor in the # Microsoft Photos app.

How to Crop an Image in Circle Shape in Paint 3D
Give a new look to your pictures by cropping them into circular shapes. Know how to crop an image in Paint 3D on # Windows 10.

How to Show Admin Settings in Windows 8 Start Screen and Group Them
Find Out How to Show Admin Settings in # Windows 8 # Start Screen and Group Them.

How to Delete and Disable Search History in Windows 8
Learn How to Delete and Disable # Search History in # Windows 8.

How to Get Mac Like Mission Control in Windows
Learn How to Get # Mac Like Mission Control in # Windows computers.
Did You Know
VLC media player supports basic mouse gestures.
How to Customize Mouse Pointer on Windows 10 and Change Scheme
Ways to Customize Mouse Pointer on Windows 10 and Change Scheme.
Most of you are using the default scheme of mouse pointer and cursor set by Windows 10. In the Windows 10 tips here, We will take you through the details of the ways to customize Mouse Pointer on Windows 10, change the scheme, and all other things that you can do with Mouse cursor.
Mouse acts as the steering wheel for a Windows PC. When you are running Windows 10, the latest version of Windows on your PC, to customize mouse pointer for your convenience is a very important job and this version provides you lots of setting to make it suitable for yourself. Mouse cursor is a graphical pointer on our computer monitor which indicates where the mouse pointer is and where the text alphabet typed will be entered. We are mainly here on this topic to let you know How to Customize Mouse Pointer on Windows 10 and Change Scheme.
How to Customize Mouse Pointer on Windows 10
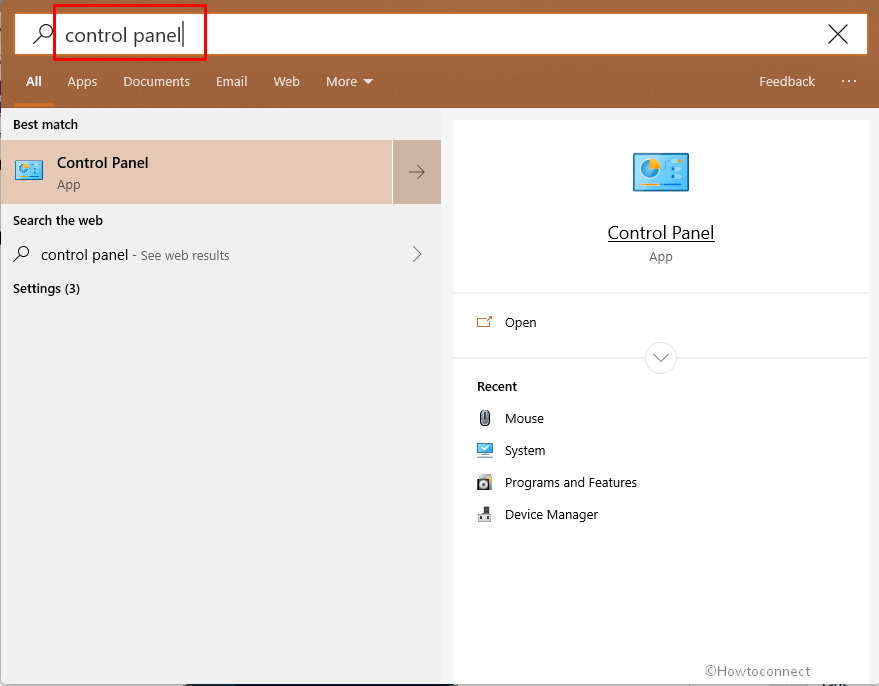
- Press Windows logo key, type control panel and then hit Enter on the keyboard.
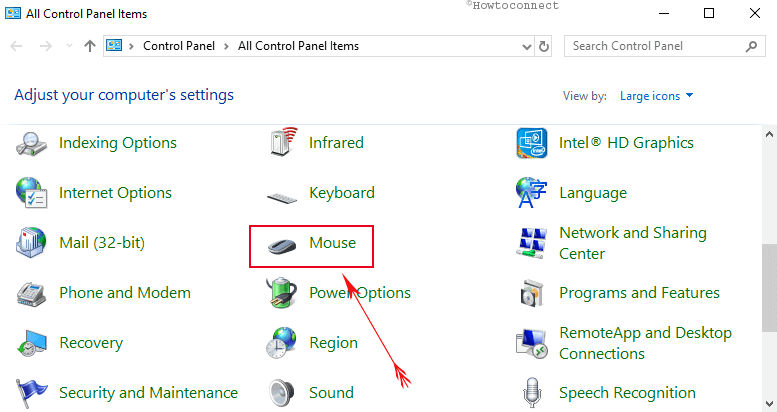
- Control Panel window emerges on your screen. Click Mouse link.
- A new Mouse Properties wizard pops up on the screen. By default, you will be taken to the Device Settings tab. Click Pointers tab.
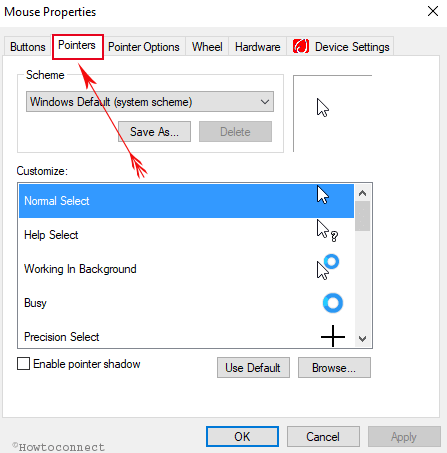
- There you can see that the Mouse Properties window is divided into two sections – Scheme and Customize.
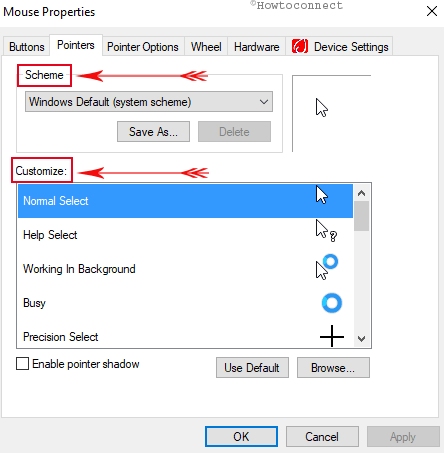
- Click the drop-down menu under the Schemes section and see what other pointer schemes are built-in.
- Once you select the pre-installed scheme then you can see different cursor shapes under the Customize section.
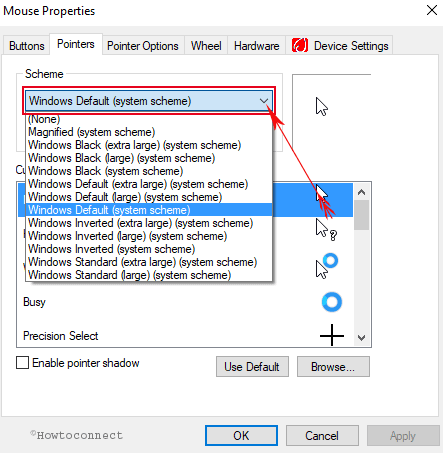
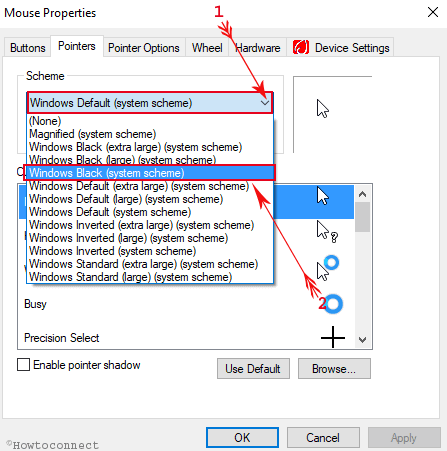
How to Change Scheme of Mouse Pointer in Windows 10
- Use the drop down menu of the Scheme section and take a look into the pre-installed schemes.
- Select any one of the Pre-installed schemes.
- After selecting the scheme, you can see various cursors of different shapes and sizes under the customize section.
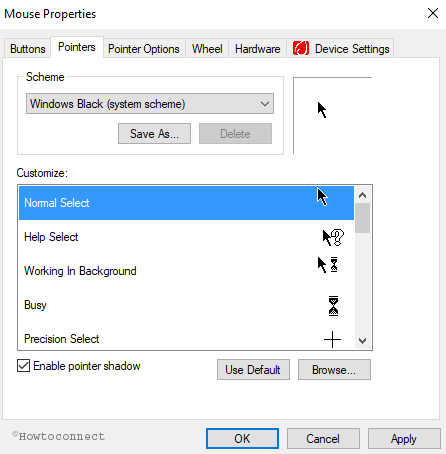
- There is a description at the side of every cursor.
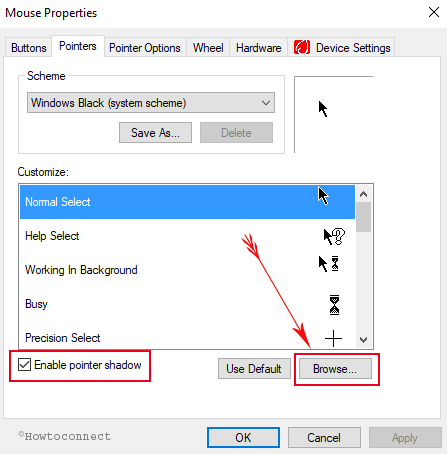
- Click on the Enable pointer shadow option if you wish to have a shadow to your mouse cursor.
- After doing the necessary changes, tap on the Apply option followed by Ok.
How to Customize Individual Mouse Pointers in Windows 10
It might happen that you did not like the shapes or sizes of the cursors of the scheme that you chose to use. We have a solution to it also in this article How to Customize Mouse Pointer on Windows 10. Follow the steps below –
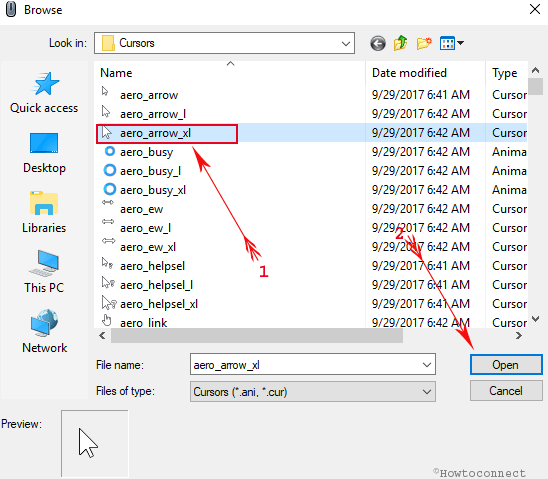
- Click on the Browse link which is under the Pointers tab of Mouse Properties window.
- It will take you to the folder where all the cursor images are stored.
- Scroll down the page and click on the option you like to choose the one as per your preference.
- After changing the cursors as per your preferences, Windows will ensure it as a new theme.
- Make sure to Save the changes and do not forget to give a name to your new theme.
How to Delete Mouse Pointer Scheme in Windows 10
- If you want to remove the built-in schemes you won’t be able to do so.
- After making a change to a theme and saving it with a name, you can delete it.
- Select that particular theme and click on the Delete option.
These are various ways to Customize Mouse Pointer on Windows 10.
With the Embark of Windows 10, technology had been up to the next level of advancement. There are so many customization options available for you to do. And I am sure Windows 10 will definitely fulfill all your preferences.
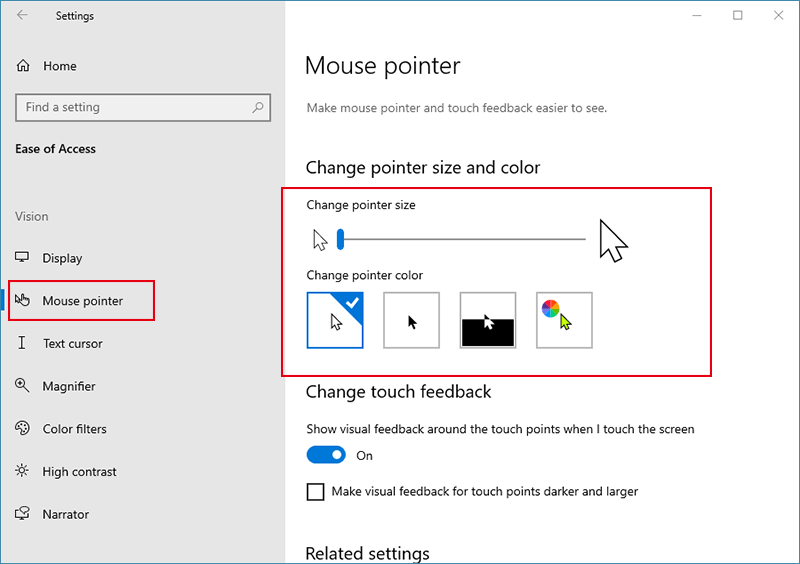
How to Customize Mouse Pointer on Windows 10 through Settings app
- Launch Settings application by pressing Win and I keys altogether.
- Click on Ease of access.

- When the next window appears, select Cursor & pointer from the left pane.

- You will experience multiple options to Customize Mouse Pointer on Windows 10 in the corresponding right pane –
How to Change mouse pointer size in Windows 10
- Simply use the slider on the control bar to Change the pointer size. Dragging it into the right direction will increase and into the left will decrease the cursor size.
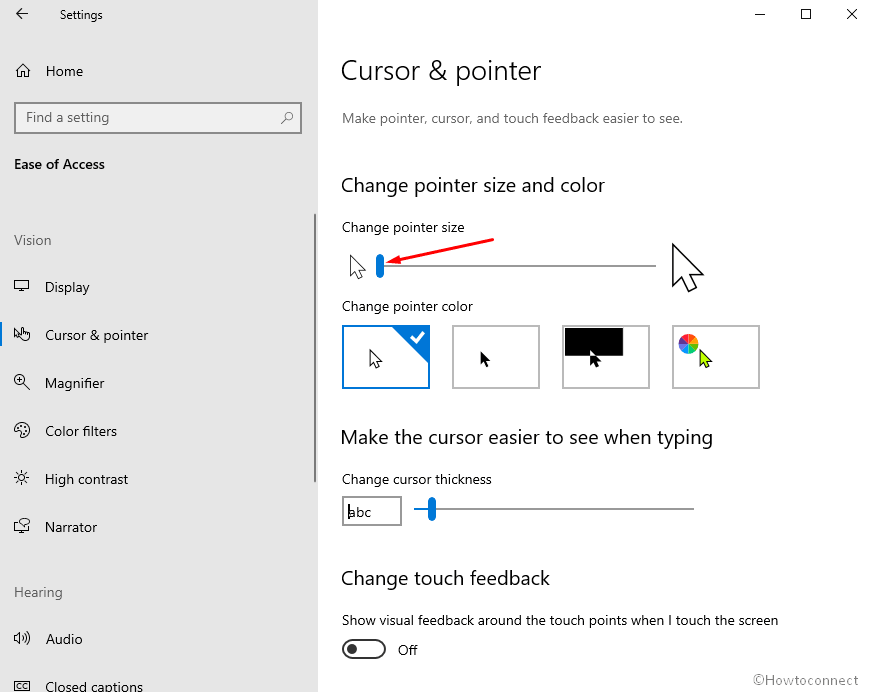
How to Change mouse pointer color in Windows 10
- To change, select either of the 3 color blocks given under Change pointer color.
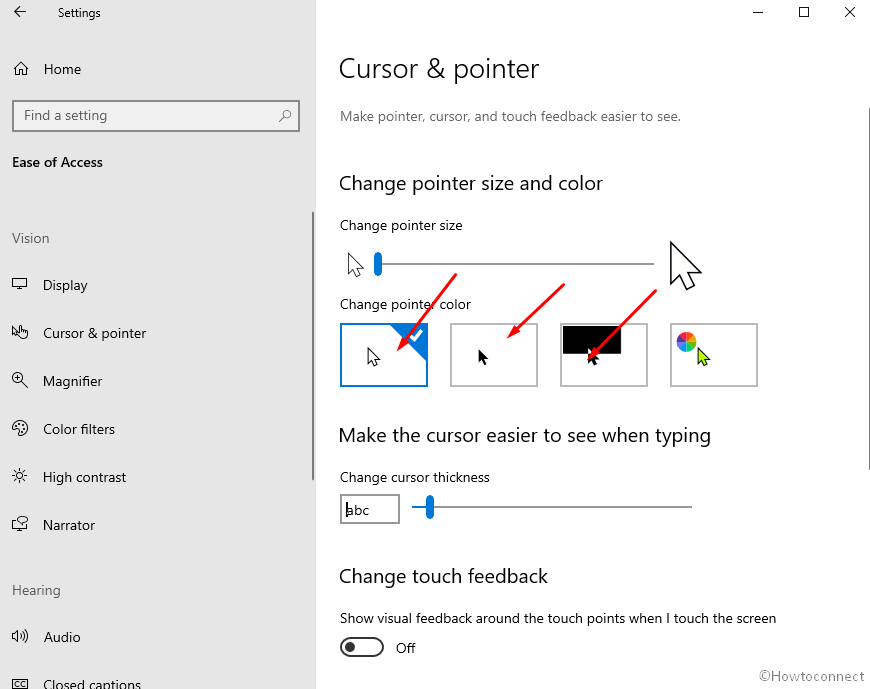
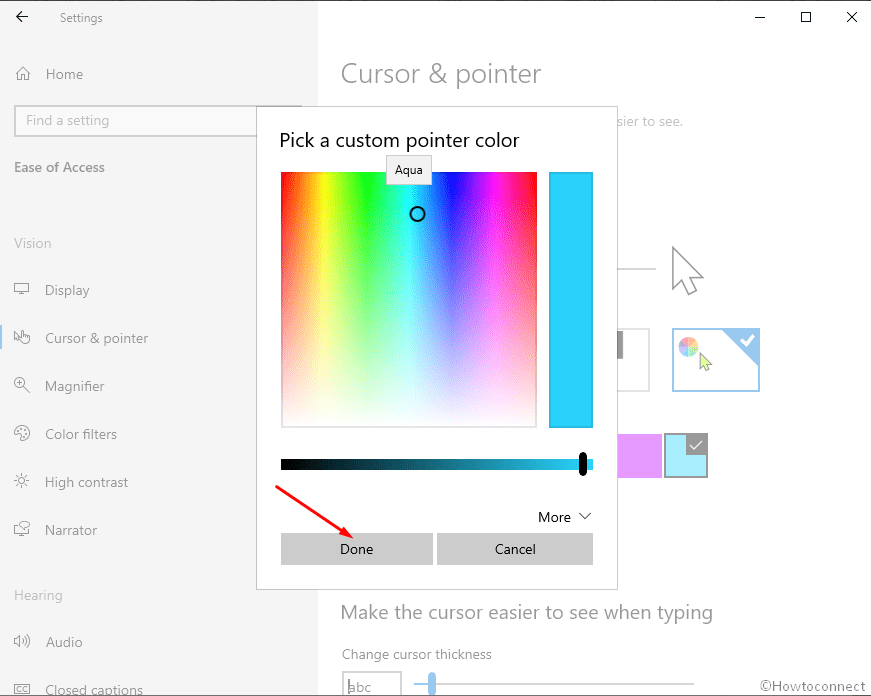
- If you are not satisfied with them click on the last block. Use Suggested pointer color to select your desired one.

- Still, looking for better; click on [+] Pick a custom pointer color.

- Prepare the desirable using the controls on the color palette and choose Done.
How to change mouse pointer thickness in Windows 1o
- Use the Change cursor thickness control to make it slim or bulky.

Customize Mouse on Windows 10 from Settings application
- Open Windows Settings Using “Win+I” Shortcut combination.
- Select Devices.

- Go to the right-hand side section and click on Mouse.
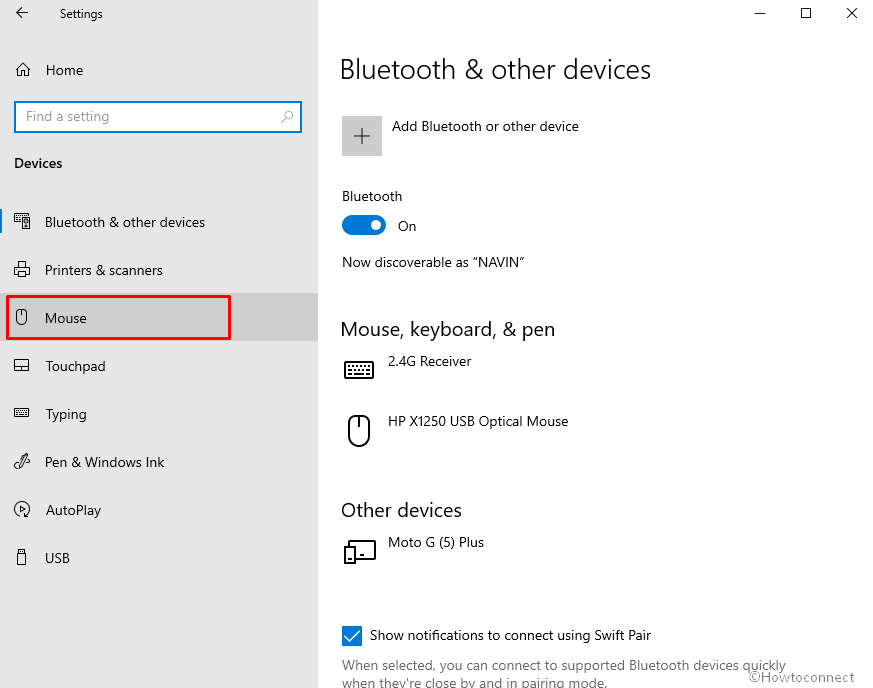
- You see here a collection of options, dropdowns, Control slider, and Toggle button in the right pane under “Mouse”.
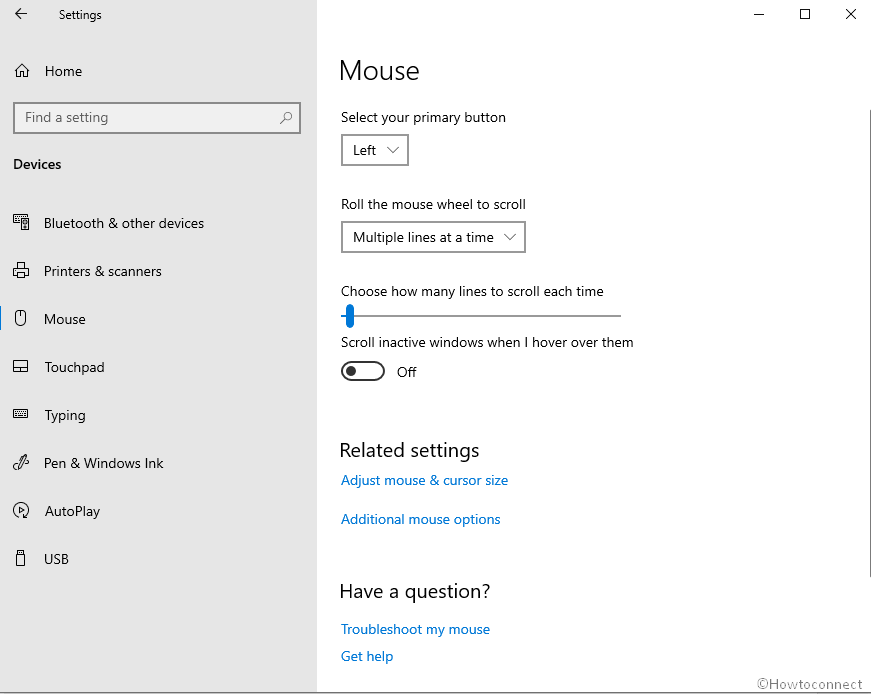
How to Set Right or Left handed mouse and switch in Windows 10
- Click on the dropdown under Select your primary button.
- Choose Left or Right matching your preference. Obviously, Right allows using the right-handed mouse and left refers left-handed.
How to Customize Roll the mouse wheel to Scroll in Windows 10
You are able to increase or decrease the scroll speed when using your mouse wheel from the built-in Settings app. Let’s see the way –
- Click Roll the mouse wheel to scroll drop down in the right part of the appearing page.
- Select one from the 2 options – 1] One Screen at a time and 2] Multiple lines at a time.
One Screen at a time – will scroll directly next screen when you scroll up or down and thus it fastens the speed.
Multiple lines at a time – This will display only next few lines (as you will set) on scrolling up or down.

- Use the control bar slider to Choose how many lines to scroll each time.
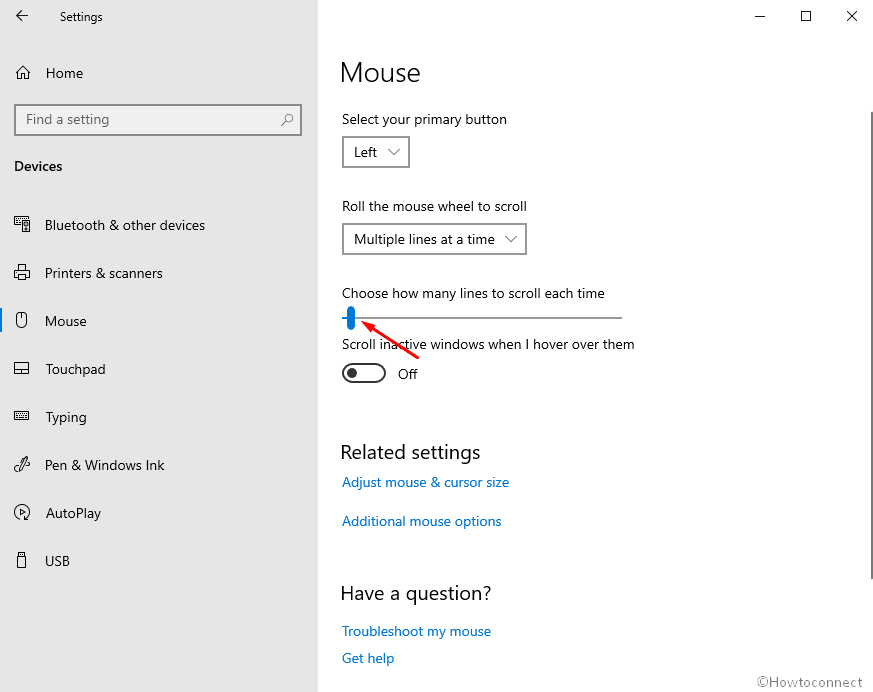
How to customize Scroll Inactive Windows Setting in Windows 10
“Scroll inactive Windows Settings” determine the scroll of a Window when you are running multiple windows. When you disable this you will be unable to scroll over a window until you make it active means click on it with your cursor. If you want to understand in the opposite way, you can only scroll on the active windows (in focus) on which you are doing your job. Just hovering on an inactive window will not work.
- Click on the toggle switch under Scroll inactive windows when I hover over them turn on or off according to your preference.


