- Fix Unidentified Network & No Internet In Windows
- Test The Internet
- Resolve Issues With Your Router Or Modem
- If You Are Using a Wired Connection:
- If You Are Using a Wireless Connection:
- Update Your Network Card Driver
- Disable Virtual Ethernet Devices
- Both Ethernet and WiFi Adapters May Be Active
- Reset TCP/IP Stack
- Resolve Issues With Your Network Adapter
- Disable Firewalls In Your Antivirus
- Summary
- Network and Internet Settings in Windows 10
- Network and Internet Settings in Windows 10
- 1. Status
- 2. WiFi
- 3. Ethernet
- 4. Dial-Up
- 5. VPN
- 6. Airplane Mode
- 7. Mobile Hotspot
- 8. Data Usage
- 9. Proxy
Fix Unidentified Network & No Internet In Windows
Try each step before moving on
The internet is great, but what about when the internet doesn’t actually work? In most cases, a little bit of troubleshooting should help fix any unidentified network errors or no internet in Windows.
With this step by step guide, you’ll be able to take all of the necessary steps to fix your internet so that you can get back online as soon as possible.
There are various causes for internet problems on Windows, so you’ll need to try each step until you find a solution.
Test The Internet
You should first test whether your internet is actually working or not. It’s a great starting point to ensure it’s not a problem related to a specific website or app. Open your browser and visit https://www.google.com/. If the page loads, your internet is working fine but other websites you are accessing may be temporarily down.

If the page doesn’t load, or it says you’re not connected to the internet, it’s time to start troubleshooting.
Resolve Issues With Your Router Or Modem
If you know your internet isn’t working, you should verify that there aren’t any issues with your router or modem. Every networking device will work slightly differently, so we can only offer a rough guide for these steps. You may need to check your router or modem manual for specific details.
Switching off your router or modem and switching it back on is a great start. Wait a few minutes for everything to come back online. Visit https://www.google.com/ to see if this resolves the unidentified network or no internet issue. If not, continue with the steps below.

If You Are Using a Wired Connection:
- Check that the ethernet cable is connected to your PC correctly.
- Check that the same ethernet cable is connected to your router or modem.
- Ensure there’s no damage to the cable.
- Make sure all cables are secure in your router. Sometimes a loose cable is all it takes to lose internet access.
- Ensure the cable for your modem or router is connected securely to the port on your wall.
- If you’re using a wireless access point, powerline adapter, or other networking equipment, ensure the connections are working and correct.
If You Are Using a Wireless Connection:
- Check the WiFi light on your router is turned on. If not, wait or call your ISP for assistance.
- Click the arrow on the task bar and select the networking option to attempt to reconnect to your network.
- If available, re-enter your WiFi password correctly.
After following these steps, attempt to visit Google again from your browser. If the connection still isn’t working, follow the next steps.
Update Your Network Card Driver
Windows 10 is great at automatically finding and installing the right drivers for your hardware. So if there is a potential driver problem, follow the steps below.
- Open the Start menu and search for Device Manager.
- Open Device Manager.
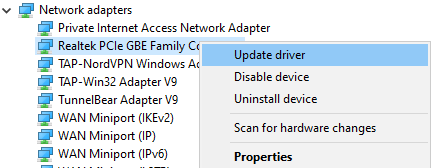
- Click the arrow on the Network adapters option.
- Right click your network adapter.
- Click Update Driver.
- Click Search automatically for updated driver software.
- Wait for the driver installation process to finish.
Next, try to visit Google in your browser again. Hopefully your internet will now work.
Don’t know which network adapter is the right one? Follow the steps below to find out.

- Open the Start Menu.
- Type CMD and click on Command Prompt.
- Type ipconfig /all and press enter.
You’ll see a number of results. There should be a single Ethernet or WiFi adapter, that will correspond with a name found in the device manager. Other results will most likely be for virtual ethernet devices like VPNs.
Disable Virtual Ethernet Devices
If you haven’t found a solution yet and are still receiving errors about an unidentified network or have no internet, you should try to remove any virtual ethernet drivers on your PC as these can cause major issues with how your PC connects to the internet. A virtual ethernet driver could be anything from a VPN to software designed to improve ping or packet loss.
You can find virtual ethernet devices and disable them by following the steps below.
- Open the Start Menu.
- Type View Network Connections and click on the result that appears.
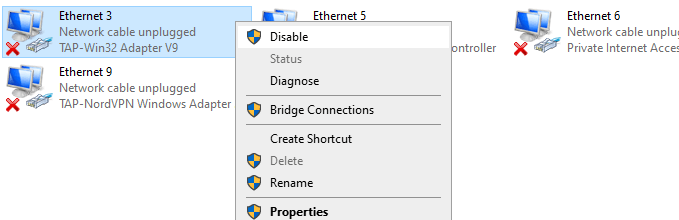
- You will now see your ethernet devices.
- Right click on each network device that belongs to software and click Disable.
- If you’re unsure, you can Google the name of each network device to learn more before disabling them.
Both Ethernet and WiFi Adapters May Be Active
If two network adapters are active at the same time, this can cause issues with your connection. It’s always better to use a wired connection over WiFi, so you can simply disable your WiFi connection if this is a problem for you.

- Open the Start Menu.
- Search for View Network Connections and click on the result.
- Right click every adapter here and disable all of them except for your main ethernet adapter.
To access WiFi networks in the future, you must visit this page to enable your WiFi adapter again.
Reset TCP/IP Stack
Using this command will allow you to reset some of your networking settings back to default. It can resolve issues that may have appeared after installing certain software or making manual changes to your network settings.
- Open the Start Menu.
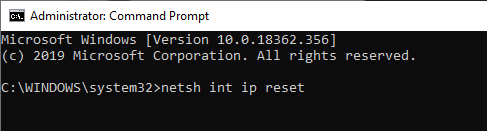
- Type CMD and right click on Command Prompt.
- Click Run as administrator.
- In the Command Prompt window, type netsh int ip reset and press enter.
- Restart your PC.
If you are still having issues, follow the next troubleshooting steps below.
Resolve Issues With Your Network Adapter
There may be some underlying issues with your network adapter that can be quickly diagnosed within the Windows control panel. If you’ve already updated your network adapter drivers, follow the steps below to try and diagnose other issues.

- Open the Start Menu.
- Type View Network Connections and click on the result that appears.
- Right click on your active network adapter.
- Click diagnose and wait for the troubleshooter to finish.
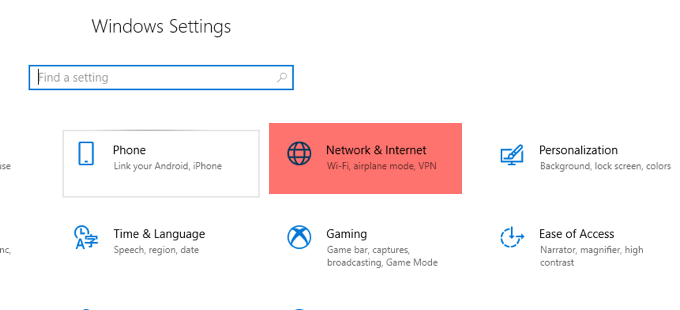
By default, if your network adapter is set to use a static IP address but it should be using DHCP, this should fix it. However, it’s a good idea to check yourself too. To do this, click on Start, then Settings (gear icon) and then click on Network and Internet.
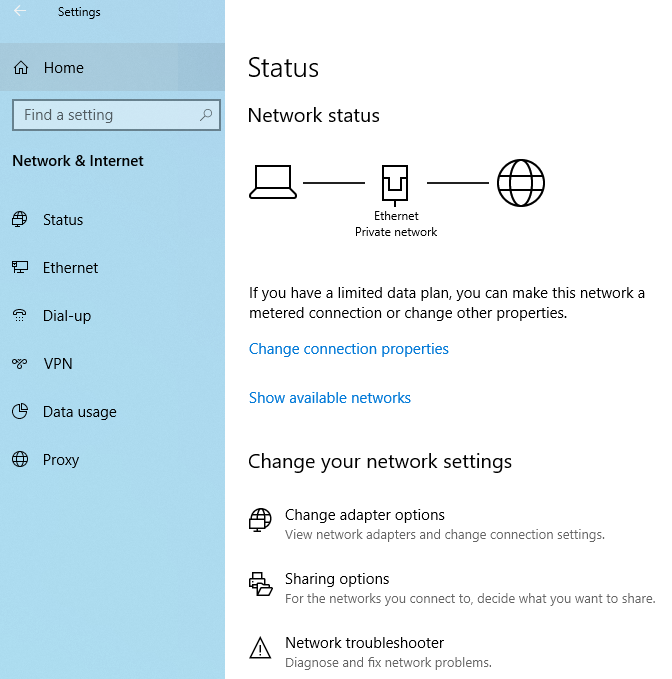
Next, click on Change adapter options under the Change your network settings heading.
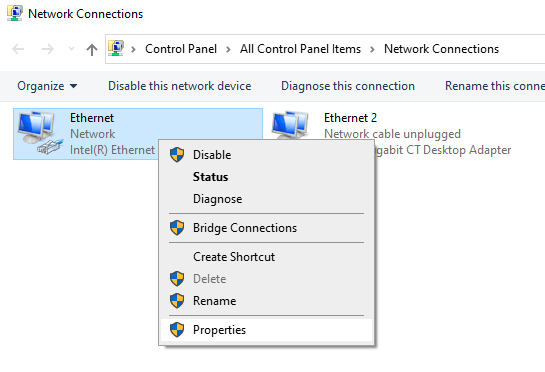
This will bring up another window that will show you all of the network adapters on your system. Depending on the one that is active, you just need to right-click on it and choose Properties.
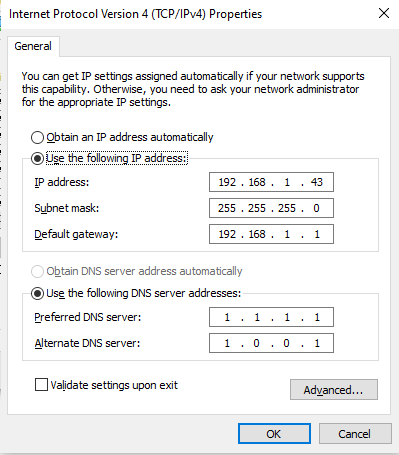
This will bring up the Ethernet or Wifi Properties dialog box. Click on Internet Protocol Version 4 (TCP/IPv4) and click on the Properties button.
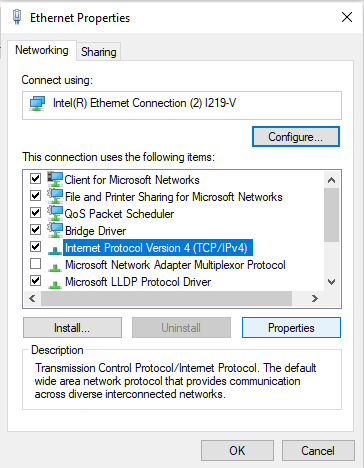
Finally, depending on your network, you either need to have the correct static IP info or you need to just select Obtain IP address automatically and Obtain DNS server address automatically.
Hopefully this can resolve your issues, but if not move onto the next step below.
Disable Firewalls In Your Antivirus
Firewalls are designed to stop bad traffic or actors from accessing your network, but because they deal with network access at an administrative level, they can sometimes cause some network connectivity issues for simple tasks like browsing online.
To find out if your antivirus firewall is causing issues with your internet connection, you should temporarily switch it off to test it. Note that once it’s switched off, you could be vulnerable to attack, so only visit trusted websites.

You must search online for how to disable your firewall for your specific antivirus. Usually, you’ll need to search for your antivirus through the start menu, open the antivirus and click on the firewall option. There will be options to disable the firewall for a set period of time.
Once disabled, open your browser and visit a website like Google.com. If your internet is working, you should uninstall that antivirus and try another one.
Summary
We hope that our guide has helped you to solve any problems with an unidentified network on your Windows PC. If you still need help, leave a comment below.
Ollie stumbled upon writing online whilst participating in a mobile network forum back in 2011. Since then, he has developed an incredible passion for writing about all sorts of tech from smartphones, PC hardware, software, and everything in between. Read Ollie’s Full Bio
Network and Internet Settings in Windows 10
Windows 10 brings the entire Settings options under one hood. We have already taken a look at the Windows 10 Personalization Settings, Privacy Settings, Devices Settings, and the Update and Security settings. In this post, we will learn about the Network and Internet Settings in Windows 10.
The new and the latest version of the Network and Internet Settings in Windows 10 include quite a lot of features such as mobile hotspot, automatic proxy setup, manual proxy setup, airplane mode, and so on. You will also be able to access the Network Reset feature that can help you reinstall Network adapters and reset Networking Components to original settings.
To open these settings, click on Start menu > Settings > Network and Internet.
Network and Internet Settings in Windows 10
In the Network and Internet Settings in Windows 10, you will see the following tabs –
- Status
- WiFi
- Ethernet
- Dial-up
- VPN
- Airplane mode
- Mobile hotspot
- Data usage
- Proxy
Let us go through them in detail.
1. Status
This tab shows you the status of the network – whether you are connected to a network or not. You can change the connection properties where you can choose to connect to a network automatically when in range. You can choose your Network Profile as public or private.
Moreover, this tab allows you to view the available network adapters, change connection settings, change sharing options for different network profiles, and diagnose and fix network problems. You will be able to access the Network Reset feature that can help you re-install network adapters and reset networking components to original settings.
2. WiFi
Check for available networks and connect to the wireless network you want. You can also manage and add a new network.
Random Hardware Addresses when turned on, makes it difficult for people to track your location when you connect to different WiFi networks. You can turn on the Hotspot 2.0 Network feature to make yourself more secure and safe when connected to public WiFi hotspots.
You can also select the option of setting a Metered Connection which gives you more control over the data usage. Turning it ON makes your apps work differently so that they use less data. This is especially helpful for users having a limited data plan. You will also see the properties of your device.
This tab allows you to adjust the Wi-Fi Sense settings in Windows 10. Wi-Fi Sense is a feature in Windows 10 that allows you to connect to your friend’s shared Wi-Fi connections. That is, you and your friends may opt to share your or their Wi-Fi connections.
3. Ethernet
You can set and view Ethernet settings here. It also allows you to set it as a metered connection if you have a limited data plan.
4. Dial-Up
This tab allows you to choose and set up a new Dial-up connection or network with the following options –
- Set up broadband or dial-up connections to the Internet.
- Set up a new router or access point.
- Connect to a hidden network or create a new wireless profile.
- Set up a dial-up or VPN connection to your workplace.
5. VPN
To add a VPN connection, keep your VPN provider, connection name and server name or address details ready. Fill in the type of sign-in info, username, and password and click Save.
Under Advanced Options, turn on the following settings if desired –
- Allow VPN over metered networks
- Allow VPN while roaming
6. Airplane Mode
Airplane mode when turned on, stops all wireless communication, Bluetooth, WiFi networks, and cellular networks.
7. Mobile Hotspot
The Mobile Hotspot feature is a new one in the latest version of Windows 10 Settings which enables you to share your Internet connection with other devices. The users can choose to share their Internet connection over Wifi or Bluetooth. User can also set the Turn On Remotely feature to allow another device to turn on mobile hotspot.
8. Data Usage
This section allows you to check the data used in the last 30 days for both WiFi as well as Ethernet. You can also view usage per app which will give you detailed information on data used by various apps on your PC. Additional features include setting data limits and restricting background data to reduce data usage on WiFi.
9. Proxy
In this section, you can set your PC to detect the Proxy settings automatically. However, you can also adjust the settings manually by entering the IP address and the proxy port.
In this post, all the features and the importance of the Network and Internet Settings in Windows 10 have been covered. Hope this post was a helpful read!
Date: June 21, 2019 Tags: Network, Settings


