The fundamentals of network booting
What is network booting?
Network booting, or booting from LAN as it is also called, is a process which allows a computer to start up and load an operating system or other program directly from the network without any locally attached storage device, like a floppy, CDROM, USB stick or hard drive.
On Intel architecture computers this is made possible with the PXE standard. PXE extends the features of the BIOS so that it can run software directly from the network. PXE support is now so common that you can expect it to be present in any reasonably modern computer that comes with an Ethernet jack (commonly known as RJ45).
This fact alone makes it possible to boot an Intel-based computer from the network without having to burn an EEPROM on your network card, like you had to do in the past.
Core technologies
- DHCP protocol, used to initialize network configuration for a client
- TFTP protocol, used to download a network boot program (NBP)
- HTTP protocol, used to download data from a web server
- PXE — a way to boot Intel computers using DHCP and TFTP
- UNDI — an API used by the PXE environment to generalize access to networking hardware
Other relevant protocols
All of these network protocols deal with how to access storage over they network in different ways.
- iSCSI — for block devices
- AoE — for block devices (non-routable, local network only)
- NBD — for block devices
- NFS — for files (mostly used on Unix)
- SMB/CIFS — for files (mostly used on Windows)
The BIOS boot process
When your computer powers on and starts running your operating system, it goes through a series of operations before it actually starts your operating system. Your operating system is a very sophisticated boot program that takes total control over your computer. But a boot program can also be a fairly simple program, like a memory diagnostics program, a hardware stability checker, or even a simple game like Pong or Tetris.
Power On When you put power on your computer and press the On button on the case. Initialize hardware The BIOS performs an inventory of all the components in the computer, such as the CPU, memory chips, extension cards, storage controllers, etc. Run self-tests All of the components discovered goes through a self-test procedure, to ensure they are operating properly. If any of the components fail, and that component is required for basic operation, your computer will usually make a series of beeps and stop functioning. When all problems have been fixed the BIOS will move on to the next step in the process, which is to discover additional option ROMs. Computer stopped If your computer ends up in this state, it will either hang forever, or it will turn itself off. This depends on how it entered this state, and how your BIOS is configured to react when it reaches this state. Discover built-in devices and option ROMs During this activity, your BIOS will discover all of the extensions available. BIOS extensions are usually included in the firmware of your BIOS or burned into an EEPROM or flash chip on one of your add-on cards. During booting you can normally notice this as your IDE, SATA, SCSI or other controllers finding the devices that are attached to them. For network cards, this is usually when you see the prompt that lets you specify what kind of boot protocol it should support (like PXE or RPL). Option ROMs should usually not do anything fancy at this point, except initialize hardware, run self-tests and set up boot service (BBS) entry points. Once all extensions have been allowed to run and add their boot service entry points, control goes back to the BIOS. At this point all the add-on cards and internal services of the BIOS have been initialized and are ready to do work. All of the boot service entry points are ordered according to the configuration specified in the BIOS. It is quite common that the user is given a choice of which boot service to try first by pressing a hotkey. F12 is a common key to start a boot service offered by a network card, but this varies among manufacturers. Once the first boot service has been selected, either manually or automatically, control moves to the next step. Start first boot service in BIOS boot services list During this stage, the program indicated by the boot service entry point is started. At this point, control passes to the boot service program, which starts its discovery process for a boot program. Boot service performs discovery for boot program Different boot services go about looking for the boot program in different ways. A floppy controller will read the first sector of the floppy and get ready to start that piece of code. A hard-drive (HDD) controller will usually read the master boot record (MBR) of the first attached HDD and designate that as the boot program. A network card using the PXE standard will perform a DHCP request to find out its IP address and location of boot program. If a location is advertised, a TFTP request is performed to fetch the boot program, commonly referred to as a network boot program (NBP). If the boot service was unable to find a valid boot program, the boot service will exit and control returns back to the BIOS, which will try the next boot service. If a boot program was successfully found, control will be handed over to it. Remove first boot service or put at bottom of list The BIOS needs to cycle to the next boot service in its list. Whether the BIOS discards the current boot service or adds it back at the end of the list varies between BIOS vendors. Both methods have pros and cons. The next step is to figure out if there are any more boot services to try out. More boot services available? If there are more boot services available, the next one in line will be started. If there are no more boot services the computer will halt and perform its halt operation. Start boot program At this point the boot program is in full control of the computer, and it will start doing whatever it is supposed to do. If the boot program detects a problem or wishes to, it can return back to the BIOS. This is not a very common thing to do for a boot program, as a lot of BIOSes have buggy implementations for getting control back. The more common method is just to display a message and hang, or reboot instantly. Since the boot program has full control over the computer it can make use of all the other devices the BIOS has detected to perform whatever action it needs to. Boot program running The final part a boot program normally does, is to hand over control to an operating system kernel. A boot program that performs this kind of action is usually called a boot loader. Common boot loaders for Linux systems are grub and syslinux. Before the boot loader does this, it will usually also fetch additional data from a storage device, e.g. drivers and configuration files. Any program code required to operate the hardware must be in main memory at this point, or you will be unable to access the hardware. This requirement is usually implemented using ramdisks, so that the kernel can be kept modular and flexible. In Linux they are called initial ramdisks (initrds), in Solaris they go by the name boot archives, and in recent Windows versions they are called wim files. The operating system kernel will then perform a complete discovery of the hardware attached to the system (again) and start doing whatever it is programmed to do. At this point, because another piece of code (the kernel) is in direct control of the hardware, it would be very unwise to switch control back to the BIOS, as hardware state has been modified under its feet.
How iPXE extends the network boot process
iPXE is a sophisticated boot program that is capable of extending the traditional PXE network boot process in several ways. It can be flashed as an add-on card’s option ROM, or it can be loaded as a network boot program (NBP) from an existing PXE option ROM via TFTP (this is called chainloading). It is also possible to include it as an option ROM inside your BIOS or load it from any local storage media, like floppy, USB, CD or HDD.
Depending on how iPXE is configured, it can load additional boot programs from several different sources in addition to TFTP. The most common way is to use HTTP to load additional content using a standard web server. If your web server supports range requests, you can also use it to boot floppies and CD images (ISOs) directly from the web server. FTP can also be used in the same way. There is even support for encrypted transmission with HTTPS. It is possible to configure it to only allow execution of programs that have been signed. If you combine this with ROM-burning you can have a network boot loader that will load only trusted code.
One of the most interesting features iPXE enables, is to boot a computer without an iSCSI host bus adapter from an iSCSI volume. This is possible, because iPXE implements a full-featured software-based iSCSI initiator. It even supports CHAP authentication! For operating systems that support it, you can also use AoE (ATA Over Ethernet) in addition to iSCSI.
The final feature that makes iPXE so impressive, is that it also has a very advanced scripting language and text-based menu system. These features enable you to make dynamic boot environments without the need to know a server-side scripting language like PHP, Perl or Python.
Windows network service boot
Network Boot Solution Background
For most network administrators, they are facing the same difficulty. Now and then, they have to troubleshoot or diagnose a problematic computer. Sometimes even need to do a clean installation of the operating system. Fortunately, network boot can help them out of such annoyance. And the same time, CCBoot supports install windows 7 via pxe boot.
Network boot Windows involves two machines: boot server and boot client. The boot client is a computer you are trying to boot up over network, while the boot server is the machine that serves over the network the files which the client needs. Network boot program allows to remote boot a computer over an IP network without access to a hard disk. It is therefore ideally suited for diskless or thin clients.
How to configure windows pxe server? When using network boot solution, the boot process will be changed from the normal order to:
Power on -> BIOS -> PXE stack built-in the NIC (Network Information Center) -> NBP (Network Boot Program) downloading from server to client’s RAM by TFTP -> NBP’s responsibility to perform the next step (a.k.a. 2nd stage boot).
Advantages of Network Boot Solution
- Reduce initial capital and implementation costs, reduce power and cooling requirements, reduce complexity and risk.
- Accelerate deployments, upgrades, and server repurposing.
- Implement enhanced Disaster Recovery solutions.
As an administrator responsible for a network of about dozens of computers or more, network boot Windows 7, Windows XP, Vista, Windows Server 2003 and 2008 will drastically reduce your daily workload.
Using CCBoot to Build a Network Boot Server
- Install Network Boot Server with CCBoot — An all-in-one Network Boot Software
Download network boot software — CCBoot server installation package from — http://www.ccboot.com/download.htm.
Launch ccbootsetup.exe on the network boot server and keep press the next button to the end.
Figure 1
CCBoot will use the following ports — 67 (DHCP), 69 (TFTP), 3260 (iSCSI), 1000 (Image Upload), 8001 (Service Control). You need to open these ports in the firewall of the network boot server. Since CCBoot v2.1, you also need to open port 66. V2.1 uses port 66 as DHCP backup.
Note: Please shut down the other DHCP services on the LAN especially the DHCP service in the router.
Launch CCBoot and you will get the main interface as bellow:
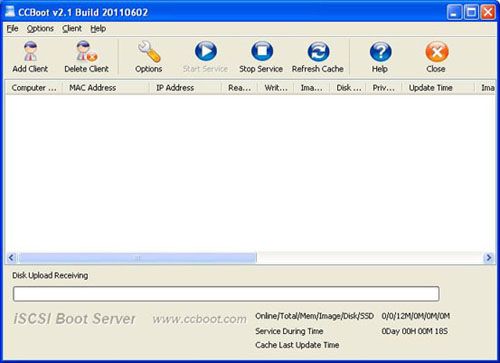
Figure 2
Initialize The Network Boot Server
Demo Environment
Server IP: 192.168.1.10
Gateway: 192.168.1.1
DNS Address: 192.168.1.1
IP Mask: 255.255.255.0
DHCP Range: 192.168.1.101-192.168.1.254
Menu «Options»->»Options Wizard» and configure step by step as bellow:
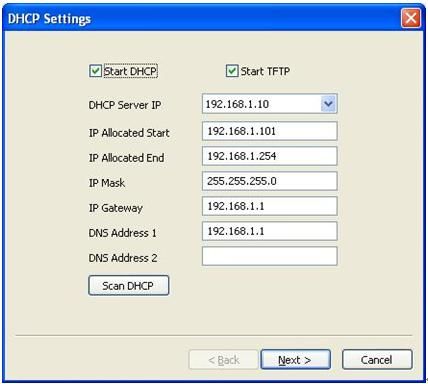
Figure 3
You need to select the correct local IP address as «DHCP Server IP». Press «Scan DHCP» to check if there are other DHCP services on the LAN. You need to stop other DHCP services on the LAN.
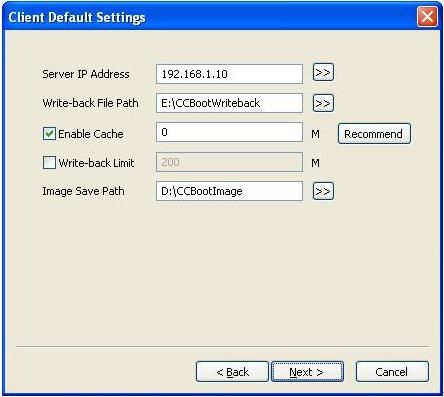
Figure 4
Set «Server IP Address». Normally, it’s the same as «DHCP Server IP».
Set «Write-back File Path» and «Image Save Path» as you want.
«Write-back File Path» is used to store the network booted clients’ write-back data. You’d better use a big volume hard disk as «Write-back File Path». This disk should be formatted as NTFS and 64K bytes per cluster.
«Image Save Path» is used to store the images for network booting. This disk should be also formatted as NTFS and 64K bytes per cluster. You’d better use a fast speed hard disk as «Image Save Path». For example, use an SAS hard disk.
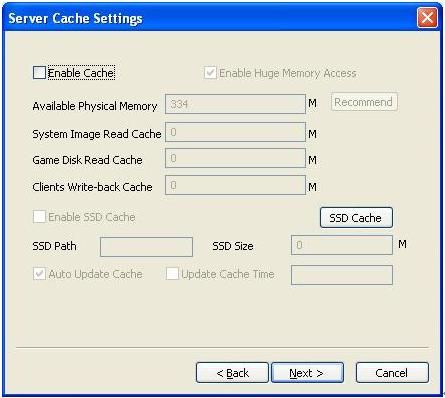
Figure 5
Keep default values in «Server Cache Settings».
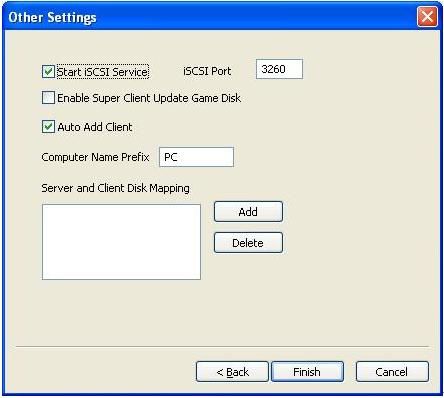
Figure 6
Keep default values in «Other Settings». Press the «Finish» button and confirm the popup dialog box.
To network boot Windows XP with CCBoot, you first of all need to create a system image and here’re the steps —
- Choose one client PC as master PC used to create network boot image. Attach a hard disk on the PC.
- Delete all partitions first. Allocate a small MBR partition about 40G size and leave the rest unallocated. Format the 40G partition with NTFS. Install Windows XP and the latest SP into this partition.
- After complete Windows installation, open the local area connection network properties and configure as bellow:
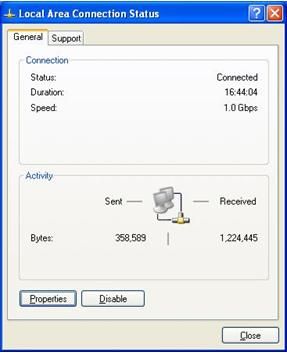
Figure 7
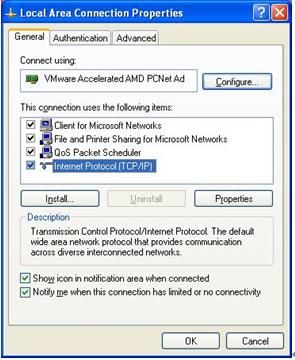
Figure 8
Select «Internet Protocol (TCP/IP)» and click «Properties».
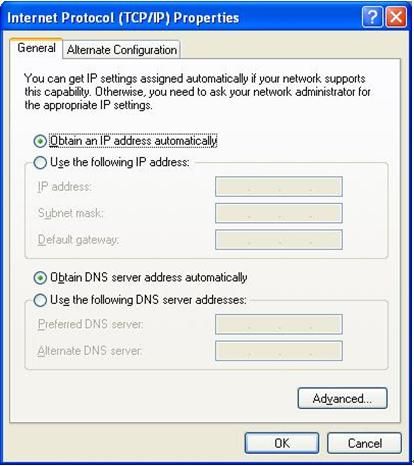
Figure 9
Select «Obtain an IP address automatically» and «Obtain DNS server address automatically», then click «OK» to save.
On the CCBoot network boot server you will find a client in the client list (Figure 10) that was added by CCBoot automatically when the client PC got IP address from the CCBoot DHCP service.
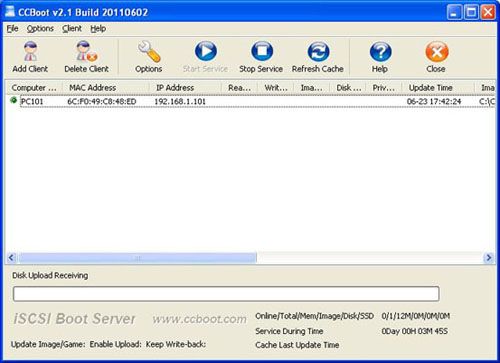
Figure 10
Double click the client to edit and check both «Enable Upload Image» and «Keep Write-back File» (Figure 11), when press «save» button it will ask you «Are you sure to delete write-back file?» Just press «No».
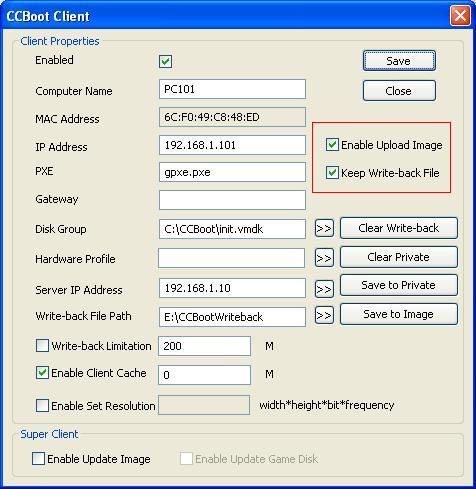
Figure 11
Download CCBoot client installation package from: http://www.ccboot.com/download.htm. Launch ccbootsetupclient.exe and keep press the next button to the end. Then launch CCBoot client and you will see the main interface as bellow (Figure 12).
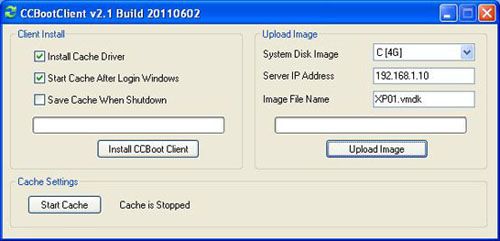
Figure 12
Note: CCBoot supports two types image file format. It supports VMDK if you are using Windows 2003 as CCBoot server system. It will support both VMDK and VHD if you are using Windows 7 or Windows 2008. As you can see in Figure 12, the file format depends on what you have set for «Image File Name». For example, «XP01.vmdk» and «XP01.vhd».
- On CCBoot network boot server, double click PC101 (Figure 10) to open the master PC’s properties dialog box, uncheck «Enable Upload Image» and «Keep Write-back File».
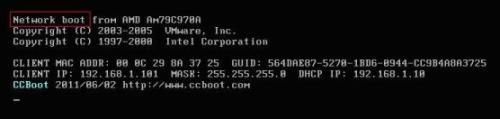
- Remove the HDD from the master PC, set it firstly boot from network (or LAN, PXE rom, or some other similar settings) in BIOS settings so that it will start network boot Windows XP.(Figure 13).

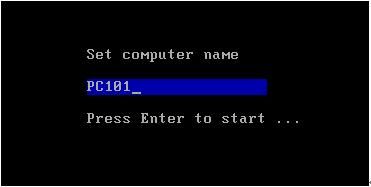
Figure 13The first time you network boot Windows XP on the master PC, you can modify its computer name (Figure 14).
Figure 14Set the computer name as you wish then press enter key to boot it over network (Figure 15).
Figure 15 - On CCBoot server, «Options» -> «Settings» -> «Default Client Settings» -> «Disk Group» -> press the «>>» button, select «XP01.vmdk» as the default boot image in «System Image Selection» section.
- Do the same as Step 2 and Step 3 for other client PCs with the same specifications as the master PC to network boot Windows XP for them.
Network boot Windows 7 step by step.
Network boot Vista step by step.
More information: windows xp fails to load network values


