- How to share files between a Linux and Windows computer
- Create a shared folder on Windows
- Access a Windows shared folder from Linux, using Konqueror
- Access a Windows shared folder from Linux, using Nautilus
- Access a Windows shared folder from Linux, using the command line
- Mounting and mapping shares between Windows and Linux with Samba
- More Linux resources
- Windows network share from linux
- Установка CIFS
- Монтируем Windows Share (сетевой ресурс)
- Безопасность учетных данных при монтировании через CIFS
- Как сделать автоматическое монтирование общей папки Windows
- Как размонтировать общую папку CIFS
- Автор
- Возможно Вам будет это инетересно
- Как инвертировать совпадение по grep
- Как посмотреть список пользователей Linux
- Конфигурация файла .gitignore в Git
- 7 thoughts on “Как подключить общую папку (сетевой ресурс, шару) Windows к Linux”
- How to Mount a Windows Share in Linux
- SMB vs CIFS vs SAMBA
- Mount a Windows Share Using GUI (Files / Nautilus)
- Mount A Windows Share Using Command Line
- Using the mount.cifs Command
- Automatically Mount CIFS Share at Boot
- Mount CIFS Share at Boot Using /etc/fstab
- Mount CIFS Share using AutoFS
- Installing autofs Package
- Create Credentials File
- Get UID for User
- Edit auto.master Map File
- Create the Shares File
- Restart the Service
- Test and Verify
- Conclusion
How to share files between a Linux and Windows computer
The easiest and most reliable way to share files between a Linux and Windows computer on the same local area network is to use the Samba file sharing protocol. All modern versions of Windows come with Samba installed, and Samba is installed by default on most distributions of Linux.
Create a shared folder on Windows
First, create a shared folder on your Windows machine.
- Open the Control Panel.
- Go to Network and Sharing Options.
- Go to Change Advanced Sharing Settings.
- Select Turn on Network Discovery and Turn on File and Print Sharing.
Now, create a new folder to share or choose an existing folder that you’d like to share.
- Right-click the folder and select Properties.
- Go to the Sharing tab.
- Above the Share button is the network name of the share you are creating. It should look like \\YOURCOMPUTERNAME\Users\YourUserName\ShareFolderName. Make a note of this network name to use later on your Linux machine.
- Click Share.
Access a Windows shared folder from Linux, using Konqueror
Many Linux distributions use the KDE desktop environment and the Konqueror file manager/browser. If this is what you are using, you can follow these steps to access your Windows shared folder:
- Click the K menu icon.
- Select Internet ->Konqueror.
- In the Konqueror window that opens, click the Network Folders link, or type remote:/ in the address bar and press Enter .
- Click the Samba Shares icon.
- Click the icon of your Windows Home workgroup.
- Click the Workgroup icon.
- Click the icon for your computer.
- When prompted, enter the username and password for the Windows account that created the share.
- Click OK.
Access a Windows shared folder from Linux, using Nautilus
Many Linux distributions, especially those that use the GNOME desktop environment, use the Nautilus file manager. If this is what you’re using, you can follow these steps to access your Windows shared folder:
- Open Nautilus.
- From the File menu, select Connect to Server.
- In the Service type drop-down box, select Windows share.
- In the Server field, enter the name of your computer.
- Click Connect.
Alternatively, in the Nautilus address bar, you can type smb://ComputerName/ShareName and press Enter . For instance, when you created your Windows Share, if the share name was listed as:
Type smb://YOURCOMPUTERNAME/Users/YourUserName/ShareFolderName and press Enter . Note the smb: at the beginning; in Linux, use forward slashes instead of backslashes.
Access a Windows shared folder from Linux, using the command line
You can also access your Windows share from the Linux command line using the smbclient program.
- Open a terminal.
- Type smbclient at the command prompt.
- If you receive a «Usage:» message, this means smbclient is installed, and you can skip to the next step. If the command is not found, however, you need to install smbclient. Follow these steps to install it.
Mounting and mapping shares between Windows and Linux with Samba

More Linux resources
In my previous article, Interoperability: Getting started with Samba, I covered installing and configuring Samba shares on a Linux server. The real power of Samba comes when Windows clients can communicate with Linux file servers. In this article, I will cover how you can access Samba shares from both Linux and Windows clients.
Install the Samba client packages
To access Samba share from Linux clients we need to install a few Samba client packages.
On the client machine, install the samba-common and samba-client packages.
Check for available shares
Let’s check if we can access our shares from the server. We can use either the hostname or ip address of the server. If you use the hostname , make sure DNS is working.
Create a directory that we can use as our mount point. I’m going to create a directory under /mnt , but you can use any directory you would like to. You may need to configure SELinux on that directory.
Now, mount the share.
Now that we’ve mounted our share, we can check the mounts with the following command:
Let’s make that directory mount persistently so it can withstand a reboot. Using the text editor of your choice, edit the /etc/fstab file. You can do this in multiple ways, but I’m going to demonstrate two ways to mount the Samba share at boot in /etc/fstab .
The first option provides a username and password for the Samba user in the fstab .
The other option is to create a credential file. You can call this file anything, but I would like to call it cred . I would like to place credentials files in the home directory of the user. In our demonstration it will be /home/user/.cred .
The _netdev option is important since we are mounting a network device. Clients may hang during the boot process if the system encounters any difficulties with the network.
Now create that .cred file inside the user’s home directory.
Next, add the Samba user’s username and password.
Finally, mount all filesystems.
Access a share from a Windows client
I will be using Windows 10 as my client machine with a workgroup called SAMBA . We need to create a local user account on the Windows machine that matches the username and password of the Samba user account we created in my previous article. Although account creation is not necessary, this will make things simpler when accessing the share.
Like I mentioned above, this step is optional and you can skip it completely. Although there are multiple approaches to adding a new local user on a Windows machine, for the simplicity of this article I will be using PowerShell. Launch PowerShell as an administrator and issue following commands:
Now that we have created a new local user account matching the Samba user account, we can log in to Windows with our newly created user account.
Access a share from Windows Explorer
To access the Samba share from Windows Explorer, start typing the IP address to our share in the search area. I am using the hostname of the Samba server. In my case, it is centos . You can also access the share by using the IP address of the Samba server.

You might be prompted to enter the username and password to access the share if you skipped the local user creation process. If you get prompted for credentials, enter the Samba username and password we created in the previous article.
You will need to enter the Samba share path every time you want to access the share. There is a better way to access the share by mapping a drive to Samba share in Windows.
Mapping a drive to a Samba share
To map a drive to the Samba share, open PowerShell and issue following command:

Accessing a Samba share on Linux and Windows is easy. With this basic setup, you will be able to access file shares from client machines in your network. With somewhat more configuration, you can deploy Samba shares in a domain environment. Samba can do more than file share. If you would like to learn more about Samba, read this article about Windows and Linux interoperability. This is a basic set up, but you can do so much more with Samba.
[ Want to test your sysadmin skills? Take a skills assessment today. ]
Windows network share from linux
CIFS (Common Internet File System) — это популярный протокол обмена файлами в Интернете. Этот протокол и позволит пользователям ОС Linux получить доступ к общей папке Windows.
CIFS — это реализация SMB (Server Message Block) — протокола, используемого для совместного использования сетевых файлов. Но он устарел.
В этой статье мы по шагам пройдем все этапы установки и настройки CIFS, чтобы подключиться к сетевому ресурсу Windows на ОС Linux.
Установка CIFS
Сейчас мы установим пакет cifs-utils на Ubuntu Linux (точно так же можно сделать на всех Debain-подобных ОС).
Монтируем Windows Share (сетевой ресурс)
Сейчас мы разберем на примерах, как монтировать общую папку Windows вручную и автоматически.
Создадим на нашем Linux директорию, к которой мы будем монтировать сетевой ресурс. Назовем ее myshare и расположена она будет в каталоге /mnt
Сетевой ресурс (шара) Windows может быть примонтирован к ОС Ubuntu или Debian с помощью следующей команды:
WIN_HOST_IP — это IP адрес хоста Windows, на котором расположена общая папка
share — имя сетевого ресурса
user — наш пользователь и Passw0rd — пароль с которыми мы подключемся к шаре.
Если пользователь доменный, то необходимо в опциях (-o) указать домен.
По-умолчанию сетевой ресурс монтируется с полными правами (rwx или 777). Если Вы хотите установить иные права, используйте опции dir_mode и file_mode.
Так же Вы можете установить владельцев uid (id пользователя) и gid (id группы).
Если после выполнения предыдущих команд Вы не получили никаких ошибок, то можете с помощью команды df -h убедиться, что сетевой ресурс успешно примонтирован к нашему ПК на Linux. В примере WIN_HOST_IP = 192.168.1.100 и имя общей папки share
Безопасность учетных данных при монтировании через CIFS
В этом разделе опишем, как лучше всего передавать учетные данные (имя пользователя, пароль, домен) при монтировании сетевого ресурса к ОС на базе Линукс.
Создайте файл с учетными данными для cifs: /etc/cifs-credentials
Внутрь поместите следующее содержимое:
Задайте права для этого файла:
Теперь мы можем подключить общую папку такой командой:
Как сделать автоматическое монтирование общей папки Windows
В примерах выше, после того, как Вы перезагрузите свой ПК, сетевой ресурс не примонтируется. Поэтому сделаем так, чтобы шара подключалась автоматически. В Linux это делается через файл /etc/fstab. Откройте этот файл любимым редактором.
И добавьте такую строку:
Следующей командой запустим монтирование всех точек, описанных в /etc/fstab
Теперь наш удаленный сетевой ресурс будет доступен даже после перезагрузки.
Как размонтировать общую папку CIFS
Размонтирование производится таким же способом, как и обычно мы жто делаем с дисками:
Часто бывает так, что сетевой ресурс занят каким-то процессом и тогда Вы получите ошибку при попытке размонтирования, тогда запустите команду с ключем -l (—lazy)
Итак, в этой статье мы рассмотрели, как быстро примонтировать удаленную сетевую папку, которая находится на хосте с Windows, к нашему хосту на Linux с помощью CIFS. Если у Вас остались какие-либо вопросы, пожалуйста, пишите в комментариях.
Автор
Админ
Возможно Вам будет это инетересно
Как инвертировать совпадение по grep
Как посмотреть список пользователей Linux

Конфигурация файла .gitignore в Git
7 thoughts on “Как подключить общую папку (сетевой ресурс, шару) Windows к Linux”
[ 13.068117] CIFS: Attempting to mount //192.168.10.250/home
[ 13.068332] CIFS VFS: Error connecting to socket. Aborting operation.
[ 13.068339] CIFS VFS: cifs_mount failed w/return code = -2
[ 13.068431] CIFS: Attempting to mount //192.168.10.250/home/Drive/школа/English
[ 13.068556] CIFS VFS: Error connecting to socket. Aborting operation.
[ 13.068564] CIFS VFS: cifs_mount failed w/return code = -2
[ 13.069981] CIFS: Attempting to mount //192.168.10.250/Учебный_год_3В
[ 13.070234] CIFS VFS: Error connecting to socket. Aborting operation.
[ 13.070241] CIFS VFS: cifs_mount failed w/return code = -2
[ 15.184815] usb 1-1: reset high-speed USB device number 2 using ehci-pci
[ 17.861600] random: crng init done
[ 17.861607] random: 7 urandom warning(s) missed due to ratelimiting
[ 23.589870] tg3 0000:3f:00.0 enp63s0: Link is up at 100 Mbps, full duplex
[ 23.589872] tg3 0000:3f:00.0 enp63s0: Flow control is off for TX and off for RX
[ 23.589901] IPv6: ADDRCONF(NETDEV_CHANGE): enp63s0: link becomes ready
Все бы хорошо, но не успевает сетевуха поднять линк
дальше вручную «sudo mount -a» и все взлетает
[ 697.728246] CIFS: Attempting to mount //192.168.10.250/home
[ 700.739946] CIFS: Attempting to mount //192.168.10.250/Учебный_год_3В
[ 701.090973] CIFS: Attempting to mount //192.168.10.250/home/Drive/школа/English
вот вопрос, как бы заставить монтироваться после поднятия линка и получение адреса
ноут по wifi нормально отрабатывает, а системник с обычной сетевухой нет
How to Mount a Windows Share in Linux
In this tutorial we will be discussing different ways to connect to a Microsoft share form Linux. Before we dive in I think it is important to understand the different terminology used when talking about Samba, SMB and CIFS shares.
Table of Contents
SMB vs CIFS vs SAMBA
SMB (Server Message Block) is a protocol used for network file sharing. It was originally designed at IBM in the 1980’s.
CIFS (Common Internet File System) is a implementation of SMB that was created by Microsoft.
SAMBA is an open source software suite and set of utilities used by UNIX/Linux to communicate with Microsoft Windows systems.
From the average user stand point SMB and CIFS can be used interchangeably. As you will see below, we will connect to the same share using both SMB and CIFS.
Mount a Windows Share Using GUI (Files / Nautilus)
You can easily connect to a Windows share using the Files application (formerly known as Nautilus) that ships with Gnome. For the sake of clarity, we will call it Nautilus.
Open the Nautilus application and select “Other Location” from the left places panel.
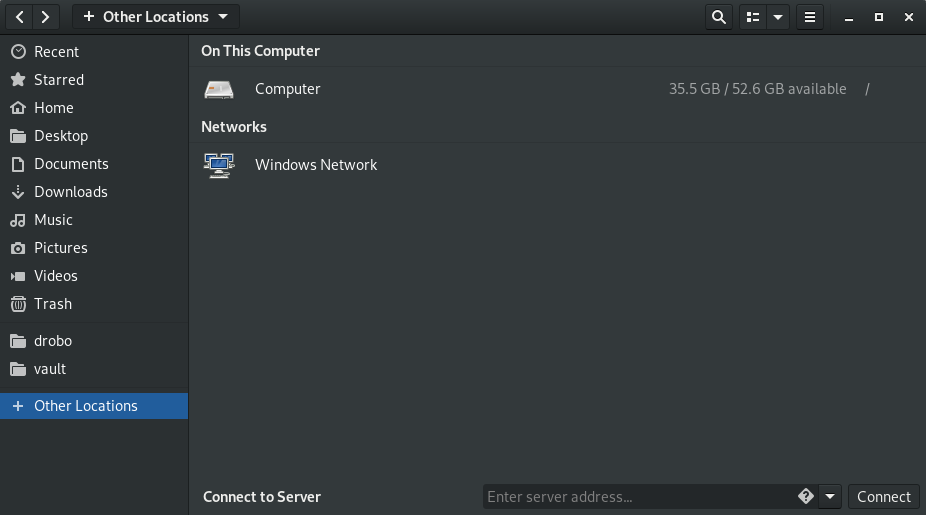
At the bottom of the screen you will see “Connect to Server” with a box asking for you to enter the server address. Inside that box is a diamond with a question mark in it that you can click for some help.
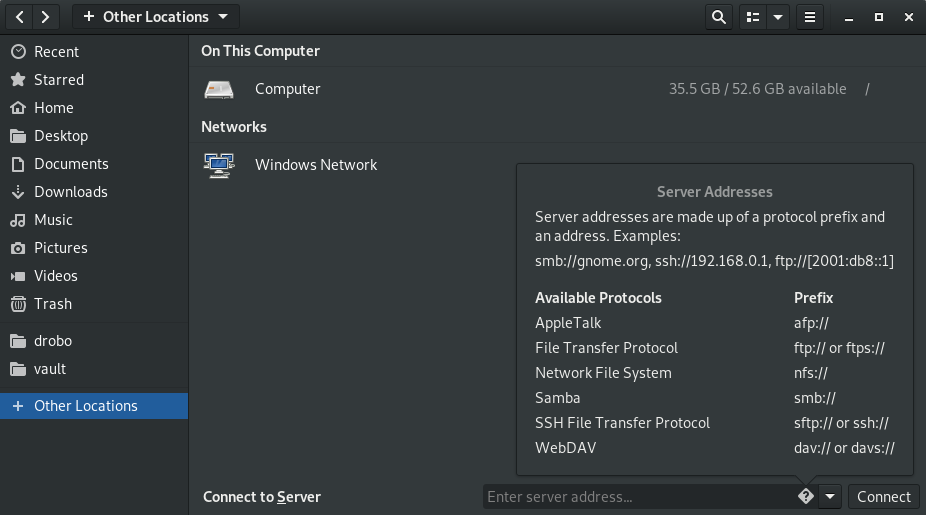
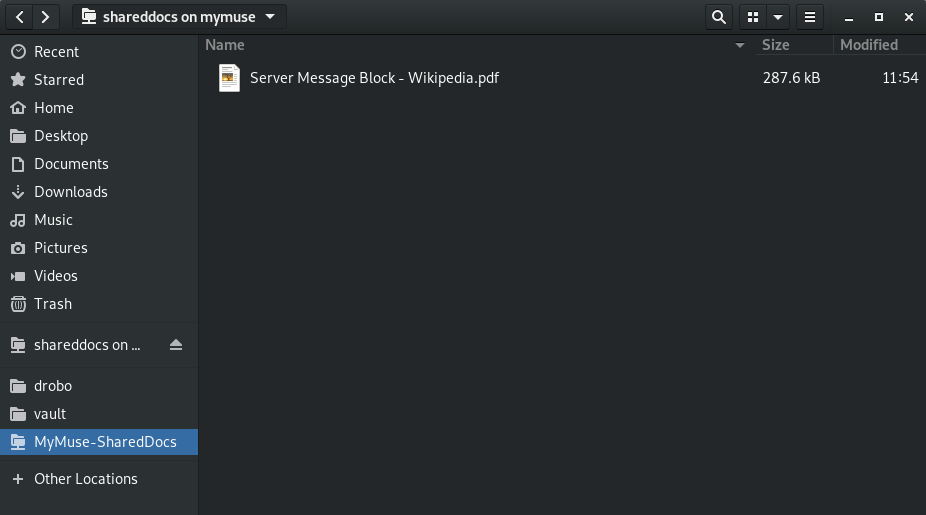
As you can see in the pop-up, server addresses are made up of a protocol prefix and an address. On my Windows machine named “MyMuse” I created a share called “SharedDocs”. So inside that entry box we will use:
We can also use the IP address:
This will bring up a dialog box asking for authentication credentials.
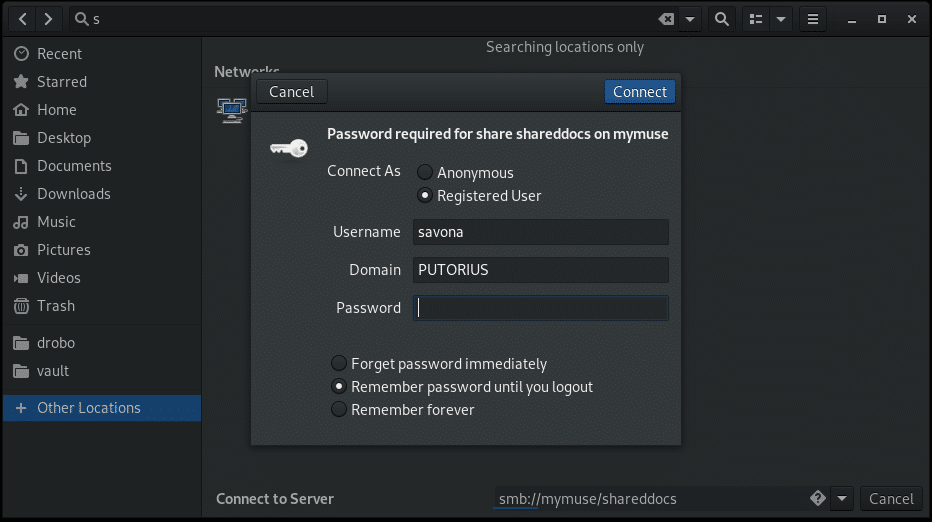
Select the “Registered User” radio button and enter your details. You have three options for storing your password.
- Forget password immediately – This will log you in and and soon as your session is over you will be required to provide your credentials again.
- Remember password until you logout – Remember your password until you explicitly logout.
- Remember forever – This option will store the credentials and allow you to easily return to the share.
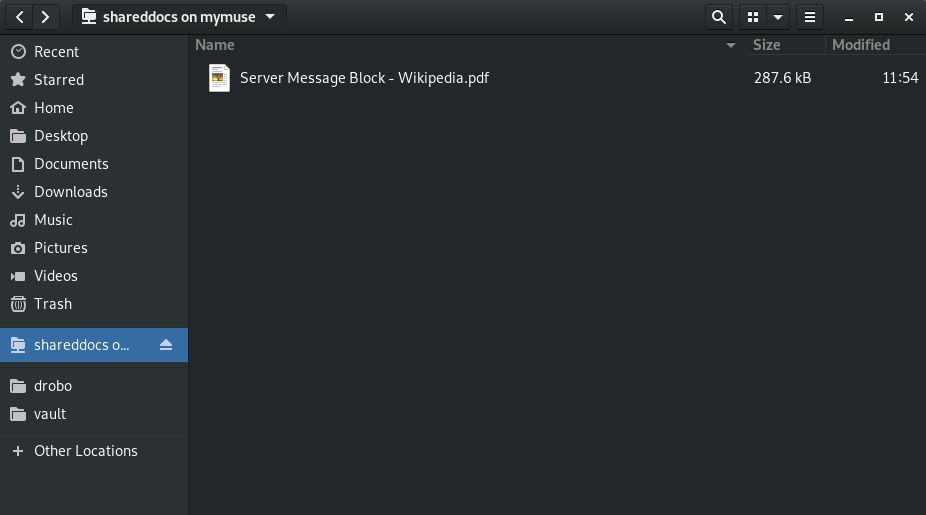
Once you are connected, Nautilus will show the location on the left panel allowing easy access to the share.
Be aware that once that connection is closed you will have to go back to “Other Locations” and use the drop down box to reconnect. If you want to make the share persistently accessible from the left menu you will need to add a bookmark.
NOTE: If you do not want to type your credentials every time ensure that you select “Remember Forever” when authenticating to the share.
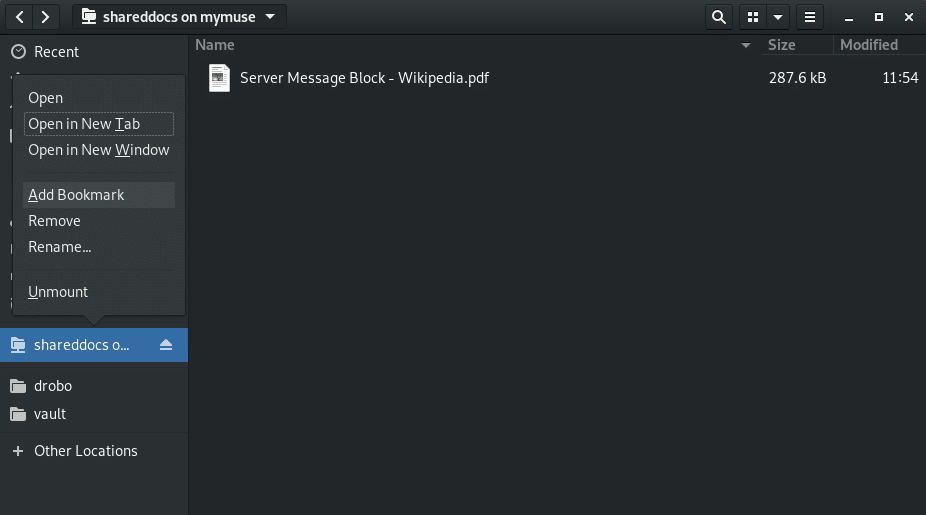
To add a bookmark, connect to the share then right click it in the left panel and select “Add Bookmark”.
If you have a lot of shares, or multiple shares on the same device, it will be hard to differentiate them. You can rename them to something more user friendly by right clicking on the bookmark and selecting “Rename…”.
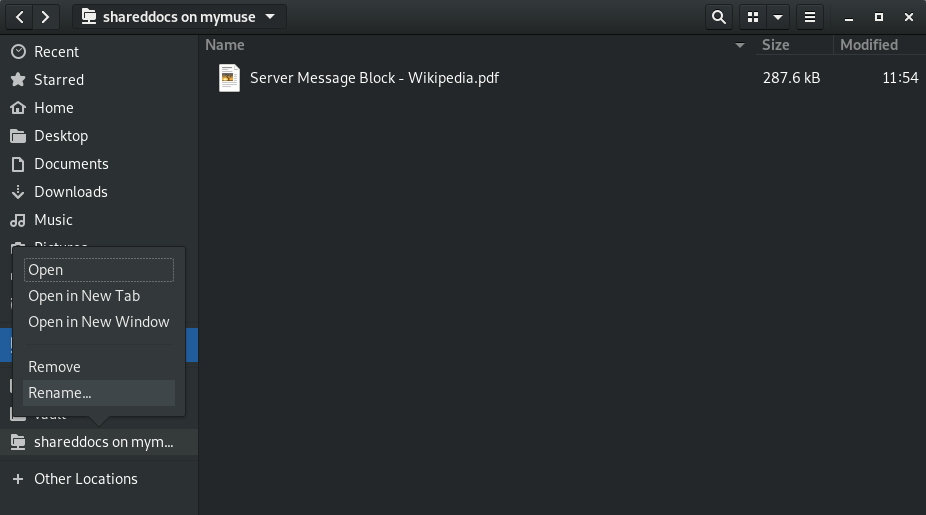
Now we can easily navigate to our share as the name is clearly visible and easy to identify.
Mount A Windows Share Using Command Line
Using the mount.cifs Command
You can easily mount a cifs share from the command line using the mount.cifs command. Using the mount command requires root privileges.
First, create a directory to mount the share:
Use the mount.cifs command to mount the share at the created directory.
You can use the IP address as well.
Alternatively, you can use mount -t cifs with the same syntax.
Automatically Mount CIFS Share at Boot
Mount CIFS Share at Boot Using /etc/fstab
You can add your CIFS mount point in /etc/fstab and have the system mount it during boot. However, there are some considerations to make. If the share is not available at boot time the system will hang until the mount attempt times out, or worse, refuse to boot. This will cause a delay in accessing the system. To avoid this you can use autofs (next section). Also mounting it via fstab requires you to put your credentials somewhere in plain text. You have two options when using fstab to mount a CIFS share.
- Put the credentials in the fstab file itself – This is a huge security risk as fstab is readable by any user. Someone can simply cat the file and see your credentials. IT IS NOT RECOMMENDED!
- Use a credentials file – This entails saving your credentials in a separate file which can then be protected by permissions. Although your credentials will still be saved in plain text, someone would need root permissions to read them.
Because of the high risk of the first option, we will not even discuss how to do it. It is easy enough to use a credentials file.
First, create a hidden file in root’s home directory (/root/). You can call this file whatever you like. Most people call it .smbcreds or similar. In this file you need two lines, one containing “username= ” and one containing “password= ”.
Now set the permissions so it is only readable by root:
Now edit the /etc/fstab file and add the following information:
- Remote server share address (//mymuse/shareddocs)
- Local mount point (/mnt/cifs)
- Filesystem type (cifs)
- options (credentials file=/root/.smbcreds)
- dump option (0)
- check option (0)
Example fstab, last line showing the CIFS mount point.
Mount CIFS Share using AutoFS
The most obvious benefit of using autofs is that the share is only mounted when being accessed. If it is unavailable it will not effect your system when it boots.
Using autofs has the same credentials issues described above with fstab. It is also necessary to store your password in plain text when using autofs for cifs shares.
Installing autofs Package
Install autofs in CentOS 7, or Red Hat 7:
Install autofs in Ubuntu 18:
Let’s configure autofs to mount our Windows share.
Create Credentials File
First, ensure you create the credentials file as described above:
DO NOT forget to set the permissions:
Get UID for User
Now, let’s get our user accounts uid so we can tell autofs to mount the share as our user instead of root.
Edit auto.master Map File
Edit the /etc/auto.master configuration file. In this file we will provide a map of directories to shares for autofs to use. Add the following line to the file:
The first part of the above line is the directory we are using as a mount point (you can create a custom directory if you wish). The second is the file that autofs should look in for instructions on how to connect to the resource and mount it.
Create the Shares File
Next edit or create the /etc/auto.shareddocs file and add the following:
Restart the Service
Now we must restart the autofs service so it reads the new configuration.
Test and Verify
Now, let’s look in the /mnt directory.
The shareddocs directory doesn’t exist until you try to access it (auto fs). If everything above was followed, we should be to cd into that directory even though we do not see it. The directory will be dynamically created as it is accessed.
Bob’s your uncle.
Conclusion
In this article we covered 3 different ways to mount your Windows shares in Linux. You should now be able to mount an SMB share via the GUI, manually on the command line, automatically on boot and with autofs.
An important point I would like to stress is make sure you protect your credentials. I hope you enjoyed this tutorial, please leave feedback or questions in the comments below.


