- Что такое Network and Sharing Center в Windows?
- Что такое Networking and Sharing Center?
- Задачи, которые запускаются из Networking and Sharing Center
- Как запустить центр Networking and Sharing Center?
- Вывод
- We answer: What is Network and Sharing Center in Windows 10?
- What is Network and Sharing Center and how does it work?
Что такое Network and Sharing Center в Windows?
в Интернет 1,659 Просмотров
Во многих наших учебниках о сети в Windows 7, Windows 8 и Windows 8.1, вы увидите, что мы уже упоминали, довольно часто Network and Sharing Center. Эта панель является входной точкой для многих сетевых задач. Поэтому, в этой статье я покажу вам, что такое Network and Sharing Center, как запустить и какие основные задачи, которые могут выполняться.
p, blockquote 1,0,0,0,0 —>
p, blockquote 2,0,0,0,0 —>
Что такое Networking and Sharing Center?
Проще говоря, Network and Sharing Center это своего рода панель управления, где находится большинство сетевых настроек и запуск задач в Windows 7, Windows 8 и Windows 8.1.
p, blockquote 3,0,0,0,0 —>
Задачи, которые запускаются из Networking and Sharing Center
Начнем с Windows 7: окно Network and Sharing Center делится на две части. Слева есть колонка с ярлыками для таких задач, как: управление беспроводными сетями, изменение параметров настройки для всех сетевых адаптеров и изменение сетевых параметров общего доступа. В нижней левой стороне есть ярлыки панели настройки Домашняя группа, панель опций Интернет и Брандмауэр Windows на панели управления.
p, blockquote 4,0,0,0,0 —>

p, blockquote 5,0,0,0,0 —>
Справа есть большая белая область разбитая на две части. Верхняя сторона показывает Вам основную информацию о текущей сети связи: имя активной сети, тип доступа и домашнюю группу, в которые входит ваш компьютер. Нижняя сторона содержит ссылки к мастерам, которые помогут Вам сделать следующее: настройку нового подключения или сети, подключиться к другой сети, изменение домашней группы и параметров общего доступа и устранение неполадок.
p, blockquote 6,0,1,0,0 —>
В Windows 8 и Windows 8.1, панель выглядит почти так же, с некоторыми незначительными отличиями. Например, «Подключиться к сети» больше нет, потому что мастер такой же, как и «Настройка нового подключения или сети».
p, blockquote 7,0,0,0,0 —>

p, blockquote 8,0,0,0,0 —>
Ссылка «Выбор домашней группы и параметров общего доступа» тоже исчезла, поскольку одни и те же настройки Домашняя группа могут быть доступны через ссылку Домашняя группа в левой колонке.
p, blockquote 9,0,0,0,0 —>
В левой колонке, Вы не найдете ссылку «Управление беспроводными сетями» даже не на ноутбуках или планшетах. Потому что управление соединениями беспроводных сетей производится по-разному в Windows 8 и Windows 8.1.
p, blockquote 10,0,0,0,0 —>
Как запустить центр Networking and Sharing Center?
Network and Sharing Center может быть запущен с помощью нескольких методов. Один путь состоит в том, чтобы запустить окно Выполнить нажатием Windows key + R ,затем введите «control.exe /имя Microsoft.NetworkAndSharingCenter» и нажмите мышкой на ОК. Это работает во всех версиях Windows, которые включают эту функцию.
p, blockquote 11,0,0,0,0 —>

p, blockquote 12,1,0,0,0 —>
Вторая альтернатива, которая работает только в Windows 7, нажмите на значок сети в правой части панели задач, а затем на «Open Network and Sharing Center».
p, blockquote 13,0,0,0,0 —>

p, blockquote 14,0,0,0,0 —>
В Windows 8 и Windows 8.1 необходимо правой кнопкой мыши щёлкнуть на значок сети в правой части панели задач, и нажать на «Open Network and Sharing Center».
p, blockquote 15,0,0,0,0 —>

p, blockquote 16,0,0,0,0 —>
Третий способ-это пойти «Панель управления -> сеть и Интернет -> Центр сети и общего доступа». Это работает во всех версиях Windows.
p, blockquote 17,0,0,0,0 —>

p, blockquote 18,0,0,1,0 —>
В Windows 8 вы можете также искать слова «общий доступ к сети» и выберите соответствующий результат поиска под пунктом Параметры.
p, blockquote 19,0,0,0,0 —>

p, blockquote 20,0,0,0,0 —>
В Windows 8.1, поиск работает так же. Единственная разница заключается в том, что вам не нужно фильтровать результаты поиска. Его ярлык отображается сразу.
p, blockquote 21,0,0,0,0 —>

p, blockquote 22,0,0,0,0 —>
Такой поиск может быть сделан также и в Windows 7 — Меню «Пуск» окно поиска.
p, blockquote 23,0,0,0,0 —>
Вывод
Как вы можете видеть из этого учебника, Network and Sharing Center является одной из самых важных панелей управления сетевыми подключениями. Если вы ищете другие интересные советы и хитрости по сети, не стесняйтесь прочитать некоторые наши рекомендации ниже.
 (Пока оценок нет)
We answer: What is Network and Sharing Center in Windows 10?

Today, most of us access internet on daily basis, and although our internet connections are created automatically by Windows 10, sometimes you need to change your network settings and make certain adjustments.
Simplest way to do that is to use Network and Sharing Center, so today we’re going to explain you what is Network and Sharing Center and how to use it.
What is Network and Sharing Center and how does it work?
Network and Sharing Center was first introduced in Windows 7, as a part of Control Panel, and it has remained a part of Windows through Windows 8 and Windows 10.
If you ever used Network and Sharing Center in Windows 7, you should know that it looks almost the same in Windows 10.
Most options are still there, so you should feel like at home with Network and Sharing Center on Windows 10. Bear in mind that some redundant options were removed or combined with other options in order to streamline the user interface.
Only option that you might miss is the Manage wireless networks option that is now moved to a different place in order to allow users to connect quickly to a certain wireless network or change the wireless settings.
If you never used Network and Sharing Center before, you should know that you can access it with just a few clicks.
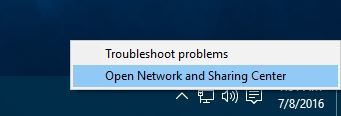
Simplest way to open Network and Sharing Center is to right click your network icon in the bottom right corner and select Open Network and Sharing Center.
Another way to open Network and Sharing Center is to use Control Panel. To access Control Panel and Network and Sharing Center do the following:
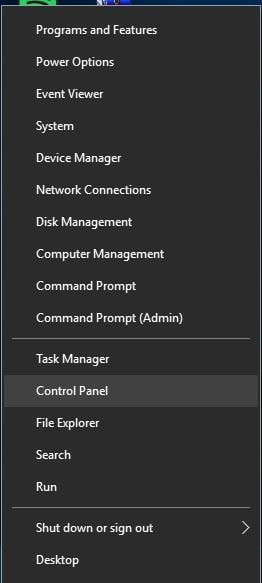
- Press Windows Key + X to open Power User Menu. Select Control Panel from the list.

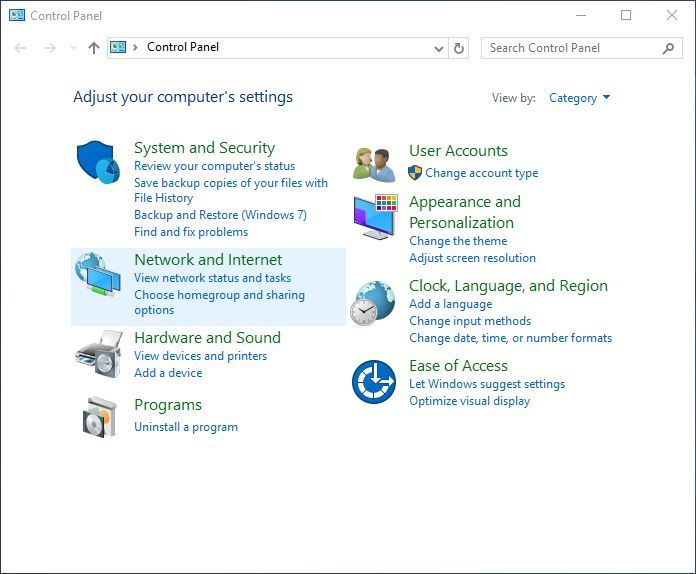
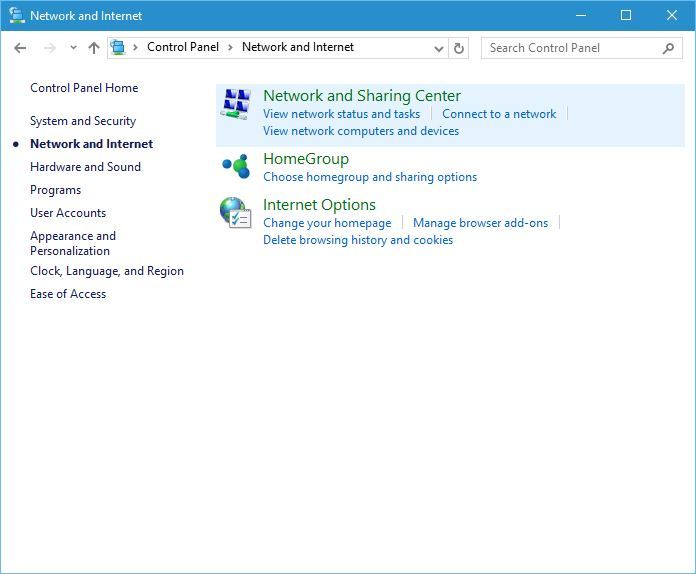
- When Control Panel opens, click on Network and Internet section.
- Now select Network and Sharing Center.
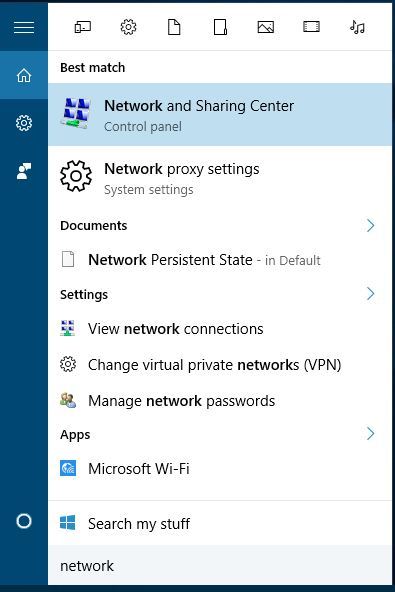
You can also access Network and Sharing Center by using Search bar. To do that just press Windows Key + S, enter Network and select Network and Sharing Center from the list of results.
Most users don’t know what to do when the Windows search box goes missing. Read this article to learn how you can get it back in just a couple of steps.
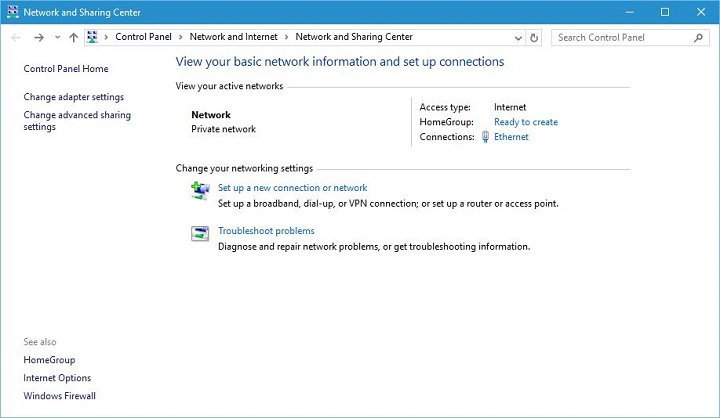
First thing that you’ll notice when you open Network and Sharing Center is the View your active networks section.
This section gives you all the important information such as the name of your currently connected network as well as the type of network you’re connected to.
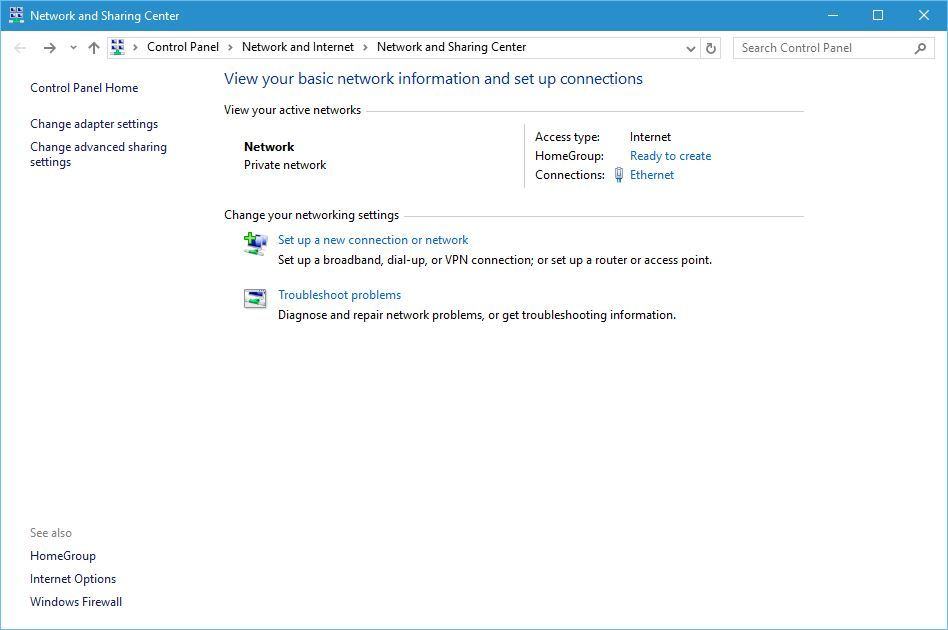
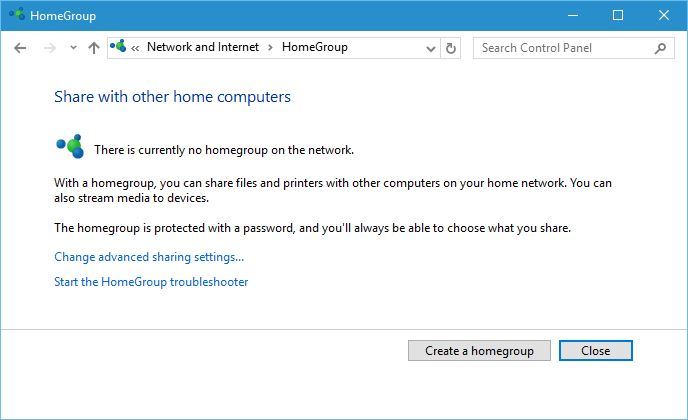
From this section you can also use create your Homegroup by clicking Ready to create link.
Homegroups allow computers on the same network to quickly and easily share files and printers, so if you have several computers connected to a network, you might want to create a Homegroup.
Next, there’s a Connections section, and you can click the connection that is listed there to see its details. For example, you can see the speed of your network connection and number of received or sent bytes.
If you want to know more about your connection, there’s a Details section that shows you the name of network adapter, current IP address, as well as your MAC address.
If you want to know more about IP addresses, we already answered what is an IP address in one of our previous articles.
Due to privacy and security concerns, we strongly recommend to secure your network with a reliable VPN (Virtual Private Network). Get now Cyberghost VPN, a leader in the VPN market. It protects your PC from attacks while browsing, masks your IP address and blocks all unwanted access.
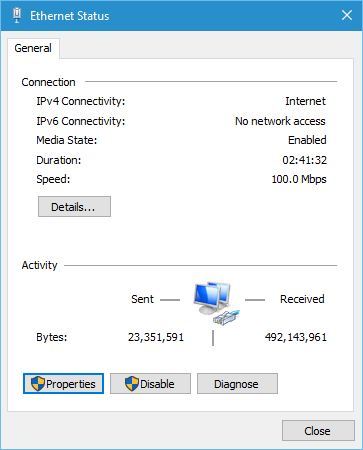
We should also mention that you can disable your network connection from this windows by clicking the Disable button.
Sometimes your network connection might have certain problems, and one of the simplest solutions is to disable your network connection and enable it again.
If disabling the connection doesn’t work, you can always use the Diagnose button that will scan for problems and automatically repair them.
Lastly, there’s a Properties button that allows you to update or remove your network driver and configure your network adapter. In addition, by using this window you can also set your IP address to be dynamic or static in your network.

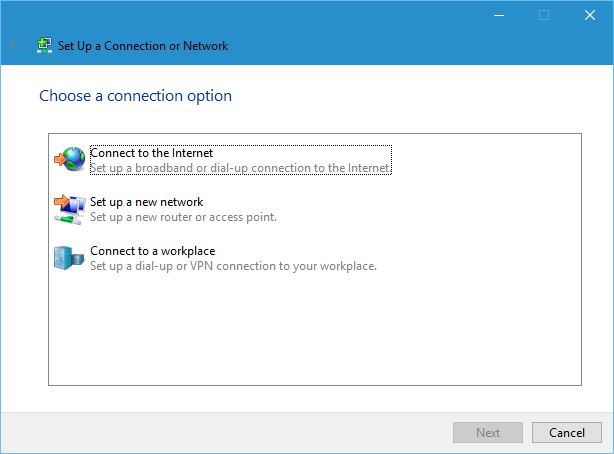
Next, we have Change your networking settings section. In this section you can create a new connection by using the Set up a new connection or network link.
When creating a new connection you’ll have three options: Connect to the Internet, Set up a new network and Connect to a workplace.
Depending on what you need, you just need to click one of the options and follow the instructions in order to create a new connection.
If you have issues with your network adapter, there’s a Troubleshoot problems section that allows you to automatically fix various problems.
When you open Troubleshoot problems section you’ll see Internet Connections, Shared Folders, HomeGroup, Network Adapter, Incoming Connections and Printer options.
By choosing one of these options you’ll run a troubleshooter for a specific option that will automatically scan and fix problems for you.

The troubleshooter fails to load with an error? Follow this useful guide and fix it in just a couple of simple steps.
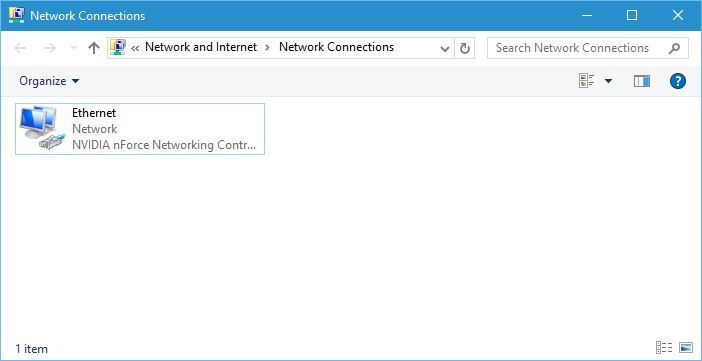
There are also several options available in the sidebar. Change adapter settings option will list all network adapters that you have and allow you to quickly disable them, rename them or change any of their settings.
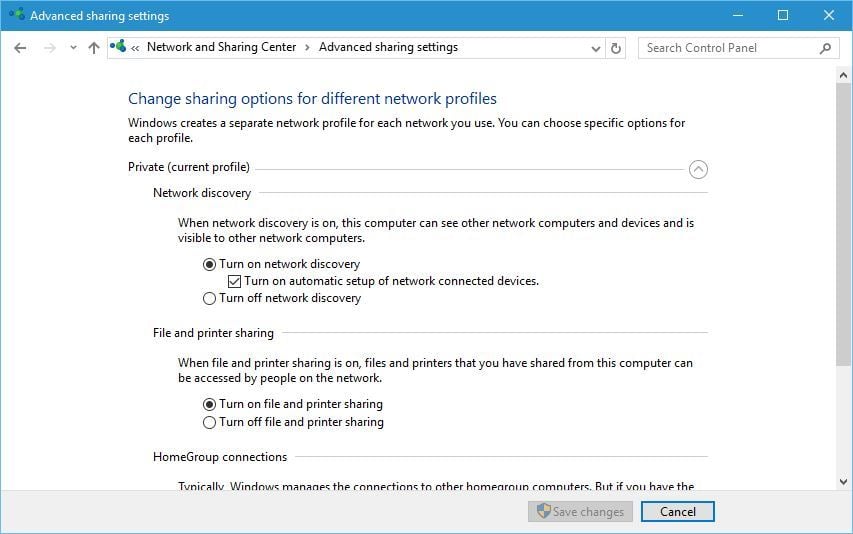
Next option is Change advanced sharing settings, and this option allows you to change how certain network profile works.
For example, you can turn network discovery on or off, thus allowing your computer to see other network devices that are connected to this network.
You can also turn on or off file and printer sharing, and change the way how homegroups work.
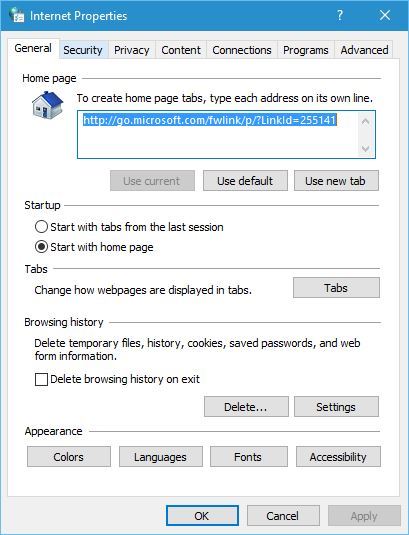
Next option is Internet Options, and from here you can change various settings related to your internet connection and Microsoft Edge or Internet Explorer.
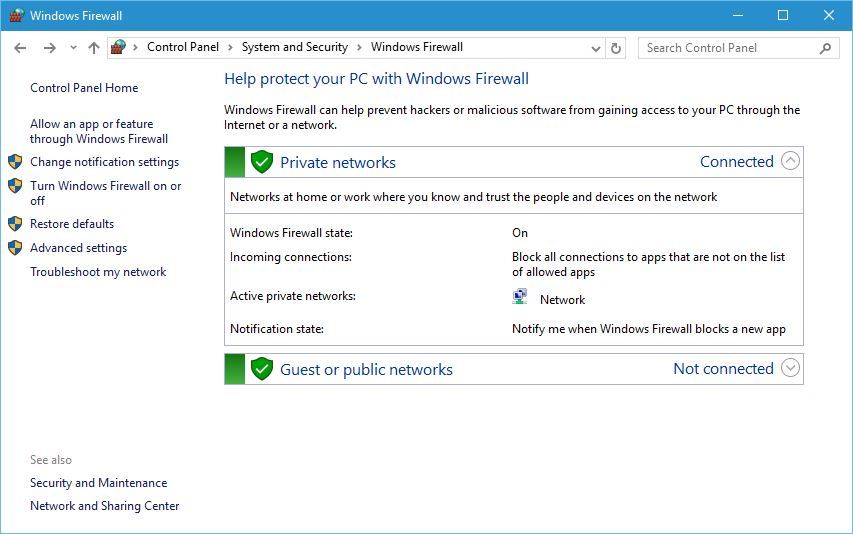
 Last option is Windows Firewall, and by using this option you can turn Windows Firewall on or off, change firewall rules or block certain application from accessing the Internet.
Network and Sharing Center on Windows 10 allows you to quickly access both basic and advanced options, and we hope that you now better understand how Network and Sharing Center works on Windows 10 after reading this article.
If you have any other questions, feel free to leave them in the comments section below.


