- How to Quickly Create a New, Blank Text File on Windows, Mac, and Linux
- Windows
- Use an Automator App to Create a New Blank Document in Any Folder on a Mac
- Use Terminal to Create a New Blank Document in Any Folder on a Mac
- Linux
- Use the Command Line to Create a New Blank Text Document in Linux
- Add a Blank Document Template to Nautilus in Ubuntu Linux
- Use the New Blank Document Template to Create a New Text File in Linux
- Save Time When Creating Text Files
- Создание, запись и чтение файла Create, write, and read a file
- Необходимые компоненты Prerequisites
- Создание файла Creating a file
- Запись в файл Writing to a file
- Чтение из файла Reading from a file
How to Quickly Create a New, Blank Text File on Windows, Mac, and Linux


Text files are useful for all kinds of things. Jot down a quick note, store information, and keep a log or journal are just a few of the things you can do with text files.
Today we’ll show you how to quickly create a new, blank text file in Windows, Mac, and Linux. In Windows, it’s easy. But on Mac and Linux, it requires some initial setup, then creating a new text file is quick and easy.
Windows
Microsoft provides a way of creating a new, blank text file using the right-click menu in File Explorer.
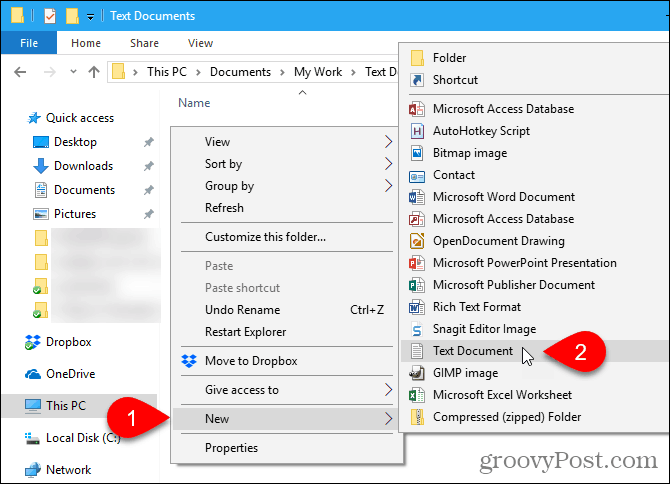
Open File Explorer and navigate to the folder where you want to create the text file. Right-click in the folder and go to New > Text Document.
 Text Document in Windows File Explorer» width=»670″ height=»484″ data-srcset=»https://www.groovypost.com/wp-content/uploads/2018/05/01-Go-to-New-Text-Document-Windows.png 670w, https://www.groovypost.com/wp-content/uploads/2018/05/01-Go-to-New-Text-Document-Windows-640×462.png 640w, https://www.groovypost.com/wp-content/uploads/2018/05/01-Go-to-New-Text-Document-Windows-300×217.png 300w» data-sizes=»(max-width: 670px) 100vw, 670px»/>
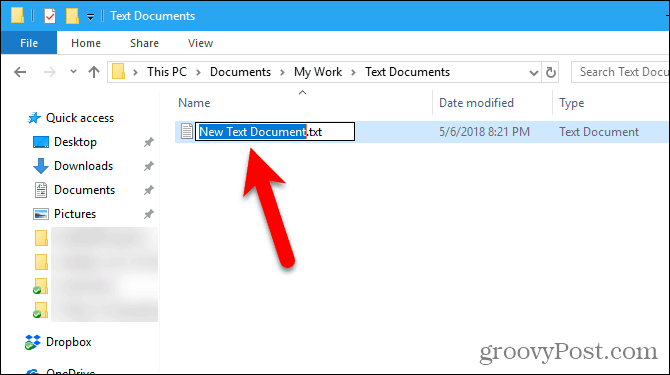
The text file is given a default name, New Text Document.txt, but the file name is highlighted. Type a new name for the file and press Enter or just press Enter to accept the default name.
There’s no built-in equivalent for Windows’ New > Text Document option on the Mac. But we can create a one-click option in Finder using the built-in Automator app.
Another option is to use a simple command in a Terminal window.
Use an Automator App to Create a New Blank Document in Any Folder on a Mac
Automator is a very useful automation tool included in macOS. We’ve covered the basics of using Automator, but today we’ll go over how to use it to add an option for creating a new text file in Finder.
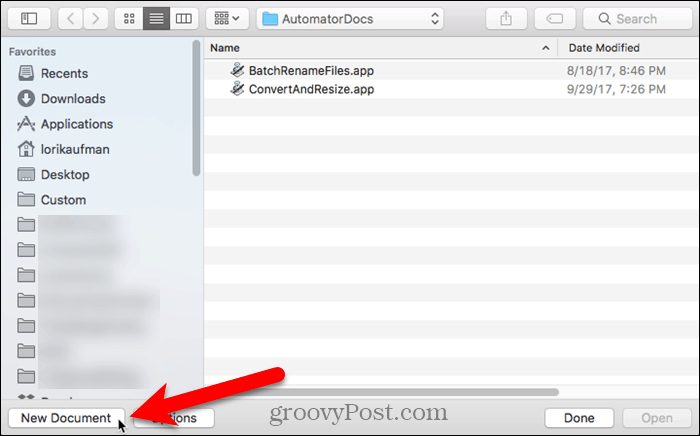
Launch Automator from the Applications folder. On the dialog box that displays, choose a location for the app you’re going to create. You can save it in the Applications folder. But if you’d rather not store it there, you can choose another location. Just make sure it’s a permanent location.
Once you’re in the chosen location, click New Document.
Automator asks what type of document you want to create. Click Application in the Choose a type for your document box. Then, click Choose.

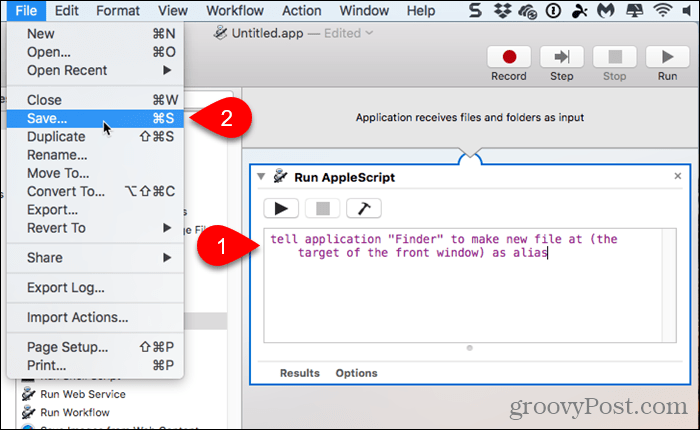
Make sure Actions is selected above the far-left pane and Library is selected in the pane. Scroll down in the list of actions and drag the Run AppleScript action to the workflow pane.

Delete the text currently in the Run AppleScript box. Copy the following line and paste it in the Run AppleScript box.
Then, go to File > Save.
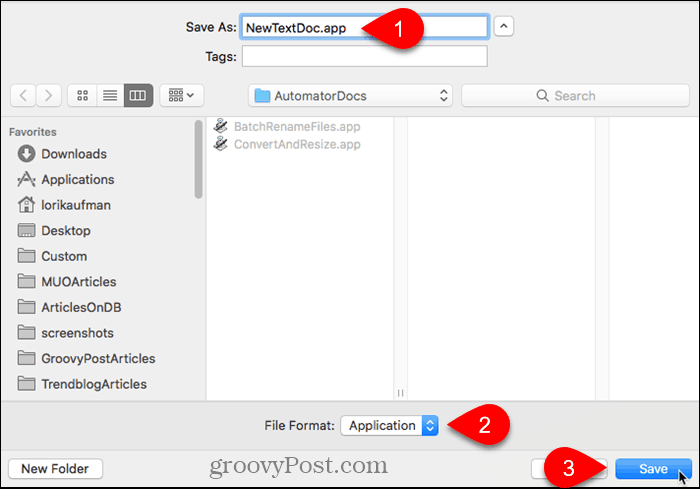
Enter a name for the app in the Save As box, keeping the “.app” extension.
Make sure Application is selected for File Format. This should be the default choice. Then, click Save.
Now that we’ve created our Automator app, we’re going to add it to the toolbar in Finder.
Open Finder and go to the folder where you saved the Automator app.
Hold down the Option and Cmd keys and drag the app file to the toolbar.
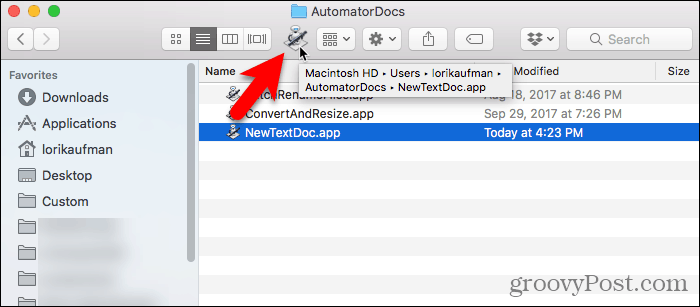
To use your new app to create a blank text file, go to the folder where you want to store the file and click the Automator button on the toolbar.
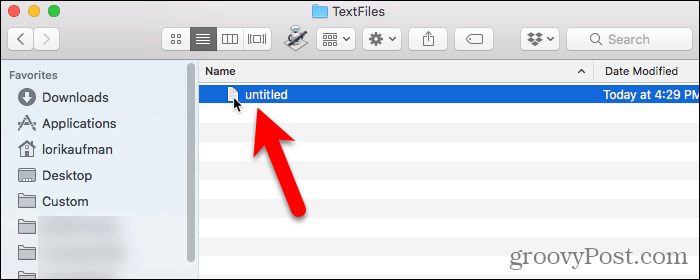
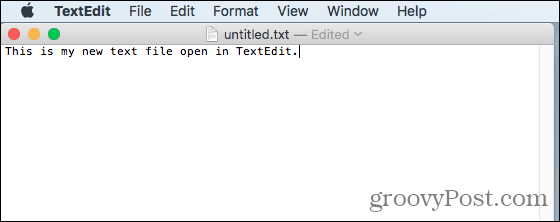
A text file called “untitled” is created in the folder.
This method of creating a blank, text file does not put the “.txt” file extension on the file. If you’re planning on transferring that file to a Windows machine, you should add the “.txt” file extension to the file. It’s harder to work with files that don’t have extensions in Windows.
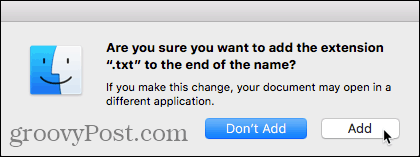
To add the “.txt” file extension, and change the file name, if you want, right-click on the text file. Then, select Rename and type a new name for the file, making sure to type: .txt at the end of the file name.
Click Add when the following dialog box displays.
Double-click the new text file to open it in your default text editor, add content to it, and save it.
Use Terminal to Create a New Blank Document in Any Folder on a Mac
You can also use the Terminal to create a new, blank text file. The easiest way is to open Finder and select the folder where you want to save the text file. Go to Finder > Services > New Terminal at Folder.
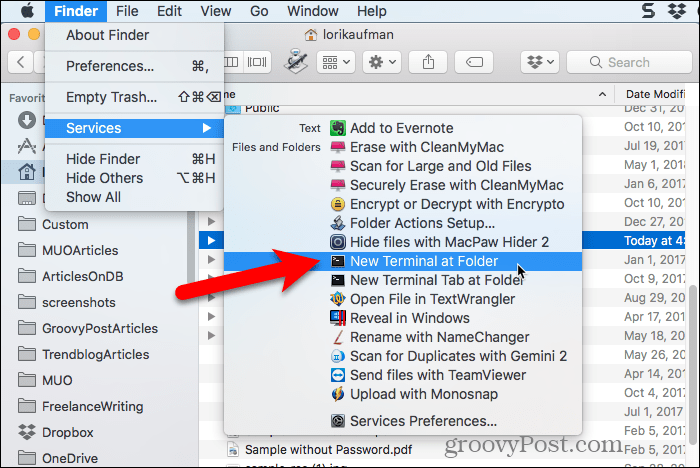
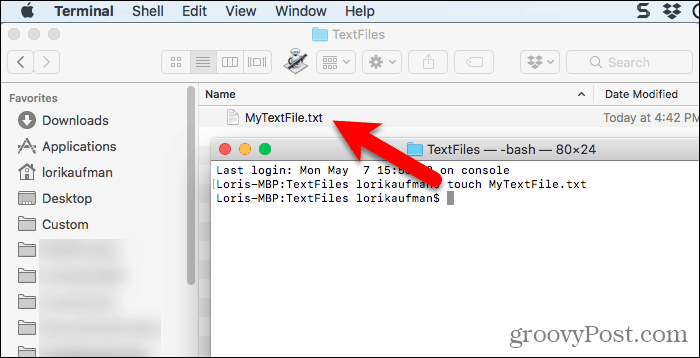
A Terminal window opens to the selected folder. Type the following command at the prompt, replacing “MyTextFile.txt” with the name you want to use for your text file.
The file is created and saved in your chosen folder. You can double-click on the file to open it in your default text editor, add content, and save it.
Linux
In Linux, you can use the command line to create a new, blank text file, in the same way you do on the Mac. If you prefer using Nautilus to deal with files, you can quickly create text files there also.
Use the Command Line to Create a New Blank Text Document in Linux
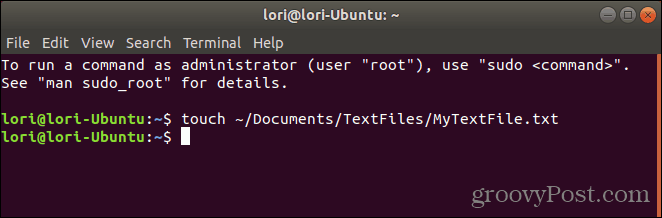
To use the command line to create a new, blank text file, press Ctrl + Alt + T to open a Terminal window. Type the following command and press Enter.
Change the path and the file name (
/Documents/TextFiles/MyTextFile.txt) to what you want to use. The tilde character (
) is a shortcut for your home directory. For example, the full path to my text file above is /home/lori/Documents/TextFiles/MyTextFile.txt.
This method works in any Linux distribution, but the shortcut key to open a Terminal window might be different.
Add a Blank Document Template to Nautilus in Ubuntu Linux
We’re going to cover how to add an option to Nautilus in Ubuntu to create a new text file. File managers in other distributions of Linux, like Linux Mint, Fedora, Red Hat, etc., may already have this type of option. If not, you can use the command line method mentioned above.
Prior to Ubuntu 17.10, Nautilus contained an option on the right-click menu that allowed you to create a new, blank document in the current folder. But that option was removed in 17.10 and 18.04. We’ll show you how to add the option back to Nautilus.
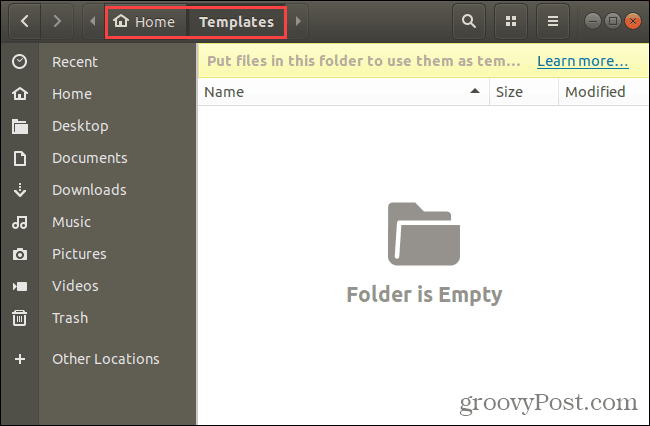
In your Home directory, you’ll see a folder called Templates. Initially, it’s empty. Adding files to this folder allows you to quickly create new files using the right-click menu in Nautilus.
You can use the touch command we talked about in the previous section to create a new blank document template file.
Press Ctrl + Alt + T to open a Terminal window. Then, type the following command and press Enter.
That’s a backslash and a space between “Empty” and “Document”. If there’s a space in your path or file name, you must put a backslash before it.
A new file called “Empty Document” is added to your Templates directory. You can use a different name for the template file but be sure to save it in the Templates directory.
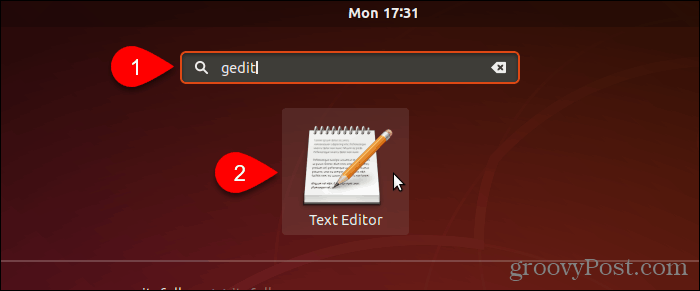
If you’re not comfortable with the command line, you can create the blank document template using gedit. Hit the Windows key and type: gedit in the search box. Then, click the Text Editor icon that displays.
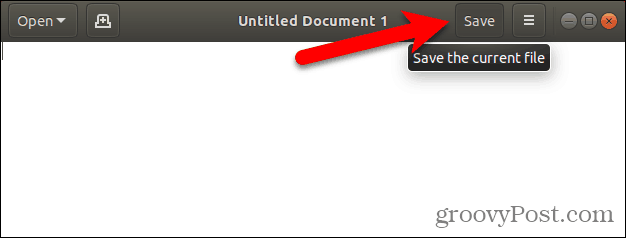
Click Save without entering any text in the file.
Go to the Templates directory in your Home directory.
Enter a name, like “Empty Document”, in the Name box and click Save.
![]()
Use the New Blank Document Template to Create a New Text File in Linux
Once you’ve created a blank document template using the steps in the previous section, you can now create a new text file in Nautilus.
Right-click in any directory and go to New Document > Empty Document. The Empty Document option shows whatever you named your template file, so the option may be different for you.
![]()
Save Time When Creating Text Files
Of course, you can always use a text editor to create a new text file. But the methods we showed you here are handy if you create a lot of text files.
Создание, запись и чтение файла Create, write, and read a file
Важные API Important APIs
Считайте и запишите файл с помощью объекта StorageFile. Read and write a file using a StorageFile object.
Полный пример: пример доступа к файлам. For a complete sample, see the File access sample.
Необходимые компоненты Prerequisites
Общее представление об асинхронном программировании для приложений универсальной платформы Windows (UWP) . Understand async programming for Universal Windows Platform (UWP) apps
Описание процесса написания асинхронных приложений на C# или Visual Basic см. в статье Вызов асинхронных API в C# и Visual Basic. You can learn how to write asynchronous apps in C# or Visual Basic, see Call asynchronous APIs in C# or Visual Basic. Чтобы узнать, как создавать асинхронные приложения с помощью C++/WinRT, ознакомьтесь с разделом Параллельная обработка и асинхронные операции с помощью C++/WinRT. To learn how to write asynchronous apps in C++/WinRT, see Concurrency and asynchronous operations with C++/WinRT. Чтобы узнать, как создавать асинхронные приложения на C++/CX, ознакомьтесь с разделом Асинхронное программирование на языке C++/CX. To learn how to write asynchronous apps in C++/CX, see Asynchronous programming in C++/CX.
Знание порядка вызова файла для считывания, записи или выполнения обеих этих операций. Know how to get the file that you want to read from, write to, or both
Сведения о вызове файла с помощью средства выбора файлов см. в разделе Открытие файлов и папок с помощью средства выбора. You can learn how to get a file by using a file picker in Open files and folders with a picker.
Создание файла Creating a file
Ниже приведен порядок создания файла в локальной папке приложения. Here’s how to create a file in the app’s local folder. Заменим его, если он уже существует. If it already exists, we replace it.
Запись в файл Writing to a file
Ниже приведен порядок записи в доступный для записи файл на диске с помощью класса StorageFile. Here’s how to write to a writable file on disk using the StorageFile class. Первое действие для каждого из способов записи в файл (если запись в файл происходит не сразу же после его создания) — это получение файла с помощью StorageFolder.GetFileAsync. The common first step for each of the ways of writing to a file (unless you’re writing to the file immediately after creating it) is to get the file with StorageFolder.GetFileAsync.
Запись текста в файл Writing text to a file
Запишите текст в файл, вызвав метод FileIO.WriteTextAsync. Write text to your file by calling the FileIO.WriteTextAsync method.
Запись байтов в файл с использованием буфера (2 действия) Writing bytes to a file by using a buffer (2 steps)
Сначала вызовите CryptographicBuffer.ConvertStringToBinary для получения буфера байтов (на основе строки), которые требуется записать в файл. First, call CryptographicBuffer.ConvertStringToBinary to get a buffer of the bytes (based on a string) that you want to write to your file.
Затем запишите байты из буфера в файл, вызвав метод FileIO.WriteBufferAsync. Then write the bytes from your buffer to your file by calling the FileIO.WriteBufferAsync method.
Запись текста в файл с использованием потока (4 действия) Writing text to a file by using a stream (4 steps)
Сначала откройте файл, вызвав метод StorageFile.OpenAsync. First, open the file by calling the StorageFile.OpenAsync method. По завершении операции открытия будет возвращен поток содержимого файла. It returns a stream of the file’s content when the open operation completes.
Далее получите выходной поток, вызвав метод IRandomAccessStream.GetOutputStreamAt из stream . Next, get an output stream by calling the IRandomAccessStream.GetOutputStreamAt method from the stream . Если вы используете C#, вставьте его в оператор using, чтобы управлять временем существования выходного потока. If you’re using C#, then enclose this in a using statement to manage the output stream’s lifetime. Если вы используете C++/WinRT, то можете контролировать его время существования, заключив его в блок или задав значение nullptr по завершении. If you’re using C++/WinRT, then you can control its lifetime by enclosing it in a block, or setting it to nullptr when you’re done with it.
Теперь добавьте этот код (если вы используете C#, то в существующий оператор using) для записи в поток вывода, создав новый объект DataWriter и вызвав метод DataWriter.WriteString. Now add this code (if you’re using C#, within the existing using statement) to write to the output stream by creating a new DataWriter object and calling the DataWriter.WriteString method.
Наконец, добавьте этот код (если вы используете C#, то во внутренний оператор using) для сохранения текста в файл с помощью DataWriter.StoreAsync и закрытия потока с помощью IOutputStream.FlushAsync. Lastly, add this code (if you’re using C#, within the inner using statement) to save the text to your file with DataWriter.StoreAsync and close the stream with IOutputStream.FlushAsync.
Рекомендации по записи в файл Best practices for writing to a file
Дополнительные сведения и рекомендации см. в разделе Рекомендации по записи в файлы. For additional details and best practice guidance, see Best practices for writing to files.
Чтение из файла Reading from a file
Ниже приведен порядок чтения из файла на диске с помощью класса StorageFile. Here’s how to read from a file on disk using the StorageFile class. Первое действие для каждого из способов чтения из файла — это получение файла с помощью StorageFolder.GetFileAsync. The common first step for each of the ways of reading from a file is to get the file with StorageFolder.GetFileAsync.
Чтение текста из файла Reading text from a file
Чтобы выполнить чтение текста из файла, вызовите метод FileIO.ReadTextAsync. Read text from your file by calling the FileIO.ReadTextAsync method.
Чтение текста из файла с использованием буфера (2 действия) Reading text from a file by using a buffer (2 steps)
Затем используйте объект DataReader, чтобы сначала считать длину буфера, а затем его содержимое. Then use a DataReader object to read first the length of the buffer and then its contents.
Чтение текста из файла с использованием потока (4 действия) Reading text from a file by using a stream (4 steps)
Откройте поток для файла, вызвав метод StorageFile.OpenAsync. Open a stream for your file by calling the StorageFile.OpenAsync method. По завершении операции будет возвращен поток содержимого файла. It returns a stream of the file’s content when the operation completes.
Получите размер потока для последующего использования. Get the size of the stream to use later.


