- Fixed and always on top popup window in a Chrome extension
- 1 Answer 1
- 🥀 Bad news.
- 🎥 Alternative for images
- 💉 Alternative using context scripts
- Chrome Packaged app, Always on top window
- 2 Answers 2
- How to Make or Disable Chrome Always on Top Windows 10 [MiniTool News]
- Summary :
- How to Make Chrome Always on Top in Windows 10 – 3 Ways
- Bottom Line
- ABOUT THE AUTHOR
- 3 Ways to Keep a Window Always on Top on Windows 10
- 1. Use a Keyboard Shortcut with an Always on Top AutoHotkey Script
- 2. Use Your Mouse with DeskPins
- 3. Use a System Tray Menu with TurboTop
- Bring the Always-on-Top Feature to All Windows
Fixed and always on top popup window in a Chrome extension
I’m working on a Google Chrome extension and I need to make a popup window that is fixed in a corner and always on top of the other windows.
I leave a reference image:

1 Answer 1
🥀 Bad news.
I’m sorry but it’s not possible anymore to force a window to stay always on top. However, if you only need to open a window in the bottom-right corner of the screen, take a look at this other answer: Getting a Chrome app window to open at the bottom right of screen.
Before, one option was to use chrome.windows.create(< type: 'panel' >) . Panels could have any size and position, supported the always on top functionality, could display any arbitrary piece of code. But they are gone now, as you can see on the docs:
Deprecated in this API. A Chrome App panel-style window. Extensions can only see their own panel windows.
The main reason for the removal was that it’s too expensive to maintain, as you can read in this article.
Another option used to be webKitNotifications.createHTMLNotification() , but that one is gone too:
Warning: webKitNotifications.createHTMLNotification() in the web notifications API has been deprecated. The new web notifications API only allows text. Chrome notifications API will be promoted to stable soon and web notifications will be updated to use the new rich notifications format.
You are not alone though. A lot of extension like Always On Top for YouTube™ or Picture in Picture Viewer relied on the always on top functionality and you can see from the bad reviews that they haven’t been able or willing to find alternative solutions.
🎥 Alternative for images
One alternative to display only images (might not work for you as you probably need sound as well) would be to use an image notification with a canvas image that you can generate and update dynamically from a background script.
With this approach, you might be able to display animations/videos, but I’m not sure how smooth it would be.
💉 Alternative using context scripts
If you want to permanently display any arbitrary code to the user, you could use the tabs API to keep track of the active tab and insert custom code on it using executeScript and insertCSS .
The three main drawbacks of this approach are that:
The content won’t appear instantly, especially in the case of videos which need to load first, so when users switch tabs, they will actually notice how the injected content appears again and loads whatever it has to load.
If Chrome is minimized or partially off-screen, they might not see the injected content.
Chrome Packaged app, Always on top window
i am writing a text editor, i need the app window be always on top when switching to browser or e-book reader software. as i know ,for windows users, chrome doesn’t provide any solution. is there any parameter to send when creating window to make window always on top?
or can i provide any button in app to turn this feature on or off?
Code i use to create window in bg.js:
thank for any suggestion.

2 Answers 2
As Ben Wells mentioned above, this feature is now available in the stable release (either v33 or v34) via the alwaysOnTop option in chrome.app.windows.create . Note that special permissions are required in the manifest.json file. Example:
background.js manifest.json
This seems to have been added in issue 26427002, gone stable in issue 159523002 and issue 48113024 thanks to the community!
I had looked into this a while back and wanted to catalog my findings since historically there were some discrepancies in the documentation which previously stated the name of the required permission was alwaysOnTop , but using this caused a «permission is unknown» error.
Reading through the original proposal for this feature lead me to issue 326361 which mentions the permission setting is actually called alwaysOnTopWindows . Using this one back then, however, yielded a «requires Google Chrome dev channel or newer» error (probably since the feature wasn’t yet stable).
I did find it peculiar from browsing the source code, these two permissions might be aliases of each other, but that might be because I don’t fully understand the Chromium codebase.
How to Make or Disable Chrome Always on Top Windows 10 [MiniTool News]
By Alisa | Follow | Last Updated November 27, 2020
Summary :

This post introduces how to make Chrome always on top of other windows in Windows 10, and how to disable it when you want. FYI, MiniTool Software offers you free data recovery software, disk partition manager, video editor, and more.
How to make Chrome always on top in Windows 10? Windows or Chrome doesn’t have a feature to let you directly set Chrome always on top of other Windows. But you have some ways to do it.
How to Make Chrome Always on Top in Windows 10 – 3 Ways
There are some tools that allows you to make a window always on top on Windows 10. Check them below.
#1. AutoHotkey
AutoHotkey is a free application letting you create scripts to perform several actions with one keyboard shortcut. You can use this tool to create a script that make Chrome always on top in Windows 10 by pressing Ctrl + Space keyboard shortcut.
AutoHotkey is running in the background and locates in the system tray in Windows 10. Download and install AutoHotkey on your Windows computer.
- After you install AutoHotkey, you can right-click on your desktop and select New -> AutoHotkey Script. Name the new script file Always on Top.
- Next right-click the new scrip file and click Edit Script.
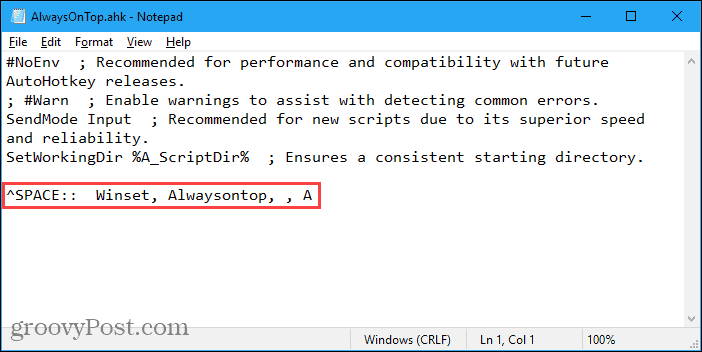
- Then you can paste the ^SPACE:: Winset, Alwaysontop, , A in the Notepad window. Save the file and close it.
- At last, you can double-click the script to run it, and it will appear in the system tray and runs in the background.
- Now you can press Ctrl + Space keyboard shortcut to set any active window always on top. Then when you use Chrome browser, you can press Ctrl + Space to make Chrome always on top, and press Ctrl + Space again to disable Chrome always on top.
#2. DeskPins
You can also use DeskPins program to set Chrome always on top of all other windows. Check how to do it below.
- Download and install DeskPins on your Windows computer from its official website. Run it after installation, and its icon will show in the system tray.
- If you want to make Chrome always on top, you can click DeskPins icon in the system tray and your mouse will turn into a pin.
- Then you can click the title bar of Google Chrome to pin it. You should see a Red pin icon on the title bar. This will make Chrome always on top. To disable it, you can click the Red pin icon again to disable Chrome always on top.

This post offers a guide for how to download and install Google Chrome for Windows 10 PC 64 bit or 32 bit. Download Google Chrome latest version.
#3. TurboTop
TurboTop is also a tool that can runs from the system tray. You can also use it to choose and set a window to be always on top on Windows.
- You can go to its official site to download and install it on your Windows computer.
- After installation, you can click the TurboTop icon at the system tray to view all your opened windows. Click Google Chrome to make it always on top. To make it no longer on the top, you can click Chrome again.
Bottom Line
By using one of the three tools, Chrome will be always on the top when you do other thing on your Windows computer.

Can’t uninstall Google Chrome from Windows 10? Check the 4 solutions to fix unable to uninstall Google Chrome in Windows 10 computer.
ABOUT THE AUTHOR

Position: Columnist
Alisa is a professional English editor with 4-year experience. She loves writing and focuses on sharing detailed solutions and thoughts for computer problems, data recovery & backup, digital gadgets, tech news, etc. Through her articles, users can always easily get related problems solved and find what they want. In spare time, she likes basketball, badminton, tennis, cycling, running, and singing. She is very funny and energetic in life, and always brings friends lots of laughs.
3 Ways to Keep a Window Always on Top on Windows 10


When you are working in Windows with limited screen space, it’s useful to have certain windows stay on top of others. Some programs in Windows automatically incorporate this “always on top” feature, but most programs don’t, and Windows doesn’t include this feature either.
Today we’ll cover three ways to easily add the “always on top” feature to every single program in Windows.
1. Use a Keyboard Shortcut with an Always on Top AutoHotkey Script
AutoHotkey is a free program that allows you to create scripts to perform multiple actions with a single keyboard shortcut. It runs in the background and sits in the system tray.
We’re going to use AutoHotkey to create a script that will keep a selected window on top of all others when you press Ctrl + Spacebar when that window is active. We’ll show you the script and explain how it works. But we’ll also provide a downloadable AutoHotkey script file you can use.
Download and install AutoHotkey and then run it.
Download the AlwaysOnTop.ahk script file, extract the .zip file, and put the script in a folder on your hard drive that won’t be moved or deleted.
The script contains some comments and then the following command:
This command sets the currently active window to always be on top when you press Ctrl + Spacebar. If you’d rather use a different key combination, you can change the first part of the command, “^SPACE“. The “^” character represents the Ctrl key. You’ll find the symbols to use for other hotkeys in the Hotkey Modifier Symbols section on this AutoHotkey help page.
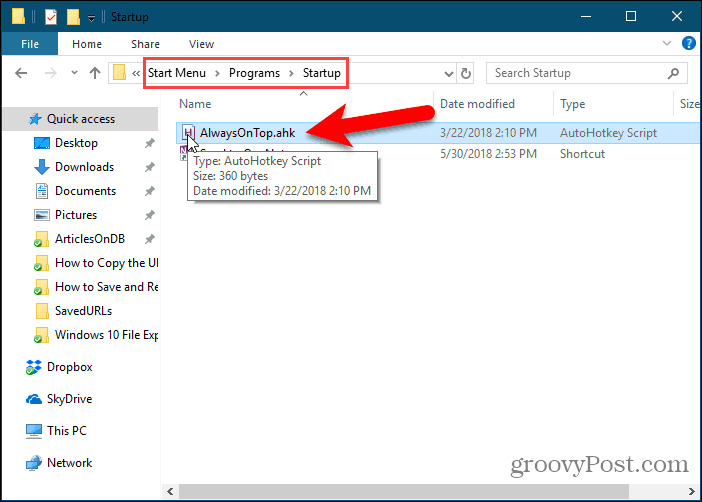
You can put the script in the Windows startup folder (%AppData%\Microsoft\Windows\Start Menu\Programs\Startup), so it starts automatically when Windows starts.
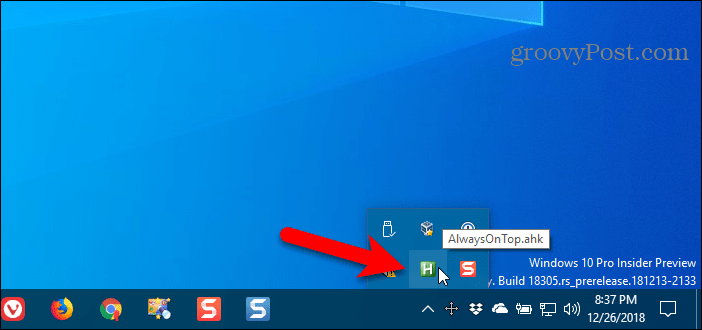
The AutoHotkey script stays in the system tray.
To make the active window always on top, press Ctrl + Spacebar (or the keyboard shortcut you assigned). Press the keyboard shortcut again to disable “always on top” for the active window.
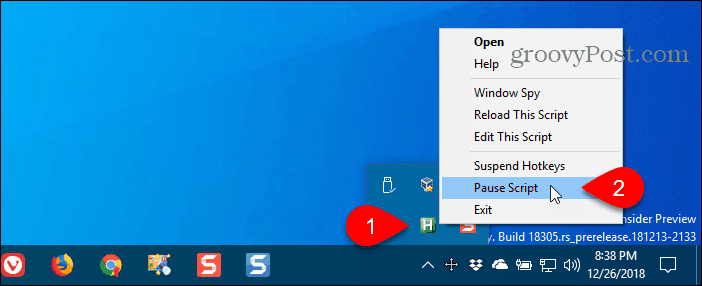
For script options, right-click on the AutoHotkey icon in the system tray.
2. Use Your Mouse with DeskPins
DeskPins provides pins you can grab and use to keep any window on top of all other windows. The program sits in the system tray and uses minimal resources.
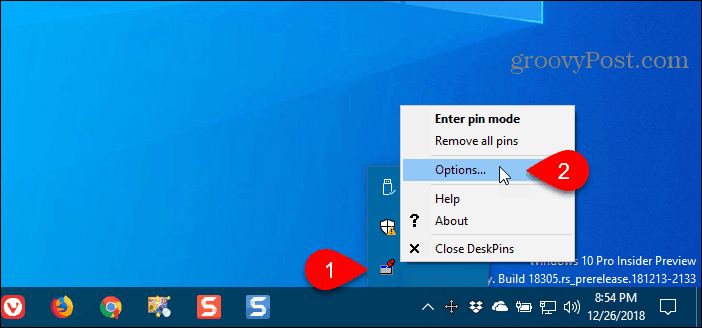
Download and install DeskPins. Run the program, right-click the icon in the system tray, and select Options to change the Pins, Autopin, and Hotkeys settings.
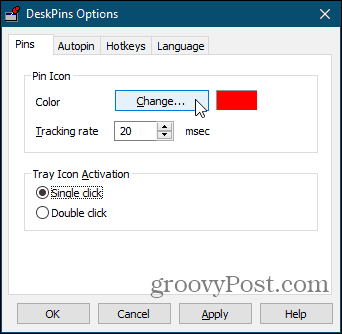
On the Pins tab, you can change the color of the pins. The Tracking rate controls how often each pin checks the pinned window’s position and state. Lower values make the pins more responsive. You can enter any number from 10 to 1000 msec (milliseonds).
If you have an older computer, you may want to increase the Tracking rate number to avoid slowing down your computer.
You can also choose Single click or Double click under Tray Icon Activation to indicate how you get pins from the DeskPins system tray icon. The default is Single click.
You can have DeskPins automatically pin certain types of windows using rules on the Autopin tab.
Check the Enable box and then click Add to add a new rule. Use the check boxes next to the rules to enable and disable individual rules.
Click Help to access the DeskPins help file for more information about automatically pinning windows.

DeskPins provides default shortcuts for entering pin mode and toggling the active window pin. You can change these shortcuts on the Hotkeys tab.

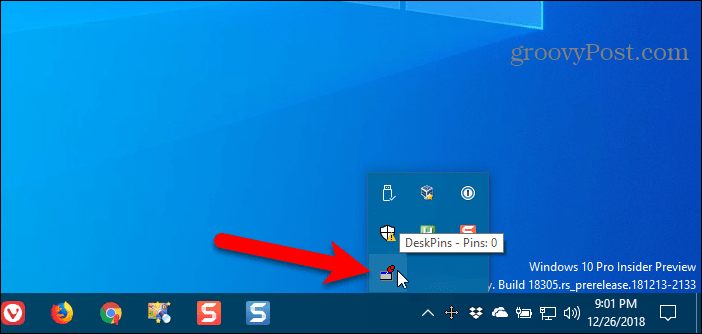
To pin a window on top, click (or double-click, depending on the setting) the DeskPins icon in the system tray.
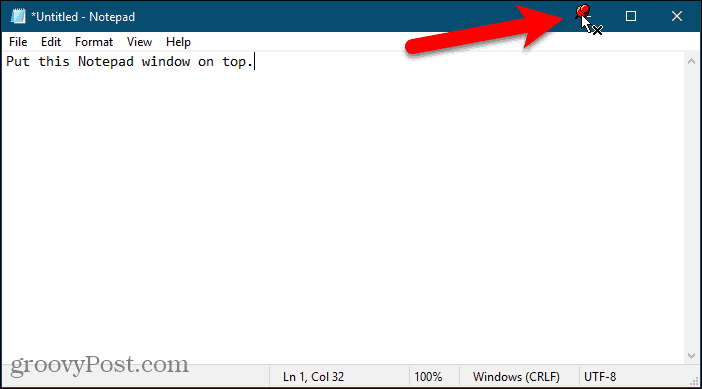
Then, click the title bar on the window you want to keep always on top.
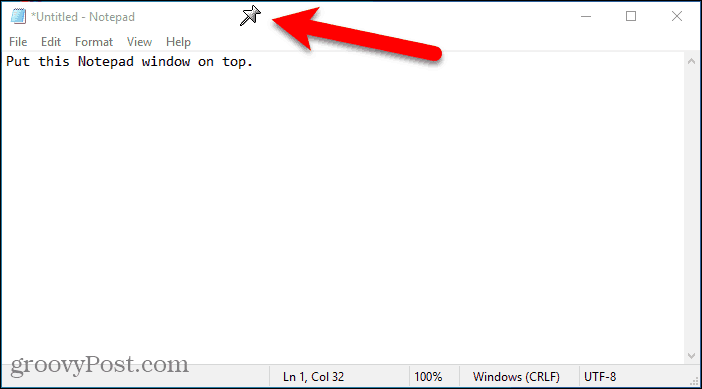
A pin displays on the title bar of the chosen window in the color you specified, or in the default color red.
Click the pin again to disable always on top for the window.
3. Use a System Tray Menu with TurboTop
TurboTop also sits in your system tray like DeskPins. But it operates differently.
Download and install TurboTop. Then, run the program.
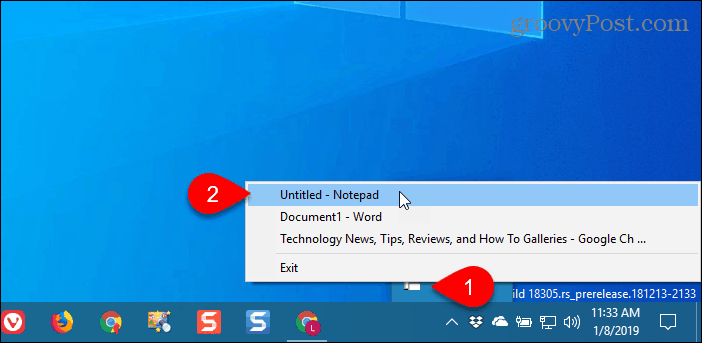
To keep a window always on top, click the TurboTop icon in the system tray. A list of all open windows displays. Select the title of the window you want.
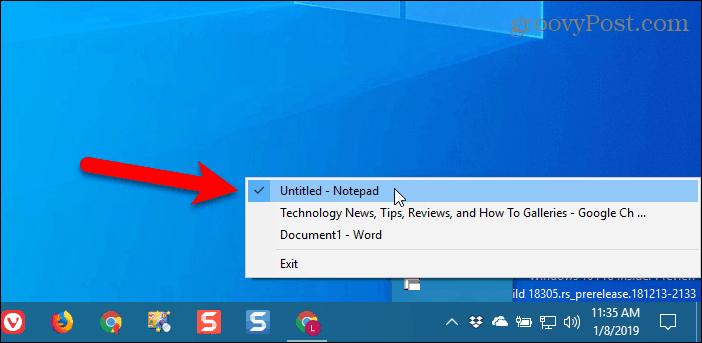
Any windows you choose to be always on top are indicated with a check mark on the TurboTop menu.
To stop keeping a window always on top, click the TurboTop icon in the system tray and select that window again, so there’s no check mark next to the window name on the menu.
Bring the Always-on-Top Feature to All Windows
Whether you like using keyboard shortcuts or prefer using the mouse, there’s an easy solution for keeping windows always on top. If you’ve found other options for keeping windows always on top, let us know in the comments.


