- Window On Top 1.2
- Информация о Window On Top 1.2
- Изменения в Window On Top 1.2
- Скачать Window On Top 1.2
- Внимание!
- window-on-top.exe
- Отзывы
- 3 Ways to Keep a Window Always on Top on Windows 10
- 1. Use a Keyboard Shortcut with an Always on Top AutoHotkey Script
- 2. Use Your Mouse with DeskPins
- 3. Use a System Tray Menu with TurboTop
- Bring the Always-on-Top Feature to All Windows
- Window On Top Portable
- Editors’ Review
- WindowTop
- Set window on top, make it dark, transparent and more
- WindowTop
- Set Window On Top
- Click Through
- Set Transparency
- Shrink Windows
- Dark/Reading Mode
- Nice Looking
- Good for coding
Window On Top 1.2
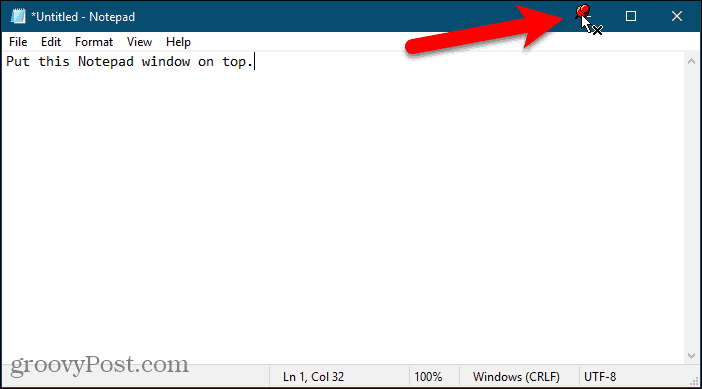
Window On Top – это небольшое бесплатное приложение, которое позволяет установливать выбранное окно поверх остальных. Активировать функцию можно при помощи комбинации Ctrl+F8 или путем перетаскивания специального курсора на выбранное окно.
Информация о Window On Top 1.2
| Название | Window On Top 1.2 |
| Операционные системы | |
| Статус | Freeware |
| Раздел | Система |
| Тип | Дополнительные компоненты |
| Язык | Английский |
| Размещено в каталоге | 13 июля 2011 |
Изменения в Window On Top 1.2
Исправлены незначительные ошибки.
Полный список изменения Window On Top 1.2 на английском
Minor bugs fixes.
Скачать Window On Top 1.2
Внимание!
Несмотря на то, что перед публикацией мы проверяем файлы несколькими антивирусами, увы, в современном мире это не гарантирует их 100% безвредности. В этой связи редакция портала F1CD.ru не несёт ответственности за ущерб, который может быть причинён Window On Top 1.2 и любым другим ПО, а также настоятельно рекомендует проверять загруженные программы Вашим антивирусом.
window-on-top.exe
Вес файла: 644,8 кб
MD5-хеш: 544485cc09c70c79cd885c7a1de7960c
Отзывы
![]()
privet vsem kak aktivirovat eto praduk?? otete pajalusta
![]()
![]()
благодарю у вас действительно получилось быстро и легко >>» >>>» >>>» >>>» >
3 Ways to Keep a Window Always on Top on Windows 10


When you are working in Windows with limited screen space, it’s useful to have certain windows stay on top of others. Some programs in Windows automatically incorporate this “always on top” feature, but most programs don’t, and Windows doesn’t include this feature either.
Today we’ll cover three ways to easily add the “always on top” feature to every single program in Windows.
1. Use a Keyboard Shortcut with an Always on Top AutoHotkey Script
AutoHotkey is a free program that allows you to create scripts to perform multiple actions with a single keyboard shortcut. It runs in the background and sits in the system tray.
We’re going to use AutoHotkey to create a script that will keep a selected window on top of all others when you press Ctrl + Spacebar when that window is active. We’ll show you the script and explain how it works. But we’ll also provide a downloadable AutoHotkey script file you can use.
Download and install AutoHotkey and then run it.
Download the AlwaysOnTop.ahk script file, extract the .zip file, and put the script in a folder on your hard drive that won’t be moved or deleted.
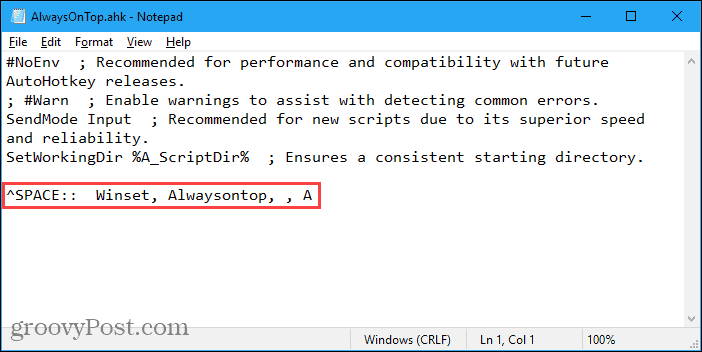
The script contains some comments and then the following command:
This command sets the currently active window to always be on top when you press Ctrl + Spacebar. If you’d rather use a different key combination, you can change the first part of the command, “^SPACE“. The “^” character represents the Ctrl key. You’ll find the symbols to use for other hotkeys in the Hotkey Modifier Symbols section on this AutoHotkey help page.
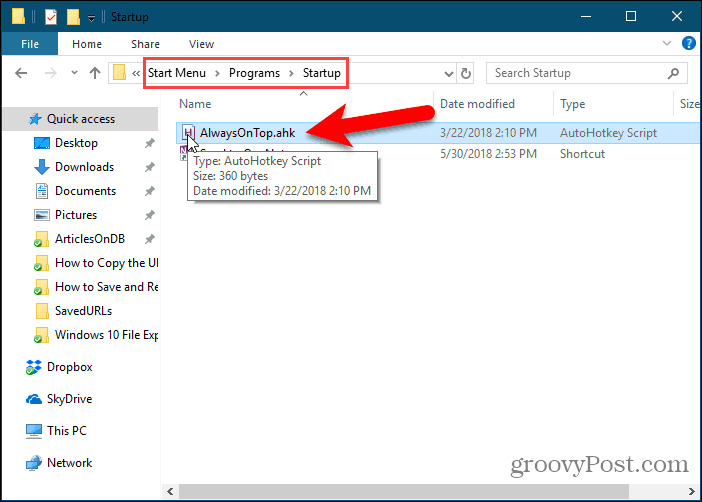
You can put the script in the Windows startup folder (%AppData%\Microsoft\Windows\Start Menu\Programs\Startup), so it starts automatically when Windows starts.
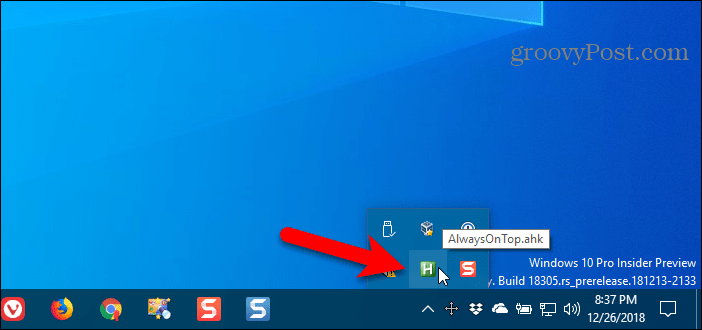
The AutoHotkey script stays in the system tray.
To make the active window always on top, press Ctrl + Spacebar (or the keyboard shortcut you assigned). Press the keyboard shortcut again to disable “always on top” for the active window.
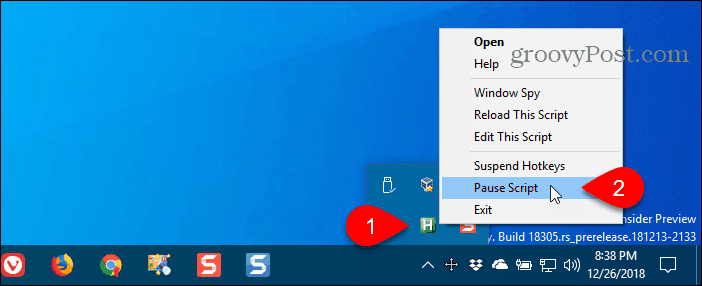
For script options, right-click on the AutoHotkey icon in the system tray.
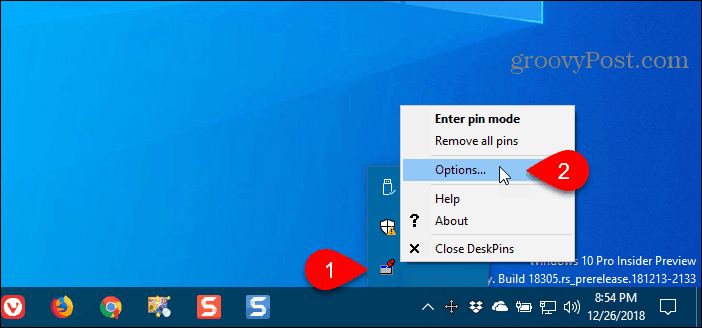
2. Use Your Mouse with DeskPins
DeskPins provides pins you can grab and use to keep any window on top of all other windows. The program sits in the system tray and uses minimal resources.
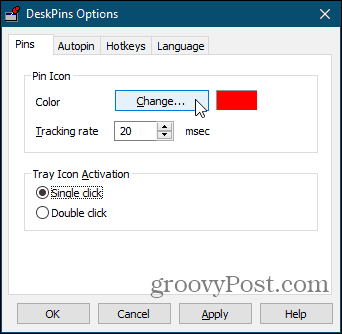
Download and install DeskPins. Run the program, right-click the icon in the system tray, and select Options to change the Pins, Autopin, and Hotkeys settings.
On the Pins tab, you can change the color of the pins. The Tracking rate controls how often each pin checks the pinned window’s position and state. Lower values make the pins more responsive. You can enter any number from 10 to 1000 msec (milliseonds).
If you have an older computer, you may want to increase the Tracking rate number to avoid slowing down your computer.
You can also choose Single click or Double click under Tray Icon Activation to indicate how you get pins from the DeskPins system tray icon. The default is Single click.
You can have DeskPins automatically pin certain types of windows using rules on the Autopin tab.
Check the Enable box and then click Add to add a new rule. Use the check boxes next to the rules to enable and disable individual rules.
Click Help to access the DeskPins help file for more information about automatically pinning windows.

DeskPins provides default shortcuts for entering pin mode and toggling the active window pin. You can change these shortcuts on the Hotkeys tab.

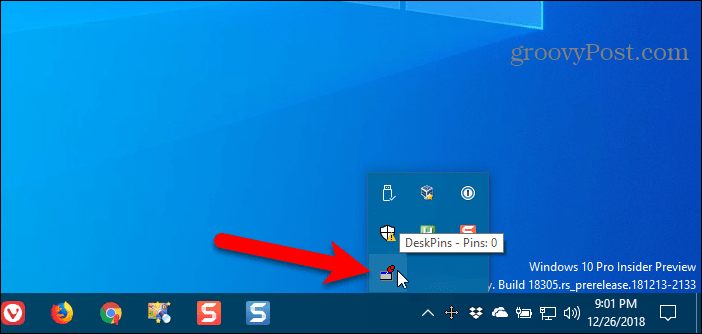
To pin a window on top, click (or double-click, depending on the setting) the DeskPins icon in the system tray.
Then, click the title bar on the window you want to keep always on top.
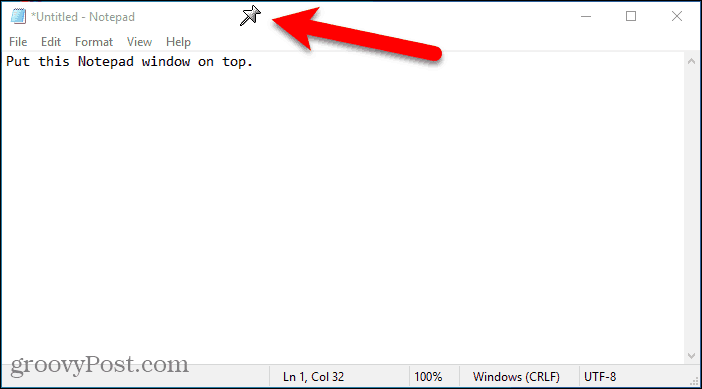
A pin displays on the title bar of the chosen window in the color you specified, or in the default color red.
Click the pin again to disable always on top for the window.
3. Use a System Tray Menu with TurboTop
TurboTop also sits in your system tray like DeskPins. But it operates differently.
Download and install TurboTop. Then, run the program.
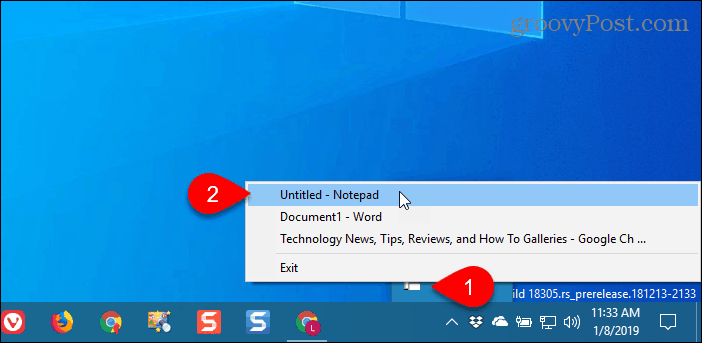
To keep a window always on top, click the TurboTop icon in the system tray. A list of all open windows displays. Select the title of the window you want.
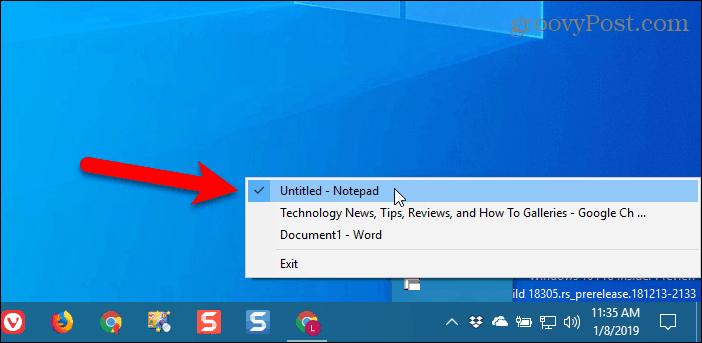
Any windows you choose to be always on top are indicated with a check mark on the TurboTop menu.
To stop keeping a window always on top, click the TurboTop icon in the system tray and select that window again, so there’s no check mark next to the window name on the menu.
Bring the Always-on-Top Feature to All Windows
Whether you like using keyboard shortcuts or prefer using the mouse, there’s an easy solution for keeping windows always on top. If you’ve found other options for keeping windows always on top, let us know in the comments.
Window On Top Portable

Editors’ Review
Window on Top Portable ensures you never lose the window you’re working in beneath a pile of other windows by keeping it on top at all times. There are many reasons you might want to keep one window on top of others and visible while you’re working, and this app makes that possible. This is one more tool to help you configure your working space just the way you want it to help you maximize efficiency.
This app has a very minimalistic interface with clear instructions for its use. When you open it, you’ll see a small window with a hand icon in it and directions on the side, which tell you what to do. Just drag the hand icon onto the window you want to keep on top and release the mouse. After that, you’re good to go. The window that you chose will stay on top and fully visible no matter where or what else you click on. You can then minimize the app icon, and when you want to access it again, it’s available from the task bar on the lower-right side of your screen. There is an option available to set your own shortcut key for initiating the app, as well.
In our tests, this app did work most of the time, but there were occasions when the selected window dropped into the pile again so that the selection process had to be repeated. Since the app is free, though, it’s worth trying out to see if it’s something that’s useful to you.
WindowTop
Set window on top, make it dark, transparent and more
WindowTop
WindowTop SW (FREE for Windows 7 – 10) enables you to manage your windows practically and efficiently with several awesome features:
- You can pin any window on top of other windows [ALT+Z]
- Enable window transparency (so you can see through the window) and even click through transparent window. [ALT+A]
- Exclusive feature of “Shrink Window” – an innovative way to minimize windows (video time: 1:42) [ALT+Q]
- And lastly the Dark/Reading Mode (video time: 1:29)
Set Window On Top

Easly set any window on top from the toolbar menu
Click Through

Only see the window without interact with it
Set Transparency

Easly set window transparency from the slider in the toolbar menu and instantly see the result
Shrink Windows

Innovative way to minimize windows — it will not minimize to the taskbar to keep your taskbar clean as you like. it will make the window smaller so you have the space you need.
Dark/Reading Mode

Easly set the window to be dark. Useful for coding, and for reading at night. This should ease the eye strains!


01. Set window on top
Easly set any window on top from the toolbar menu
04. Shrink Window
Innovative way to minimize windows — it will not minimize to the taskbar to keep your taskbar clean as you like. it will make the window smaller so you have the space you need.
03. Dark Mode
Easly set the window to be dark. Useful for coding, and for reading at night. This should ease the eye strains!

02. Set Transparency
Easly set window transparency from the slider in the toolbar menu and instantly see the result
05. Enable Smart-Transparency
Easly set the window to be dark. Useful for coding, and for reading at night. This should ease the eye strains!
6.2. Delete window configuration
Use this option to delete the window configuration so that non of the features will be automatically enabled for the window
06. Other Options
Right click on the arrow

6.1. Save window configuration
Use this option to save the configurations such as Set-Top, Opacity, Dark-Mode If you saved the configuration, the window will automatically have one of these options enabled with the specified configuration
Watch videos/windows in small view-box while you do your work You can shrink window and enable for it live preview by right click on the shrink box and select “Enable live preview”.

Have bigger preview when the mouse is hovering above shrinked window, and use other windowtop fetchers on shrinked window
View your code while you see it’s results behind!

A better dark mode that will not invert colors of images and will automatically turn off when the window is already dark

No need to manually enable every time some feature to the selected window.
Nice Looking

Replace the unpleasant white background of the window with the desktop background to get a better user experience.
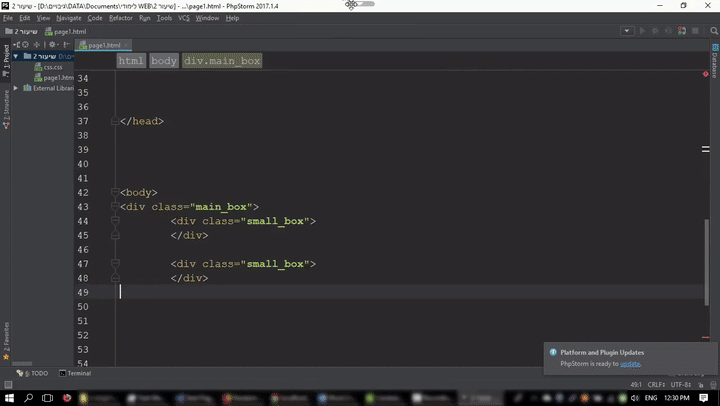
Good for coding
Transparent code editor is very useful and this is made possible thanks to the Glass feature in the software. This allows you to see the result of the code right behind the code. Instead of having 2 windows next to each other, this solution lets you have both windows on top of each other.


