- File sharing over a network in Windows 10
- Unable to access shared folder on Windows 10 [Super Guide]
- What to do if shared folder is not accessible on Windows 10?
- 1. Check the availability of the folder sharing setup on your PC
- 2. Enable network discovery
- 3. Check your PC’s credentials
- 4. Enable all Network services
- 5. Run the Shared Folder Troubleshooter
- How to Find Shared Windows Folders
- Access shared folders with other networked PCs
- Where Do Shared Folders Go?
- Use the Net Share Command
- 3 ways to view your shared folders in Windows (all versions)
- 1. View your shared folders using File Explorer or Windows Explorer (in all Windows versions)
- 2. View your shared folders using Computer Management (in all Windows versions)
- 3. View your shared folders using Command Prompt or PowerShell (in all Windows versions)
- How do you prefer to view shared folders in Windows?
File sharing over a network in Windows 10
In Windows 10, some features of file and folder sharing over a network have changed, including the removal of HomeGroup. Read on for answers to common questions about other changes to file and folder sharing in Windows 10.
To share a file or folder in File Explorer, do one of the following:
Right-click or press a file, select Give access to > Specific people.

Select a file, select the Share tab at the top of File Explorer, and then in the Share with section select Specific people.

If you select multiple files at once, you can share them all in the same way. It works for folders, too—share a folder, and all files in it will be shared.
To stop sharing in File Explorer, do one of the following:
Right-click or press a file or folder, then select Give access to > Remove access.

Select a file or folder, select the Share tab at the top of File Explorer, and then in the Share with section select Remove access.

File Explorer shows the «Remove access» option («Stop sharing» in older versions of Windows 10) for all files, even those that aren’t being shared over a network.
Open File Explorer, then type \\localhost into the address bar.
Note: When you’ve shared a file from a folder in your user profile and you go to \\localhost, you’ll see your user profile and all its files there. This doesn’t mean that all of your files are shared—just that you have access to all your own files.
If you open File Explorer, go to Network, and see an error message («Network discovery is turned off….»), you’ll need to turn on Network discovery to see devices on the network that are sharing files. To turn it on, select the Network discovery is turned off banner, then select Turn on network discovery and file sharing.

To troubleshoot problems with sharing files or folders, follow the steps below on all computers from which you’re trying to share.
Make sure the computers are on the same network. For example, if your computers connect to the internet through a wireless router, make sure they all connect through the same wireless router.
If you’re on a Wi-Fi network, set it to Private. To find out how, read Make a Wi-Fi network public or private in Windows 10.
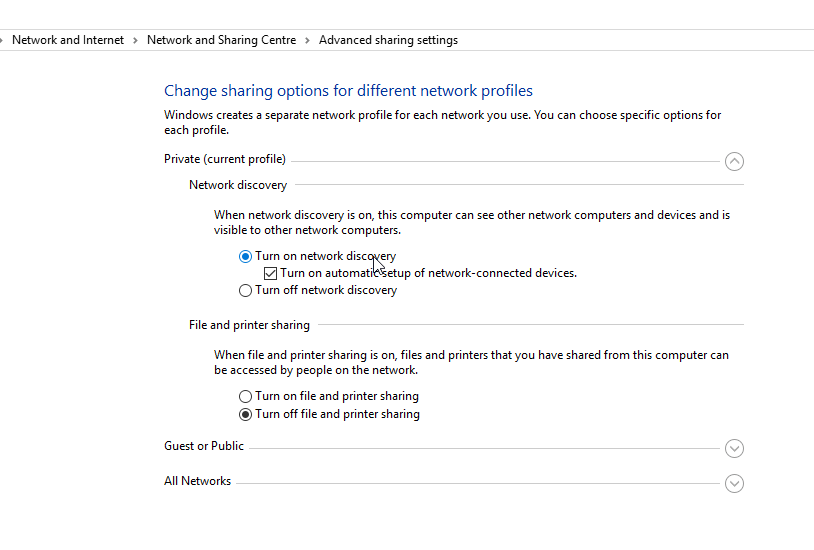
Turn on network discovery and file and printer sharing, and turn off password protected sharing.
Select the Start button, then select Settings > Network & Internet , and on the right side, select Sharing options.
Under Private, select Turn on Network discovery and Turn on file and printer sharing.
Under All Networks, select Turn off password protected sharing.
Make sharing services start automatically.
Press the Windows logo key + R.
In the Run dialog box, type services.msc, and then select OK.
Right-click each of the following services, select Properties, if they’re not running, select Start, and next to Startup type, select Automatic:
Unable to access shared folder on Windows 10 [Super Guide]


Many Windows 10 users reported that Windows is unable to access the shared folder on their PC. This can be an issue, and in today’s article we’re going to show you how to fix this problem.
What can I do if I’m unable to access shared folder on Windows 10? First thing that you should do in order to fix this problem is to enable folder sharing and network discovery. To do that, just check your network settings window. If the problem is still there, make sure that the required services are running and are set to start automatically.
What to do if shared folder is not accessible on Windows 10?
- Check the availability of the folder sharing setup on your PC
- Enable network discovery
- Check your PC’s credentials
- Enable all Network services
- Run the Shared Folder Troubleshooter
1. Check the availability of the folder sharing setup on your PC
If you are unable to access a shared folder on Windows 10, the first thing to do is to check your system, to ascertain if the File Sharing setup is available. Normally, this setup is built-in on Windows; thus, it is usually present.
To run this check, follow the guidelines below:
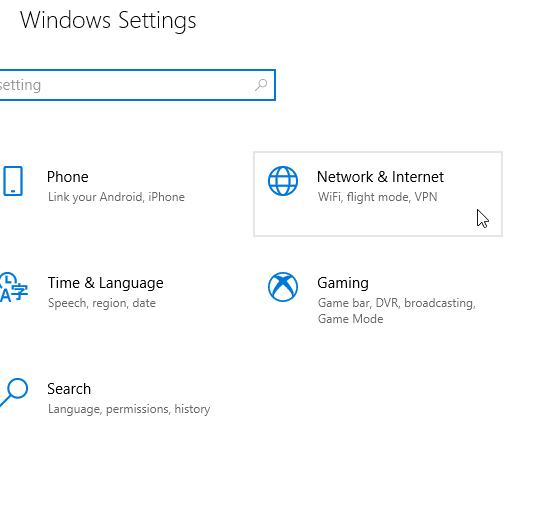
- Open the Start Menu and click on Settings.

- Select Network and Internet.
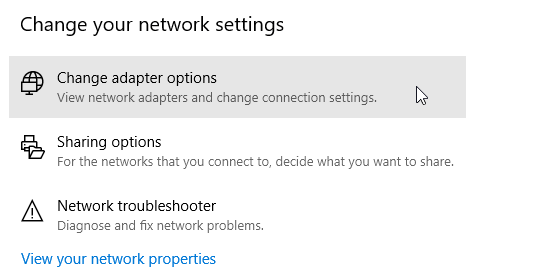
- Under Network and Internet, select Network and Sharing Center.
- Now click on Change adapter settings.
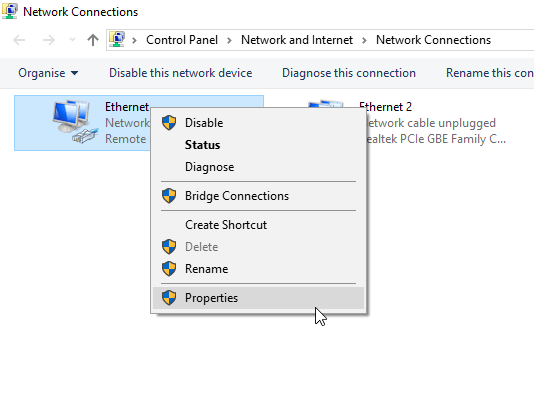
- Locate your network connection, right-click on it and select Properties.
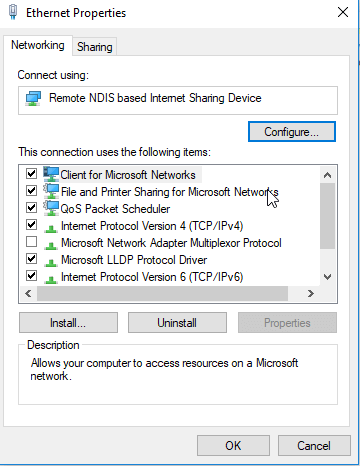
- Navigate to the This connection uses the following items area and then locate the File and Printer Sharing for Microsoft Networks.
- If the option is available, simply check the box next to it; otherwise, proceed.
- Click on the Install.
- Afterward, click OK.
- Exit the window and restart your PC.

If the problem persists, you can try the next fix.
2. Enable network discovery
In case you are experiencing the Windows 10 unable to access shared folder error, it is recommended you check if your PC‘s network is discoverable by other computers. To configure Network discovery on Windows 10, follow the simple steps below:
- Open the Settings app.
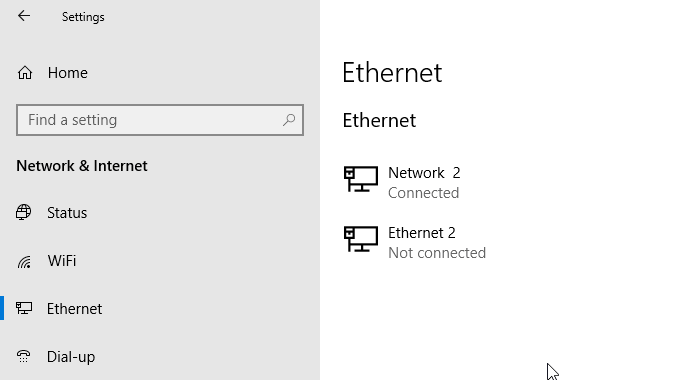
- Select Network and Internet.
- In the left panel, click either Wi-Fi or Ethernet (depending on your connection type).
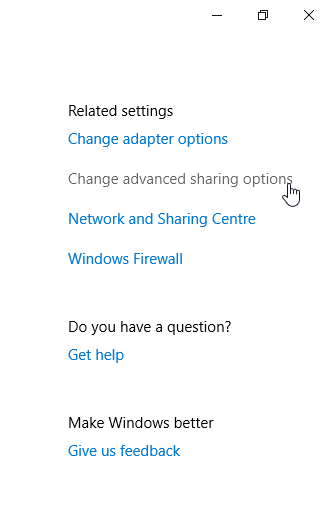
- Under the Related Settings menu, click on Change advanced sharing options.
- Under Advanced options, check if the Make this PC discoverable option is enabled ( On). If it is not enabled (Off), simply enable it by toggling the button to On.
- Then click on Save changes
If the problem persists after making your PC discoverable, there is obviously another factor in play. Thus, you can try the next solution.
3. Check your PC’s credentials
If you’re unable to access the shared folder on your PC, it’s possible that you have issues with credentials. However, you can fix that by doing the following:
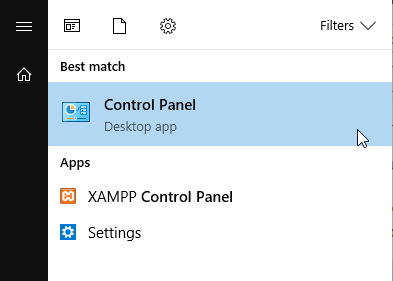
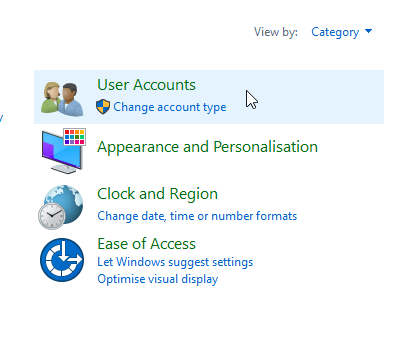
- Open the Start Menu and search for control panel.
- Select Control Panel.
- Navigate to User Accounts and click on it.
- Under User Accounts, locate and select Credential Manager.
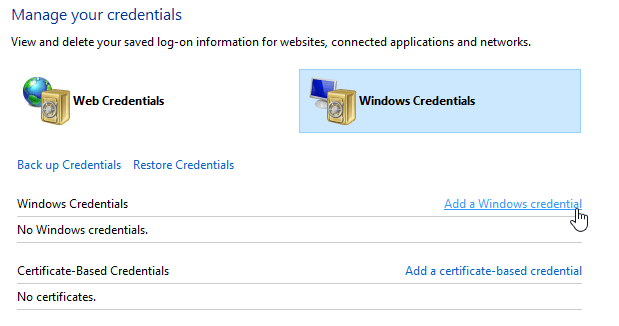
- Locate and click on Windows Credentials.
- Select Add a Windows credential.
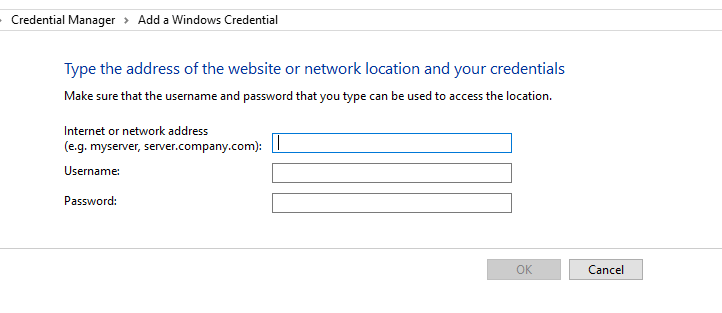
- Add other relevant details like Admin username, password and hosting PC‘s IP.
- Save changes by clicking OK.


If the problem persists after running this, you can try the next solution.
4. Enable all Network services
If you’re unable to access shared folder on your PC, ensure that you enable all relevant network services on your PC. Below is a list of relevant services that should be enabled and run automatically in order for file sharing to work:
- IPv6
- SSDP Discovery
- Publication
- Function Discovery Provider
- DNS Client
- Peer Networking Group
- Host
- Function Discovery Result
- UPnP Device Host
- Home Group Provider
- Home Group Listener.
If the problem persists, you can try the next solution.
5. Run the Shared Folder Troubleshooter
There is a designated troubleshooter on Windows 10 that is specially designed for fixing errors such as this. If you’re still unable to access shared folders, running the troubleshooter might be helpful. You can do that by following these steps:
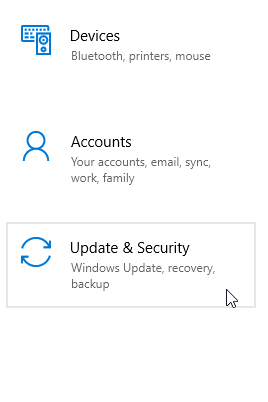
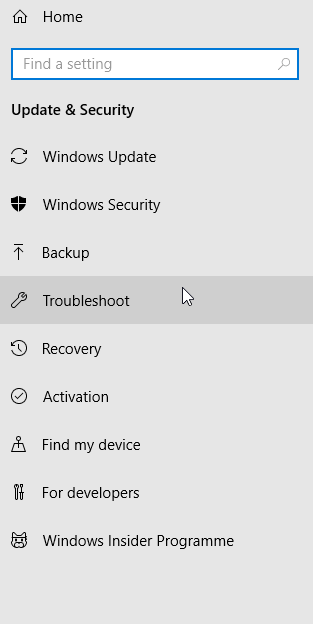
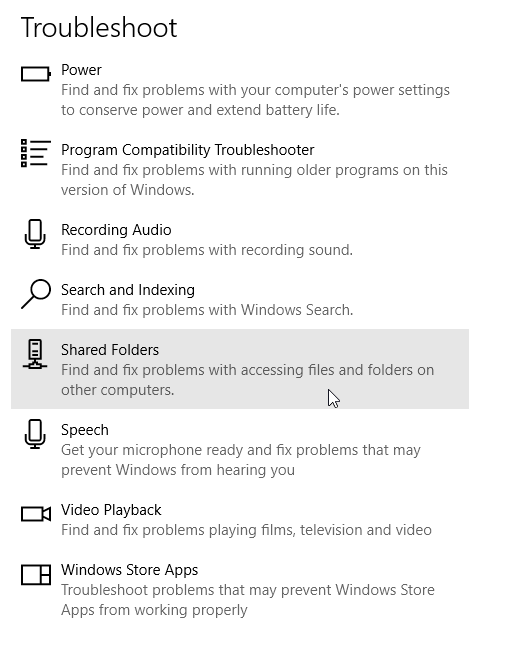
- Go to Settings. Locate and click on Update & Security.
- Select Troubleshoot > Shared Folders.
- Follow the on-screen instructions to finish up the process.
- Exit program and restart PC.
There you go, these are a couple of solutions that might help you fix Windows 10 unable to access shared folder. Feel free to let us know in the comments section if these solutions helped you fix the problem.
How to Find Shared Windows Folders
Access shared folders with other networked PCs
:max_bytes(150000):strip_icc()/WorkBadgePhoto-61c0b98ef5a74e4a85851a8f706dbd65.jpg)
With Microsoft Windows, folders can be shared on a network so that desktops and laptops can access the files in these folders without physical access to the computer where the folders are stored. When a folder of documents or videos is shared, anyone with access can open, edit, save, and possibly delete the files and folders if the permissions allow it.
Instructions in this article apply to Windows 10, Windows 8, and Windows 7.
Where Do Shared Folders Go?
The easiest way to find a list of network shares is to use Windows Explorer.
Go to Windows Search and search for Network. Or, open Windows File Explorer, go to the Folders pane, and select Network.
:max_bytes(150000):strip_icc()/001_finding-shared-windows-folders-816533-ee4f16caba9e4df591fbe98588d9026e.jpg)
Select the computer that has the shared folders you want to browse. In older versions of Windows, open Entire Network and select Microsoft Windows Network to see shares.
Any non-administrative Windows shares that are set on that computer appear in the left pane. If no items are shown, then nothing is shared. Folders that are shown in this window are linked to the shared folders.
The folder contents are the same as on the shared computer. However, the folder paths may differ if the person who shared the data chose a unique share name. For example, the path MYPC\Files\ with double backslashes points to the folder on the MYPC computer, but the actual folder path on that computer is C:\Backup\2018\Files\.
Use the Net Share Command
Use the net command to find the location of file shares, including administrative shares. In Command Prompt, enter the net share command to display the Share name that can be used to access the share plus the Resource, which is the share’s true location.
Shares with a dollar sign ($) at the end of the name are the administrative shares, which should not be modified. The root of every hard drive, the print driver folder, and C:\Windows\ are shared by default as administrative shares. You can open administrative shares only through the name+$ syntax with admin credentials, such as MYPC\C$ or MYPC\ADMIN$.
3 ways to view your shared folders in Windows (all versions)
Are you looking for an answer to the question: “Where can I see all the folders shared on my Windows computer or device?” We thought it was a really good question and we decided to answer it. We have three different alternatives to discuss: one using File or Windows Explorer, one using Computer Management, and one using Command Prompt or PowerShell. All these methods work in all modern versions of Windows. So, if you want to learn how to find the shared folders on your Windows computer or how to find the path of a shared folder, read on:
1. View your shared folders using File Explorer or Windows Explorer (in all Windows versions)
The simplest method for viewing the folders that you have shared in Windows is from File Explorer if you’re using Windows 10 or 8.1, or Windows Explorer if you’re using Windows 7. Open it, and then expand the Network section from the left side of the window, and click or tap on the name of your Windows PC. This shows you the list of folders shared by your computer or device with the network.
The problem with this view is that it does not show hidden shares and doesn’t give too much information about how each folder is shared. However, you can right-click or press and hold on each folder and then press Properties, or hit ALT + Enter on your keyboard.
This opens the Properties window of the selected shared folder. You can use it to access more information about how the folder is shared, the security settings it has and so on.
Even though this method works, it is not an elegant way to see your shared folders or to manage them. There are better alternatives.
2. View your shared folders using Computer Management (in all Windows versions)
The best tool for getting the full list of folders that you’re sharing on your PC is Computer Management. Open Computer Management and, on the left side of the window, browse “System Tools -> Shared Folders -> Shares.”
The central panel from Computer Management loads the complete list of all the folders and partitions that are shared by your Windows computer or device. You see both the folders you shared and the default shares of Windows, such as C$ and D$ (which are the partitions on your PC), as well as the default remote administration shares created by Windows, like ADMIN$.
For each shared folder or partition, you see the official share name (as it is viewed by others on the network, if not hidden), the exact folder path, the type of share, the number of connections made from the network to that folder and a short description (if available).
If you double-click or double-tap on a shared folder, its Properties window opens. There you can manage the different sharing parameters such as the share name, description, and the maximum number of users that are allowed to connect to the shared folder simultaneously.
If you go to the Share Permissions tab from the Properties window, you can view and set which users and user groups have access to the shared folder and the type of access that each of them has.
Going back to the Computer Management window, if you click or tap the Sessions link from the left side column, you can see the list of users who are currently connected to your network shares. For each user, you can see the device from where the connection is made, how many files he or she has opened, the time since the connection was initiated, and so on.
In the same column, the Open Files link shows all the files and folders that are accessed by the users who are connected to your network shares.
All this is really useful information, isn’t it?
3. View your shared folders using Command Prompt or PowerShell (in all Windows versions)
You can also get the complete list of the folders that you’re sharing with the network, from the Command Prompt or PowerShell. Open the tool you prefer and type net share. Then press Enter on your keyboard, and the list with shared folders is instantly generated.
Furthermore, if you want to find the path of a shared folder, it’s easy because the net share command also outputs this information in the Resource column.
Neat, right? Obviously, the same command can be run in PowerShell too.
How do you prefer to view shared folders in Windows?
As always with Windows operating systems, there is more than one way of doing something. Try the methods that we have showed you in this guide and then tell us which one works best for you, in the comments below.


