- Fix: Audacity ‘Error while opening sound device’
- Please check the recording device settings and the project sample rate
- What Causes Audacity “Error opening sound device” Error?
- Solution 1: Let Apps Use Your Microphone
- Windows 10 Users:
- Further Troubleshooting for Windows 10 and Older Versions of Windows
- Solution 2: Use the Built-in Voice Recorder and Switch to Audacity
- Error opening sound device
- Contents
- Windows 10 April 2018 Update resulting microphone problems
- Check Audacity settings
- Check operating system settings
- Check sound device drivers and firmware
- Check PCI card or external sound device settings and connections
- Windows WASAPI: Recording from a USB device
- Fix sound problems in Windows 10
Fix: Audacity ‘Error while opening sound device’
Please check the recording device settings and the project sample rate
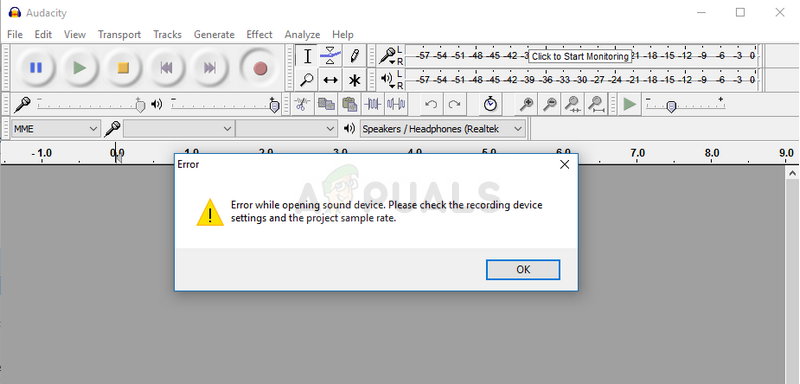
Audacity is a free virtual studio software for Windows computers and it’s a great tool to edit music files for free. However, some users have reported having problems when trying to record or play their files using Audacity. The error message read “Error opening sound device” and it has bugged users all over the world.
 Audacity Error while opening sound device
There are a couple of causes and methods which can be used to solve the problem and we recommend you follow through the rest of the article to find out just what to do to solve the problem.
What Causes Audacity “Error opening sound device” Error?
It’s usually a permissions issue which started to appear after a specific Windows Update because it has reset some permissions settings for apps which are allowed to use your microphone.
Solution 1: Let Apps Use Your Microphone
This little option may have always been turned on before but it might have been changed by new programs being installed or by a Windows Update which might have turned it off for various security reasons. This solution is the simplest and it can save you hours of pain so make sure you don’t skip this method.
Windows 10 Users:
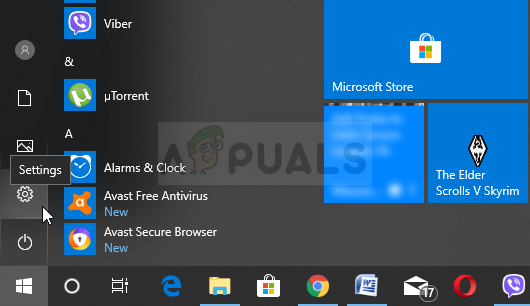
- Click the gear icon in the lower left section of the Start menu in order to open the Settings app. You can also search for it.
 Windows 10 Settings
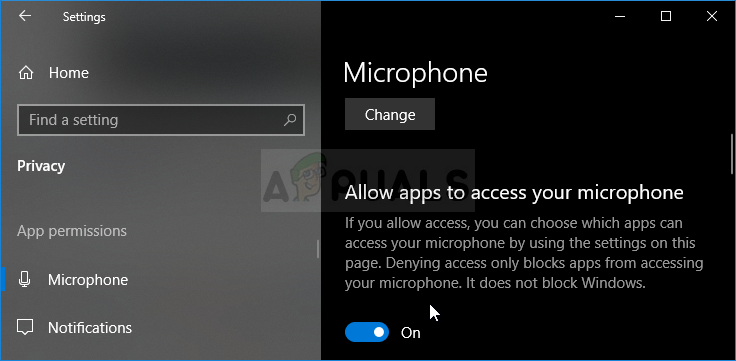
- Scroll down until you see the Privacy section and make sure you click on it. At the left side of the window, you should see the App permissions section. Scroll down until you reach Microphone and click on this option.
- First of all, check if the Microphone access for this device option is on. If it’s not, click on Change and set the slider to on.
 Microphone Permissions in Windows 10 Settings
- After that, switch the slider under the “Allow apps to access your microphone” option to On and scroll down in the list of installed apps on your computer to locate Skype. Switch the slider next to the Skype entry on the list to on.
- Reopen Audacity and check to see if the problem persists.
Further Troubleshooting for Windows 10 and Older Versions of Windows
It’s possible that one of your core sound devices may have been disabled by a program or by a new Windows Update. Also, this can fix the problem if there are other similar tools installed on your computer which might try to access sound devices at the same time as Audacity.
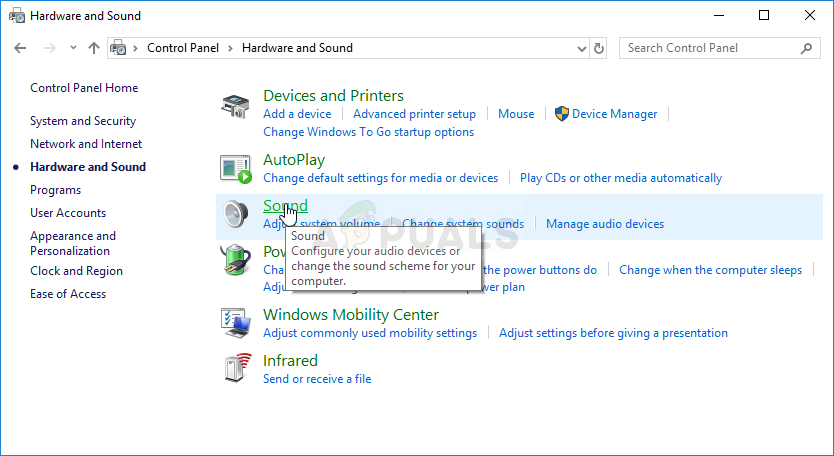
- Right-click on the volume icon located at your taskbar and choose the Sounds option. If this icon is not located at your taskbar, you can locate Sound settings by opening Control Panel, switching the view to Category and selecting Hardware and Sound >> Sound.
 Sound in Control Panel
- Check to see if your microphone is enabled under the Recording tab. Switch to this tab by clicking at the top of the window and locate the Microphone you are using. It should be located at the top and be selected.
- Click on it once and click the Properties button at the lower right part of the window. In the Properties window which opens, check under Device usage and set the option to Use this device (enable) if it wasn’t already and apply the changes.
 Speakers Properties
- Navigate to the Advanced tab in the same properties window and check under Exclusive mode.
- Uncheck the boxes next to the “Allow applications to take exclusive control of this device” and “Give exclusive mode applications priority”. Apply these changes as well and repeat the same process for your Speaker device in the Playback tab before you close these windows. Reopen Audacity and check to see if the error persists.
Note: Even if you are a Windows 10 user, you should still try out the second set of steps as they managed to solve the problem for some Windows 10 users when the above has failed.
Solution 2: Use the Built-in Voice Recorder and Switch to Audacity
It’s quite possible that a third party app is hogging one of your sound devices and it’s almost impossible to take ownership of it once more. The reason why opening Voice Recorder which is built into your Windows OS might work is because this app is verified by Microsoft and it has better permissions than any third-party app.
The Voice Recorder is available on all versions of Windows so make sure you use it to solve the Audacity “Error opening sound device” error!
- Search for Voice Recorder’s shortcut on the Desktop and double-click it, or search for it in the Start menu. If you struggle finding it, you can use the command below.
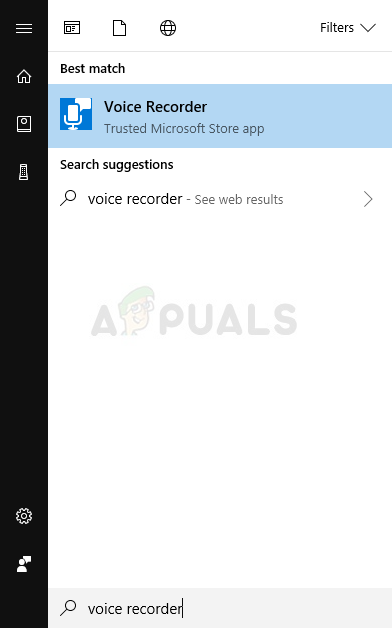 Voice Recorder in Start menu
- Search for “Command Prompt” by typing it either right in the Start menu or by pressing the search button right next to it. Right-click the first entry which will pop up as a search result and select the “Run as administrator” context menu entry.
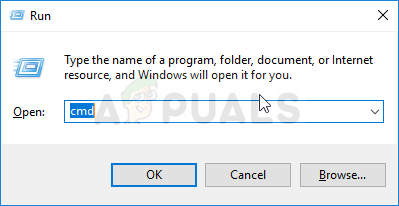 Command Prompt via Run box
- Type in the command below in the window and make sure you press Enter after typing each one. Wait for the Voice Recorder window to open to know that the command worked
- Click the microphone button in order to start a recording. Close Voice Recorder and reopen Audacity to see if the problem still appears.
Error opening sound device
There are three forms of this message
- Error opening recording device — Error code -xxxx this means there is a problem with your Audacity, operating system or sound device recording settings, where xxxx is replaced by a numeric code.
- Error opening recording device — Error code -xxxx this means there is a problem with your playback settings, where xxxx is replaced by a numeric code.
- Error opening sound device . this is a generic message that is usually associated with a failure to start the audio stream.
These messages can suggest a problem with the drivers of the sound device, or possibly that you are asking the device to do something it cannot do. For example you will see this error if you attempt to Record to more channels than your device supports, or if you try to overdub on a device that can either record or play back but not both.
The recording device message most commonly occurs on Windows when one of the sound device inputs is not properly enabled or otherwise cannot respond to Audacity’s request to start recording.
Contents
Windows 10 April 2018 Update resulting microphone problems
For some users Windows 10 is now blocking Audacity from using the microphone, on the basis of privacy settings.
After upgrading to version 1803, a small number of users have been reporting that the microphone is getting detected, but it does not pick up any sound.
In order to get around this issue, Microsoft recommends that you need to enable the microphone in your Privacy settings using these steps:
- Open Settings
- Click on Privacy
- Click on Microphone
- Turn on the Allow apps to access your microphone toggle switch.
See this Microsoft website for more details.
Check Audacity settings
- Set the project rate bottom left of the Audacity window to the standard rate of 44,100 Hz (or if your audio interface only supports a particular rate such as 48,000 Hz, set the project rate to that). Help > Diagnostics >Audio Device Info. should show the rates the device claims to support.
- Try turning off Transport > Transport Options >Software Playthrough (on/off) (this should never be enabled if recording computer playback).
- Try turning off Transport > Transport Options >Overdub (on/off) because recording while playing could stress your sound device or computer. If this solves the problem, read the Wiki pages Updating Sound Device Drivers and Managing Computer Resources and Drivers for advice on how to make your sound device or computer more capable.
- Check in Device Toolbar that the playback and recording devices are correctly and explicitly selected.
- On Windows, do not choose «Microsoft Sound Mapper» or «Primary Sound Driver» which point to the current Windows default device; choose the required device by name. Try selecting «Windows Direct Sound» as the «Host» instead of «MME».
Check operating system settings
- Windows: Follow the instructions for Windows to access and configure the Windows Sound settings. The key points are:
- Ensure all available inputs are listed and enabled in the Windows Sound dialog.
- Additionally for Windows: Ensure Default Format for the playback and recording devices contains the same sample rate and number of recording channels as in Audacity.
- Very rarely, it can help to use 16-bit or 24-bit Default Format then change the Audacity Quality Preferences to that sample format.
- If necessary, put a checkmark in both Exclusive Mode boxes then set the «Host» in Audacity’s Device Toolbar to «Windows DirectSound» and choose a project rate that your playback and recording devices support. Audacity can then request that rate directly from the sound device.
- Mac: In Finder, choose Go > Utilities > Audio MIDI Setup.app . In «Audio Devices», select in turn the required Recording and Playback devices. Set «Format» to the same sample rate, bit-depth and number of recording channels as in Audacity.
- In the first instance, try refreshing Audacity’s list of audio devices at Transport >Rescan Audio Devices then select the default option in Device Toolbar. If the error still occurs, recheck the Audacity settings.
- It is possible that another application may have exclusive access to the audio device. Try logging out and back in again, then re-check the Audacity settings before opening any other application that may use the audio device.
- If pulse is an option in Device Toolbar, ensure that you have Pulse Audio Volume Control (pavucontrol) installed. If it is not installed, use your system’s package manager to install it. Open Pulse Audio Volume Control and check that there is an available output device.
- If Jack Audio System is running on the computer, ensure that it is selected as the Host in Device Toolbar.
- Open the system Sound Preferences and check that a recording device is available. Sound Preferences is often available through a loudspeaker icon on the Desktop, Desktop panel, or in the system Preferences menu.
- Open AlsaMixer (type alsamixer in a terminal window) and check the audio interface and recording device settings. To view the AlsaMixer manual, type man alsamixer in a terminal window.
Check sound device drivers and firmware
The computer’s built-in sound device should usually have the latest drivers for your operating system, supplied by the motherboard or computer manufacturer. A PCI or external sound card should usually have the latest drivers and firmware supplied by the manufacturer of the device. See Updating Sound Device Drivers on the Wiki for help with correcting driver issues.
Check PCI card or external sound device settings and connections
If you use a high-end PCI sound card or external USB or FireWire interface, you must make the sample rate, bit-depth and number of input channels the same in all possible places. This is especially important if you are recording Multi-Track Overdubs where you play and record at the same time. Settings must match in:
- the Audacity Project Rate
- the track(s) in Audacity (to resample tracks to the Project Rate, select each track in turn then choose Tracks >Resample. ).
- all inputs and outputs in the operating system sound control panel or application
- all inputs and outputs in any software or hardware control panel the sound device may have.
Windows WASAPI: Recording from a USB device
You may get this error if you set Audacity to record from a USB device and playback through your onboard soundcard with the Audio Host set to WASAPI.
Fix sound problems in Windows 10
If you’re having audio problems, the following suggestions might help. The tips are listed in order, so start with the first one, see if that helps, and then continue to the next one if it doesn’t.
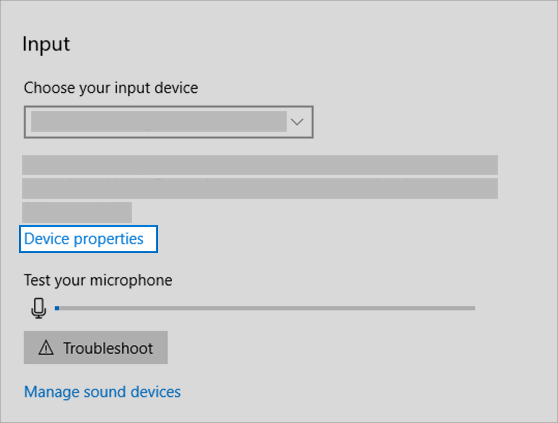
If multiple audio output devices are available, check that you have the appropriate one selected. Here’s how:
Select the Speakers icon on the taskbar.
Next, select the arrow to open a list of audio devices connected to your computer.
Check that your audio is playing to the audio device you prefer, such as a speaker or headphones.
If this doesn’t help, continue to the next tip.
The audio troubleshooter might be able to fix audio problems automatically.
To run the troubleshooter
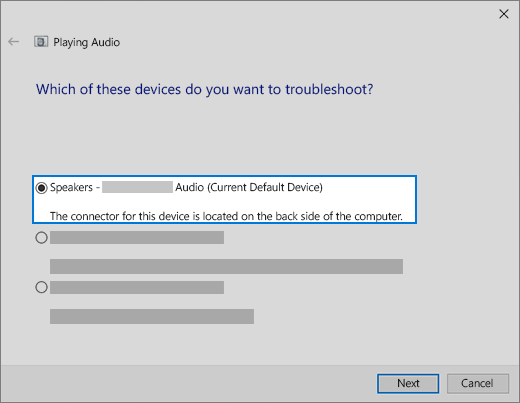
In the search box on the taskbar, type audio troubleshooter, select Fix and find problems with playing sound from the results, then select Next.
Select the device you want to troubleshoot and then continue through the troubleshooter.
You can also launch the troubleshooter from audio Settings. Select Start > Settings > System > Sound > Troubleshoot.
If running the troubleshooter doesn’t help, continue to the next tip.
To check for updates
Select Start > Settings > Update & Security > Windows Update > Check for updates.
Do one of the following:
If the status says «You’re up to date, go to the next tip.
If the status says «Updates are available,» select Install now.
Select the updates you want to install, then select Install.
Restart your PC and see if your sound is working properly.
If that didn’t solve your problem, continue to the next tip.
Try these steps
Check your speaker and headphone connections for loose cords or cables. Make sure all cords and cables are plugged in.
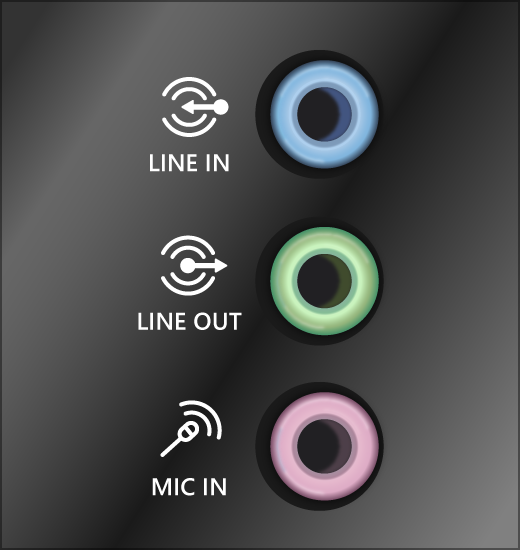
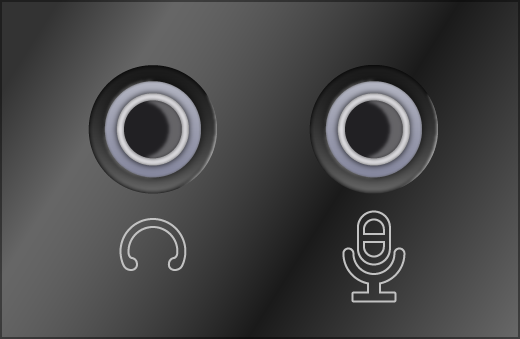
If you have multiple 5mm jacks to plug into, especially on a surround sound system, make sure all cords and cables are plugged into the correct jack.
If it’s not clear which jack goes with which cord, consult your hardware manufacturer, or try the most obvious outputs one at a time and see if they work.
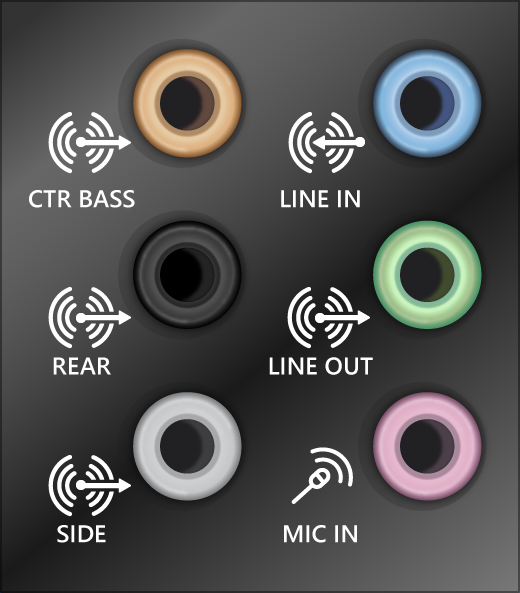
Note: Some systems use a green jack for output and pink for mic input and others will be labeled «headphone» or «microphone.»
Make sure the power is turned on and check the volume level.
Make sure the mute setting is not turned on, and try turning up all the volume controls.
Remember some speakers and apps have their own volume controls. Be sure to check them all.
Try connecting your speaker and headphones to a different USB port.
It’s possible that your speakers won’t work when your headphones are plugged in. Unplug your headphones and see if that helps.
If your cables and volume are OK, see the next sections for additional troubleshooting.
Check to make sure your audio devices aren’t muted and haven’t been disabled.
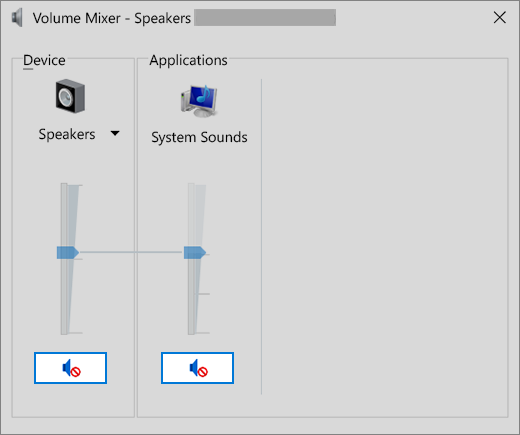
Right-click the Speakers icon on the taskbar, and then select Open Volume mixer.
You’ll see a set of volume controls for your devices. Make sure none of them are muted. If any of them are muted, you’ll see a red circle with a line through it next to the volume control. In that case, select the volume control to unmute.
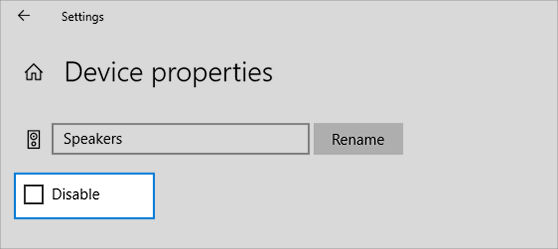
Check your device properties to make sure that your devices have not been disabled by mistake. Select Start > Settings > System > Sound .
Select your audio device, and then select Device properties. Be sure to select Device properties for both the output and input devices.
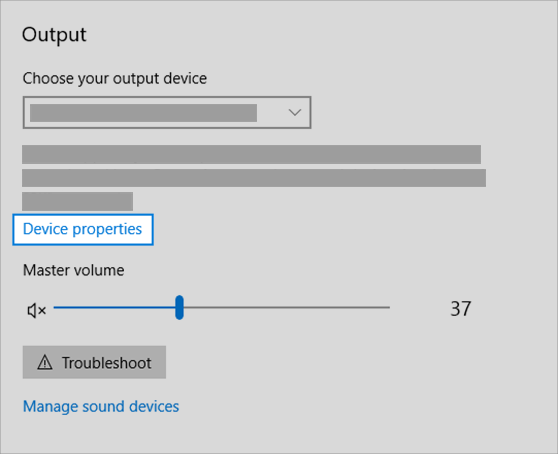
Make sure the Disable check box is cleared for the output and input devices.
If that didn’t solve your problem, continue to the next tip.
Hardware problems can be caused by outdated or malfunctioning drivers. Make sure your audio driver is up to date and update it if needed. If that doesn’t work, try uninstalling the audio driver (it will reinstall automatically). If that doesn’t work, try using the generic audio driver that comes with Windows. If you’re having audio issues after installing updates, try rolling back your audio driver.
To update your audio driver automatically
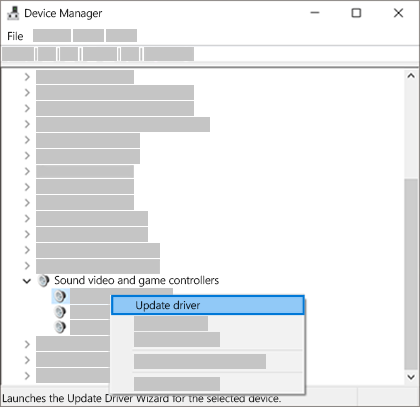
In the search box on the taskbar, type device manager, then select it from the results.
Select the arrow next to Sound, video and game controllers to expand it.
Right-click the listing for your sound card or audio device, such as headphones or speakers, select Update driver, then select Search automatically for updated driver software. Follow the instructions to complete the update.
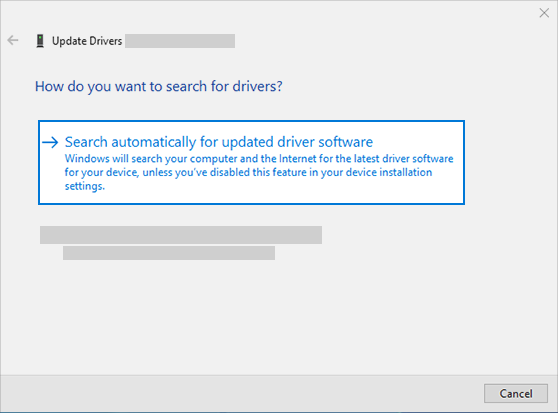
If Windows doesn’t find a new driver, look for one on the device manufacturer’s website and follow those instructions. If that doesn’t work, try uninstalling your audio driver.
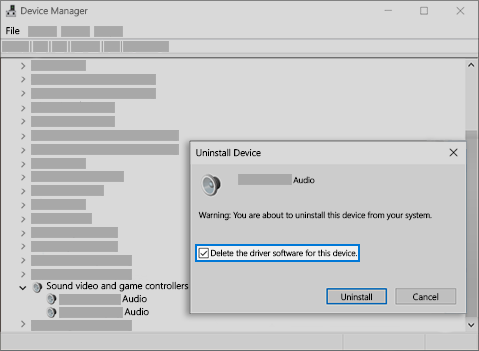
To uninstall your audio driver
In the search box on the taskbar, type device manager, then select it from the results.
Select the arrow next to Sound, video and game controllers to expand it.
Right-click the listing for your sound card or audio device, select Uninstall device, select the Delete the driver software for this device check box, and then select Uninstall.
Restart your PC.
Note: Be sure to save documents and any other current work before you restart.
This restart will automatically prompt your PC to reinstall your audio driver.
To restart, select Start > Power > Restart .
If those options didn’t work, try using the generic audio driver that comes with Windows.
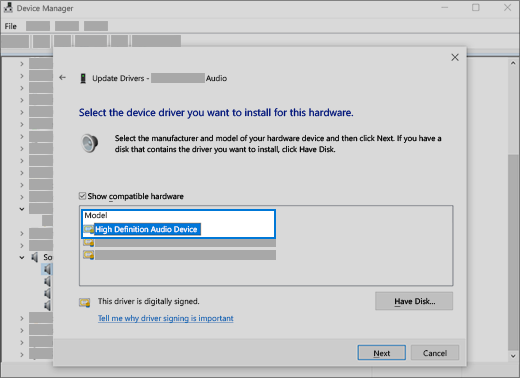
To use the generic audio driver that comes with Windows
In the search box on the taskbar, type device manager, then select it from the results.
Select the arrow next to Sound, video and game controllers to expand it.
Right-click the listing for your sound card or audio device, then select Update driver > Browse my computer for driver software > Let me pick from a list of device drivers on my computer.
Select the audio device whose driver you want to update, select Next, and then follow the instructions to install it.
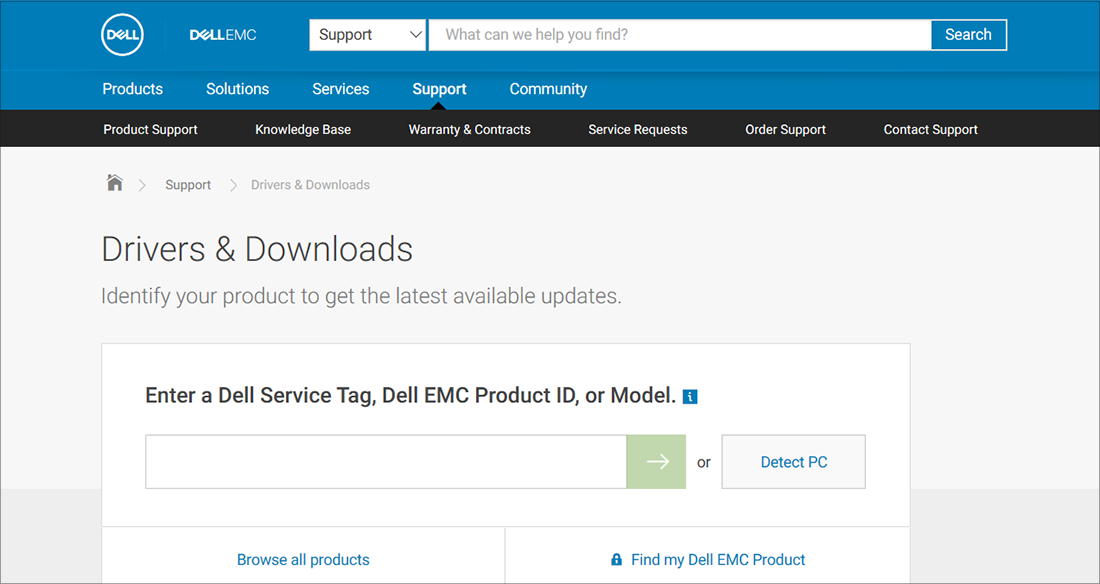
If these steps didn’t solve your audio issue, visit your device manufacturer’s website and install the most recent audio/sound drivers for your device. Following is an example of a driver download page for a sound device manufacturer.
If you have audio issues after installing updates
If your audio was working before you ran Windows Update and now isn’t working, try rolling back your audio driver.
To roll back your audio driver
In the search box on the taskbar, type device manager, then select it from the results.
Select the arrow next to Sound, video and game controllers to expand it.
Right-click the listing for your sound card or audio device, then select Properties.
Select the Driver tab, then select Roll Back Driver.
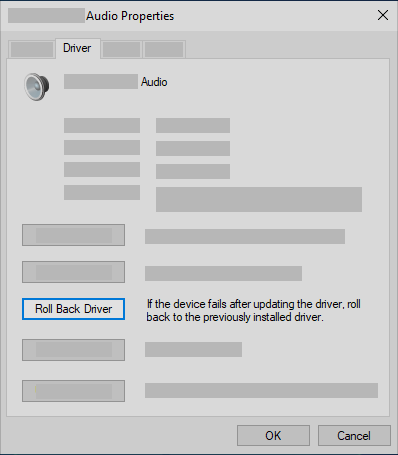
Read and follow the instructions and then select Yes if you want to roll back your audio driver.
If rolling back your audio driver didn’t work or wasn’t an option, you can try to restore your PC from a system restore point.
Restore your PC from a system restore point
When Microsoft installs updates on your system, we create a system restore point in case problems arise. Try restoring from that point and see if that fixes your sound problems. For more info, see «Restore from a system restore point» in Recovery options in Windows 10.
If you’re connecting to an audio device—such as headphones or speakers—using USB or HDMI, you might need to set that device as the default audio device. If you’re using an external monitor that doesn’t have built-in speakers, make sure that the monitor isn’t already selected as your default output device. if it is, you won’t have any audio. You can check that when you set your default output audio device. Here’s how:
In the search box on the taskbar, type control panel, then select it from the results.
Select Hardware and Sound from the Control Panel, and then select Sound.
On the Playback tab, right-click the listing for your audio device, select Set as Default Device, and then select OK.
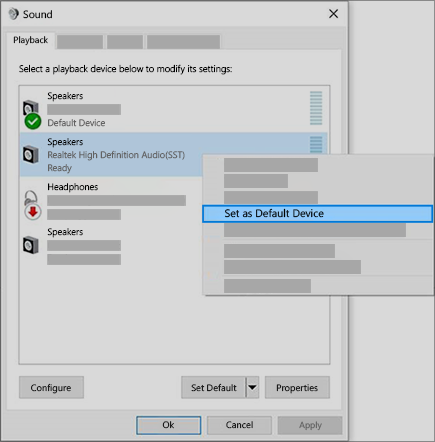
If setting your audio device as the default device doesn’t help, continue to the next tip for additional troubleshooting.
Sometimes having audio enhancements on can result in audio issues. Disabling them may resolve your issue.
In the search box on the taskbar, type control panel, then select it from the results.
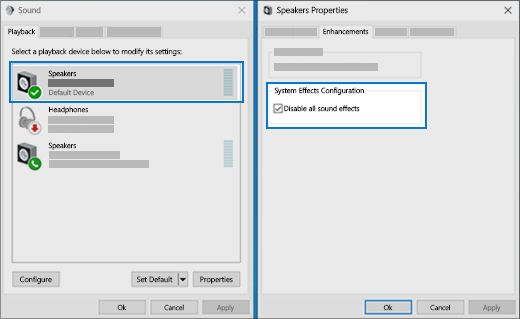
Select Hardware and Sound from the Control Panel, and then select Sound.
On the Playback tab, right-click the Default Device, and then select Properties.
On the Enhancements tab, select either the Disable all enhancements or the Disable all sound effects check box (depending on which option you see), select OK, and try to play your audio device.
If that doesn’t work, on the Playback tab, select another default device (if you have one), select either the Disable all enhancements or the Disable all sound effects check box (depending on which option you see), select OK, and try to play audio again. Do this for each default device.
If turning off audio enhancements doesn’t help, see the next sections for additional troubleshooting.
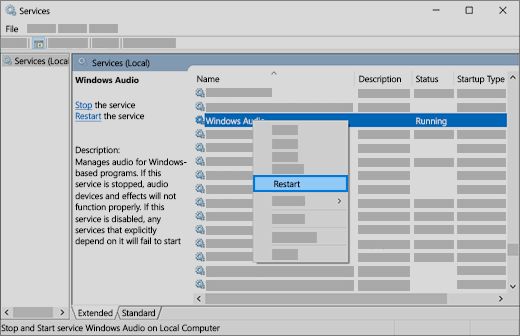
In the search box on the taskbar, type services, then select it from the results.
Select each of the following services, right-click, and then select Restart:
Windows Audio Endpoint Builder
Remote Procedure Call (RPC)
If restarting these services doesn’t resolve your issue, see the next sections for more troubleshooting.
In the search box on the taskbar, type control panel, and then select it from the results.
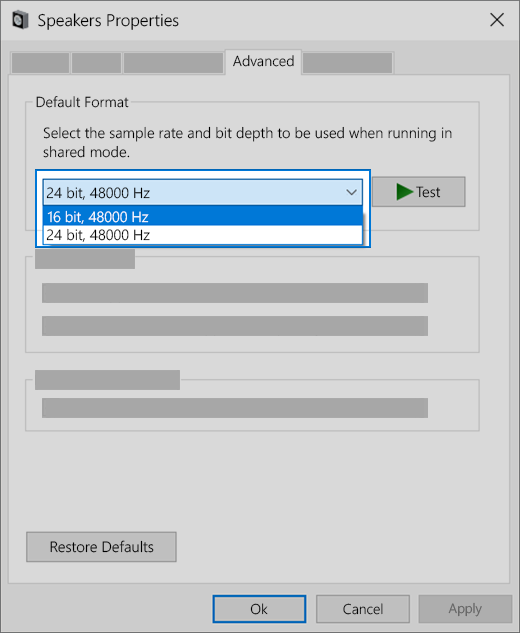
Select Hardware and Sound from the Control Panel, and then select Sound.
On the Playback tab, right-click (or press and hold) Default Device, and then select Properties.
On the Advanced tab, under Default Format, change the setting, select OK,and then test your audio device. If that doesn’t work, try changing the setting again.
If trying different audio formats doesn’t help, see the next sections for additional troubleshooting.
Many updates require you to restart your device.
To check and see if you have installed updates pending and need to restart
Save your work and close all open applications.
Select Start > Power . If you have installed updates pending, you’ll see options to Update and restart and Update and shut down.
Select one of those restart options to apply the updates
If restarting doesn’t help, see the next section for additional troubleshooting.
Some audio problems might be caused by an issue with the audio system’s IDT High Definition Audio CODEC. This can be fixed with a manual driver update which allows you to choose the sound driver you want to use.
Note: Not all systems will have an IDT High Definition Audio CODEC.
To check and see if you have one, and to manually update the driver
In the search box on the taskbar, type device manager, then select it from the results.
Select the arrow next to Sound, video and game controllers to expand it.
Look for IDT High Definition Audio CODEC. If it’s listed, right-click it and select Update driver, then select Browse my computer for driver software > Let me pick from a list of device drivers on my computer.
You’ll see a list of pre-installed drivers. Select High Definition Audio Device, and then select Next.
1. Select Start > Settings > Privacy , and then select Microphone from the left menu.
Under Allow access to the microphone on this device, select Change. Make sure the toggle is turned On.
If you’re having this issue with a specific app, scroll down to Choose which Microsoft Store apps can access your microphone and make sure that the toggle next to that app is turned On as well.


