Windows® Setup creates log files for all actions that occur during installation. If you are experiencing problems installing Windows, consult the log files to troubleshoot the installation.
WindowsВ Setup log files are available in the following directories:
Log file location
Description
Log location before Setup can access the drive.
Log location when Setup rolls back in the event of a fatal error.
Log location of Setup actions after disk configuration.
Used to log Plug and Play device installations.
Location of memory dump from bug checks.
Location of log minidumps from bug checks.
Location of Sysprep logs.
WindowsВ Setup Event Logs
WindowsВ Setup includes the ability to review the WindowsВ Setup performance events in the Windows Event Log viewer. This enables you to more easily review the actions that occurred during WindowsВ Setup and to review the performance statistics for different parts of WindowsВ Setup. You can filter the log so as to view only relevant items that you are interested in. The WindowsВ Setup performance events are saved into a log file that is named Setup.etl, which is available in the %WINDIR%\Panther directory of all installations. To view the logs, you must use the Event Viewer included with the Windows media that corresponds to the version of the customized image that you are building.
To view the logs on a computer that does not include the corresponding kit, you must run a script from the root of the media that installs the Event Trace for Windows (ETW) provider. From the command line, type:
where D is the drive letter of the Windows DVD media.
To view the WindowsВ Setup event logs
Start the Event Viewer, expand the Windows Logs node, and then click System.
In the Actions pane, click Open Saved Log and then locate the Setup.etl file. By default, this file is available in the %WINDIR%\Panther directory.
The log file contents appear in the Event Viewer.
To Export the log to a file
From the command line, use the Wevtutil or Tracerpt commands to save the log to an .xml or text file. For information about how to use these tools, see the command-line Help. The following commands show examples of how to use the tools:
Enabling debug logging for the Netlogon service
This article describes the steps to enable logging of the Netlogon service in Windows to monitor or troubleshoot authentication, DC locator, account lockout, or other domain communication-related issues.
Original product version: В Windows 10 — all editions, Windows Server 2016, Windows Server 2019, Windows Server 2012 R2 Original KB number: В 109626
More information
This section, method, or task contains steps that tell you how to modify the registry. However, serious problems might occur if you modify the registry incorrectly. Therefore, make sure that you follow these steps carefully. For added protection, back up the registry before you modify it. Then, you can restore the registry if a problem occurs. For more information about how to back up and restore the registry, click the following article number to view the article in the Microsoft Knowledge Base:
322756 How to back up and restore the registry in Windows
The version of Netlogon.dll that has tracing included is installed by default on all currently supported versions of Windows. To enable debug logging, set the debug flag that you want by using Nltest.exe, the registry, or Group Policy. To do it, follow these steps:
For Windows Server 2019, Windows Server 2016, Windows Server 2012 R2
These steps also apply to Windows 10.
To enable Netlogon logging:
Open a Command Prompt window (administrative Command Prompt window for Windows Server 2012 R2 and later versions).
Type the following command, and then press Enter:
It’s typically unnecessary to stop and restart the Netlogon service for Windows Server 2012 R2 or later to enable Netlogon logging. Netlogon-related activity is logged to %windir%\debug\netlogon.log. Verify new writes to this log to determine whether a restart of the Netlogon service is necessary. If you have to restart the service, open a Command Prompt window (administrative Command Prompt window for Windows 10, and Windows Server 2012 R2 and later versions). Then run the following commands:
In some circumstances, you may have to perform an authentication against the system in order to obtain a new entry in the log to verify that logging is enabled.
Using the computer name may cause no new test authentication entry to be logged.
To disable Netlogon logging, follow these steps:
Open a Command Prompt window (administrative Command Prompt window for Windows Server 2012 R2 and higher).
Type the following command, and then press Enter:
It’s typically unnecessary to stop and restart the Netlogon service for Windows Server 2012 R2 or later versions to disable Netlogon logging. Netlogon-related activity is logged to %windir%\debug\netlogon.log. Verify that no new information is being written to this log to determine whether a restart of the Netlogon service is necessary. If you have to restart the service, open a Command Prompt window (administrative Command Prompt window for Windows 10, and Windows Server 2012 R2 and later versions). Then run the following commands:
Alternative methods to enable Netlogon logging
In all versions of Windows, you can use the registry method that’s provided in the Enable/Disable logging by using registry method section.
On computers that are running Windows Server 2012 R2 and later versions of the operating system, you can also use the following policy setting to enable verbose Netlogon logging (value is set in bytes):
A value of decimal 545325055 is equivalent to 0x2080FFFF (which enables verbose Netlogon logging). This Group Policy setting is specified in bytes.
The Group Policy method can be used to enable Netlogon logging on a larger number of systems more efficiently. We don’t recommend that you enable Netlogon logging in policies that apply to all systems, such as the Default Domain Policy. Instead, consider narrowing the scope to systems that may be causing problems by using one of the following methods:
Create a new policy by using this Group Policy setting, and then provide the Read and Apply Group Policy rights to a group that contains only the required computer accounts.
Move computer objects into a different OU, and then apply the policy settings at that OU level.
Enable/Disable logging by using registry method
To enable logging, you may have to obtain a checked build of Netlogon.dll.
Start Registry Editor.
If it exists, delete the Reg_SZ value of the following registry entry, create a REG_DWORD value with the same name, and then add the 2080FFFF hexadecimal value: HKEY_LOCAL_MACHINE\SYSTEM\CurrentControlSet\Services\Netlogon\Parameters\DBFlag
It’s typically unnecessary to stop and restart the Netlogon service for Windows Server 2012 R2 and later versions to enable Netlogon logging. Netlogon-related activity is logged to %windir%\debug\netlogon.log. Verify the new writes to this log to determine whether a restart of the Netlogon service is necessary. If you have to restart the service, open a Command Prompt window (administrative Command Prompt window for Windows Server 2012 R2/Windows 10 and above). Then run the following commands:
In some circumstances, you may have to do an authentication against the system to obtain a new entry in the log to verify that logging is enabled.
Using the computer name may cause no new test authentication entry to be logged.
To disable Netlogon logging, follow these steps:
In Registry Editor, change the data value to 0x0 in the following registry key:
Exit Registry Editor.
It’s typically unnecessary to stop and restart the Netlogon service for Windows Server 2012 R2, Windows 10, or later versions to disable Netlogon logging. Netlogon-related activity is logged to %windir%\debug\netlogon.log. Verify that no new information is being written to this log to determine whether a restart of the Netlogon service is necessary. If you have to restart the service, open a Command Prompt window (administrative Command Prompt window for Windows Server 2012 R2/Windows 10 and later versions of the operating system). Then run the following commands:
Set the maximum log file size for Netlogon logs:
The MaximumLogFileSize registry entry can be used to specify the maximum size of the Netlogon.log file. By default, this registry entry doesn’t exist, and the default maximum size of the Netlogon.log file is 20 MB. When the file reaches 20 MB, it’s renamed to Netlogon.bak, and a new Netlogon.log file is created. This registry entry has the following parameters:
Remember that the total disk space that’s used by Netlogon logging is the size that’s specified in the maximum log file size times two (2). It’s required to accommodate space for the Netlogon.log and Netlogon.bak file. For example, a setting of 50 MB can require 100 MB of disk space, which provides 50 MB for Netlogon.log and 50 MB for Netlogon.bak.
As mentioned earlier, on Windows Server 2012 R2 and later versions of the operating system, you can use the following policy setting to configure the log file size (value is set in bytes):
For more information, click the following article numbers to view the articles in the Microsoft Knowledge Base: 247811 How domain controllers are located in Windows
Как посмотреть логи Windows?
Логи — это системные события, который происходят в любой операционной системе. С помощью логов можно легко отследить кто, что и когда делал. Читать логи могут не только системные администраторы, поэтому в данной инструкции рассмотрим, как смотреть логи ОС windows.
Ищете сервер с Windows? Выбирайте наши Windows VDS
Просмотр событий для проверки логов.
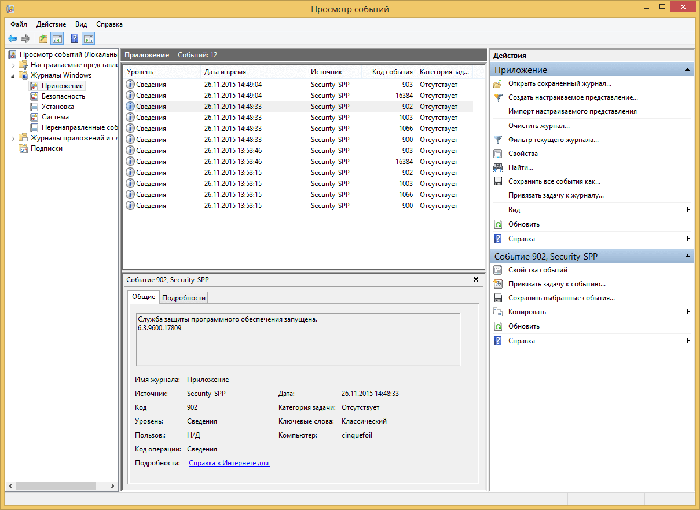
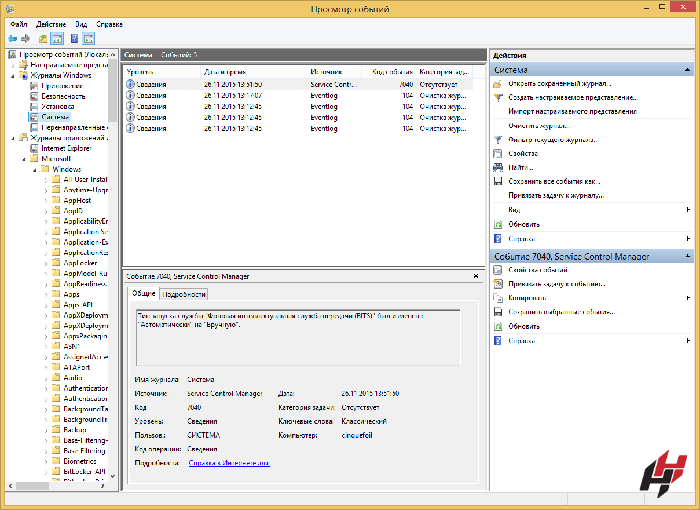
После нажатия комбинации “ Win+R и введите eventvwr.msc ” в любой системе Виндовс вы попадаете в просмотр событий. У вас откроется окно, где нужно развернуть Журналы Windows. В данном окне можно просмотреть все программы, которые открывались на ОС и, если была допущена ошибка, она также отобразится.
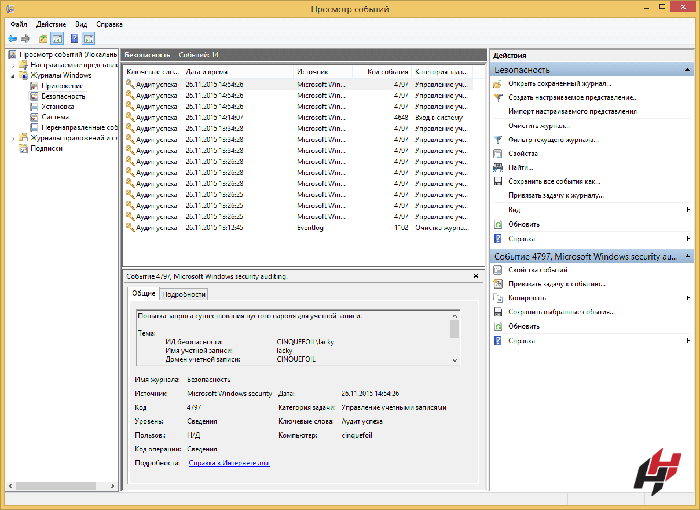
Аудит журнал поможет понять, что и кто и когда делал. Также отображается информация по запросам получения доступов.
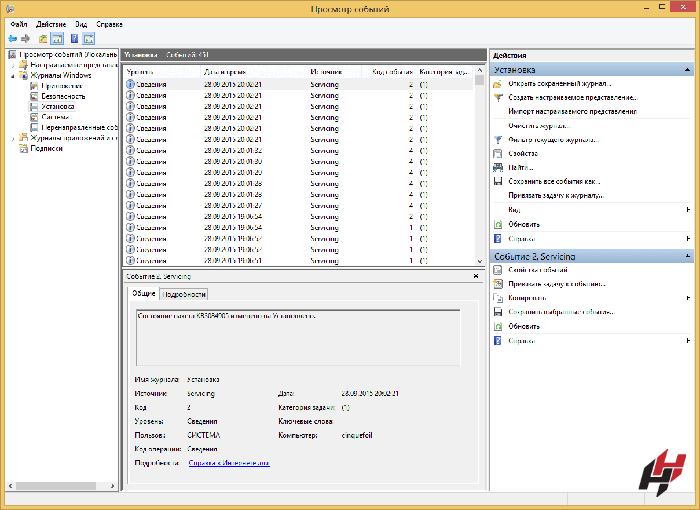
В пункте Установка можно посмотреть логи ОС Виндовс, например, программы и обновления системы.
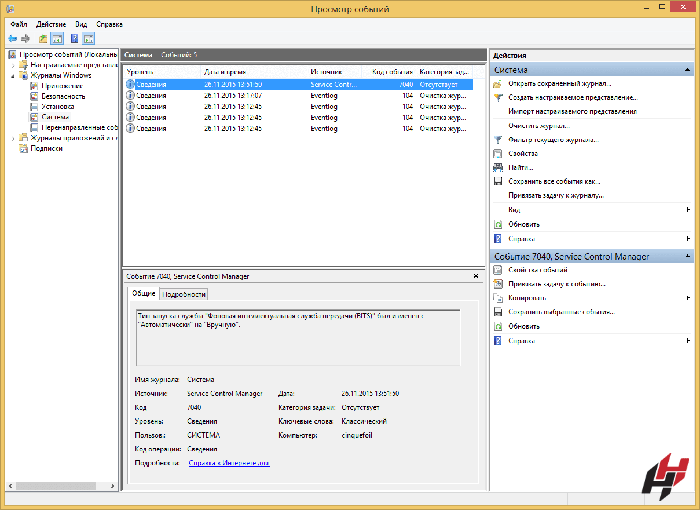
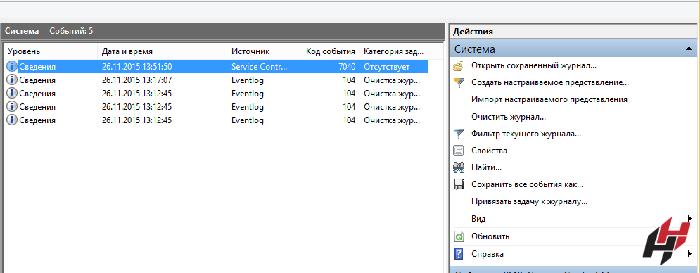
Система — наиболее важный журнал. С его помощью можно определить большинство ошибок ОС. К примеру, у вас появлялся синий экран. В данном журнале можно определить причину его появления.
Логи windows — для более специфических служб. Это могут быть DHCP или DNS.
Фильтрация событий.
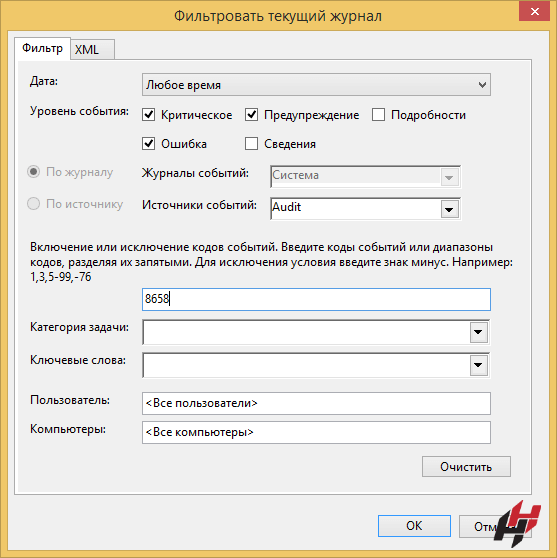
С помощью Фильтра текущего журнала (раздел Действия) можно отфильтровать информацию, которую вы хотите просмотреть.
Обязательно нужно указать уровень Событий:
Критическое
Ошибка
Предупреждение
Сведения
Подробности
Для сужения поиска можно отфильтровать источник событий и код.
Просмотр PowerShell логов.
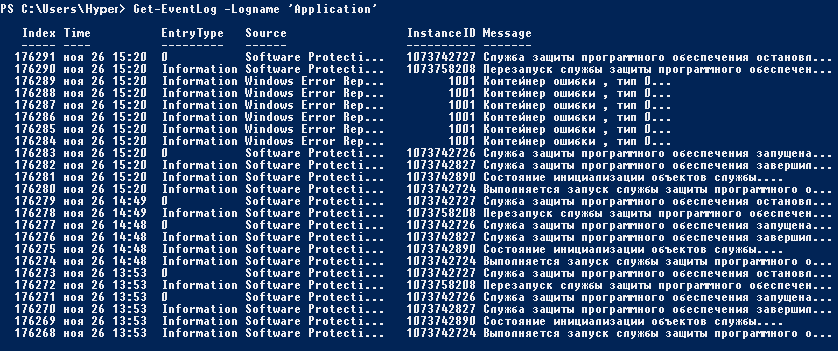
Открываем PowerShell и вставляем следующую команду Get-EventLog -Logname ‘System’
В результате вы получите логи Системы
Для журнала Приложения используйте эту команду Get-EventLog -Logname ‘Application
Также обязательно ознакомьтесь с перечнем аббревиатур:
Код события — EventID
Компьютер — MachineName
Порядковый номер события — Data, Index
Категория задач — Category
Код категории — CategoryNumber
Уровень — EntryType
Сообщение события — Message
Источник — Source
Дата генерации события — ReplacementString, InstanceID, TimeGenerated
Дата записи события — TimeWritten
Пользователь — UserName
Сайт — Site
Подразделение — Conteiner
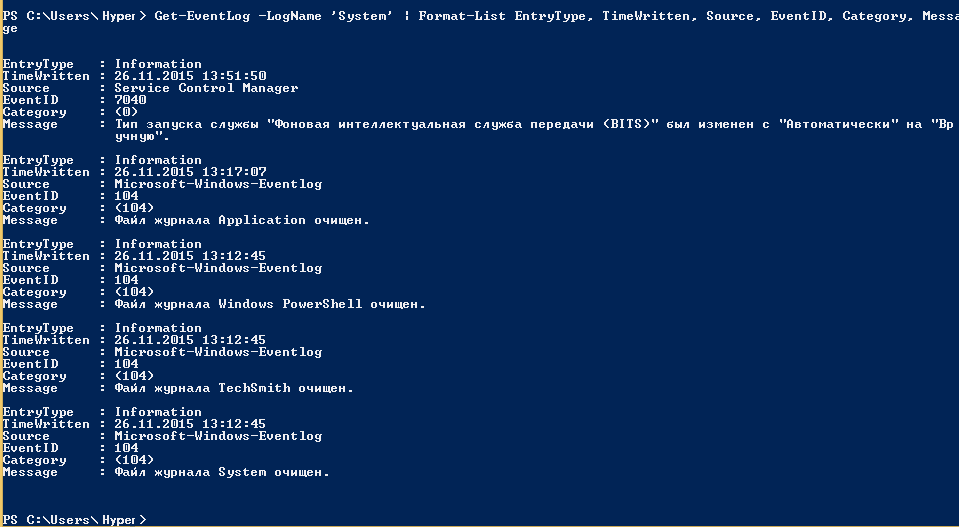
Для выведения событий в командной оболочке только со столбцами «Уровень», «Дата записи события», «Источник», «Код события», «Категория» и «Сообщение события» для журнала «Система» используйте: