- How sort find result by file sizes
- 5 Answers 5
- 4 Ways To Find Large Files In Windows 10
- Find Large Files In Windows 10 Using File Explorer
- Search For Large Files In Windows 10 With Command Prompt
- Use Largest Files Finder To Find Large Files On Windows 10
- Find Largest Files On Windows 10 With TreeSize Free
- How to Sort Files in Windows 10 Numerically and By Size
- Gaurav Bidasaria
- 1. Sort Numerically Using Group Policy Editor
- 2. Enable Numeric Sorting Using Registry Editor
- 3. Sort Folders in Windows 10 by Size
- 4. TreeSize
- Space Organization
- Read Next
- 9 Fixes for Windows 10 File Explorer Is Slow or Loading Slowly Error
- How to Enable or Disable Confirm on Delete Files Pop-up in Windows 10
- How to Manage Files and Folders Efficiently on Windows 10
- How to Count Number of Files or Subfolders Inside a Folder
- How to Disable Fullscreen Optimization in Windows 10
- 7 Best Ways to Fix Kindle for PC Desktop App Won’t Open on Windows
- What Is Microsoft Power Automate Desktop and Why Do You Need It
- 6 Best Ways to Fix Action Center Greyed Out on Windows 10
How sort find result by file sizes
How can I sort by file size the results of the find command?
I trying to sort the result of this find command:
I don’t want the size of directories, I need the files relative paths sorted by size only.
5 Answers 5
Here is how to do using find command:
Here is how to do using recursive ls command:
Or, if you want to display only file names:

Parsing ls or variations thereof will add unnecesary complexity.
Sorted file paths by file size:
- Change sort -n to sort -nr to get reverse order
The question had -print0 but catering for file names containing newlines seem pedantic.
The question mentioned relative paths, and changing %p to %P will get relative paths under src/

Size in MiB, path is relative.
WARNING! I use not -exec . \; , but -exec . <> + . This construction doesn’t pluck every file just it was found, but it waits, while all files will be found, and then puts them to one command (this time — ls ) as one big list of arguments. Then ls is looking at files and, because key -S , sorts them by size, largest first.
Literally none of these answers actually worked.
Here’s what I made.
You run it by doing:
and it will list, ordered biggest to smallest, only files that are 100 MB or bigger in the current directory. Pass in -r for it to be recursive.
4 Ways To Find Large Files In Windows 10
Free up space quickly by deleting them
If you quickly want to free-up memory space on your Windows machine, the best way to do that is to find large files on your Windows 10 PC and get rid of them if they’re no longer useful. The question though is how do you go about searching for large files on your computer?
Windows provides you with multiple ways to find all the large files that are stored in your drives. Either you can use the built-in tools on your machine to look for these files or you can grab a third-party app that will do the task for you. Either way, you’ll find the files that occupy a significant portion of your memory space.

Once such files are found, it’s then up to you what you want to do with them. If deleting them permanently isn’t something you’d like to do straightaway, you can move them over to a cloud storage or to an external hard drive.
Also, be sure to check out our YouTube video from our sister site Online Tech Tips where we go through some of the options mentioned below in this article.
Find Large Files In Windows 10 Using File Explorer
File Explorer comes with a lot of hidden features to let you organize, sort, and find files on your computer. One of its abilities is to help you find files that are of specific size on your computer. Using this feature, you can locate those memory-hogging files and get them removed from your PC.
Before you do that, though, you’ll need to first enable the hidden files option. This is to ensure that Explorer looks for large hidden files as well in addition to searching for the normal files.
However, be cautious while dealing with the hidden files. Most of the time, these are system and app related files which, if you delete, will cause your apps to malfunction and even lead your entire system to crash. Before you delete anything, just make sure you know what it is and you’ll be fine.
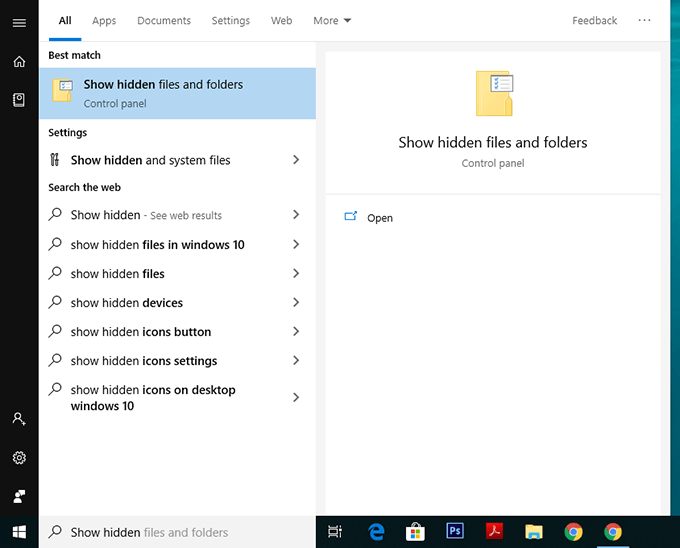
Open the Start Menu and search for Show hidden and click on Show hidden files and folders.
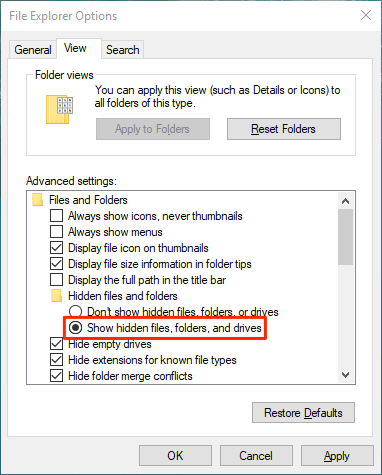
When the dialog box opens, click on the View tab at the top. You’ll see various File Explorer options that you can modify.
Find the option that says Show hidden files, folders, and drives and put a checkmark in it. Then click on the OK button to save your changes.
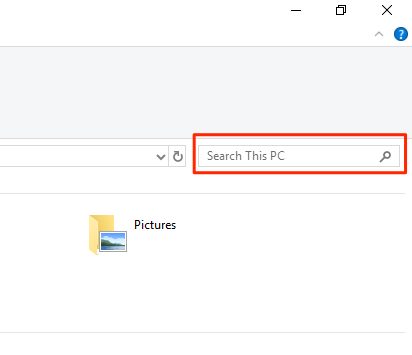
Double-click on This PC on your desktop to launch File Explorer. When the utility launches, click on the search box given at the top-right corner.
A new menu item will be added to the top of your screen. Click on the newly added item that says Search to view further options.
Select the Size option and then select an appropriate option from the list. It’ll let you find large files available on your PC.
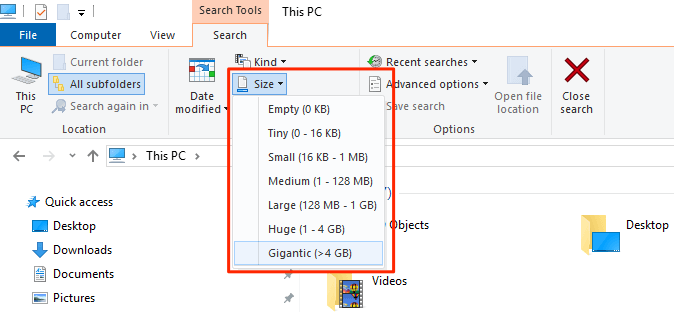
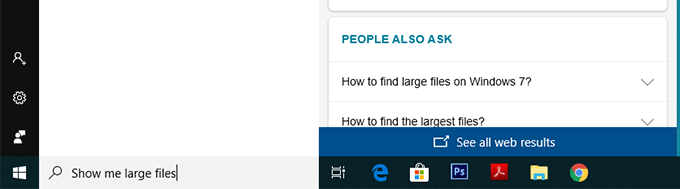
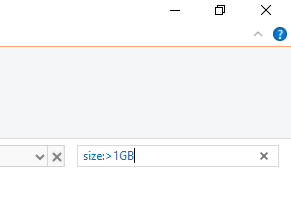
If what you consider as a large file isn’t available in the default menu, type in size:>1GB (replace 1GB with your size) in the search box and hit Enter. It’ll only look for the files that are larger than your specified size.
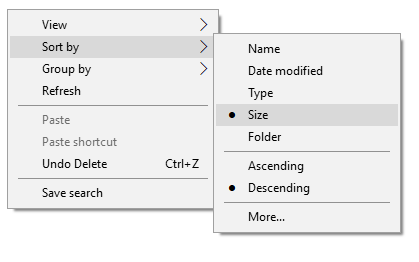
When the search results appear, right-click anywhere blank and select Sort by followed by Size and Descending. This’ll ensure the largest file is shown at the top of the results.
Search For Large Files In Windows 10 With Command Prompt
If you’re more of a geeky person, you can use the Command Prompt utility to retrieve a list of all the files larger than a specified size value. The files list can be exported to a text file for you to then actually find those files on your machine.
Press Windows + R, type in cmd, and hit Enter to launch the utility.
When it launches, type in the following command and hit Enter. It’ll find all the files that are larger than 1GB in size. You can modify the value in the command so it finds files that you think are large.
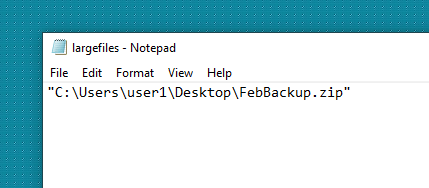
forfiles /S /M * /C “cmd /c if @fsize GEQ 1073741824 echo @path > largefiles.txt

Open the newly created largefiles.txt file and it’ll have a list of all the large files sitting on your computer.
Use Largest Files Finder To Find Large Files On Windows 10
File Explorer and Command Prompt aren’t the only tools to find large files on your Windows 10 computer. There are a few third-party apps as well that can help you find such files.
Largest Files Finder is one of those apps that helps you find the top 100 largest files on your computer. It claims to be only taking a minute to scan drives sized upto 200GB. Also, it doesn’t require any installation and works straight out of the box.
- Download and launch the app on your computer.
- Soon as it launches, it automatically starts searching for large files on your computer. When it’s done, you can review the results for yourself.
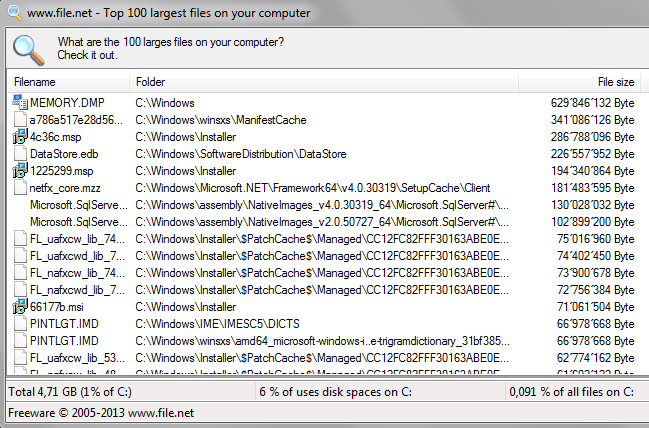
If you want to delete any files from the search results, you can do so with ease from within the app. Simply right-click on any of the files and select Delete.
Find Largest Files On Windows 10 With TreeSize Free
TreeSize Free has been around for quite a long time and it helps you find space hogging files on your Windows computers. It requires a small installation but then it works like a charm.
- Download, install, and launch the app on your computer. Make sure to run it with admin rights so it can search the folders that it can’t otherwise.
- You’ll see a tree of your folders along with the space they occupy on your screen. You can double-click on any folder to view its subfolders and their sizes.
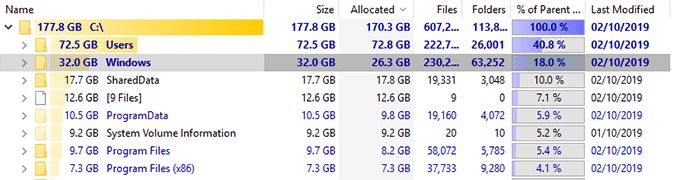
You can then sort the directories by the Size column so that the largest files are always shown at the top.
It has a few customizable options as well should you want to use them. Feel free to play around with any options you think will make it easier to find large files on your computer.
Mahesh has been obsessed with technology since he got his first gadget a decade or so ago. Over the last few years, he’s written a number of tech articles on various online publications including but not limited to MakeTechEasier and Android AppStorm. Read Mahesh’s Full Bio
How to Sort Files in Windows 10 Numerically and By Size
Gaurav Bidasaria
17 Dec 2018
The on-going development of Windows 10 and related products is fascinating. New features are being rolled out consistently to make Windows 10 a robust operating system. However, users have to grapple with several issues at the same time. One common problem is the inconvenience of sorting files and folders numerically or by size.

Microsoft has not made it easy to do it. That leaves several users at the mercy of support forums for answers. Don’t worry because we have got you covered. Here are a few ways you can sort files, and even folders in Windows 10 numerically and by size.
1. Sort Numerically Using Group Policy Editor
The Group Policy Editor isn’t present in the Windows 10 Home edition. You can grab it from reputed sites or download it using the link below.
If you have files beginning with numbers like 1,2,3, etc., you cannot sort them in ascending or descending order. This is how it is looking currently.

You will have to enable numeric sorting in Windows 10 because it is not enabled by default. Duh. To begin, press the Windows Key+R on your keyboard to launch the Run command prompt. Type gpedit.msc in there and hit the Enter key.

It may take some time so don’t get worked up. You should now see the Local Group Policy Editor window with two panes. In the left one, click on Computer Configuration and then double-click on Administrative Templates in the right window pane.

When you see the Windows Components folder, double-click on it.

Scroll down to find the File Explorer folder and open it.

You should see a bunch of files here. Find ‘Turn off numerical sorting in File Explorer’ here and open it.

You will notice that the setting is ‘Not Configured’ by default. Select Enabled and click on Apply to save your settings.

Getting back to the example I shared above, you can see that the files are now sorted numerically.

The file named 22 appears before file named 3 because the first digit 2 is smaller than 3. If it is not working for you, try restarting your system after saving everything.
The numerical sorting order takes the sequence of digit occurrence into consideration. In simpler terms, it arranges the files by following the historical value of the first digit, second digit and so on. That’s why 11, 12, and 22 file names are appearing between 1 and 3.
Also on Guiding Tech

How to Fix the Black Folder Background Issue in Windows 10
2. Enable Numeric Sorting Using Registry Editor
Let’s test another method. Registry Editor is available on all Windows editions. Once again, launch the Run command prompt by pressing Windows Key+R, type regedit in the field and hit Enter.

Windows may ask your permission to open Registry Editor, so click on Yes if asked. The folder structure that you have to navigate through is as follows:
This is how it should look.

You’ll have to create a new file here. Right-click anywhere in the right pane and select New and then select DWORD (32-bit) Value from the context menu. This will create a blank file.

Rename the newly created file to NoStrCmpLogical.

Double-click to open this file and enter the numerical value ‘0’ in the Value data field. Then hit OK.

Going back to the example in the previous section, your files should be ordered numerically. If not, reboot your computer.
3. Sort Folders in Windows 10 by Size
There can be many reasons why you would want to sort files and folders in your hard disk by size in the file explorer. One of them is that you need to know which files/folders are taking up most space. We all need to perform house cleaning on the hard disk from time to time.
Don’t worry. This one is less complicated because Microsoft has already thought of it. Only they didn’t make it easy to spot.
Open file explorer by pressing the Windows+E shortcut. On the upper right corner, you will see the familiar search bar. Type size: to reveal a hidden drop-down menu.

You can now choose one of the several options available. You can find empty files or files that are smaller or larger than a particular value.
To use the search function in the file explorer without having to use the mouse, press CTRL+F.
Also on Guiding Tech

What is Windows Defender Exploit Guard and How to Enable it on Windows 10
4. TreeSize
TreeSize is a free tool which can be a bit more helpful than the default option provided by Microsoft. When you launch TreeSize, it will automatically scan your computer for files and folders, and present them in a tree structure.

You can not only view files in ascending or descending order of size but also folders, which can be really, really helpful. Hovering over individual entries will reveal even more useful data like dates, compression, average file size, and so on.
Space Organization
Helpful shortcuts and tools like these can help manage the storage better. Using the above methods, you can easily sort files numerically. You also now know how to sort folders by size which can be helpful when you need to free up some space from your computer.
Next up: Not happy with the default photos app which ships with Windows 10? Here are 5 alternatives worth checking out.
Last updated on 5 Jul, 2019
The above article may contain affiliate links which help support Guiding Tech. However, it does not affect our editorial integrity. The content remains unbiased and authentic.
Read Next

9 Fixes for Windows 10 File Explorer Is Slow or Loading Slowly Error
If # File Explorer is loading slowly or acting slow on your # Windows 10 computer, try one of these 9 fixes to resolve that error and speed things up.

How to Enable or Disable Confirm on Delete Files Pop-up in Windows 10
Are you irked by the # Windows confirmatino whenever you want to delete files? Here’s a guide on how to enable or disable confirm on delete files pop-up on # Windows 10.

How to Manage Files and Folders Efficiently on Windows 10
Here are some useful organizational tips and tricks on managing files and folders on # Windows 10 computers.

How to Count Number of Files or Subfolders Inside a Folder
Want to count the number of files and subfolders inside a # folder? Here are 5 ways to count files and subfolders, and view how much space they are consuming.

How to Disable Fullscreen Optimization in Windows 10
Facing lags while playing games on # Windows 10? Here are the fixes for the Fullscreen Optimizations to get rid of the new borderless display mode.

7 Best Ways to Fix Kindle for PC Desktop App Won’t Open on Windows
Can’t open the Amazon # Kindle app on your # desktop PC? Here are some solutions to fix that issue so you can get back to reading your books in peace in your free time.

What Is Microsoft Power Automate Desktop and Why Do You Need It
Everything you need to know about # Microsoft # Power Automate Desktop. Where to get it, how to use it, how to create your first workflow, and who should use it. Complete guide.

6 Best Ways to Fix Action Center Greyed Out on Windows 10
Is the Action Center greyed out on your # Windows 10 computer? Here is an in-depth look at all the solutions that can help you fix this issue promptly.


