- How to open your user profile folder in Windows
- Where is the user profile folder?
- The %USERPROFILE% environment variable
- Using %USERPROFILE% in File Explorer
- Using %USERPROFILE% in Command Prompt
- Why do I need to open the profile folder?
- How to Rename User and User Folder in Windows 7, 8, 8.1 or 10 OS.
- How to Rename User and User Profile Folder in Windows 10/8/7 *
- Relocation of the Users and the ProgramData directories to a drive other than the drive that has the Windows directory
- More information
- Information that is documented in the current release of the Windows AIK and the Windows OPK
- The Profiles Directory setting
- The ProgramData setting
How to open your user profile folder in Windows

In Windows, your user profile folder is a special folder containing files and folders pertaining only to you. It contains your Desktop, your Documents, and personal data such as your application preferences.
Files in the user profile folder are private to you. If other people use your computer, they cannot view and change the files in your user profile folder, unless they are an administrator. The same permissions apply to all subdirectories of your profile directory, such as your Desktop directory, your Documents directory, etc.
Where is the user profile folder?
Your user profile folder is located in the Users folder on your Windows system drive, which on most computers is C:.
In the Users folder, your profile folder name is the same as your username. If your username is hope, your user profile folder is located at C:\Users\hope\.
The %USERPROFILE% environment variable
If you’re not sure what your username is, you can always get to your profile folder using the environment variable %USERPROFILE%.
An environment variable is a special word containing a value. The %USERPROFILE% variable contains the path of your user profile folder.
Using %USERPROFILE% in File Explorer
In your File Explorer, the location bar shows the name of the folder you’re viewing. It works like an address bar in a web browser. You can type a location on your computer into the location bar, and File Explorer opens that folder.
As shown in the following steps, if you type %USERPROFILE% in the location bar, File Explorer opens your profile folder.
- Open a new File Explorer window. You can open it from the Start menu (Windows System → File Explorer).
Or, press the keyboard shortcut Windows key + E (hold down the Windows key and press E).

- File Explorer opens your user profile folder and displays its contents. The title bar of the window and your location bar both display your full login name.

Using %USERPROFILE% in Command Prompt
If you use the Windows Command Prompt, you can use the cd command with %USERPROFILE% to change the current directory to your profile folder.
- Open the Command Prompt. For example, press Windows key + R to open the run box, then type cmd and press Enter .

- Your command prompt displays the current directory, followed by a >.

By default, when you open a new Command Prompt window, the current directory is your user profile folder.
- To change to your profile folder at any time, use the cd command:

- You can also use the echo command to display the value of %USERPROFILE%.
To view your username, use echo %USERNAME%.

For more information about environment variables, see: What are the default environment variables in Windows?
Why do I need to open the profile folder?
Usually, you don’t need to open your profile folder directly. The Quick Access shortcuts on the left side of the File Explorer window (Desktop, Documents, Downloads, Music, etc.) already point to the major folders in your profile directory.
As a general rule, you should not rearrange the files and folders that already exist in your profile directory, because Windows expects them to have certain names and locations. For instance, do not move or rename your Desktop folder.
However, you can put files and folders in your profile directory if you choose.
Also, some tasks, such as adding items to your Startup folder, require you know the location of your profile folder.
How to Rename User and User Folder in Windows 7, 8, 8.1 or 10 OS.
If you ‘re using a Windows 10/8 or 7 personal computer (not part of a Domain) and you want to rename the user account name and the related User Profile folder name then this tutorial may be useful for you. As you may know when you change the username of a user in Windows, the related user folder remain unchanged and you must perform some additional steps to accomplish this. In this tutorial you ‘ll learn how to rename a user in Windows and how to rename the user folder in order to match the name of the user.
How to Rename User and User Profile Folder in Windows 10/8/7 *
* Important: To apply the steps below you must sign into Windows, by using an account with Administrative privileges.
Assumption: Let’s suppose that the current username and the related profile folder is named «Josh» and you want to change the account name and the profile folder name to «Joshua».
Step 1. Rename the User from User Account Properties.
To change the username of a local account in Windows:
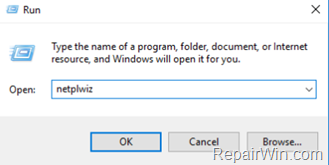
1. Press simultaneously the Windows  + R keys to open the run command box.
2. Type netplwiz & Press Enter.
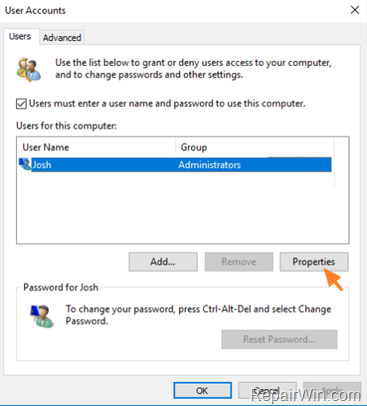
3. Highlight the user that you want to rename and select Properties.
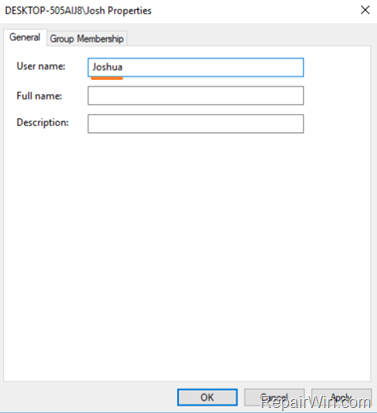
4. Then change the current User name (e.g. «Josh) with the new one (e.g «Joshua»)
5. When done click Apply and OK twice to close all open windows.
Step 2. Change the User Profile Folder Path in Registry.
1. Open Registry Editor: To do that:
-
- Press simultaneously the Windows
 + R keys to open the run command box.
 - Type regedit & Press Enter.
- Press simultaneously the Windows

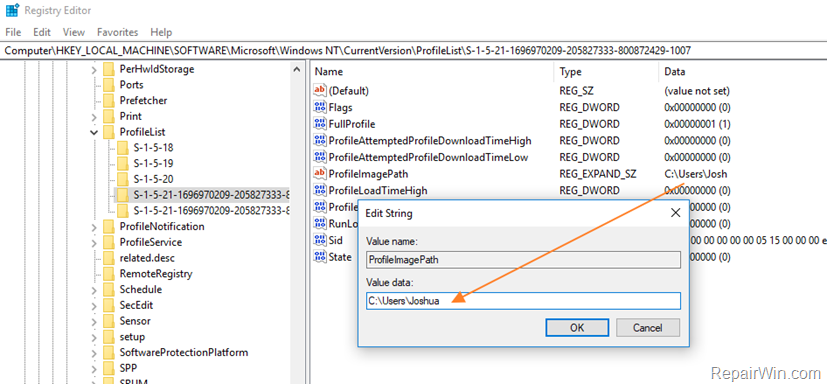
2. Navigate to the following key at the left pane:
3. Click at any “S-1-5-21-xxx…” registry key, until you find which one contains the path for your profile folder at the «ProfileImagePath» REG_DWORD value.
* e.g. If your Username is “Josh” then see which S-1-5-21-xxx…” registry key, contains the “C:\Users\Josh” value at ProfileImagePath.
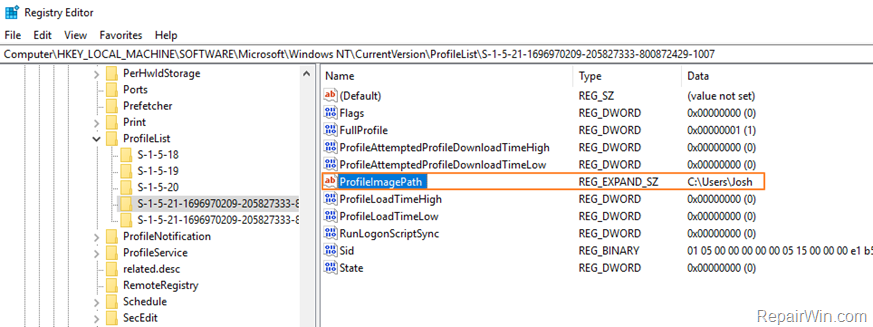
4. When you find that key, double click at ProfileImagePath and rename the current path (profile folder name) to the new one. *
* e.g. At this example we proceed to change the «C:\Users\Josh» folder name, with the new folder name «C:\Users\Joshua».
5. When done, click OK.
6. Close Registry Editor and Restart your computer.
Step 3. Rename the User Profile Folder.
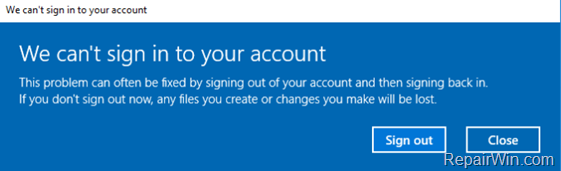
1. After restart you ‘ll be sign to a temporary profile (empty profile) with the message «We can’t sign in to your account». (Click Close at this message and continue below).
2. Open Windows Explorer and explore the contents of the «C:\Users» folder.
3. Right click on the user profile folder (e.g. «Josh» in this example) and choose Rename.
4. Type the new name for the profile folder (e.g. «Joshua» in this example) and press Enter.
5. Click Continue when asked to provide administrator permission to rename the folder. *
* Note: If you receive an «Access denied» error, when you try to rename the user folder, then try to rename the folder in Safe Mode or try the following:
1. Open Command Prompt as Administrator.
2. Type the following command and press enter: net user administrator /active:yes
3. Restart the computer and login as Administrator
4. Rename the user profile folder.
5. Restart again and login to the (renamed) user.
6. If everything is OK, then disable the administrator account by typing this command (in Command Prompt Admin): net user administrator /active:no

6. Restart your computer to login to your profile with all files and settings untouched!
Step 4. FIX Invalid Registry References.
The next step, is to fix in the Registry, the references to the old profile folder. To do that:
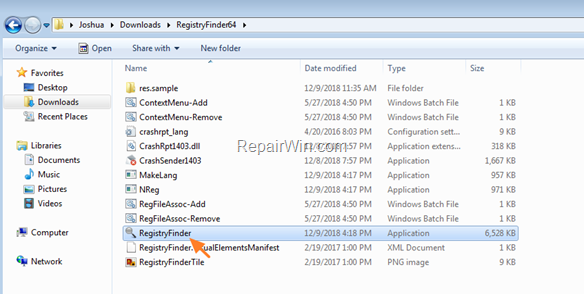
1. Download the Registry Finder utility in an archive format, according your Windows version (32 or 64Bit) and extract the download file (RegistryFinder.zip).
2. From the extracted folder, double click to run the RegistryFinder application.
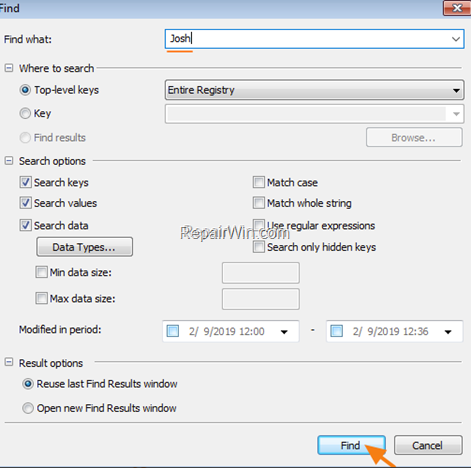
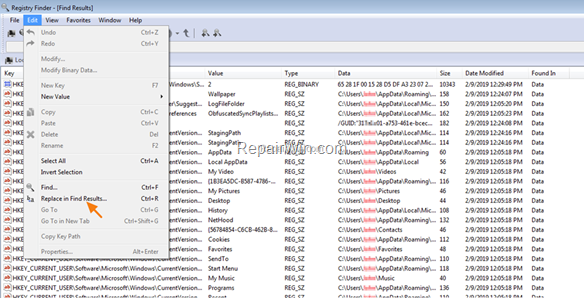
3. In Registry Finder, click the Edit menu and choose Find.
4. Type the old folder name (e.g. Josh») and click Find.
5. When the search is completed, click Edit and choose Replace in Find Results.
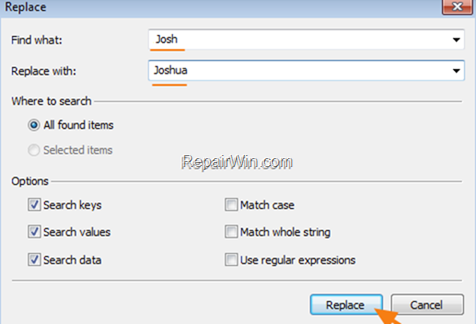
6. At ‘Find what’ field type the old name (e.g. Josh») and in the ‘Replace with’ field type the new name (e.g. Joshua). When done, click Replace.
7. When the operation is completed, you should receive an error message that says «error encountered». Just ignore the error message and click No to close the window.

8. Close the Registry Finder and restart your PC.
Step 5. Rebuild the Search Index.
The final step is to rebuild the search index. To do that:
1. Navigate to Windows Control Panel and open Indexing Options.*
* If you don’t see the Indexing Options, set the View (View by) to Small icons.
2. At Indexing Options click Advanced.
3. At Troubleshooting section, click the Rebuild button.
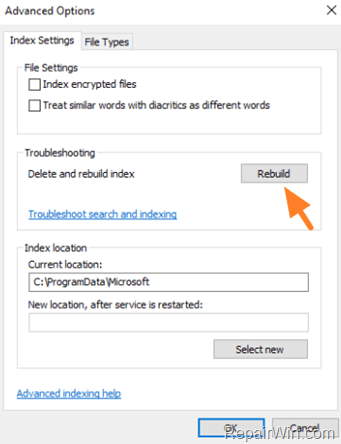
4. Press OK to rebuild the Index.
5. Wait until the index rebuilding is completed and then restart your computer again.
That’s all folks! Did it work for you?
Please leave a comment in the comment section below or even better: like and share this blog post in the social networks to help spread the word about this problem.
Relocation of the Users and the ProgramData directories to a drive other than the drive that has the Windows directory
This article describes the changes in policy for the relocation of the Users directory and the ProgramData directory to a drive other than the %systemdrive% drive in Windows operating systems.
Original product version: В Windows 10 — all editions, Windows Server 2019, Windows Server 2016, Windows Server 2012 R2
Original KB number: В 949977
Using the ProgramData setting to redirect folders to a drive other than the system volume will block your ability to upgrade to future versions of Windows.
By changing the default location of the user profile directories or program data folders to a volume other than the system volume, you cannot service your Windows installation. Any updates, fixes, or service packs cannot be applied to the installation. We recommend that you do not change the location of the user profile directories or program data folders.
Beginning with Windows 10, OS upgrades are supported even if user profiles are redirected to another drive. For example, if you are using Windows 8.1 with ProfilesDirectory set to D:\, you can upgrade to Windows 10.
More information
%systemdrive% is defined as the drive that contains the Windows directory. There are various reasons why you may want to relocate the Users directory or the ProgramData directory to other drives.
For Windows, the most common reasons are as follows:
- It is easier to back up data from a single drive and from a drive that contains only user files.
- It is easier to rebuild the operating system drive on a user’s computer if user data is located on a separate volume. In this case, the drive that contains the Windows directory can be formatted, and Windows can be reinstalled without having to worry about how to remove user data.
For Windows Server, the most common reason is as follows:
- There are performance improvements when you relocate the Users directory and the ProgramData directory to a drive other than the operating system drive.
For information about how to use the answer file setting, see Answer Files Overview.
If you use the FolderLocations unattend setting to move user data to a location other than the %systemdrive% drive, some servicing components may not be installed. These components may include critical updates, security updates, hotfixes, and service packs.
Information that is documented in the current release of the Windows AIK and the Windows OPK
The Windows Automated Installation Kit (AIK) and the Windows OEM Preinstallation Kit (OPK) for Windows and Windows Server contain documentation warnings that are related to the usage of the Profile Directory and ProgramData unattend settings. These are the settings that let you relocate the Users directory and the ProgramData directory to locations other than their default locations. This includes other drives.
These warnings were included before the servicing stack update (update 937287) was available. This update addresses the issue that is discussed in the warning text. Windows AIK and the Windows OPK documentation reads as follows. You cannot upgrade such installations to the next version of Windows.
Setting information from the Windows AIK and Windows OPK documentation:
The Profiles Directory setting
The Profiles Directory setting specifies the path of the user profile folder.
Use this setting to move the user profile folder (typically %SYSTEMDRIVE%\Users) to another location during Setup or Sysprep. The destination path can be on a volume other than the system drive, as long as it meets the following requirements:
- It must be on an NTFS volume.
- It must not be the path of another operating system user profile folder.
- It must not contain any serviceable components.
This setting can be used to keep system data separate from user data. If Windows is reinstalled on the system volume, a user who has administrative rights can manually recover data from this location.
Using ProfilesDirectory to redirect folders to a drive other than the system volume blocks upgrades. Using ProfilesDirectory to point to a directory that is not the system volume will block SKU upgrades and upgrades to future versions of Windows. For example, if you use Windows 8 together with ProfilesDirectory set to D:\, you cannot upgrade to Windows 8 Pro or to the next version of Windows. The servicing stack does not handle cross-volume transactions, and it blocks upgrades.
The ProgramData setting
The ProgramData setting specifies the path of the program data folder.
These settings should be used only in a test environment. By changing the default location of the user profile directories or program data folders to a volume other than the System volume, you cannot service your Windows installation. Any updates, fixes, or service packs cannot be applied to the installation. Microsoft recommends that you do not change the location of the user profile directories or program data folders. This is especially true for Microsoft Store apps. Changing the location of %programdata% will cause errors when you install, uninstall, or update these apps.
If you use the unattend settings to set up the operating systems that are listed in this article, we will provide commercially reasonable efforts to support your scenario.


