- Keep your photos safely stored and up to date on all of your devices
- Keep your photos updated automatically with iCloud
- Before you begin
- Turn on iCloud Photos
- Sync your photos manually using the Finder
- Turn off Finder syncing
- How to view Apple photos on Windows
- How do I view my Apple photos on my Windows PC?
- 1. Use Adobe Lightroom
- Adobe Lightroom
- 2. Create an Apple ID using your Windows 10 computer
- 3. Create an Apple ID using an iOS device
- 3. Using an OS X device
- 4. Set up iCloud for Windows 10
- 5. Download your photos to your PC
- Other useful information
- Frequently Asked Questions
- How do I view Apple photos on my PC?
- How do I open photos on my Mac on Windows 10?
- How do I download photos from iCloud to Windows 10?
- Переходим с Windows Phone на iPhone: данные, контакты, фото
- Для начала процесса переноса воспользуемся iTunes программой
- Как перенести контакты с Windows Phone на iPhone
- Перемещение фотографий и видео данных с виндовс гаджета на айфон смартфон
- Перемещение музыки и видео
Keep your photos safely stored and up to date on all of your devices
iCloud Photos is the easiest way to keep your entire library safe and updated across your devices, automatically. Or you can use your computer to sync photos and videos manually to your iPhone, iPad, or iPod touch.
Use iCloud Photos
Sync Photos with Finder
Keep your photos updated automatically with iCloud
With iCloud Photos, you can keep all your photos and videos stored in iCloud and synced seamlessly across all of your devices so you can access your library from your Mac, Apple TV, iPhone, iPad, and even your PC.
When you’re connected to the Internet, Wi-Fi, or a cellular network, your newest shots upload automatically and your edits update in real time. So you always see the latest version on your devices and online.
Before you begin
- Update your iPhone, iPad, or iPod touch to the latest version of iOS, your Mac to the latest macOS, and your Apple TV 4K or Apple TV (4th generation) to the latest tvOS.
- Make sure that you’re signed in to iCloud with the same Apple ID on all of your devices.
- Set up iCloud on all of your devices. If you have a PC, download iCloud for Windows.
- Make sure that your device is connected to Wi-Fi.
Turn on iCloud Photos
- On your iPhone, iPad, or iPod touch, go to Settings > [your name] > iCloud > Photos, then turn on iCloud Photos.
- On your Mac, go to System Preferences > iCloud > Options next to Photos, then select iCloud Photos.
- On your Apple TV, go to Settings > Accounts > iCloud > iCloud Photos.
- On your Windows PC, download iCloud for Windows then set up iCloud Photos.
When you turn on iCloud Photos, any photos or videos that you’ve synced manually to your iOS device are overwritten. If these photos and videos are still on your Mac or PC, they’ll appear on your iOS device when iCloud Photos updates your photo library.
If you choose not to turn on iCloud Photos, you can sync your photos and videos manually in the Finder on your Mac.
Sync your photos manually using the Finder
You can use the Finder on your Mac to sync photos to your iPhone, iPad, or iPod touch from the Photos app, or from a folder on your computer. Each time that you sync your iOS device with your computer, the photos and videos on your iOS device update to match the albums on your computer. If you have photos on your iPhone, iPad, or iPod touch that aren’t on your computer, follow these steps to import them.
- Open a Finder window and connect your device to your computer using a USB cable.
- Your device appears in the sidebar of the Finder window. Click the device to select it.
- If prompted, trust your device.
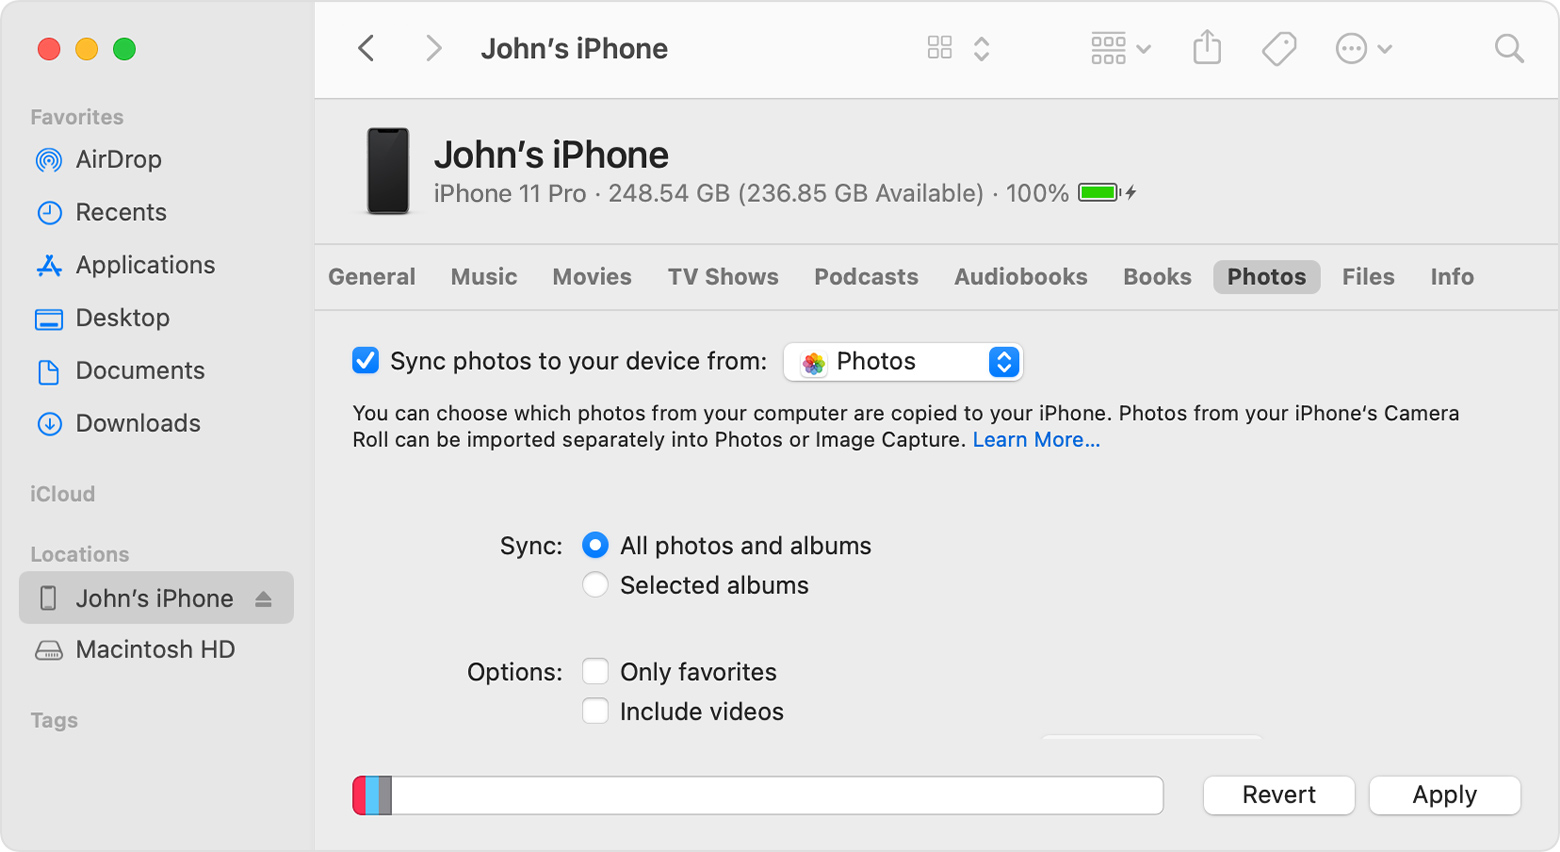
- Click the Photos tab below your device’s information.
- Select the checkbox next to Sync photos to your device from, then select Photos or a folder on your Mac.
- Choose between syncing all your photos and albums or only selected albums. You can also choose to sync only favorites, and whether to include videos.
- Click the Apply button in the lower-right corner of the window. If syncing doesn’t start automatically, click the Sync button.
You must import Slo-Mo and Time-Lapse videos through the Photos app or Image Capture in OS X Yosemite or later for their effect to be synced via the Finder. When you use iCloud Photos, Slo-Mo and Time-Lapse videos keep their effects.
Live Photos keep their effect when you import them to Photos in OS X El Capitan and later, but they lose their effect if you sync them back to your device via your computer. Use iCloud Photos so that Live Photos keep their effect, no matter what device you use.
You can sync your device only with the System Photo Library. If you have more than one photo library on your Mac, be sure that the correct one is designated as the System Photo Library.
Turn off Finder syncing
If you don’t want the synced photos on your iPhone, iPad, or iPod touch anymore, turn off syncing in the Finder and they’ll be removed from your device. You can turn off syncing for some of your photo albums or all of them at once.
How to view Apple photos on Windows

- Apple has its own environment and it could be difficult to see your Apple photos on Windows.
- You can install a powerful A pple photo viewer for Windows like Adobe Lightroom.
- Another method of how to open Apple photos on Windows is to create an Apple ID on your PC.
- You can also open the photos library on Windows using a dedicated tool.

- Photos
- Videos
- Songs
- 3D models & infographics
- Many other artworks
Apple is notorious for locking down its products and services from outside access.
In the case that you’re a Windows user, you need only install a driver to allow access to your iCloud account from a PC in order to view your Apple photos on a Windows PC.
Photos are not the only thing you can download from iCloud: you also access emails, contacts, calendars and reminders.
First of all, you need to create an iCloud account. Here are three easy methods to do that.
How do I view my Apple photos on my Windows PC?
1. Use Adobe Lightroom
Adobe Lightroom offers cross-platform functionality so you have access to all your photos regardless of the platform you use. Easily edit, manage and share photos with just a few taps or clicks.
This powerful software allows you to search, your library, do on-the-fly edits and it supports an impressive amount of cameras and mobile devices so you can edit your RAW files with ease.
Take advantage of the of all of these features for free with the Lightroom app for mobile, PC and Mac.

Adobe Lightroom
2. Create an Apple ID using your Windows 10 computer
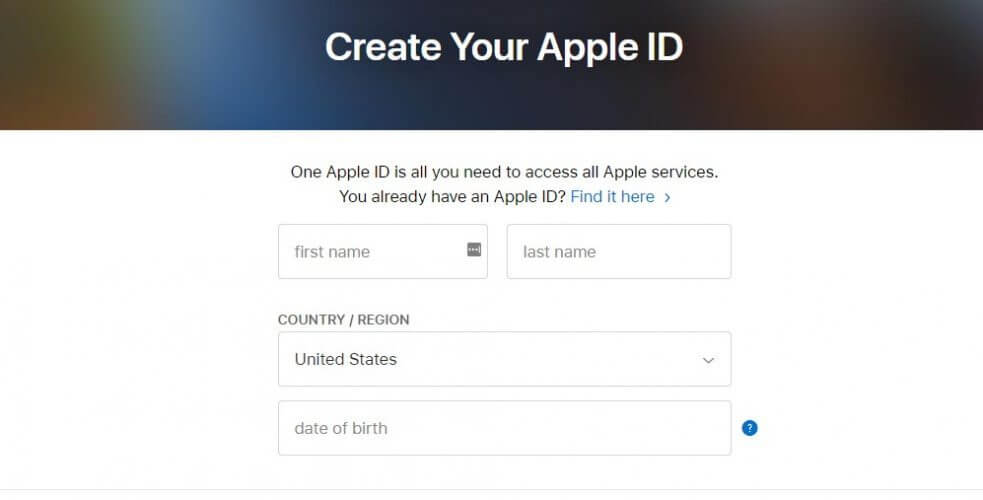
- Go to Apple’s official page to create your account.
- You will be directed to the personal information table (Enter an email that you want to be attached to the Apple account for recovery).
- Choose a strong password.
- Enter your personal information.

- Select and answer three security questions (Pay attention because these questions will be used for the account recovery process).
- Select your country.
- Check/uncheck if you want any notifications from Apple.
- Enter the captcha code and click on the Continue button.
- You will receive a mail with an activation code that you have to enter in the dialog box displayed on the Apple website to finish your account activation.
- Check if your account has been activated.
Open your browser and go to the Apple ID website. An Apple ID and the iCloud Account are pretty much the same thing because through the Apple ID you have access to the iCloud storage.
3. Create an Apple ID using an iOS device

- Go to Settings. You can use this feature to sync your files from the device to your iCloud account.
- Tap on iCloud to open the iCloud menu on your iOS device.
- If an account is already signed in, you have to sign out to create a new one.
- After you signed out tap on the Get a Free Apple ID button to start the account creation process.
- Enter your birthday. This will determine what kind of content you can access.
- Enter your real name. The Account information must comply with billing information.
- Enter your e-mail address (Make sure that you still have access to that address because you will receive an activation mail, and if your iCloud account is compromised, you can recover it using this e-mail address).
- Enter a password (Choose a strong one and use a combination of letters and numbers. Remember that the iCloud account contains a lot of your personal information).
- Choose and answer 3 security questions (You will have to answer the same questions every time you want to change the account settings).
- Add a rescue e-mail address (Even if it is an optional feature, we strongly recommend you to do that because it increases the security level of your account).
- Finish the account configuration by accepting the Apple terms and conditions. After accepting, you will be logged in with your new ID.
iOS devices have a preset feature in the Settings app for activating the iCloud account.
3. Using an OS X device

- Click on the Apple menu button from the upper-left corner of your screen.
- Select System Preferences.
- This will open a window with different programs and applications installed on your device. Select the iCloud icon to open the iCloud settings menu.
- It will open a dialog box where you can sign in to your account, if you already have one, or create a new account. In this case, you must click on the Create new Apple ID.
- You have to fill out a form with your personal information (active e-mail, strong password and security questions). Make sure that you will remember all the information because with their help you can to recover your account if it gets compromised.
- Apple will send you a mail with an activation code.
- After you enter the code, you will have access to your iCloud account.
Depending on what kind of information you want to access from iCloud, you need to use different software packages.
For example, for mail, contacts, calendars, and reminders you will need any version of Outlook from 2007 until now.
For bookmarks, you will need Safari 5.1.7 or later, Google Chrome 28 or later, Firefox 22 or later or Internet Explorer 10 or later. And for documents, you will need to install iCloud Drive.
4. Set up iCloud for Windows 10

- Download iCloud for Windows from Apple. The installation process should start automatically. Otherwise, you need to go to File Explorer and manually open the iCloud Setup.
- After installation, restart your computer to let iCloud finish the configuration.
- Make sure that iCloud is running when you open your PC. Otherwise, you’ll need to go to the Start menu and search for iCloud.
- Double-click iCloud to open it.
- Enter your Apple ID to access your iCloud Account.
- Choose what kind of content you want to have synchronized with your iCloud account.
- Click on the Apply button to finish the configuration.
5. Download your photos to your PC
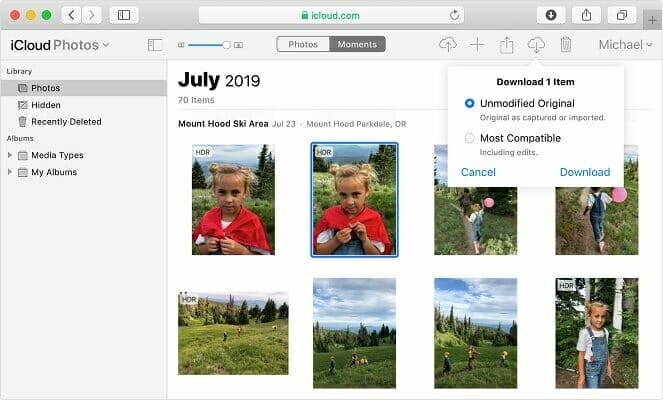
When you turn on the Photos feature, iCloud will automatically create a folder called iCloud Photos.
All the pictures or videos you add to the iCloud folder from your PC can be viewed on any Apple device connected to your account.
You can also access those files from iCloud.com. Through the iCloud Photo Sharing feature, you can share pictures and videos of your most important moments with friends.
Other useful information
Manage your iCloud storage space
iCloud is a free service that offers users 5GB of cloud space to store their data. For most of us, this space is often insufficient and because of this, Apple provides us with the opportunity to upgrade the storage space.
Depending on our needs and budget, you can increase the capacity of the cloud up to 2TB. You can find a price list right on Apple’s website. This upgrade is not permanent and comes with a monthly subscription.
Upgrade iCloud for Windows
All you have to do is open the Apple Software Update on your PC and it will notify you when updates are available. To receive update notifications, you need to configure the Apple Software Update.
From the software’s interface, click on the Edit button and go to Preferences. From that menu, you can choose how often you would like to check for updates (daily, weekly, monthly, or never).
Turn off or uninstall iCloud for Windows
- Type control in the search tab and click on Control Panel from the results.
- Select Programs and Features.
- You will see a list of all the installed programs on your computer.
- Click on iCloud and select Uninstall.
- Click OK to begin the uninstalling process.
Frequently Asked Questions
How do I view Apple photos on my PC?
You can easily view photos from your iCloud on your Windows PC by downloading the iCloud for Windows app and signing in with your Apple ID.
How do I open photos on my Mac on Windows 10?
There are several ways to do this, as shown in our guide, but using a third-party app like Adobe Lightroom, you will be able to manage and access your photos regardless of which platform you’re using.
How do I download photos from iCloud to Windows 10?
You can download your photos from iCloud on your Windows PC via the iCloud for Windows app or one of the other ways listed in this guide.
Переходим с Windows Phone на iPhone: данные, контакты, фото

Решили отказаться от вашего старого смартфона на Windows и перейти на iPhone? Наверняка хотели бы сохранить все ваши контакты и медиа данные. Сегодня мы поговорим о том, как это можно осуществить и сделать перенос наиболее важных файлов на айфон с iOS платформой.
Если вы хотя бы какое-то время пользовались аппаратом с Windows, то наверняка у вас есть список вещей, которые вы не хотите потерять: календари, заметки, телефонную книгу, почту, музыку, любимые приложения, фото. Перечислять то, что вы желаете перенести можно долго. И если в случае со смартфонами на андроиде юзеры пользуются различными облачными ресурсами вроде OneDrive, то в случае с Windows Phone придется поступить немного иначе.
Для начала процесса переноса воспользуемся iTunes программой
Яблочный сервис iCloud и медиаплеер iTunes представляют собой восхитительную смесь все в одном. С их помощью можно синхронизировать массу данных, и для переноса информации с Windows phone на iPhone они незаменимы. Для владельцев Mac iTunes устанавливается вместе с системой, а вот для Windows потребуется скачать приложение.
Как перенести контакты с Windows Phone на iPhone
Мы уже давно не пользуемся смартфонами только для звонков. Современные гаджеты стали основным средством коммуникации. И нет ничего странного, что в них хранится чудовищное количество информации о наших планах и задачах, расписание и почта, а также множество других не менее важных вещей. Вполне очевидно, что перенести все это с виндовс телефона на айфон достаточно важно.
Благо что Apple предусмотрели этот вариант, предположив, что вы воспользуетесь вашей уже существующей учетной записью Microsoft. Не лишним будет сделать бэкап на старом телефоне.
Откройте настройки на iPhone;
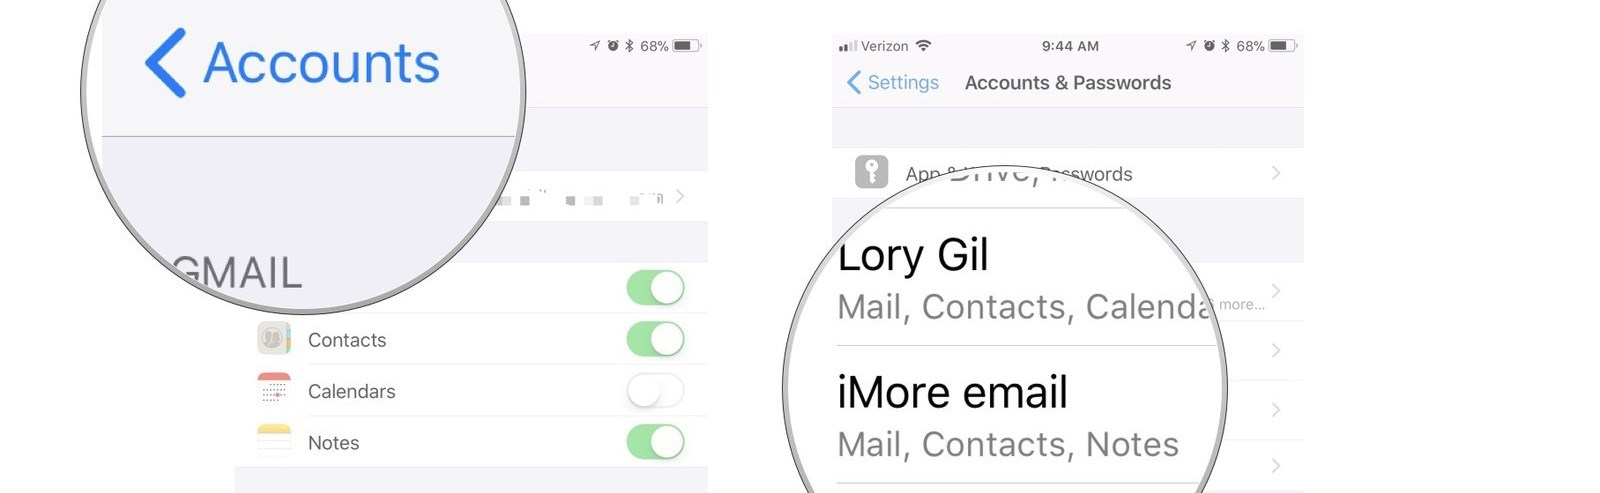
Перейдите по ссылке «Учетные записи и пароли»;
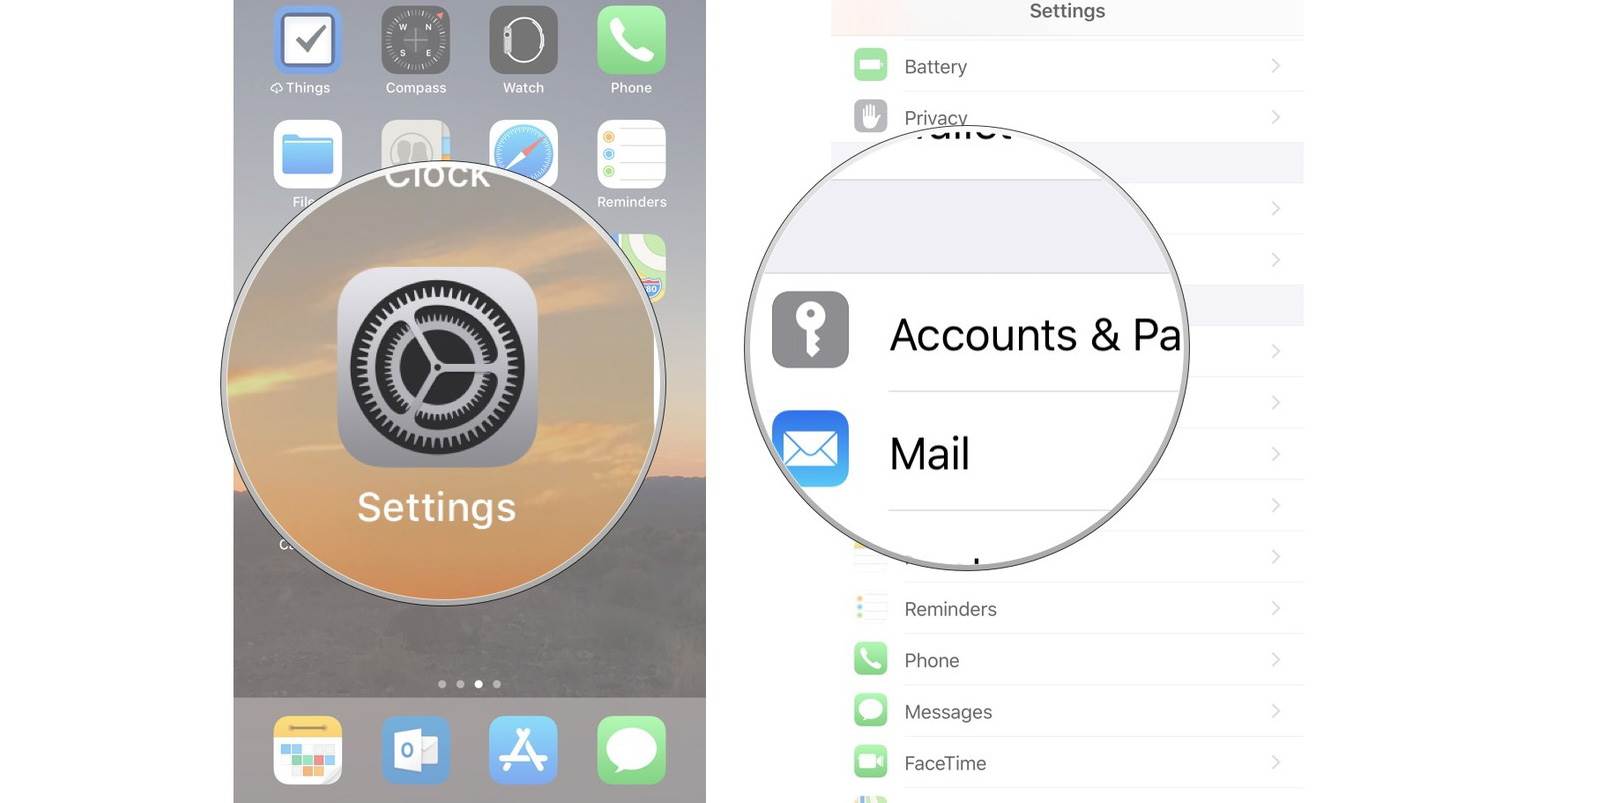
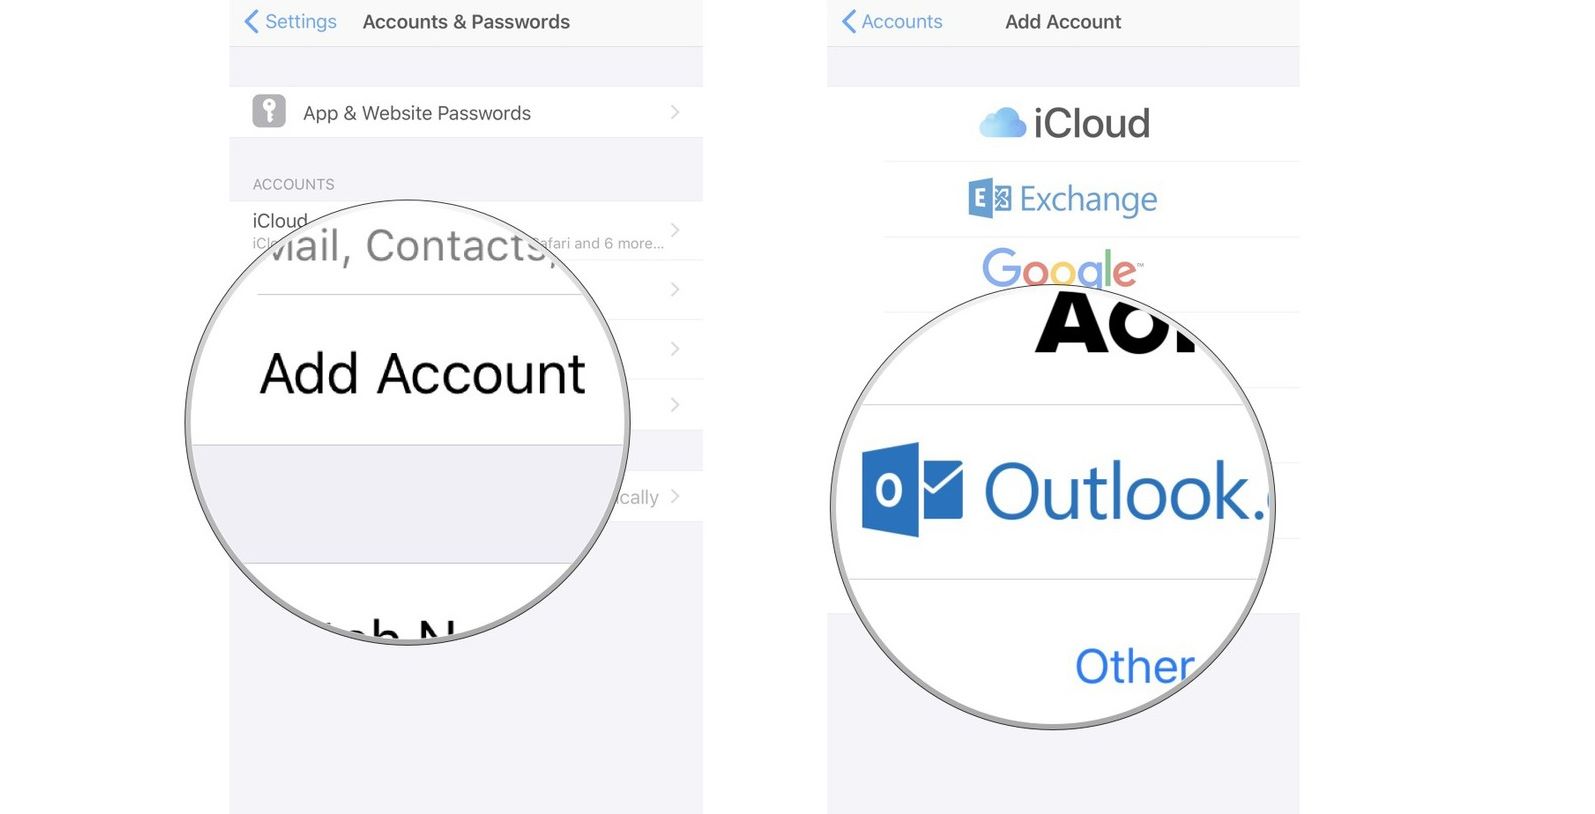
Нажмите «Добавить учетную запись»;
Выберите учетную запись, в которой находятся текущая почта, календари и контакты;
Следуйте инструкциям для входа в аккаунт;
После добавления учетной записи убедитесь, что вы включили синхронизацию для всех данных, которые вы хотите перенести на устройство с iOS платформой.
Если вы еще не оказались на странице вашего аккаунта, то в верхнем левом углу нажмите «Учетные записи»
Выберите созданный аккаунт и настройте его
В настройках Почты включите получение почты и её синхронизацию. Переключатель должен стать зеленым.
Подобную операцию необходимо провести для перекидывания Контактов;
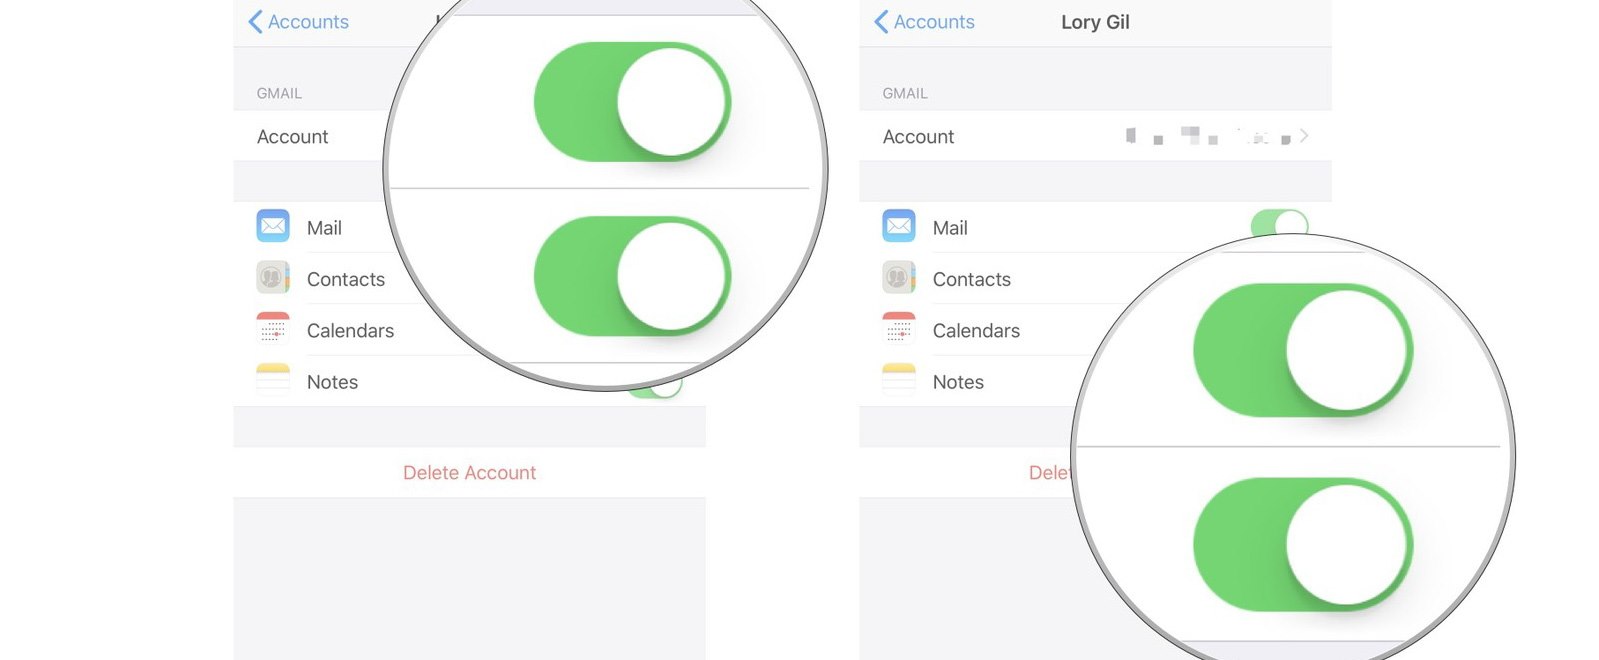
Настроенный в iPhone доступ к аккаунту Microsoft позволит легко получить доступ ко всей имеющейся в аккаунте информации.
Вторым вариантом станет использование Microsoft Outlook для iOS, для этого приложение потребуется установить на вашем яблочном гаджете. Процесс копирования телефонной книги в этом случае пройдет гораздо быстрее.
Перемещение фотографий и видео данных с виндовс гаджета на айфон смартфон

В первую очередь мы рекомендуем вам отказаться от переноса всей фото и видеотеки со старого аппарата на виндовс напрямую в айфон. Если вы использовали для хранения ваших фото и видео карту microSD, то с нее передать данные на iPhone будет проблематично. Вы вполне можете начать все заново и сохранить старые фото и видео на пк. Либо можете воспользоваться онлайн-сервисом и через него перенести все необходимые данные.
Лучшим вариантом станет использование облака. Если ваш аппарат работал на Windows 10 Mobile велика вероятность, что смартфон сам настроил загрузку библиотеки в OneDrive. Если же нет, — сделайте это сами. А дальше достаточно будет из OneDrive загрузить все в iPhone, или оставить в облаке. В обоих случаях вы будете работать с уже привычным и знакомым сервисом, что не должно вызвать каких-либо затруднений.
Вам просто нужно установить приложение OneDrive из App Store, и появится мгновенный доступ ко всем фотографиям, где бы вы ни находились.
Если вы используете сервис Dropbox, то принцип действий останется тем же. Вам потребуется установить соответствующее приложение на айфон.
Если вы не можете или попросту не хотите использовать облачные сервисы для переноса контактов с Lumia на iPhone, то вы всегда можете воспользоваться старым добрым кабелем. Используйте ПК с Windows 10. Через приложение Phone Companion синхронизируйте данные старого телефона и ПК. Затем останется через проводник перенести фото и видео.
В случае с Мак все незначительно сложнее. Для перемещения фото с компьютера на айфон потребуется iTunes. Ну а дальше достаточно будет подключить iPhone через кабель USB-to-Lightning и выбрать элементы для синхронизации.
Что насчет моих любимых приложений Microsoft?

Microsoft создает хорошие кросс-платформенные приложения и сервисы. И многие популярные и любимые приложения доступны как пользователям Microsoft, так и владельцам iPhone. Ранее в этой статье мы уже рассказали, как связать аккаунты OneDrive и Outlook на айфоне. Приведенный ниже список поможет вам с большим комфортом перейти на новый смартфон:
Полный список всех приложений Microsoft для iPhone можно найти здесь.
Перемещение музыки и видео

iPhone и iTunes хорошо работают с медиаданными. Так что, если у вас есть коллекция на компьютере или смартфоне просто запустите iTunes и начните синхронизацию.
Разберемся с остальными приложениями и данными для переноса с Windows гаджета

App Store является уникальным местом, где вы можете найти сотни приложений. В том числе вы можете без проблем получить доступ к самым популярным сервисам, установить многие приложения Google и Microsoft. некоторые мы уже рассмотрели в статье, а вот еще небольшой список:
И это лишь основные приложения. В App Store вы найдете сотни тысяч игр и программ, потому заходите с App Store и скачивайте все, что вам понравится.
Синхронизация данных и поиск знакомых приложений лишь первый шаг, который поможет вам освоиться с новым iPhone. Огромное количество приложений и отшлифованная работа с облачными сервисами, а также серьезная поддержка популярных программ поможет вам легко и быстро освоиться с новым смартфоном и удобно использовать все привычные средства коммуникации и получения информации.


