- How to Restore Missing Power Plan Options on Windows 10
- What Causes Power Options to go Missing?
- Solution 1: Restore Them Manually
- Command Prompt:
- Download the Files Yourself:
- Solution 2: Use the Following Registry Hack
- Solution 3: A Useful Workaround
- Solution 4: Check for the New Battery Slider
- Как включить Ultimate Performance Power Plan в Windows 10
- Максимальная производительность Power Plan в Windows 10
- Включить Ultimate Performance Power Plan
- Отключить режим максимальной производительности
- How to enable Ultimate Performance Power Plan in Windows 10
- Ultimate Performance Power Plan in Windows 10
- Enable Ultimate Performance Power Plan
- Disable Ultimate Performance Mode
How to Restore Missing Power Plan Options on Windows 10
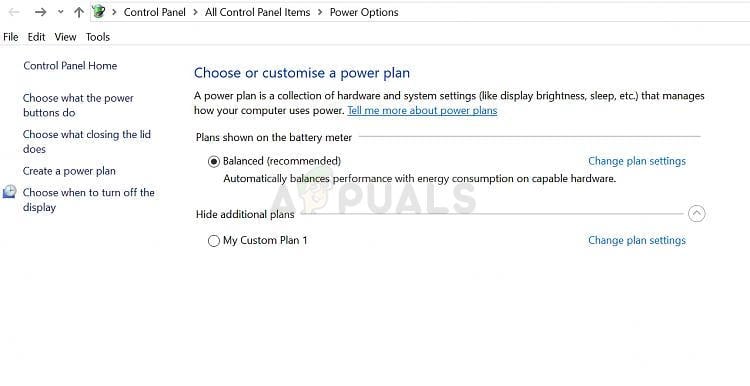
On Windows 10, Power Options allows you to customize your Power Usage – as per requirements. Technically, a power plan is a set of hardware and system settings that defines how power is used and preserved by your computer. There are three built-in power plans: Balanced, Power Saver and High Performance. They can be customised for your system, or you can create new plans based on them.
What Causes Power Options to go Missing?
Many users have reported variations of missing power plans, such as only balance power plan is available and the high performance power plan is missing. This could be due to a system corruption or a Windows Update recently installed which may have modified the registry or tweaked the power options.
We have gathered some working solutions so make sure you try them out. Good luck!
Solution 1: Restore Them Manually
If a Windows Update or something else you did has removed the power plans from your computer, you can get to them by running commands which will recreate them and have them available on your computer the same way as they were before. There are two ways you can do this and it depends on what you prefer.
Command Prompt:
You can restore the missing power plan settings simply by running several commands in Command Prompt.
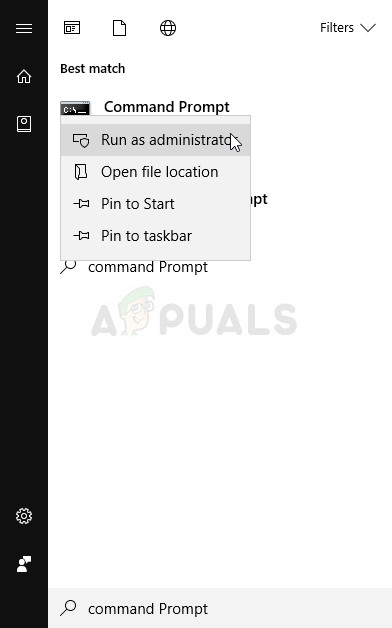
- Search for “Command Prompt” either right in the Start menu or by tapping the search button right next to it. Right-click on the first result which will appear at the top and select the “Run as administrator” option.
- Type in the following set of commands one after another and make sure you click Enter after typing each one and wait for the process to finish and display a “process successful” message:
Note: The last command can only work on Windows 10 versions after the 17101 build as it’s related to restoring the Ultimate Performance Power Plan available for the newest Windows 10 builds for workstations.
- Restart your computer and check to see if the power plans are back where they belong.
Download the Files Yourself:
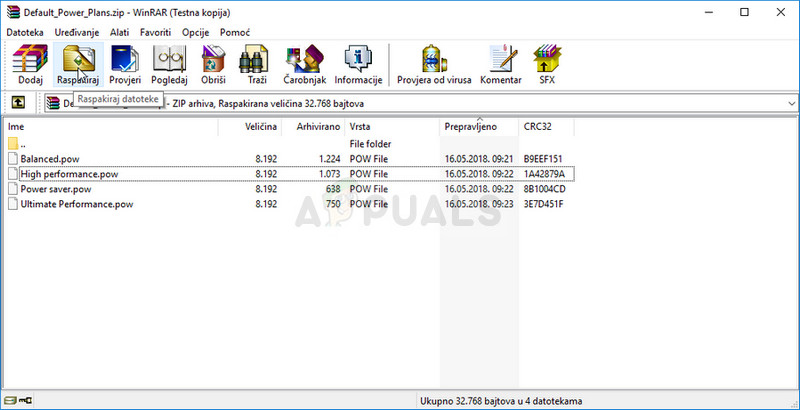
You can download the required files easily from a guide made by TenForums and it contains the “.pow” files which are used to represent a power plan.
- Click on this link in order to download the “.zip” file containing the power plans. Locate the file in your Downloads folder, right-click on it, and choose the Extract to option. Extract the files to any location but it’s best to keep it simple because of the following steps.
- Search for “Command Prompt” either right in the Start menu or by tapping the search button right next to it. Right-click on the first result which will appear at the top and select the “Run as administrator” option.
- Use the following command in order to install the required power plan:
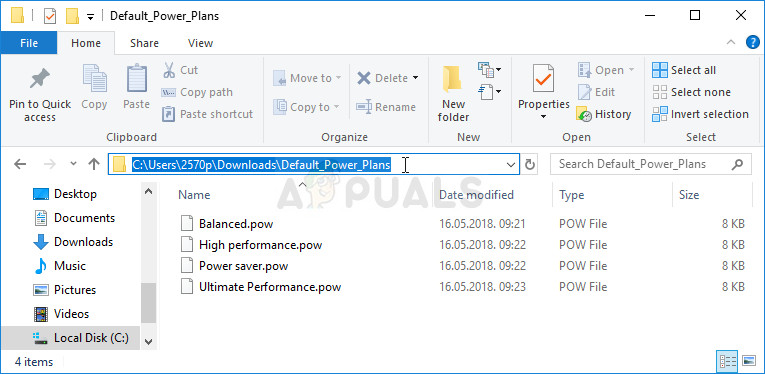
- In this scenario, instead of “Full path of .pow file”, you will have to paste the correct path to the file, in the folder you have extracted the files to. Let’s say you want to install the “Power saver” plan which is also named that way in the folder.
- Navigate to the folder where the files are located, click the address navigation bar at the top and copy the address after it has been selected. Head back to Command Prompt and paste the address. If the files were, let’s say, in the Downloads folder within their own folder called Default_Power_Plans, the command should look like:
- Make sure you repeat the same process for all power plans you want to install and check to see if they have returned in Control Panel.
Solution 2: Use the Following Registry Hack
If a Windows Update has indeed hidden these options, it’s possible that Windows it trying to replace this feature or push it into the history by replacing it with other features. If you still wich to use this exact option, you can turn it on using the following registry hack.
Since you will have to edit a registry key, we recommend you check out this article we have made for you to safely backup your registry to prevent unwanted side effects which shouldn’t occur if you just follow the steps carefully.
- Open the Registry Editor window by typing “regedit” in either the search bar, the Start menu, or the Run dialog box which can be accessed with the Windows Key + R key combination. Navigate to the following key in your registry by navigating at the left pane:
- Click on this key and try to locate an entry called CsEnabled at the right side of the window. If such option exists, right-click on it, and choose the Modify option from the context menu.
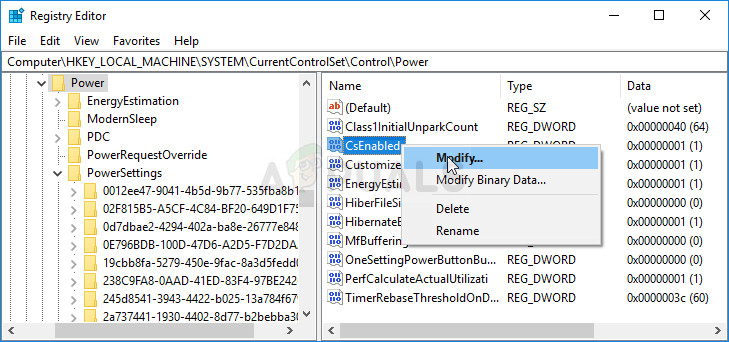
- In the Edit window, under the Value data section change the value from 1 to 0, and apply the changes you have made. Confirm any security dialogs which may appear during this process.
- You can now manually restart your computer by clicking Start menu >> Power button >> Restart and check to see if the problem is gone.
Note: If this didn’t work out for you, you can try adding an option to show these power plans individually for every power plan your computer knows about.
- Navigate to the following key in your registry by navigating at the left pane:
- You will be able to see plenty of weirdly named keys inside the PowerSettings key. Navigate to each one of these keys, right-click the right blank side of the, screen, and choose New >> DWORD (32bit) Value.
- Name each one of these values “Attributes” by right-clicking and choosing the Rename option. After that, right-click the newly created attributed value and choose the Modify option.

- Set the value to 2 under value data, keep the base in hexadecimal and click OK. Repeat the same process for each key in PowerSettings.
- Check to see if the problem is gone now.
Solution 3: A Useful Workaround
This workaround can be used quite easily if you want to add the power option which is missing quite easily. Since a new build of Windows usually only leaves the Balanced power plan intact, you can add it (or any other default plan) easily by creating a new plan which is exactly the same as this one.
- Right-click on the battery icon located in the system tray or the lower right part of your screen, next to time and date, and click on Power Options.
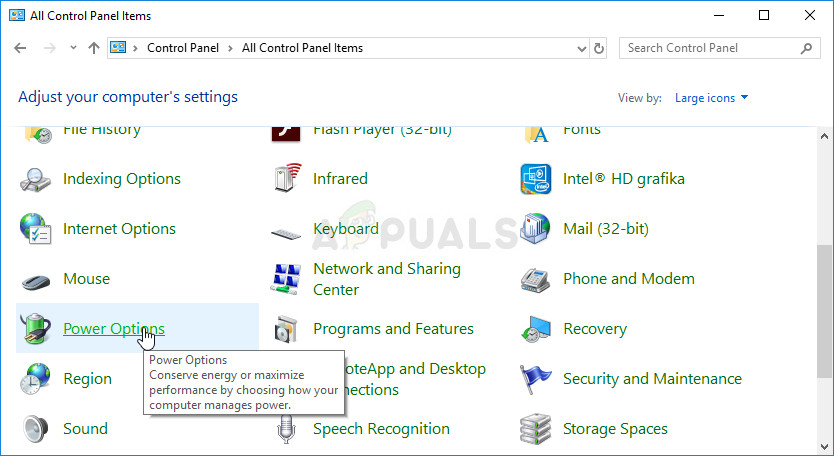
- If you have removed this from the system tray, click on the Start menu and search for Control Panel. Change the View by option to Large icons and click on the Power Options button.
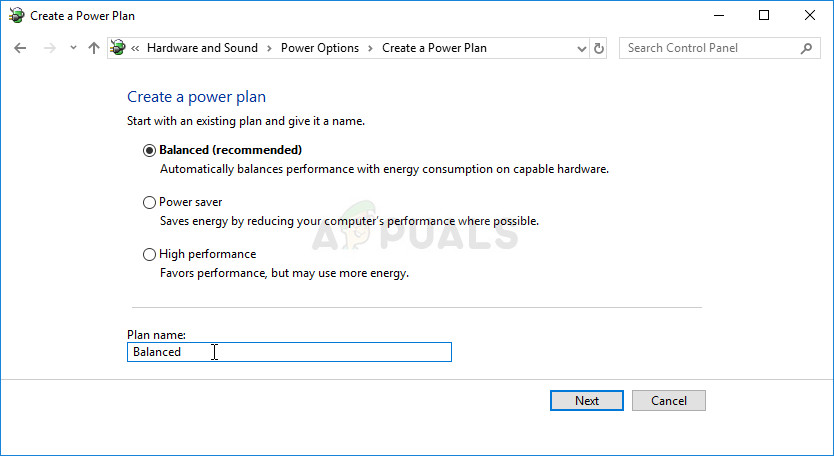
- At the left side of the window you should see several options displayed one under the other so click the Create a power plan option. You should see the Create a power plan window and a list of choices. Set the radio button to the power plan you wish to bring back.
- Under the Plan name, you can even name it the same way as it was originally named before clicking the Next button at the lower right part of the window.
- You will some additional settings, such as Turn off the display, Put the computer to sleep and Adjust plan brightness. You can set them up now or later, before clicking Create.
- You will now have access to this power plan so make sure you select it when necessary.
Solution 4: Check for the New Battery Slider
From the latest build of Windows, it appears that the power options have now started to change for users who didn’t perform the steps above and everyone will get to see the new slider you can use to either set everything to high performance or to save battery life.
Also, these settings will now be managed through the Settings tool and not via Control Panel.
Как включить Ultimate Performance Power Plan в Windows 10
Режим Ultimate Performance Mode – это план электропитания в Windows 10, выпущенный вместе с Windows 10 v1803, который предназначен для рабочих станций и нацелен на оптимизацию производительности операционной системы. Хотя это и предназначено для повышения производительности, IMO, это очень поможет и геймерам, и тем, кто выполняет какие-либо задачи с высокой интенсивностью. В этом руководстве мы узнаем, как включить Ultimate Performance Power Plan в Windows 10 .
Ultimate Performance Power Plan доступна только для ПК с высокопроизводительной конфигурацией, работающих непосредственно от источника питания, и прямого способа включить это для всех ПК не существует. Тем не менее, я по-прежнему не буду рекомендовать этот режим для ноутбуков, так как он будет потреблять много батареи, но если вы уверены, что хотите его, вы можете использовать его для лучшего игрового опыта.
Максимальная производительность Power Plan в Windows 10
Давайте попробуем понять, почему этот режим был построен. На серверах и рабочих станциях, где производительность является приоритетом, Microsoft исключила все факторы, обеспечивающие сбалансированное энергопотребление или что-либо еще, чтобы батарея работала долго. Многие временные компании должны выполнять свою работу и могут выдерживать затраты на энергопотребление, так как результаты необходимы вовремя.
Microsoft создала этот режим, чтобы он мог помочь пользователям получить максимальную производительность от своего оборудования. По умолчанию этот режим доступен только на рабочих станциях. Этот режим недоступен в системах, в которых используется батарея. Но с помощью этого хака вы можете включить его для всех. Но если вы включите его на устройстве с использованием аккумулятора, аккумулятор будет быстро разряжаться. Вы также можете включить его на рабочем столе.
Включить Ultimate Performance Power Plan
Выполните следующие действия, чтобы включить Ultimate Performance Power Plan в Windows 10. В этом режиме приложения будут работать быстрее. Тем не менее, он будет потреблять много батареи, и если вы находитесь на ноутбуке, убедитесь, что он подключен к сети.
Убедитесь, что вы обновили свой компьютер до Windows 10 версии 1803. Это можно проверить в меню «Настройки»> «Система»> «О программе».
Теперь откройте Настройки> Система> Питание и сон> Дополнительные параметры питания.
В разделе Выберите, чтобы настроить тарифный план , разверните опцию «Показать дополнительные планы».
Если вы не видите Режим максимальной производительности , выполните следующие действия.
Откройте командную строку от имени администратора.
В командной строке скопируйте следующую команду и нажмите Enter.

Сверните командную строку и выберите «Настройки»> «Система»> «Питание и спящий режим»> «Дополнительные параметры питания».
Выберите Ultimate Performance Power Plan.
Вы можете дополнительно настроить план питания.
Режимами по умолчанию в Windows 10 являются Сбалансированный, Энергосбережение и Высокая производительность. Ultimate Performance делает это на шаг впереди.
Основные характеристики режима максимальной производительности:
- Жесткий диск никогда не идет спать
- Частота таймера JavaScript на максимуме.
- Спящий режим и Сон отключены.
- Состояние процессора, политика слияния, максимальная частота процессора максимально.
Отключить режим максимальной производительности
- Вернитесь в Расширенные настройки питания.
- Нажмите Изменить параметры плана рядом с режимом максимальной производительности.
- В следующем окне вы можете удалить его.
Так что если вы не видите его включенным на вашем ноутбуке после использования этой команды, возможно, ваша система не поддерживает его.
Если у вас есть компьютер, который не использует батарею, я настоятельно рекомендую вам использовать его во время игры или когда вы используете программное обеспечение для редактирования видео, которому требуется много ресурсов процессора/графического процессора, чтобы получить лучший результат в гораздо более короткие сроки. время.
How to enable Ultimate Performance Power Plan in Windows 10
Ultimate Performance Mode is a power plan in Windows 10, which is designed for Workstations and aims to optimize the performance of the operating system. While it is meant to improve performance, IMO, this is going to help a lot for gamers as well or anyone with any high-intensity task. In this guide, we will learn how to enable Ultimate Performance Power Plan in Windows 10.
Ultimate Performance Power Plan is available only with PCs with high-end configuration running directly on power, and there is no direct way to enable this for all PCs. That said, I will not still recommend this mode for Laptops as it will consume a lot of battery, but if you are sure you want it, you can use it for your best gaming experience.
Ultimate Performance Power Plan in Windows 10
Let’s try to understand why this mode was built. On Servers and Workstation where performance is a priority, Microsoft took out all the factors which made sure of balanced power consumption or anything to keep the battery last long. Many times companies need to get the job done and can sustain the cost of power consumption as the results are needed on time.
Microsoft built this mode so that it can help users get maximum performance from their hardware. By default, this mode is available on workstations only. This mode is not available on systems that use a battery. But using this hack you can enable it for all. But if you enable it on a device using Battery, the battery will be drained fast. You can enable it on your Desktop as well.
Enable Ultimate Performance Power Plan
Follow these steps to enable Ultimate Performance Power Plan in Windows 10. This mode will make applications perform faster. However, it will consume a lot of battery, and if you are on a laptop, make sure to keep it connected to the Mains.
Make sure you have updated your PC to Windows 10 version 1803. You can check this in Settings > System > About.
Now, open Settings >System > Power & sleep > Addtional Power Settings.
Under Choose to customize a power plan, expand the option which says “Unhide Additional plans.”
If you do not see Ultimate Performance Mode, then follow the next steps.
In the command prompt, copy the following command, and hit Enter.
Minimize the command prompt, and Settings >System > Power & sleep > Addtional Power Settings.
Select Ultimate Performance Power Plan.
The default modes in Windows 10 are Balanced, Power Saver, and High Performance. Ultimate Performance takes it one step ahead.
Highlights of Ultimate Performance Mode:
- Hard disk never goes to sleep
- Javascript timer frequency is at maximum.
- Hibernation and Sleep are turned off.
- Processor State, Colling Policy, maximum processor rate are maxed out.
Disable Ultimate Performance Mode
- Go back to Advanced Power Settings.
- Click on Change Plan Settings next to Ultimate Performance Mode.
- In the next window, you can choose to delete it.
So if you don’t see it enabled on your laptop after using this command, maybe your system does not support it.
If you have a PC which doesn’t use the battery, I will strongly suggest you use it when you are gaming, or when you are using a video editing software that needs a lot of CPU/GPU power to get the best result in a much shorter time.


