- Power User Tasks Menu
- Why should I use the Power User Tasks Menu?
- How to open the Power User Tasks Menu
- Power User Tasks Menu Options
- How to use the Power User Menu hotkeys
- Как редактировать Windows 8 Power User меню — Как — 2021
- Table of Contents:
- Что такое Windows 8 Power User Menu?
- Настройте меню питания
- Как изменить power user menu (win+x menu, меню при щелчке правой кнопкой по пуску) (Апрель 2021).
- We answer: What is Power User Menu in Windows 10 and how to use it?
- What is Power User Menu and how to use it?
- Run a System Scan to discover potential errors
Power User Tasks Menu

The Power User Tasks Menu, also called the power user menu, provides quick access to essential Windows features. It was first introduced as part of Windows 8. In Windows 10, it includes updated options and features.
Why should I use the Power User Tasks Menu?
There are several features on this menu which can be difficult to find using the conventional Start menu. Microsoft has stated that this design choice may prevent an inexperienced user from stumbling upon the menu by accident. For example, it reduces the chance that a user will unintentionally delete their hard disk partition (in Disk Management) or disable their System Protection (under System).
Some of the features accessible from the Power User Tasks Menu can cause system instability or loss of data if used incorrectly. Before making changes to your system configuration, back up all your important data. Always make sure you know exactly what you’re doing before making changes to your system.
How to open the Power User Tasks Menu
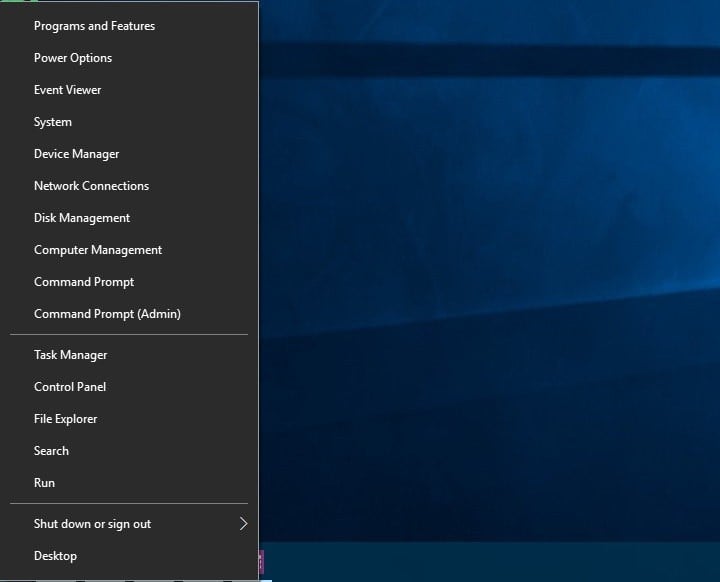
To open the menu, move your mouse cursor to the bottom-left corner of the screen (the Start menu icon) and right-click. You can also open the menu by typing Windows key + X (holding down the Windows key and pressing X on the keyboard).

After pressing Windows key + X , the Power User Tasks Menu appears at the bottom left of your screen. Below is a close-up of the entire contents of the menu.
Some of these options have changed after the Creators Update.

Let’s look at each menu option and describe what it does.
Power User Tasks Menu Options
| Option | Hotkey | Description |
|---|---|---|
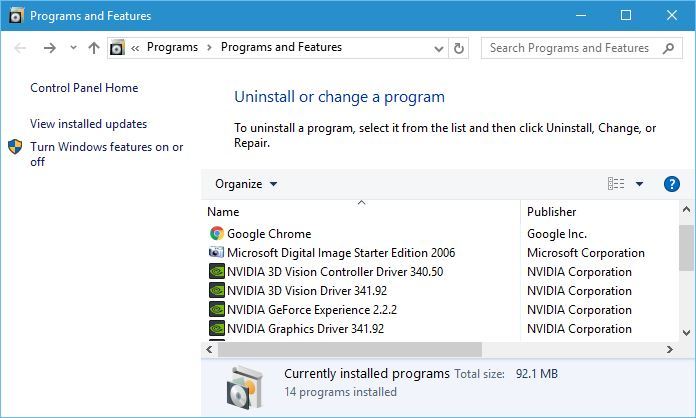
| Programs and Features, or Apps and Features. | F | Open the Programs and Features window where you can uninstall programs, change how they are installed, or repair a damaged program installation. Programs and Features can also be launched from Start menu → Windows System → Control Panel → Programs → Programs and Features. |
| Mobility Center. | B | Launch the Windows 10 Mobility Center, which is a compact, useful collection of options for giving presentations on a laptop computer. Change the display brightness, picture orientation, audio volume, power utilization, and network sync options all from a single window. Mobility Center can also be launched from Start menu → Windows System → Control Panel → Hardware and Sound → Windows Mobility Center. |
Note: This option was removed in the Creators Update.
WARNING: Do not make any changes do your disk drive configuration unless you have backed up all important data on your system and know exactly what you are doing. As a rule, never make changes to your disk partitions unless you are prepared to restore your entire system from scratch if something goes wrong.
WARNING: When the command prompt is open with Administrator privileges, you can cause damage or instability to your computer if you run the wrong command. Make sure all your important data is backed up and you know exactly what you’re doing before running commands in this mode.
Note: This option was removed in the Creators Update and replaced with Settings. However, you can still access the Control Panel by click Start and typing «control panel» and press Enter .
 ).
).How to use the Power User Menu hotkeys
When you open the power user menu by pressing Win+X on the keyboard, execute any of the options by pressing the underlined letter in the option name. For instance: Win+X, C opens a command prompt, and Win+X, U, S puts your computer to sleep.
Как редактировать Windows 8 Power User меню — Как — 2021
Table of Contents:
Windows 8 включает в себя скрытое так называемое меню Power User, которое облегчает доступ к системным инструментам, которые нужны администраторам и опытным пользователям. Вот чудовищный трюк, который позволяет вам сделать некоторые ограниченные настройки, переупорядочивая элементы в меню и удаляя ненужные вещи.
Что такое Windows 8 Power User Menu?
Насколько мне известно, у Microsoft нет официального названия для этого скрытого контекстного меню. И, возможно, это к лучшему, учитывая ужасную историю соглашений об именах.
Это меню облегчает доступ к системным инструментам с рабочего стола или с экрана «Пуск». Просто нажмите Windows Key + X на клавиатуре или наведите курсор мыши в левом нижнем углу экрана и щелкните правой кнопкой мыши всплывающую всплывающую плитку. Он содержит важные вещи, которые нужны администраторам и опытным пользователям, такие как командная строка, диспетчер устройств и программа просмотра событий.

Настройте меню питания
Отличная часть — вы можете сделать ее еще более полезной, изменив порядок отображения местоположений и удалив те, которые вы не используете.
Откройте проводник Windows и выберите C: \ Users \ Brian \ AppData \ Local \ Microsoft \ Windows \ WinX
Примечание: замените Брайана своим именем пользователя. Вы также захотите включить Показать скрытые файлы и папки, чтобы увидеть папку AppData. В каталоге WinX вы увидите три папки — Group1-3.

Папка Group1 имеет ярлык на рабочем столе, который находится внизу меню. Группы 2 и 3 имеют ярлыки, которые также соответствуют каждой группе в меню. Вот ярлыки, перечисленные в Group3 — который находится в верхней части меню.

Теперь вы сможете настроить меню питания по своему вкусу. Например, здесь я скопировал ярлык из Group2 и Group3 в папку Group1.

Примечание. Чтобы увидеть изменения в меню, необходимо выйти и снова войти.
Таким образом, в результате в нижней части меню отображаются две иконки — «Панель управления» и «Выполнить».

Я пытался добавить ярлыки для других программ и мест, но кажется, что вы можете использовать только те ярлыки, которые отображаются в предварительно заданных местах в меню. Но я смог добавить папку Group4 и скопировать в нее разные ярлыки. Я также пытался добавить группу 5, но это не отображалось.
Вот еще один пример, где я удалил все ярлыки в Group2, кроме командной строки, и добавил четвертую группу. Некоторые из предметов, очевидно, удвоены, но, потратив немного времени и настроек, вы можете сделать это самостоятельно.

Есть несколько интересных правок, которые вы можете сделать с помощью этого трюка. Может быть, поместить все предметы, которые вы используете чаще всего, внизу, а наименее использованные — сверху? Или вы можете удвоить ярлыки с четырьмя группами.
Я думаю, что вы могли бы перейти в свойствах ярлыка в папке группы, изменить его цель, а затем изменить его значок тоже. Но я еще не дошел, чтобы проверить это. Если вы попробовали это и знаете способ добавления ярлыков, отличных от заданных, оставьте мне комментарий или отправьте мне электронное письмо!
Как изменить power user menu (win+x menu, меню при щелчке правой кнопкой по пуску) (Апрель 2021).
We answer: What is Power User Menu in Windows 10 and how to use it?

- Download Restoro PC Repair Tool that comes with Patented Technologies (patent available here).
- Click Start Scan to find Windows issues that could be causing PC problems.
- Click Repair All to fix issues affecting your computer’s security and performance
- Restoro has been downloaded by 0 readers this month.
Windows 8 made some major changes in terms of user interface, but it also brought some new features, such as Power User Menu. This was such well-received feature that it has made its way to Windows 10, and today we’re going to explain you what is Power User Menu and how to use it on Windows 10.
As you probably know, Windows 8 removed the Start Menu completely, and this is why Microsoft implemented a somewhat hidden feature in Windows 8 called the Power User Menu. Although Power User Menu is no Start Menu replacement, it’s still rather useful since it provides access to some of the advanced features of Windows.
With Windows 10 we got Start Menu back, but since Power Menu turned out to be such a popular feature, it’s still present in Windows 10. In fact, in many of our how to articles we mentioned the Power User Menu, so you might be already familiar with it.
What is Power User Menu and how to use it?
Power User Menu gives users a quick way to access some of the most commonly used tools and features in a matter of seconds. This menu is rather useful, since it makes some of the most popular tools available at your fingertips, and you can easily access them with a single keyboard shortcut.
If you want to access Power User Menu, you just need to right click the Start Button or press the Windows Key + X on your keyboard.
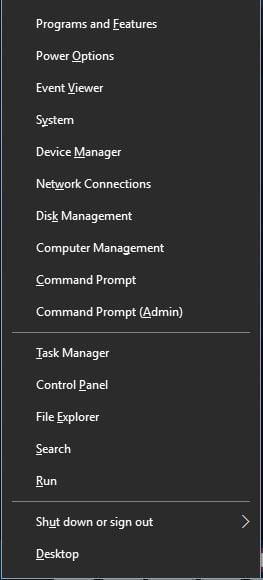
As you can see, Power User Menu offers quick access to some of the popular tools on Windows 10, and we’ll explain quickly what each of these tools does.
First is Programs and Features, and this tool is used to remove installed software, but you can also use it to view and remove installed Windows Updates or to turn certain Windows features on or off.
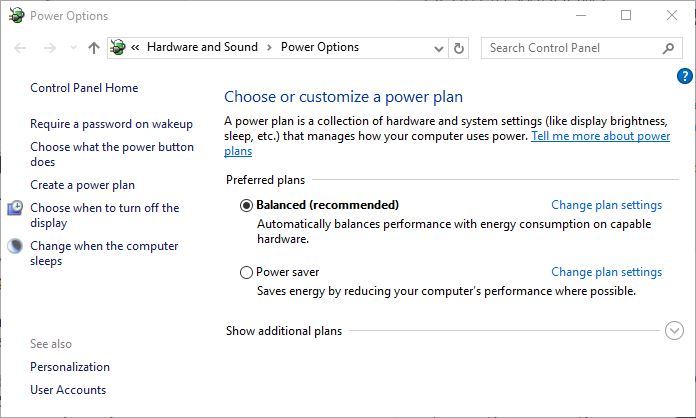
Next on our list is Power Options. Using Power Options you can change your power plan, which is rather useful if you’re using a laptop, change what the power button does, or set your PC or monitor to turn itself off after a certain time of inactivity.
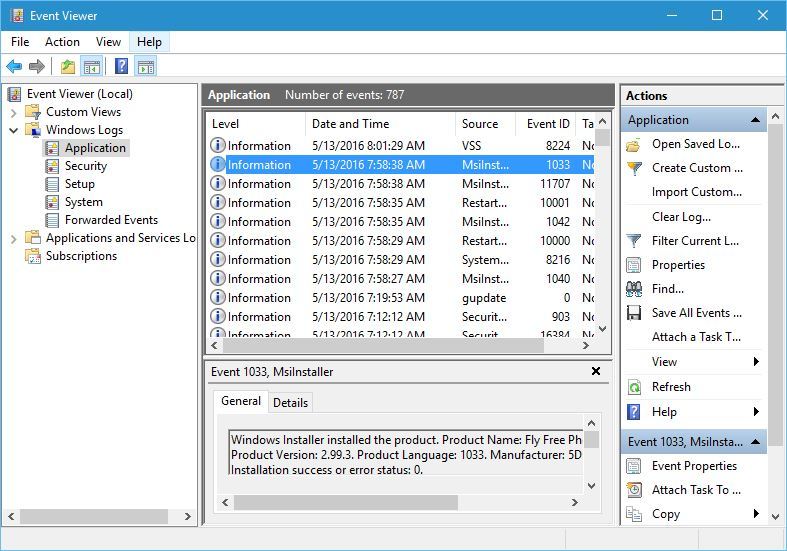
Event Viewer is an advanced tool that lets you see log of events that happened on your PC. You can use this tool to see when your PC was turned on or off, or you can use it to see when and why certain application crashed. Event Viewer is one of more complex tools on our list, and it’s and due to its complexity, it might not be suitable for basic users.
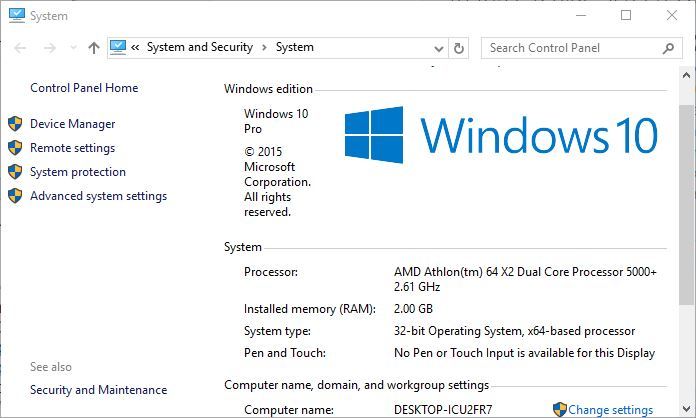
Next we have System, and by using this shortcut you can see some of the basic system information, such as the version of Windows 10 that you’re running, amount of RAM or the CPU that you’re using.
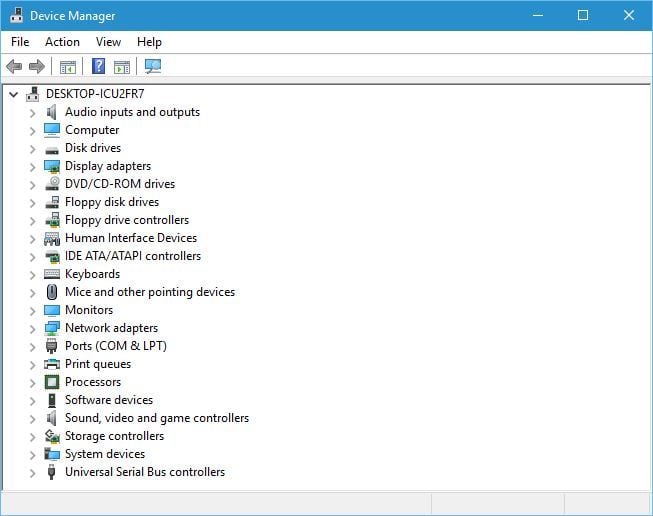
Device Manager is a tool we mention and use rather often. This tool will allow you to view all your installed devices and uninstall or update their drivers. In addition, Device Manager allows you to change the properties of installed devices, so it can be rather useful tool.
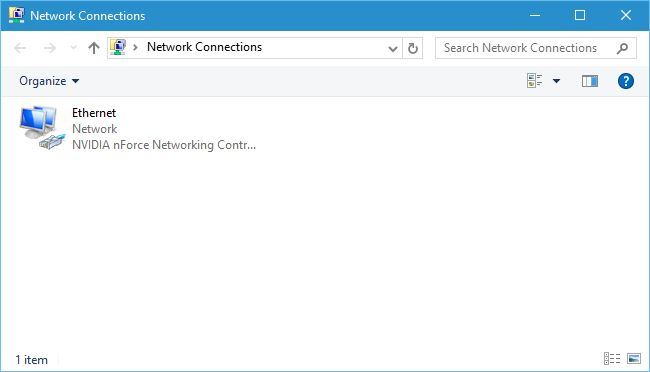
Network Connections will allow you to see all network adapters on your PC. By using this shortcut you can easily change the properties of your network adapter or even disable it completely.
Run a System Scan to discover potential errors


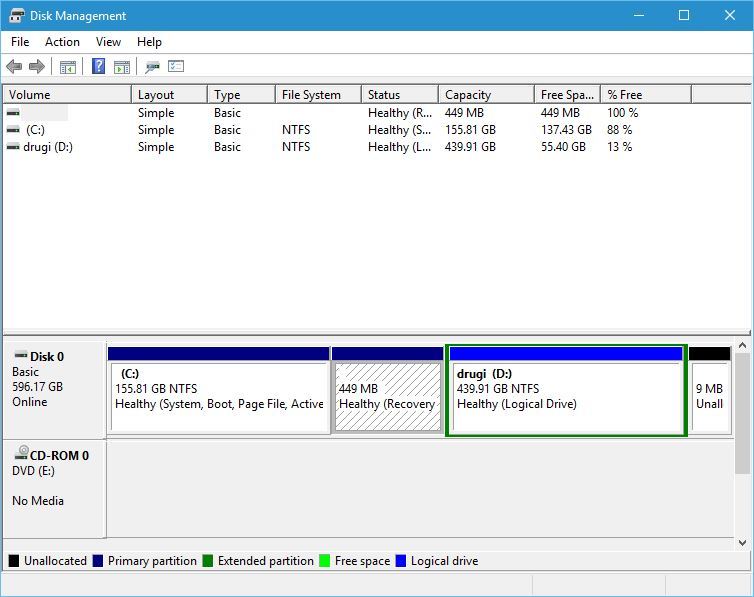
Disk Management is another advanced tool that allows you to create new partitions or to change the size of hard drive partitions. This tool can delete entire partitions, so be extra careful if you’re going to use it.
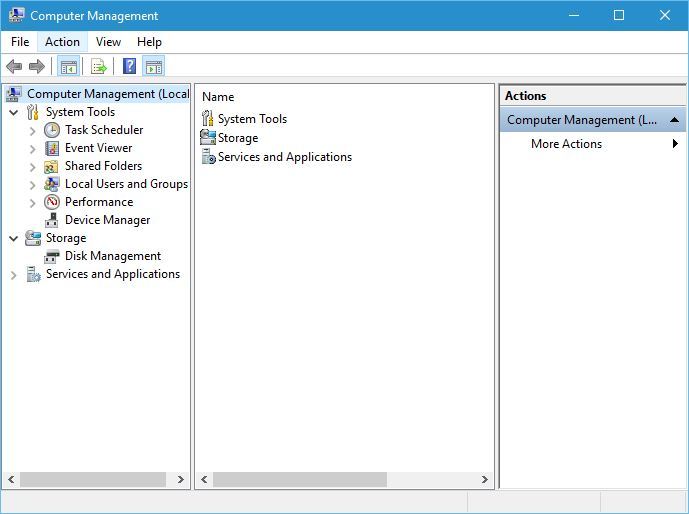
Computer Management is a tool that lets you access many hidden Windows 10 features. In fact, you can even use Computer Management to access some tools that are available in Power User Menu. Since this tool can be used to access many other advanced features and tools, you should be careful if you’re going to use it.
Command Prompt and Command Prompt (Admin) are the same tool, but they come with different privileges. Command Prompt comes in a form of command line, and you can use it to create files, delete folders, check your network adapter properties, create new users, or even format your hard drive.
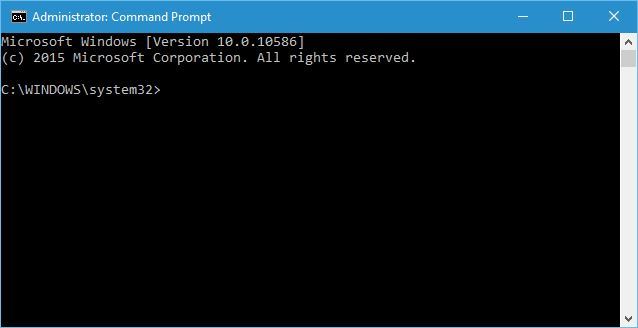
There are countless ways you can use Command Prompt, but not all of the advanced features are available in regular Command Prompt, so you’ll have to use Command Prompt (Admin) that has full administrator privileges.
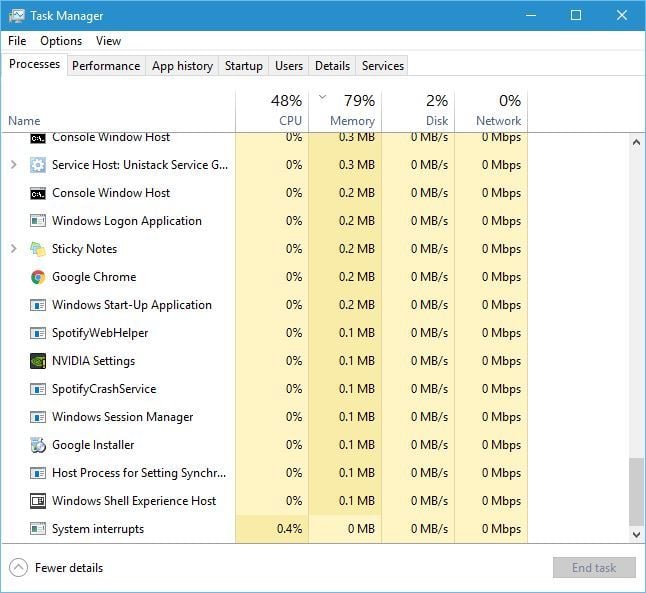
Next on our list is Task Manager, and you are probably familiar with this tool, so we won’t go into much detail. You can use Task Manager to view all your currently running applications and close them instantly if they stop responding. In addition, you can set which applications will start alongside Windows 10 every time you start your PC.
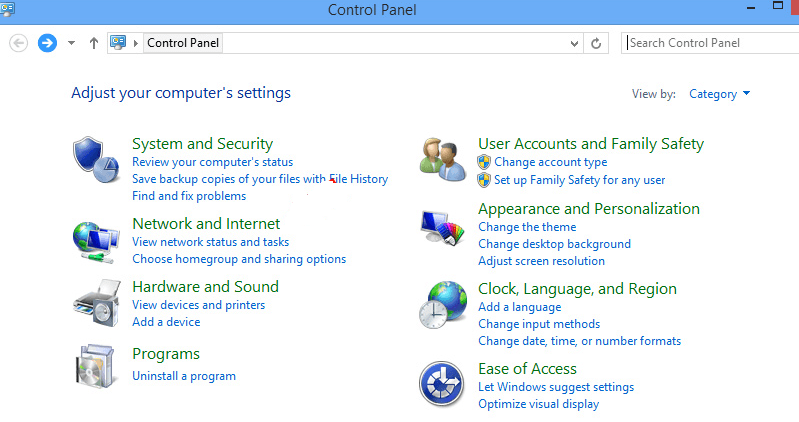
If you used any previous version of Windows, you’re probably familiar with Control Panel and you know that you can use it to change almost any setting on your PC.
File Explorer and Search options don’t offer access to any advanced features, and instead they work as a shortcuts to File Explorer and Search.
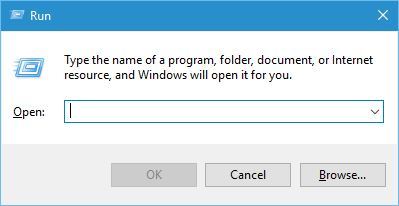
Run option will open a Run dialog that allows you to run almost any application from your PC. You can use this feature to run tools such as Command Prompt or Registry Editor by simply entering the name of the file in the input field.
Shutdown or sign out option allows you to quickly turn off or restart your computer, so you might use this option from time to time. Last option on our list is Desktop, and by using this option you will minimize all open windows and instantly show your Desktop.
As you can see, Power User Menu offers shortcuts to some of the most used and most powerful features on Windows 10. It’s also worth mentioning that you can access any of these options by using a simple keyboard shortcut. When you press Windows Key + X shortcut, you should see Power User Menu, and each option on the list will have an underline under a certain character, and you can simply press that character on your keyboard to quickly access a specific tool. For example, if you press Windows Key + X and then press T, you’ll open Task Manager. These shortcuts are available for all options on the list, thus making these features easier to access.
Power User Menu is rather useful and it can be used to access many tools and features of Windows 10 quickly. Bear in mind that some of these tools are rather powerful, so use them with caution.


