- Running Remote Commands
- Windows PowerShell Remoting Without Configuration
- Windows PowerShell Remoting
- Start an Interactive Session
- Run a Remote Command
- Run a Script
- Establish a Persistent Connection
- Advanced Remoting
- Удаленное управление через Powershell
- Connect to Exchange servers using remote PowerShell
- What do you need to know before you begin?
- Connect to a remote Exchange server
- How do you know this worked?
- See also
- Подключение к серверам Exchange Server с помощью удаленной оболочки PowerShell
- Что нужно знать перед началом работы?
- Подключение к удаленному серверу Exchange
- Как убедиться, что все получилось?
- См. также
Running Remote Commands
You can run commands on one or hundreds of computers with a single PowerShell command. Windows PowerShell supports remote computing by using various technologies, including WMI, RPC, and WS-Management.
PowerShell Core supports WMI, WS-Management, and SSH remoting. In PowerShell 6, RPC is no longer supported. In PowerShell 7 and above, RPC is supported only in Windows.
For more information about remoting in PowerShell Core, see the following articles:
Windows PowerShell Remoting Without Configuration
Many Windows PowerShell cmdlets have the ComputerName parameter that enables you to collect data and change settings on one or more remote computers. These cmdlets use varying communication protocols and work on all Windows operating systems without any special configuration.
These cmdlets include:
Typically, cmdlets that support remoting without special configuration have the ComputerName parameter and don’t have the Session parameter. To find these cmdlets in your session, type:
Windows PowerShell Remoting
Using the WS-Management protocol, Windows PowerShell remoting lets you run any Windows PowerShell command on one or more remote computers. You can establish persistent connections, start interactive sessions, and run scripts on remote computers.
To use Windows PowerShell remoting, the remote computer must be configured for remote management. For more information, including instructions, see About Remote Requirements.
Once you have configured Windows PowerShell remoting, many remoting strategies are available to you. This article lists just a few of them. For more information, see About Remote.
Start an Interactive Session
To start an interactive session with a single remote computer, use the Enter-PSSession cmdlet. For example, to start an interactive session with the Server01 remote computer, type:
The command prompt changes to display the name of the remote computer. Any commands that you type at the prompt run on the remote computer and the results are displayed on the local computer.
To end the interactive session, type:
For more information about the Enter-PSSession and Exit-PSSession cmdlets, see:
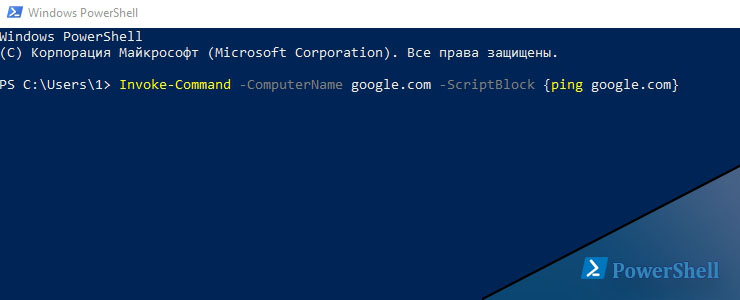
Run a Remote Command
To run a command on one or more computers, use the Invoke-Command cmdlet. For example, to run a Get-UICulture command on the Server01 and Server02 remote computers, type:
The output is returned to your computer.
Run a Script
To run a script on one or many remote computers, use the FilePath parameter of the Invoke-Command cmdlet. The script must be on or accessible to your local computer. The results are returned to your local computer.
For example, the following command runs the DiskCollect.ps1 script on the remote computers, Server01 and Server02.
Establish a Persistent Connection
Use the New-PSSession cmdlet to create a persistent session on a remote computer. The following example creates remote sessions on Server01 and Server02. The session objects are stored in the $s variable.
Now that the sessions are established, you can run any command in them. And because the sessions are persistent, you can collect data from one command and use it in another command.
For example, the following command runs a Get-HotFix command in the sessions in the $s variable and it saves the results in the $h variable. The $h variable is created in each of the sessions in $s, but it doesn’t exist in the local session.
Now you can use the data in the $h variable with other commands in the same session. The results are displayed on the local computer. For example:
Advanced Remoting
Windows PowerShell remote management just begins here. By using the cmdlets installed with Windows PowerShell, you can establish and configure remote sessions both from the local and remote ends, create customized and restricted sessions, allow users to import commands from a remote session that actually run implicitly on the remote session, configure the security of a remote session, and much more.
Windows PowerShell includes a WSMan provider. The provider creates a WSMAN: drive that lets you navigate through a hierarchy of configuration settings on the local computer and remote computers.
For more information about the WSMan provider, see WSMan Provider and About WS-Management Cmdlets, or in the Windows PowerShell console, type Get-Help wsman .
For more information, see:
For help with remoting errors, see about_Remote_Troubleshooting.
Удаленное управление через Powershell
В Powershell есть несколько методов удаленного подключения. Это через:
Сегодня мы поговорим о PS remoting/WinRM. В его состав входит, в основном, два командлета — это:
Этот командлет устанавливает сессию c удаленным компьютером и мы сможем работать прям на нем. Если сравнивать с Linux, то это почти одно и то же:
И второй командлет, который нужен для удаленного выполнения команд как на одном, так и сотни компьютеров:
Где:
-ComputerName — имена компьютеров (или одного)
-Scriptblock — скрипт или командлет в скобках <>
Если опять же сравнить с Linux ssh, то это почти одно и то же:
Как настроить удаленное управление через Powershell?
Для того что бы суметь настроить нужно понять как это работает. Команды выше могут работать по протоколу HTTP (по порту 5985) и HTTPS (5986), за исключением версии Powershell 1.0, который работал в XP (там порт 80/443). По умолчанию у нас стоит HTTP, но и эти данные шифруются используя симметричный ключ AES-256. Сама аутентификация работает в 2 режимах NTLM и Kerberos(по умолчанию стоит он). Если у вас сеть с домен контроллером, т.е. есть Kerberos, то у вас должны работать команды выше. Если компьютеры в Workgroup, то они используют NTLM и для этого нужна дополнительная настройка. Кроме того, если вы вместо имен используете IP, то вы в любом случае используете NTLM и это по умолчанию не работает.
Если у вас не работают команды выше нужно проверить запущен ли сервис WinRM на том компьютере, к которому мы хотим подключиться:
Если не запушен:
В этом случае мы ставим запуск сервиса автоматически и настраиваем winrm в дефолтной конфигурации. Этот сервис дает возможность принимать команды Powershell и устанавливать сеансы.
Если вы работаете под профилем сети «Public» (не «Domain» или «Private»), то нужно выполнить еще один командлет, разрешающий работать в таких сетях:
Если мы выполним такую команду:
Получим ошибку:
Connecting to remote server 192.168.3.100 failed with the following error message : The WinRM client cannot process the request. Default authentication may be used with an IP address under the following conditions: the transport is HTTPS or the destination is in the TrustedHosts list, and explicit credentials are provided.
Которая говорит, что мы можем подключится по IP если используем HTTPS (для этого нужен сертификат) или добавить хост, к которому подключаемся в TrustedHost компьютера с которого хотим запустить команду. Для этого делаем:
После этого все будет работать, но команды должны исполняться с переменной, в которой будут лежать учетные данные пользователя. Т.е. так:
Где:
$cred — это переменная, куда мы сохраняем данные с формы Get-Credential
-Credential — сюда мы передаем переменную
Так же отмечу, что все команды, которые мы запускаем для удаленного выполнения через Poweshell, должны происходить от члена группы Администратора того хоста, к которому мы подключаемся.
Теперь мы можем устанавливать множество сессий с помощью командлета:
Получать ID этих сессий:
И подключаться по этим ID:
Или использовать с invoke существующую сессию, а командлет для удаленного компьютера запускать с файла:
А так же, т.к. WinRM настроен, выполнять командлеты где есть ключ -ComputerName, сразу на нескольких компьютерах. Этот командлет пропингует AD сразу с нескольких компьютеров:
Или же использовать методы описанные выше.
Дополнительные ключи мы можем узнать по командлетам:
Connect to Exchange servers using remote PowerShell
If you don’t have the Exchange management tools installed on your local computer, you can use Windows PowerShell to create a remote PowerShell session to an Exchange server. It’s a simple three-step process, where you enter your credentials, provide the required connection settings, and then import the Exchange cmdlets into your local Windows PowerShell session so that you can use them.
We recommend that you use the Exchange Management Shell on any computer that you use to extensively administer Exchange servers. You get the Exchange Management Shell by installing the Exchange management tools. For more information, see Install the Exchange Server Management Tools and Open the Exchange Management Shell. For more information about the Exchange Management Shell, see Exchange Server PowerShell (Exchange Management Shell).
The Get-ExchangeCertificate cmdlet does not fully support remote PowerShell. We recommend that you use the Exchange Management Shell instead to get all the properties of this cmdlet.
What do you need to know before you begin?
Estimated time to complete: less than 5 minutes
After you connect, the cmdlets and parameters that you have or don’t have access to is controlled by role-based access control (RBAC). For more information, see Exchange Server permissions.
You can use the following versions of Windows:
- Windows 10
- Windows 8.1
- Windows Server 2019
- Windows Server 2016
- Windows Server 2012 or Windows Server 2012 R2
- Windows 7 Service Pack 1 (SP1) *
- Windows Server 2008 R2 SP1 *
* This version of Windows has reached end of support, and is now supported only in Azure virtual machines. To use this version of Windows, you need to install the Microsoft .NET Framework 4.5 or later and then an updated version of the Windows Management Framework: 3.0, 4.0, or 5.1 (only one). For more information, see Install the .NET Framework, Windows Management Framework 3.0, Windows Management Framework 4.0, and Windows Management Framework 5.1.
Windows PowerShell needs to be configured to run scripts, and by default, it isn’t. You’ll get the following error when you try to connect:
Files cannot be loaded because running scripts is disabled on this system. Provide a valid certificate with which to sign the files.
To require all PowerShell scripts that you download from the internet are signed by a trusted publisher, run the following command in an elevated Windows PowerShell window (a Windows PowerShell window you open by selecting Run as administrator):
For more information about execution policies, see About Execution Policies.
Having problems? Ask for help in the Exchange Server forum.
Connect to a remote Exchange server
On your local computer, open Windows PowerShell, and run the following command:
In the Windows PowerShell Credential Request dialog box that opens, enter your user principal name (UPN) (for example, chris@contoso.com ) and password, and then click OK.
Replace with the fully qualified domain name of your Exchange server (for example, mailbox01.contoso.com ) and run the following command:
Note: The ConnectionUri value is http , not https .
Run the following command:
Be sure to disconnect the remote PowerShell session when you’re finished. If you close the Windows PowerShell window without disconnecting the session, you could use up all the remote PowerShell sessions available to you, and you’ll need to wait for the sessions to expire. To disconnect the remote PowerShell session, run the following command:
How do you know this worked?
After Step 3, the Exchange cmdlets are imported into your local Windows PowerShell session and tracked by a progress bar. If you don’t receive any errors, you connected successfully. A quick test is to run an Exchange cmdlet (for example, Get-Mailbox) and review the results.
If you receive errors, check the following requirements:
A common problem is an incorrect password. Run the three steps again, and pay close attention to the user name and password you enter in Step 1.
The account you use to connect to the Exchange server needs to be enabled for remote PowerShell access. For more information, see Control remote PowerShell access to Exchange servers.
TCP port 80 traffic needs to be open between your local computer and the Exchange server. It’s probably open, but it’s something to consider if your organization has a restrictive network access policy.
See also
The cmdlets that you use in this article are Windows PowerShell cmdlets. For more information about these cmdlets, see the following articles.
Подключение к серверам Exchange Server с помощью удаленной оболочки PowerShell
Если на вашем локальном компьютере не установлены средства управления Exchange, вы можете с помощью Windows PowerShell создать удаленный сеанс PowerShell на сервере Exchange Server. Эта простая процедура состоит из трех шагов: сначала вы вводите учетные данные, затем предоставляете необходимые параметры подключения, после чего импортируете командлеты Exchange в локальный сеанс Windows PowerShell, чтобы использовать их в дальнейшем.
Рекомендуем использовать командную консоль Exchange на любом компьютере, предназначенном для активного администрирования серверов Exchange Server. Командную консоль Exchange можно получить, установив средства управления Exchange. Дополнительные сведения см. в статьях Установка средств управления Exchange Server и Открытие командной консоли Exchange. Для получения дополнительных сведений о командной консоли Exchange см. статью Exchange Server PowerShell (командная консоль Exchange).
Командлет Get-ExchangeCertificate не полностью поддерживает удаленную оболочку PowerShell. Вместо этого мы рекомендуем использовать командную консоль Exchange, чтобы получить все свойства этого командлета.
Что нужно знать перед началом работы?
Предполагаемое время для завершения: менее пяти минут.
После подключения управление наличием доступа к командлетам и параметрам осуществляется путем управления доступом на основе ролей (RBAC). Дополнительные сведения см. в статье Разрешения Exchange Server.
Ниже приведены версии Windows, которые можно использовать.
- Windows 10
- Windows 8.1
- Windows Server 2019
- Windows Server 2016
- Windows Server 2012 или Windows Server 2012 R2
- Windows 7 с пакетом обновления 1 (SP1) *
- Windows Server 2008 R2 с пакетом обновления 1 (SP1) *
* Эта версия Windows больше не поддерживается; исключением является только использование на виртуальных машинах Azure. Чтобы использовать эту версию Windows, необходимо установить Microsoft .NET Framework 4.5 или более позднюю версию, а затем обновленную версию Windows Management Framework: 3.0, 4.0 или 5.1 (только одну). Дополнительные сведения см. в статьях Установка .NET Framework, Windows Management Framework 3.0, Windows Management Framework 4.0 и Windows Management Framework 5.1.
Чтобы запускать сценарии, необходимо настроить Windows PowerShell. По умолчанию это приложение не настроено. При попытке подключения появится указанная ниже ошибка.
Файлы невозможно загрузить, поскольку выполнение сценариев в этой системе отключено. Предоставьте действительный сертификат для подписи файлов.
Чтобы требовать подпись надежного издателя для всех сценариев PowerShell, загружаемых из Интернета, выполните следующую команду в окне Windows PowerShell с повышенными привилегиями (окно Windows PowerShell, которое открывается с помощью параметра Запуск от имени администратора).
Дополнительные сведения о политиках выполнения см. в статье Сведения о политиках выполнения.
Возникли проблемы? Обратитесь за помощью к участникам форума Exchange Server.
Подключение к удаленному серверу Exchange
На локальном компьютере откройте Windows PowerShell и запустите следующую команду:
В открывшемся диалоговом окне Запрос учетных данных Windows PowerShell введите имя участника-пользователя (UPN) (например, chris@contoso.com ) и пароль, а затем нажмите кнопку OK.
Замените полным доменным именем сервера Exchange Server (например, mailbox01.contoso.com ) и выполните следующую команду:
Примечание. Значением ConnectionUri является http , а не https .
Выполните следующую команду:
По завершении настройки отключите удаленный сеанс PowerShell. Если закрыть окно Windows PowerShell, не выполнив отключение сеанса, можно исчерпать лимит доступных сеансов удаленной среды PowerShell. К тому же, придется дождаться завершения сеанса. Чтобы отключить удаленный сеанс PowerShell, выполните следующую команду:
Как убедиться, что все получилось?
После шага 3 командлеты Exchange импортируются в локальный сеанс Windows PowerShell и отображаются в индикаторе выполнения. Если при этом не возникают ошибки, подключение успешно установлено. Чтобы выполнить быструю проверку, запустите командлет Exchange (например, Get-Mailbox) и просмотрите результаты его выполнения.
Если возникают ошибки, просмотрите список возможных причин ниже.
Распространенная проблема — неправильный пароль. Еще раз повторите три описанные выше действия, уделив особое внимание действию 1 — вводу имени пользователя и пароля.
Для учетной записи, которую вы используете для подключения к серверу Exchange Server, необходимо включить удаленный доступ к PowerShell. Дополнительные сведения см. в статье Управление удаленным доступом к PowerShell для серверов Exchange Server.
Между локальным компьютером и сервером Exchange Server необходимо открыть трафик для TCP-порта 80. Вполне вероятно, что он уже открыт, но в этом следует убедиться, если в вашей организации действует политика ограниченного сетевого доступа.
См. также
В этой статье используются командлеты Windows PowerShell. Дополнительные сведения об этих командлетах см. в следующих статьях.


