- Installing preview versions of the Windows Driver Kit (WDK)
- Install Windows Driver Kit (WDK) Insider Preview
- 1. Install Visual Studio
- 2. Disable strong name validation
- 3. Install SDK Insider Preview
- 4. Install WDK Insider Preview
- Install Enterprise WDK (EWDK) Insider Preview
- Run-time requirements for the WDK and the EWDK
- Kits and tools overview
- ADK for Windows 10
- Learn about the ADK tools
- Microsoft Visual StudioВ 2017
- Standalone Windows SDK for WindowsВ 10
- WDK 10
- Enterprise WDK (EWDK)
- Windows symbols
- Windows Hardware Lab Kit (HLK) for WindowsВ 10
- HLK supplemental test content
- Как получить среду предустановки Windows 10
- Создание пакета подготовки для Windows 10 Create a provisioning package for Windows 10
- Создание нового проекта Start a new project
- Настройка параметров Configure settings
- Сборка пакета Build package
Installing preview versions of the Windows Driver Kit (WDK)
This page contains installation instructions for Insider Preview (pre-release) versions of the Windows Driver Kit (WDK). The download links for the latest pre-release version of the WDK and the EWDK are on https://www.microsoft.com/software-download/windowsinsiderpreviewWDK.
For info about the latest released versions of the WDK, see Download the Windows Driver Kit (WDK). For downloads of earlier versions of the WDK, see Other WDK downloads.
Install Windows Driver Kit (WDK) Insider Preview
1. Install Visual Studio
- The WDK now supports Visual Studio 2019. All editions are supported. The WDK no longer supports Visual Studio 2017.
- Download from https://visualstudio.microsoft.com/vs/preview/.
- Select workload: Development with C++.
- ARM: To build ARM drivers you must additionally install the component: Individual components -> Compilers, build tools, and runtimes -> Visual C++ compilers and libraries for ARM.
- ARM64: Currently not supported.
2. Disable strong name validation
The WDK Visual Studio Extensions are currently not strong name signed. Run the following commands from an elevated command prompt to disable strong name validation:
3. Install SDK Insider Preview
4. Install WDK Insider Preview
During installation you will see the Visual Studio installer install the WDK Visual Studio Extensions.
Install Enterprise WDK (EWDK) Insider Preview
The EWDK is a standalone self-contained command-line environment for building drivers. It includes Build Tools for Visual Studio 2019, the SDK, the WDK and support for ARM64 driver development. See more at Installing the Enterprise WDK.
To get started, disable strong name validation by running the following commands from an elevated command prompt:
Then mount the ISO that you downloaded from the Insider Preview page and select LaunchBuildEnv to use the EWDK.
Run-time requirements for the WDK and the EWDK
The WDK requires Visual Studio. For more info about system requirements for Visual Studio, see Visual Studio 2019 System Requirements.
In addition, the EWDK requires .NET 4.7.2. For more info about what .NET runs on, see .NET Framework system requirements.
You can use the WDK Insider Preview and the EWDK Insider Preview to develop drivers for these operating systems:
Kits and tools overview
These kits and tools are available for use with WindowsВ 10 for desktop editions (Home, Pro, Enterprise, and Education) and WindowsВ 10 Mobile for development and manufacturing.
Learn about known issues and workarounds for this release in our WinHEC forums.
ADK for Windows 10
Download the Windows ADK to install tools and documentation for OEMs and ODMs to customize Windows 10 images, assess the quality and performance of systems or components, and to deploy Windows operating systems to new computers. The Windows ADK includes Windows Configuration Designer, the Windows Assessment Toolkit, the Windows Performance Toolkit, and several new and improved deployment tools that can help you automate a large-scale deployment of Windows 10. For more information, see What’s new in kits and tools.
Learn about the ADK tools
The topics below provide instructions on using the tools included in the Windows 10 ADK:
Microsoft Visual StudioВ 2017
Start by downloading Visual StudioВ 2017 and Microsoft Visual Studio Tools for WindowsВ 10. Used together, Microsoft Visual Studio, Visual Studio Tools for WindowsВ 10, standalone Windows Software Development Kit (SDK) for WindowsВ 10, and Windows Driver Kit (WDK) 10 provide an integrated development environment for creating efficient, high-quality drivers for devices running WindowsВ 10.
Standalone Windows SDK for WindowsВ 10
Windows SDK for WindowsВ 10 contains headers, libraries, and tools you can use when you create apps that run on Windows operating systems. You can use the Windows SDK for WindowsВ 10, along with your chosen development environment, to write apps for WindowsВ 10 for desktop editions and WindowsВ 10 Mobile.
WDK 10
WDK 10 contains the tools to build, test, debug, and deploy drivers for WindowsВ 10. WDK 10 unifies support for mobile and desktop devices, Universal Windows drivers, and, with Visual Studio, provides a unified test experience with reliable deployment and debug provisioning that includes WinDbg. You can run many basic certification tests in the integrated environment. The WDK 10 includes templates for several technologies and driver models, including Windows Driver Frameworks (WDF), Universal Serial Bus (USB), print, networking, and file system filters. WDK 10 also supports WindowsВ 7, WindowsВ 8, and WindowsВ 8.1 driver development.
For more information about driver development for WindowsВ 10, see What’s new in Universal Windows driver development and What’s new in kits and tools.
Enterprise WDK (EWDK)
The Enterprise WDK (EWDK) is a kit that large organizations can use as an alternative to downloading and installing the SDK and WDK individually on each computer. The EWDK has a command-line build environment that is based on files and is not computer-dependent, so after the environment file structure has been created, it can be distributed for direct use, such as through version control software or by zipping the contents and unzipping on other computers. It contains the necessary elements to build Windows Driver Model (WDM) drivers, WDF drivers, and classic Windows test applications.
Windows symbols
Symbol files make it easier to debug your code. The easiest way to get Windows symbols is to use the Microsoft Symbol Server. If you prefer to download the entire set of symbols for a particular version of Windows, download a symbol package.
Windows Hardware Lab Kit (HLK) for WindowsВ 10
The Windows Hardware Lab Kit (HLK) for WindowsВ 10 is an all-purpose test and measurement kit to help you determine how well your hardware interacts with Windows. The HLK provides a test infrastructure for PCs. For more information on the using the HLK with WindowsВ 10, see Windows Hardware Lab Kit User’s Guide.
HLK supplemental test content
Some tests, like graphics and multimedia tests, require additional files for testing. You can find this content in the Windows HLK supplemental media test content section on the Download the Windows HLK, HCK, or Logo Kit page.
Как получить среду предустановки Windows 10
По умолчанию, когда я устанавливал на свою рабочую систему Windows 10 Pro amd64 (Version 10.0.17134.254) пакет Windows ADK, пакет установил по сути все необходимое за исключением Среда предустановки Windows (WinPE) которая представляет из себя мини операционную систему используемую для установки, развертывания. Возможности WinPE – это
- Пункт №1: настройка HDD (SSD) перед установкой Windows
- Пункт №2: установка Windows с помощью файла ответов, как с локального диска, так и по сети (smb-ресурс)
- Пункт №3: добавление драйверов с целью выполнить пункт 2
Итак еще раз обратившись к поисковой системе вышел на страницу где отдельно скачивается среда предустановки Windows: https://go.microsoft.com/fwlink/?linkid=2022233 , после скачивания пакета: adkwinpesetup.exe (размер 5,7 Gb), получаю возможность установить « Средство предустановки Windows (Windows PE) ” которое включает в себя:
- Среда предустановки Windows (x86)
- Среда предустановки Windows (AMD64)
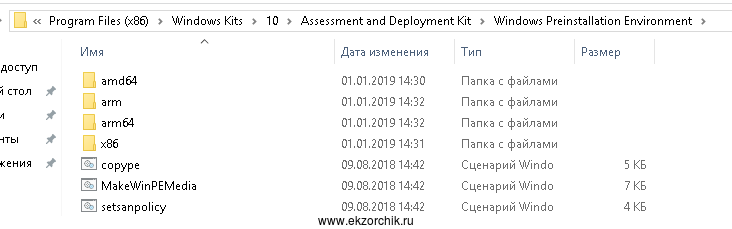
Win + Windows Kits – Среда средств развертывания и работы с образами и запускаем ее с правами « Администратора ». Проверяю, что утилита теперь имеется:
C:\Program Files (x86)\Windows Kits\10\Assessment and Deployment Kit\Deployment Tools>copype
Creates working directories for WinPE image customization and media creation.
amd64 Copies amd64 boot files and WIM to \media.
x86 Copies x86 boot files and WIM to \media.
arm Copies arm boot files and WIM to \media.
arm64 Copies arm64 boot files and WIM to \media.
Note: ARM/ARM64 content may not be present in this ADK.
workingDirectory Creates the working directory at the specified location.
Example: copype amd64 C:\WinPE_amd64
Да, теперь я могу подготовить образ winpe под различные архитектуры с последующей целью установки Windows 10 через файл ответов ( Autounattend.xml ) который у меня лежит там же где и распакованный образ Windows 10 с конкретной редакцией install.wim на SAMBA-ресурсе.
Для архитектуры amd64:
C:\Program Files (x86)\Windows Kits\10\Assessment and Deployment Kit\Deployment Tools>copype amd64 c:\winpe_x64
C:\Program Files (x86)\Windows Kits\10\Assessment and Deployment Kit\Deployment Tools>copy «c:\Program Files\Windows AIK\Tools\PETools\amd64\winpe.wim» c:\winpe_x64\media\sources\boot.wim /Y
C:\Program Files (x86)\Windows Kits\10\Assessment and Deployment Kit\Deployment Tools>copy «c:\Program Files\Windows AIK\Tools\amd64\imagex.exe» c:\winpe_x64\media\
C:\Program Files (x86)\Windows Kits\10\Assessment and Deployment Kit\Deployment Tools>oscdimg -n -bC:\winpe_x64\fwfiles\etfsboot.com c:\winpe_x64\media c:\winpe_x64\winpe_amd64.iso
А вот на релиз Windows 10 Pro x64 (10.0.17134.112) когда установил среду предустановки WinPE таких путей не оказалось как выше, а файл winpe.wim располагается по:
C:\Program Files (x86)\Windows Kits\10\Assessment and Deployment Kit\Windows Preinstallation Environment\amd64\en-us
А значит с учетом этого команды по подготовке образа winpe_amd64.iso будут следующими:
C:\Program Files (x86)\Windows Kits\10\Assessment and Deployment Kit\Deployment Tools>copype amd64 c:\winpe_x64
C:\Program Files (x86)\Windows Kits\10\Assessment and Deployment Kit\Deployment Tools>cd «..\..\Assessment and Deployment Kit\Windows Preinstallation Environment»
C:\Program Files (x86)\Windows Kits\10\Assessment and Deployment Kit\Windows Preinstallation Environment>copy amd64\en-us\winpe.wim c:\winpe_x64\media\sources\boot.wim /Y
C:\Program Files (x86)\Windows Kits\10\Assessment and Deployment Kit\Windows Preinstallation Environment>copy «C:\Program Files (x86)\Windows Kits\10\Assessment and Deployment Kit\Deployment Tools\amd64\DISM\imagex.exe» c:\winpe_x64
C:\Program Files (x86)\Windows Kits\10\Assessment and Deployment Kit\Windows Preinstallation Environment>oscdimg -n -bC:\winpe_x64\fwfiles\etfsboot.com c:\winpe_x64\media c:\winpe_x64\winpe_amd64.iso
Для архитектуры x86:
C:\Program Files (x86)\Windows Kits\10\Assessment and Deployment Kit\Deployment Tools>copype x86 c:\winpe_x86
C:\Program Files (x86)\Windows Kits\10\Assessment and Deployment Kit\Deployment Tools>copy «c:\Program Files\Windows AIK\Tools\PETools\x86\winpe.wim» «c:\winpe_x86\media\sources\boot.wim» /Y
C:\Program Files (x86)\Windows Kits\10\Assessment and Deployment Kit\Deployment Tools>copy «C:\Program Files\Windows AIK\Tools\x86\imagex.exe» c:\winpe_x86\media\
C:\Program Files (x86)\Windows Kits\10\Assessment and Deployment Kit\Windows Preinstallation Environment>oscdimg -n -bC:\winpe_x86\fwfiles\etfsboot.com c:\winpe_x86\media c:\winpe_86\winpe_amd86.iso
по аналогие с выше указанным для текущей редакции Windows и пути для образа x86 будут другими.
На заметку: Я уже давно не использую Windows 10 Pro x86 так что не особо-то и заостряю на ней внимание.
Так теперь его нужно проверить, а как? К примеру создать VM либо через Virtualbox, либо QEMU+KVM и выставить что первым загрузка должна идти с образа winpe. И если Вы увидите загрузку ниже, как на моем представленном скриншоте, то все у Вас получилось.
Создание пакета подготовки для Windows 10 Create a provisioning package for Windows 10
Применимо к: Applies to
- Windows 10 Windows 10
- Windows10 Mobile Windows 10 Mobile
С помощью Конструктора конфигурации Windows можно создать пакет подготовка (.ppkg), содержащий параметры настройки, а затем применить пакет предварительной настройки к устройству под управлением Windows 10 или Windows 10 Mobile. You can use Windows Configuration Designer to create a provisioning package (.ppkg) that contains customization settings, and then apply the provisioning package to a device running Windows 10 or Windows 10 Mobile.
Мы рекомендуем создать учетную запись местного администратора при разработке и проверке пакета предварительной разработки. We recommend creating a local admin account when you develop and test your provisioning package. Мы также рекомендуем использовать учетную запись пользователя с наименее привилегированным доменом для пользования устройствами в домене Active Directory. We also recommend using a least privileged domain user account to join devices to the Active Directory domain.
Создание нового проекта Start a new project
Откройте конструктор конфигураций Windows. Open Windows Configuration Designer:
На экране Пуск или в меню Пуск введите конструктор конфигурации Windows, а затем выберите ярлык конструктора конфигурации Windows. From either the Start screen or Start menu search, type Windows Configuration Designer, and then select the Windows Configuration Designer shortcut.
Если установлен конструктор конфигурации Windows из ADK, перейдите к C:\Program Files (x86)\Windows Kits\10\Assessment and Deployment Kit\Imaging and Configuration Designer\x86 (на компьютере x64) или C:\Program Files\Windows Kits\10\Assessment and Deployment Kit\Imaging and Configuration Designer\x86\ICD.exe (на компьютере x86), а затем выберите ICD.exe. If you installed Windows Configuration Designer from the ADK, navigate to C:\Program Files (x86)\Windows Kits\10\Assessment and Deployment Kit\Imaging and Configuration Designer\x86 (on an x64 computer) or C:\Program Files\Windows Kits\10\Assessment and Deployment Kit\Imaging and Configuration Designer\x86\ICD.exe (on an x86 computer), and then select ICD.exe.
Выберите нужный вариант на странице Пуск, на которой представлено несколько вариантов создания пакета подготовки, как показано на следующем изображении. Select your desired option on the Start page, which offers multiple options for creating a provisioning package, as shown in the following image:

Следующие параметры мастера предоставляют простой интерфейс для настройки общих параметров для настольных, мобильных и киосков: The following wizard options provide a simple interface for configuring common settings for desktop, mobile, and kiosk devices:
Мастера также доступны для создания пакетов подготовки для устройств Microsoft Surface Hub и Microsoft HoloLens. Wizards are also available for creating provisioning packages for Microsoft Surface Hub and Microsoft HoloLens devices. Сводку параметров, доступных на настольных, мобильных устройствах и устройствах киосков, см. в сводке «Что можно настроить с помощью мастеров конструктора конфигурации». For a summary of the settings available in the desktop, mobile, and kiosk devices, see What you can configure using Configuration Designer wizards.
Опция Advanced provisioning открывает новый проект со всеми доступными настройками времени работы. The Advanced provisioning option opens a new project with all the runtime settings available. (В остальной части этой процедуры используется предварительная подготовка.) (The rest of this procedure uses advanced provisioning.)
Приступить к созданию проекта можно в обычном мастере, а затем перенести проект в расширенный редактор. You can start a project in the simple wizard editor and then switch the project to the advanced editor.

Введите имя для проекта и выберите Далее. Enter a name for your project, and then select Next.
Выберите параметры, которые необходимо настроить, в зависимости от типа устройства, а затем выберите Далее. Select the settings you want to configure, based on the type of device, and then select Next. В следующей таблице приведено описание параметров. The following table describes the options.
| Выпуск Windows Windows edition | Параметры, доступные для настройки Settings available for customization | Применение пакета подготовки Provisioning package can apply to |
|---|---|---|
| Все выпуски Windows All Windows editions | Общие параметры Common settings | Все устройства с Windows 10 All Windows 10 devices |
| Все выпуски Windows для настольных ПК All Windows desktop editions | Общие параметры и параметры, относящиеся к настольным устройствам Common settings and settings specific to desktop devices | Все выпуски Windows10 для настольных ПК (Домашняя, Pro, Корпоративная, Pro для образовательных учреждений, Корпоративная для образовательных учреждений) All Windows 10 desktop editions (Home, Pro, Enterprise, Pro Education, Enterprise Education) |
| Все выпуски Windows Mobile All Windows mobile editions | Общие параметры и параметры, относящиеся к мобильным устройствам Common settings and settings specific to mobile devices | Все устройства с Windows 10 Mobile All Windows 10 Mobile devices |
| Windows 10 IoT Базовая Windows 10 IoT Core | Общие параметры и параметры, относящиеся к Windows 10 IoT Базовая Common settings and settings specific to Windows 10 IoT Core | Все устройства с Windows 10 IoT Базовая All Windows 10 IoT Core devices |
| Windows 10 Holographic Windows 10 Holographic | Общие параметры и параметры, относящиеся к Windows 10 Holographic Common settings and settings specific to Windows 10 Holographic | Microsoft HoloLens Microsoft HoloLens |
| Выпуск Windows 10 для совместной работы Common to Windows 10 Team edition | Общие параметры и параметры, относящиеся к Windows 10 для совместной работы Common settings and settings specific to Windows 10 Team | Microsoft Surface Hub Microsoft Surface Hub |
На странице Импорт пакета подготовка (необязательный) можно выбрать Готово для создания проекта или просмотреть и выбрать существующий пакет подготовка для импорта в проект, а затем выбрать finish. **** On the Import a provisioning package (optional) page, you can select Finish to create your project, or browse to and select an existing provisioning package to import to your project, and then select Finish.
Функция Импорт пакета подготовки позволяет упростить создание разных пакетов подготовки, содержащих некоторые общие параметры. Import a provisioning package can make it easier to create different provisioning packages that all have certain settings in common. Например, можно создать пакет подготовка, содержащий параметры для сети организации, а затем импортировать его в другие пакеты, которые вы создаете, чтобы не нужно было повторно перенастроять эти общие параметры. For example, you could create a provisioning package that contains the settings for your organization’s network, and then import it into other packages that you create so you don’t have to reconfigure those common settings repeatedly.
- В области Доступные настройки теперь можно настроить параметры пакета. In the Available customizations pane, you can now configure settings for the package.
Настройка параметров Configure settings
При создании проекта с помощью расширенной подготовки конструктор конфигураций Windows откроет панель Доступные настройки. For an advanced provisioning project, Windows Configuration Designer opens the Available customizations pane. Пример на следующем изображении основан на параметрах для Всех выпусков Windows для настольных ПК. The example in the following image is based on All Windows desktop editions settings.

В основе параметров в конструкторе конфигураций Windows используются поставщики служб конфигурации Windows 10 (CSP). The settings in Windows Configuration Designer are based on Windows 10 configuration service providers (CSPs). Дополнительные сведения о поставщиках служб конфигурации см. в разделе Основы работы с поставщиками служб конфигурации (CSP) для ИТ-специалистов. To learn more about CSPs, see Introduction to configuration service providers (CSPs) for IT pros.
Процесс настройки параметров является одинаковым для всех параметров. The process for configuring settings is similar for all settings. В следующей таблице приведен пример. The following table shows an example.
 Разверните категорию. Expand a category. Разверните категорию. Expand a category. |  |
 Выберите параметр. Select a setting. Выберите параметр. Select a setting. |  |
 Введите значение для параметра. Enter a value for the setting. Выберите Добавить, если кнопка отображается. Select Add if the button is displayed. Введите значение для параметра. Enter a value for the setting. Выберите Добавить, если кнопка отображается. Select Add if the button is displayed. |  |
 Для некоторых параметров (таких как в этом примере) нужно указать дополнительные сведения. Some settings, such as this example, require additional information. На панели Доступные настройки выберите значение, которое вы только что создали. После этого отобразятся дополнительные параметры. In Available customizations, select the value you just created, and additional settings are displayed. Для некоторых параметров (таких как в этом примере) нужно указать дополнительные сведения. Some settings, such as this example, require additional information. На панели Доступные настройки выберите значение, которое вы только что создали. После этого отобразятся дополнительные параметры. In Available customizations, select the value you just created, and additional settings are displayed. |  |
 В ходе настройки параметра он отображается на панели Выбранные настройки. When the setting is configured, it is displayed in the Selected customizations pane. В ходе настройки параметра он отображается на панели Выбранные настройки. When the setting is configured, it is displayed in the Selected customizations pane. |  |
Дополнительные сведения о каждом конкретном параметре см. в Справочнике по параметрам подготовки Windows. For details on each specific setting, see Windows Provisioning settings reference. При выборе параметра в конструкторе конфигураций Windows также отображается раздел справки по настройке этого параметра, как показано на следующем изображении. The reference topic for a setting is also displayed in Windows Configuration Designer when you select the setting, as shown in the following image.

Сборка пакета Build package
После настройки настройки выберите экспорт ивыберите пакет предварительной настройки. After you’re done configuring your customizations, select Export, and then select Provisioning Package.

В окне Описание пакета подготовка введите следующую информацию, а затем выберите Далее: In the Describe the provisioning package window, enter the following information, and then select Next:
- Имя— в этом поле предварительно указывается имя проекта. Name — This field is pre-populated with the project name. Вы можете изменить это значение, введя другое имя в поле Имя. You can change this value by entering a different name in the Name field.
- Версия (в формате Major.Minor — необязательная). Version (in Major.Minor format — Optional. Вы можете изменить версию пакета по умолчанию, задав новое значение в поле Версия. You can change the default package version by specifying a new value in the Version field.
- Владелец — выберите пункт ИТ-администратор. Дополнительные сведения см. в разделе Приоритеты пакетов подготовки. Owner — Select IT Admin. For more information, see Precedence for provisioning packages.
- Ранг (от 0 до 99)— необязательное поле. Rank (between 0-99) — Optional. Можно выбрать значение от 0 до 99 включительно. You can select a value between 0 and 99, inclusive. Ранг пакета по умолчанию— 0. The default package rank is 0.
В окне Выбор сведений о безопасности для окна пакета подготовка можно выбрать для шифрования и/или подписывания пакета подготовка с выбранным сертификатом, а затем выбрать Далее. In the Select security details for the provisioning package window, you can select to encrypt and/or sign a provisioning package with a selected certificate, and then select Next. Оба выбора необязательны: Both selections are optional:
Зашифровать пакет— при выборе этого пункта на экране отобразится автоматически созданный пароль. Encrypt package — If you select this option, an auto-generated password will be shown on the screen.
Подписать пакет— при выборе этого пункта необходимо выбрать действительный сертификат, который будет использоваться для подписывания пакета. Sign package — If you select this option, you must select a valid certificate to use for signing the package. Вы можете указать сертификат, выбрав выберите и выберите сертификат, который необходимо использовать для подписи пакета. You can specify the certificate by selecting Select and choosing the certificate you want to use to sign the package.
Необходимо настроить безопасность пакетов, только если пакет используется для подготовка устройств и когда пакет содержит конфиденциальные данные безопасности, такие как сертификаты или учетные данные, которые не должны быть скомпрометированы. You should only configure provisioning package security when the package is used for device provisioning and when the package has content with sensitive security data, such as certificates or credentials that should be prevented from being compromised. При применении зашифрованного и/или подписанного пакета подготовки во время запуска при первом включении или через пользовательский интерфейс настройки пакет может быть расшифрован, и если он подписан, стать доверенным без явного согласия пользователя. When applying an encrypted and/or signed provisioning package, either during OOBE or through the setting UI, the package can be decrypted, and if signed, be trusted without explicit user consent. ИТ-администратор может задать политики на устройстве пользователя, чтобы запретить удаление необходимых пакетов с устройства или выполнение подготовки потенциально опасных пакетов на устройстве. An IT administrator can set policy on a user device to restrict the removal of required packages from the device, or the provisioning of potentially harmful packages on the device.
Если пакет подготовки подписан доверенным поставщиком, его можно установить на устройстве без запроса на получение согласия от пользователя. If a provisioning package is signed by a trusted provisioner, it can be installed on a device without a prompt for user consent. Чтобы включить сертификаты доверенного поставщика, перед установкой доверенного пакета подготовки необходимо настроить параметр TrustedProvisioners. In order to enable trusted provider certificates, you must set the TrustedProvisioners setting prior to installing the trusted provisioning package. Это единственный способ установки пакета без согласия пользователя. This is the only way to install a package without user consent. Для обеспечения дополнительной защиты также можно настроить параметр RequireProvisioningPackageSignature, который запретит пользователям устанавливать пакеты подготовки не подписанные доверенными поставщиками. To provide additional security, you can also set RequireProvisioningPackageSignature, which prevents users from installing provisioning packages that are not signed by a trusted provisioner.
В окне Выберите, где сохранить окно пакета подготовка, укажите расположение вывода, куда необходимо, чтобы пакет подготовка был создан, а затем выберите Далее. In the Select where to save the provisioning package window, specify the output location where you want the provisioning package to go once it’s built, and then select Next. По умолчанию конструктор конфигураций Windows использует в качестве расположения выходных данных папку проекта. By default, Windows Configuration Designer uses the project folder as the output location.
В окне Сборка пакета подготовка выберите Сборка. In the Build the provisioning package window, select Build. Сборка пакета подготовки выполняется быстро. The provisioning package doesn’t take long to build. Сведения о проекте отображаются на странице сборки, а индикатор выполнения указывает состояние сборки. The project information is displayed in the build page and the progress bar indicates the build status.
Если необходимо отменить сборку, выберите Отмена. If you need to cancel the build, select Cancel. Это отменяет текущий процесс сборки, закрывает мастер и возвращает вас на страницу Настройки. This cancels the current build process, closes the wizard, and takes you back to the Customizations page.
В случае сбой сборки появится сообщение об ошибке, которое включает ссылку на папку проекта. If your build fails, an error message will appear that includes a link to the project folder. Вы можете просмотреть журналы, чтобы определить, что вызвало ошибку. You can scan the logs to determine what caused the error. После устранения проблемы попробуйте выполнить построение пакета еще раз. Once you fix the issue, try building the package again.
В случае успешного построения отобразятся пакет подготовки, выходной каталог и каталог проекта. If your build is successful, the name of the provisioning package, output directory, and project directory will be shown.
При желании вы можете выполнить построение пакета подготовки снова и выбрать другой путь для выходного пакета. If you choose, you can build the provisioning package again and pick a different path for the output package. Для этого выберите «Назад», чтобы изменить имя и путь выпускаемого пакета, а затем выберите Далее, чтобы запустить другую сборку. To do this, select Back to change the output package name and path, and then select Next to start another build.
Когда вы закончите, выберите Готово, чтобы закрыть мастер и вернуться на страницу Настройки. When you are done, select Finish to close the wizard and go back to the Customizations page.


