- Fix: A problem is preventing the troubleshooter from starting on Windows 10
- How to Fix ‘A problem is preventing the troubleshooter from starting’
- Solution 1: Use the SFC Scan
- Solution 2: Check if the Default Path to Temp Folder has been Changed
- Solution 3: Start the Cryptographic Service
- Solution 4: Perform a System Restore
- Preventing Programs/Process from starting automatically in Windows 10
- Replies (3)
- A patch is preventing the system from starting
Fix: A problem is preventing the troubleshooter from starting on Windows 10
This problem is a common problem which occurs on Windows. It pops up when you try to run the built-in troubleshooting feature of Windows to fix issues or when you try to run Microsoft’s official Fix It tools you downloaded from their site. As soon as you run the troubleshooter, you receive the above mentioned error message.

It can be fixed in numerous ways considering that the error itself is not so self-explanatory. There are various methods you can use to fix it and we have decided to list them all out below.
How to Fix ‘A problem is preventing the troubleshooter from starting’
Solution 1: Use the SFC Scan
Even though the SFC scan barely solves any real problems (yet Microsoft staff recommends it all the time), this time it appears that the problem can be solved via this built-in Windows tool.
Use the SFC.exe (System File Checker) tool which is accessed via the administrative Command Prompt. The tool will scan your Windows system files for broken or missing files and it’s able to fix or replace the files instantly.
This can be quite useful if you need those files for the troubleshooting process since this error appears if there is a problem with one of your system files used to run the troubleshooter.
If you want to take a look at detailed instructions on how to operate this tool, check out our article on the topic: How to: Run SFC Scan in Windows 10.
Solution 2: Check if the Default Path to Temp Folder has been Changed
Some users have used other troubleshooting methods and advice suggested by online users to change the default path to the Temp folder to another location. It seems that Windows does not like this and it reports this error when you try to run a troubleshooter. The Temp folder hosts various important but temporary files used by various services so it’s important to return it to its place.
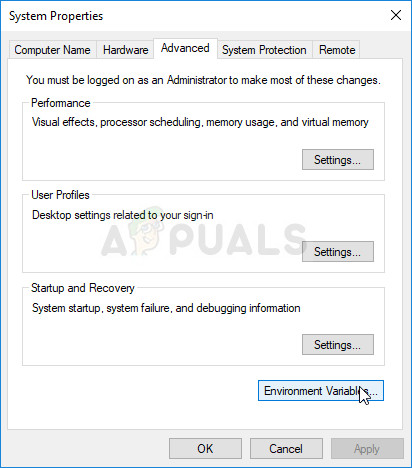
- Right-click on My Computer/This PC depending on your Windows operating system and choose the Properties option. After that, locate the Advanced system settings button at the right pane of the Properties window, click on it, and navigate to the Advanced tab.
- At the bottom right part of the Advanced tab, you will be able to see the Environment Variables option so click on it and you will be able to see a list of all system variables under the System variables section.
- Scroll down until you locate both the TEMP and TMP variables. The value of both of these variables should be set to “C:\\WINDOWS\TEMP”. If it’s set to something else, select it and click the Edit button.
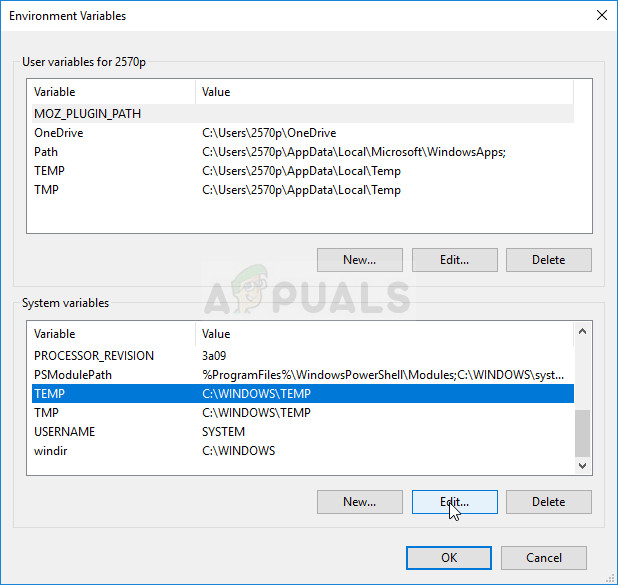
- Under the Variable value make sure you enter “%SystemRoot%\TEMP” as this will work even if you rename the name of your drive or if you switch to a new version of Windows. Apply the changes, restart your computer, and check to see if troubleshooting works as it should.
Solution 3: Start the Cryptographic Service
Another major culprit of this error is a broken Cryptographic Service which was either stopped by another application or by an error on Windows. Either way, the service needs to be started in order to get rid of the error message you are currently dealing with. The process is rather simple and it has helped plenty of users get rid of the problem. Good luck!
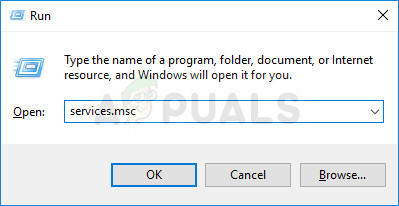
- Open the Run dialog box by using the Windows Key + R key combination on your keyboard. Type “services.msc” in the box without the quotation marks and click OK in order to open Services.
- Locate Cryptographic Service in the services list, right-click on it and select Properties from the context menu which appears.
- If the service is started (you can check that just next to the Service status message), you should spot it immediately by clicking the Stop button in the middle of the window. If it is stopped, leave it as it is (for now, of course).
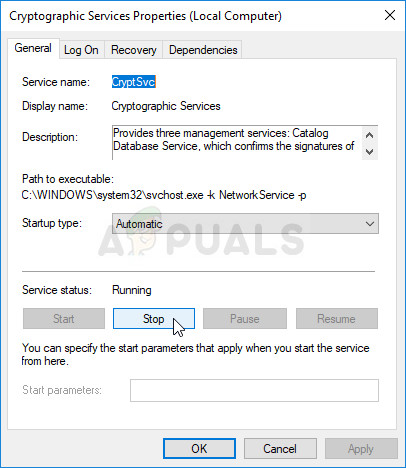
- Make sure that the option under the Startup type menu in the Credential Manager Service’s properties is set to Automatic before you proceed with the instructions. Confirm any dialogue boxes which may appear when you set the startup type. Click on the Start button at the middle of the window before exiting.
You may receive the following error message when you click on Start:
“Windows could not start the Cryptographic Service on Local Computer. Error 1079: The account specified for this service differs from the account specified for other services running in the same process.”
If this occurs, follow the instructions below to fix it.
- Follow the steps 1-3 from the instructions above in order to open Cryptographic Service’s properties. Navigate to the Log On tab and click on the Browse… button.
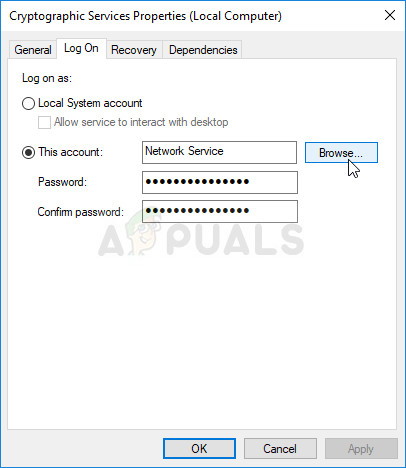
- Under the “Enter the object name to select” box, type in your account’s name, click on Check Names and wait for the name to become recognized.
- Click OK when you are finished and type in the password in the Password box when you are prompted with it, if you have setup a password. It should now start without issues!
Solution 4: Perform a System Restore
Unfortunately, sometimes this error does not come alone. The same thing which is preventing the problematic troubleshooter from starting may prevent other services on your computer such as Windows Update, SFC, DISM, etc. These things have some common dependencies and probably to quickest way to fix them is to perform a System Restore.
It will restore your computer to a state in which it was before the error started to occur so it’s important that you carefully think about the time when the error started to occur and choose a restore point before that date.
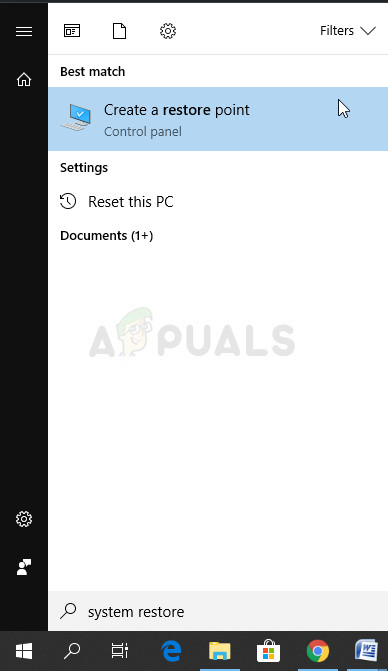
- First of all, we shall turn on the System Restore utility on your PC. Search for System Restore by clicking the Start menu and simply start typing. From there, click on Create a restore point.
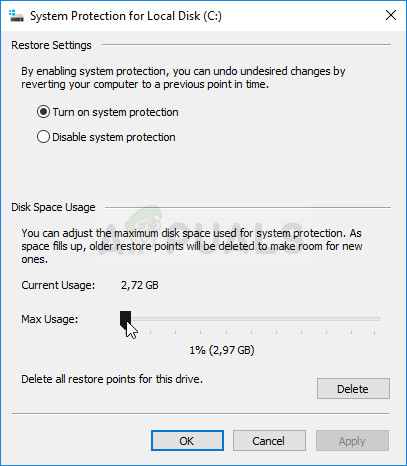
- A System Restore window will appear and it will display the current settings. Inside this window, open the Protection Settings and make it sure that protection is enabled on your system drive.
- If it is disabled by any chance, select that disk and click on the Configure button to enable protection. You should also provide a sufficient amount of disk space for system protection. Click on Apply and OK afterwards to apply the settings.
- Now, the system will create a restore point automatically whenever a new program is installed or an important change has occurred on your computer.
After you have enabled the tool successfully, let’s revert your PC back to the state where the “A problem is preventing the troubleshooter from starting” error didn’t occur. Make sure you backup some important documents and apps you have created or installed in the meantime just to be safe if you created them recently.
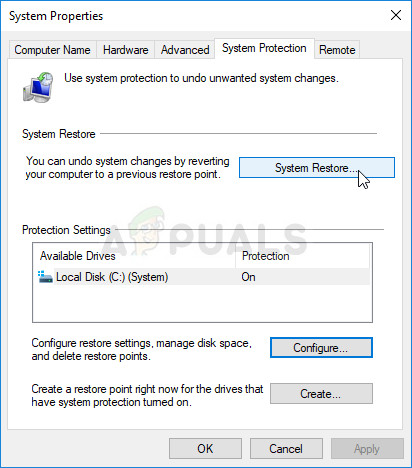
- Search for System Restore using the Search button next to the Start menu and click on Create a restore point. Inside the System Properties window, click on System Restore.
- Inside the System Restore window, select the option called Choose a different restore point and click the Next button.
- Select a particular restore point you saved before manually. You can also select any restore point available in the list and hit the Next button to proceed with the restoration process. Make sure you choose the correct one After the process is over, you will be reverted to the state your computer was in at that period in time.
Note: If this doesn’t work by any chance and if you receive an error during any step, we will try to start System Restore from the Recovery menu as opposed the classic method because plenty of users who solved their problem using this method actually couldn’t start System Restore with Windows loaded.
- On the login screen, click on the Power icon and hold the Shift key while clicking restart. This is a great shortcut to accessing the Recovery menu without having to input your recovery DVD.
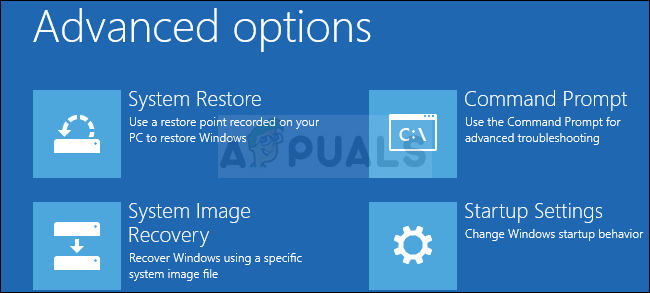
- Instead or restarting, a blue screen will appear with several options. Choose Troubleshoot >> Advanced Options >> System Restore and for your computer to open the tool.
- You should be able to follow the same steps from the second set from the method below (the steps which include restoring your PC). When the process is completed, your computer should boot normally to check to see if the problem is still there.
Preventing Programs/Process from starting automatically in Windows 10
There are several programs/processes that start automatically in my Windows 10 (example: Skype, Microsoft Store). How do I prevent programs/processes from starting automatically? They are not listed in the startup tab in Task Manager.
Thanks for your help!
Replies (3)
Turn off all unnecessary Background Apps
Open the Settings App
Go to Privacy — Background Apps
Turn off any App you do not need running in the background
Task Manager and indeed Msconfig offer only limited control over Startup items . . .
Click the link below to download a small free utility that does not require installation
When the file downloads, unzip it.
Depending on your system, run Autoruns or Autoruns64 as Administrator
With that utility, you can right click and delete any startup item in Windows
On the initial list work your way down to find the processes you do not want starting with Windows, then untick any you find . . .
Power to the Developer!
MSI GV72 — 17.3″, i7-8750H (Hex Core), 32GB DDR4, 4GB GeForce GTX 1050 Ti, 256GB NVMe M2, 2TB HDD
Was this reply helpful?
Sorry this didn’t help.
Great! Thanks for your feedback.
How satisfied are you with this reply?
Thanks for your feedback, it helps us improve the site.
How satisfied are you with this reply?
Thanks for your feedback.
Hi CherylSams
Greetings! I am Vijay, an Independent Advisor. I am here to work with you on this problem.
1. Windows Key+R > Copy and paste following into Run and Enter
shell:startup
This will open up Startup folder
See if you have these apps in it
If yes, Delete shortcut from here
2. Use Autoruns to find out where these get hidden
Do let me know if you have any more question or require further help.
Best regards
Vijay A. Verma @ http://www.eforexcel.com/
Timezone: UTC+05:30, PST+12:30
Availability Hours (UTC) : 05:00 AM — 05:00 PM
Was this reply helpful?
Sorry this didn’t help.
Great! Thanks for your feedback.
How satisfied are you with this reply?
Thanks for your feedback, it helps us improve the site.
How satisfied are you with this reply?
Thanks for your feedback.
![]()
There is an order that you should follow to stop apps from starting with Windows:
1- Go through the app’s menus until you find a setting that controls whether or not the app starts with Windows . turn that setting off.
This is, by far, the best way to prevent an app from starting with Windows, because you are working with the app in the way it was designed to be used.
2- The second best thing to do is to ask the developer how to prevent the app from starting with Windows; if not actually asking then finding the information in the developer’s published information.
This is good because the steps you will follow come from the app’s own developer.
3- Moving lower down the list, the next thing to do is to actively prevent the app from starting with Windows. You can do this by disabling it in the Startup tab of Task Manager, or with the aid of an app, like Mark Russinovich’s Autoruns.
This is really not desirable, because you are actually interfering with the app. It’s still trying to start with Windows, because that’s what it was coded to do, and you are defeating it. This should be viewed as a temporary measure, until you can think of something better to do.
4- Last on the list is manually editing the Windows registry and/or disabling the file that starts the app with Windows. This is like doing mixed martial arts on your computer. You might win, but you can come out of it all bloody.
There are some ‘Lazarus’ apps that have a way of resurrecting themselves even after you’ve done everything to stop them. In that case, the only thing you can do is to uninstall them. Spotify comes to mind. And in the old days, QuickTime.
A patch is preventing the system from starting
I have a Lenovo G570 hasn’t been able to start Windows. After I boot it, it goes through a screen that shows ‘Windows Loading’ and now will not start windows. When I press F8 ,o n startup, it fails to boot into Windows 7. I get «Windows Error Recovery» with 2 options: Launch Startup Repair (recommended) and Start Windows Normally
When I choose Launch Setup Repair, it says it cannot repair this computer automatically. The Problem Details are:
«Startup Repair cannot repair cannot repair this computer automatically
Sending more information can help Microsoft create solutions.
->Send information about this problem (recommended)
->Dont Send
[V] View problem details»
problemsignature:
Problem event name: startup repair offline
Problem signature 01: 6.1.7600.16385
Problem signature 02: 6.1.7600.16385
Problem signature 03: Unknown
Problem signature 04: 0
Problem signature 05: AutoFailover
Problem signature 06: 1
Problem signature 07: BadPatch
OS version: 6.1.7601.2.1.0.256.1
Locale ID : 1033
Also in Startup Repair diagnosis and repair log it showed me some tests performed and at the end gave me this message
Root cause found:
A patch is preventing the system from starting.
Repair action: System Restore
Result: Failed. Error code = 0x 1f
Time taken = 448097 ms
Repair action : System files integrity check and repair
Result: failed. Error code = 0x490
Time taken = 815433ms
In the system recover options i choose «System Restore» . it ran through some files when i hit finish, laptop restarted came through the same problem earlier ( screen showing ‘Windows Loading’ and is stuck there).


