- Windows pxe server centos
- Установка CentOS по сети
- Setting up a ‘PXE Network Boot Server’ for Multiple Linux Distribution Installations in RHEL/CentOS 7
- Requirements
- Step 1: Install and configure DNSMASQ Server
- Step 2: Install SYSLINUX Bootloaders
- Step 3: Install TFTP-Server and Populate it with SYSLINUX Bootloaders
- Step 4: Setup PXE Server Configuration File
- Step 5: Add CentOS 7 Boot Images to PXE Server
- Step 6: Create CentOS 7 Local Mirror Installation Source
- Step 7: Start and Enable Daemons System-Wide
- Step 8: Open Firewall and Test FTP Installation Source
- Step 9: Configure Clients to Boot from Network
- If You Appreciate What We Do Here On TecMint, You Should Consider:
Windows pxe server centos
Всем привет! Продолжаем настройку нашего PXE server, в 6 части мы рассмотрели как установить FreeBSD по сети, сегодня мы разберем как установить CentOS 6 и CentOS 7 через PXE сервер. Для выполнения поставленной задачи у вас должны быть скачаны нужные вам релизы CentOS. Сам процесс будет частично похож на предыдущие, так что не пугайтесь, все будет легко и быстро. Уверен, что многие захотят иметь такой дистрибутив в своей локальной сети.
Установка CentOS по сети
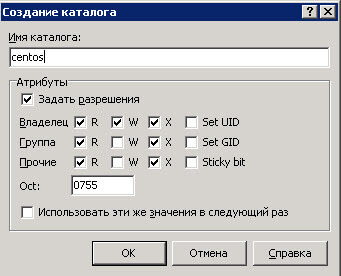
Как и с другими ОС нужно создать отдельную папку в /srv/tftp, назовем ее centos.
Как установить загрузочный PXE сервер для установки Windows, Linux, ESXI 5.5-7 часть. Добавляем CentOS-02
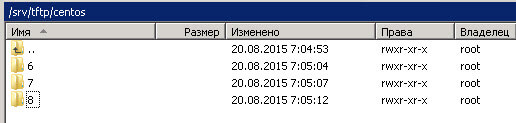
В папке centos создадим несколько папок с именами 6 и 7, на будущее можно и 8.
Как установить загрузочный PXE сервер для установки Windows, Linux, ESXI 5.5-7 часть. Добавляем CentOS-03
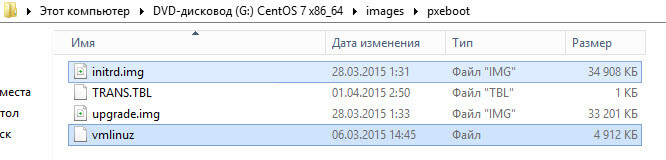
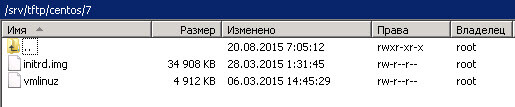
Теперь нам нужно поместить в эти папки загрузочные файлы, найти которые можно на установочном диске, если его нет то скачать можно у меня с яндекс диска . Диски необходимые нам называются initrd.img и vmlinuz
Как установить загрузочный PXE сервер для установки Windows, Linux, ESXI 5.5-7 часть. Добавляем CentOS-05
копируем их на наш сервер PXE.
Как установить загрузочный PXE сервер для установки Windows, Linux, ESXI 5.5-7 часть. Добавляем CentOS-06
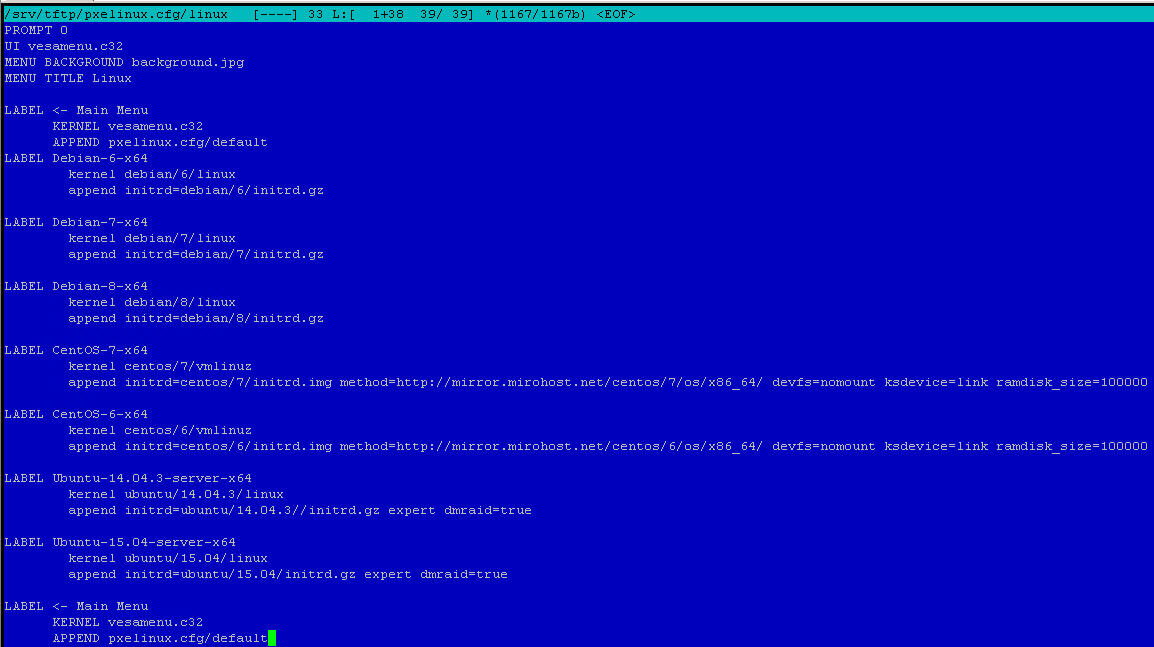
Далее нужно подправить конфиг /srv/tftp/pxelinux.cfg/linux и добавить в него вот такие вот строки
LABEL CentOS-7-x64
kernel centos/7/vmlinuz
append initrd=centos/7/initrd.img method=http://mirror.mirohost.net/centos/7/os/x86_64/ devfs=nomount ksdevice=link ramdisk_size=100000
LABEL CentOS-6-x64
kernel centos/6/vmlinuz
append initrd=centos/6/initrd.img method=http://mirror.mirohost.net/centos/6/os/x86_64/ devfs=nomount ksdevice=link ramdisk_size=100000
Как установить загрузочный PXE сервер для установки Windows, Linux, ESXI 5.5-7 часть. Добавляем CentOS-07
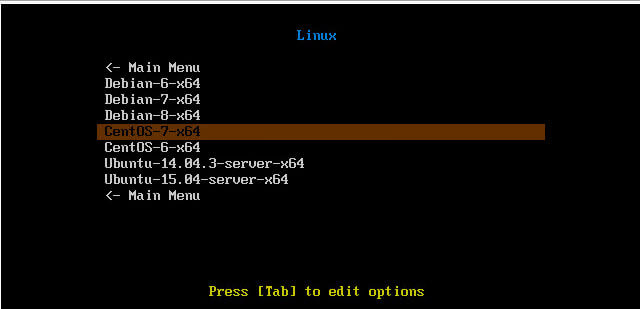
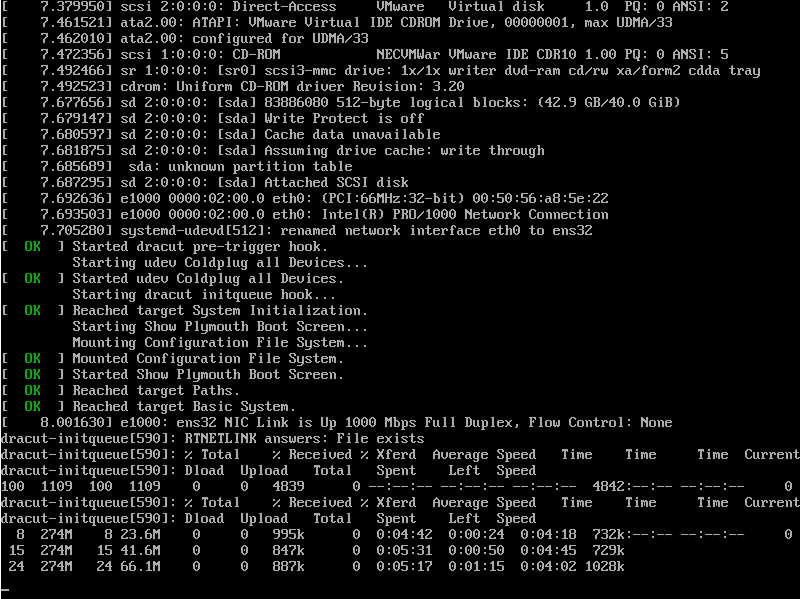
Пробуем с клиентской машины загрузить CentOS по PXE, выбираем для примера CentOS 7.
Как установить загрузочный PXE сервер для установки Windows, Linux, ESXI 5.5-7 часть. Добавляем CentOS-08
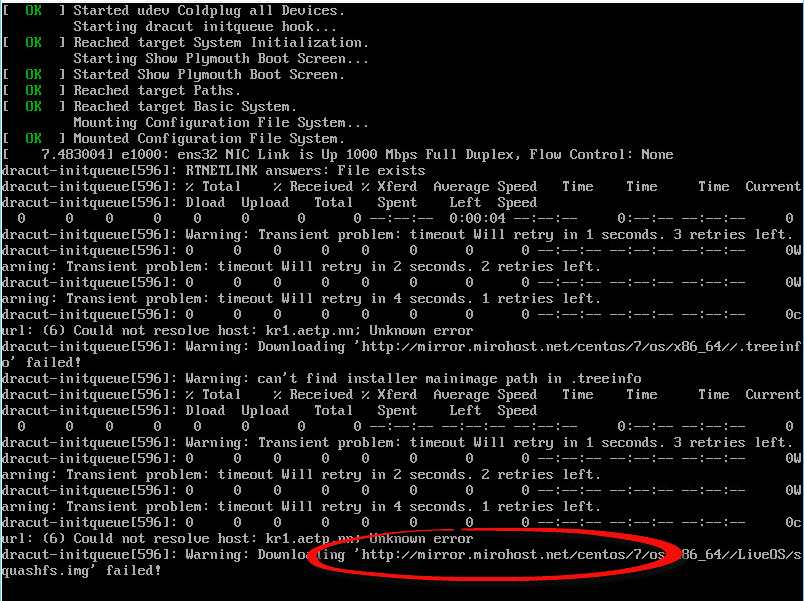
Пошла загрузка, но мы получили вот такую вот ошибку что mirror.mirohost.net не доступен открываем его на проксе.
Как установить загрузочный PXE сервер для установки Windows, Linux, ESXI 5.5-7 часть. Добавляем CentOS-09
После открытия видим, что начинается скачивание пакетов.
Как установить загрузочный PXE сервер для установки Windows, Linux, ESXI 5.5-7 часть. Добавляем CentOS-10
Появилось окно установки CentOS 7.
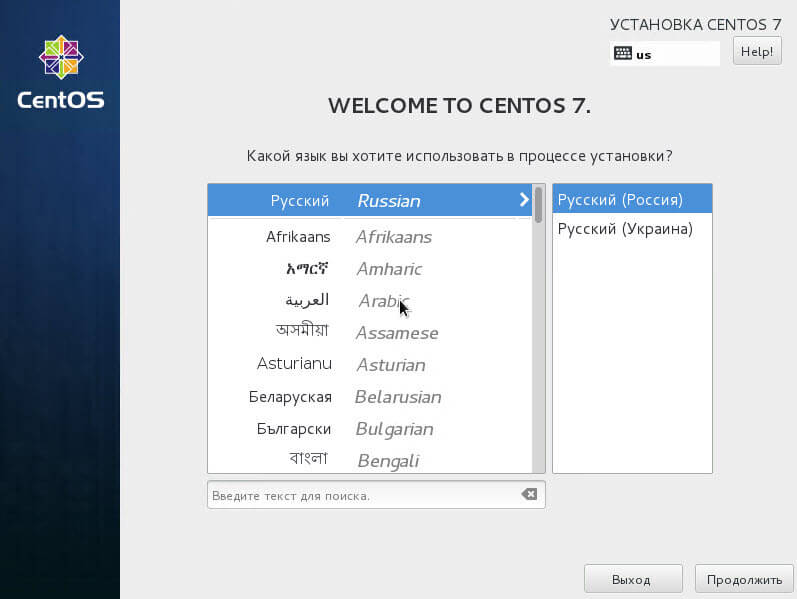
Как установить загрузочный PXE сервер для установки Windows, Linux, ESXI 5.5-7 часть. Добавляем CentOS-11
Проверяем CentOS 6, выбираем язык начнется докачивание пакетов.

Как установить загрузочный PXE сервер для установки Windows, Linux, ESXI 5.5-7 часть. Добавляем CentOS-12
Начинается установка CentOS 6.

Как установить загрузочный PXE сервер для установки Windows, Linux, ESXI 5.5-7 часть. Добавляем CentOS-13
В следующих статьях я расскажу как сделать свой локальный репозиторий CentOS. Вот так вот просто установить CentOS 6 и CentOS 7 по сети с помощью нашего PXE server. В 8 части я расскажу как добавить на ваш сервер утилиту проверки памяти Memtest86+.
Setting up a ‘PXE Network Boot Server’ for Multiple Linux Distribution Installations in RHEL/CentOS 7
PXE Server – Preboot eXecution Environment – instructs a client computer to boot, run or install an operating system directly form a network interface, eliminating the need to burn a CD/DVD or use a physical medium, or, can ease the job of installing Linux distributions on your network infrastructure on multiple machines the same time.
![]() Setting PXE Network Boot in RHEL/CentOS 7
Setting PXE Network Boot in RHEL/CentOS 7
Requirements
This article will explain how you can install and configure a PXE Server on RHEL/CentOS 7 x64-bit with mirrored local installation repositories, sources provided by CentOS 7 DVD ISO image, with the help of DNSMASQ Server.
Which provides DNS and DHCP services, Syslinux package which provides bootloaders for network booting, TFTP-Server, which makes bootable images available to be downloaded via network using Trivial File Transfer Protocol (TFTP) and VSFTPD Server which will host the local mounted mirrored DVD image – which will act as an official RHEL/CentOS 7 mirror installation repository from where the installer will extract its required packages.
Step 1: Install and configure DNSMASQ Server
1. No need to remind you that is absolutely demanding that one of your network card interface, in case your server poses more NICs, must be configured with a static IP address from the same IP range that belongs to the network segment that will provide PXE services.
So, after you have configured your static IP Address, updated your system and performed other initial settings, use the following command to install DNSMASQ daemon.
![]() Install dnsmasq Package
Install dnsmasq Package
2. DNSMASQ main default configuration file located in /etc directory is self-explanatory but intends to be quite difficult to edit, do to its highly commented explanations.
First make sure you backup this file in case you need to review it later and, then, create a new blank configuration file using your favorite text editor by issuing the following commands.
3. Now, copy and paste the following configurations on dnsmasq.conf file and assure that you change the below explained statements to match your network settings accordingly.
![]() Dnsmasq Configuration
Dnsmasq Configuration
The statements that you need to change are follows:
- interface – Interfaces that the server should listen and provide services.
- bind-interfaces – Uncomment to bind only on this interface.
- domain – Replace it with your domain name.
- dhcp-range – Replace it with IP range defined by your network mask on this segment.
- dhcp-boot – Replace the IP statement with your interface IP Address.
- dhcp-option=3,192.168.1.1 – Replace the IP Address with your network segment Gateway.
- dhcp-option=6,92.168.1.1 – Replace the IP Address with your DNS Server IP – several DNS IPs can be defined.
- server=8.8.4.4 – Put your DNS forwarders IPs Addresses.
- dhcp-option=28,10.0.0.255 – Replace the IP Address with network broadcast address –optionally.
- dhcp-option=42,0.0.0.0 – Put your network time servers – optionally (0.0.0.0 Address is for self-reference).
- pxe-prompt – Leave it as default – means to hit F8 key for entering menu 60 with seconds wait time..
- pxe=service – Use x86PC for 32-bit/64-bit architectures and enter a menu description prompt under string quotes. Other values types can be: PC98, IA64_EFI, Alpha, Arc_x86, Intel_Lean_Client, IA32_EFI, BC_EFI, Xscale_EFI and X86-64_EFI.
- enable-tftp – Enables the build-in TFTP server.
- tftp-root – Use /var/lib/tftpboot – the location for all netbooting files.
For other advanced options concerning configuration file feel free to read dnsmasq manual.
Step 2: Install SYSLINUX Bootloaders
4. After you have edited and saved DNSMASQ main configuration file, go ahead and install Syslinx PXE bootloader package by issuing the following command.
![]() Install Syslinux Bootloaders
Install Syslinux Bootloaders
5. The PXE bootloaders files reside in /usr/share/syslinux absolute system path, so you can check it by listing this path content. This step is optional, but you might need to be aware of this path because on the next step, we will copy of all its content to TFTP Server path.
![]() Syslinux Files
Syslinux Files
Step 3: Install TFTP-Server and Populate it with SYSLINUX Bootloaders
6. Now, let’s move to next step and install TFTP-Server and, then, copy all bootloders files provided by Syslinux package from the above listed location to /var/lib/tftpboot path by issuing the following commands.
![]() Install TFTP Server
Install TFTP Server
Step 4: Setup PXE Server Configuration File
7. Typically the PXE Server reads its configuration from a group of specific files (GUID files – first, MAC files – next, Default file – last) hosted in a folder called pxelinux.cfg, which must be located in the directory specified in tftp-root statement from DNSMASQ main configuration file.
Create the required directory pxelinux.cfg and populate it with a default file by issuing the following commands.
8. Now it’s time to edit PXE Server configuration file with valid Linux distributions installation options. Also note that all paths used in this file must be relative to the /var/lib/tftpboot directory.
Below you can see an example configuration file that you can use it, but modify the installation images (kernel and initrd files), protocols (FTP, HTTP, HTTPS, NFS) and IPs to reflect your network installation source repositories and paths accordingly.
Add the following whole excerpt to the file.
![]() Configure PXE Server
Configure PXE Server
As you can see CentOS 7 boot images (kernel and initrd) reside in a directory named centos7 relative to /var/lib/tftpboot (on an absolute system path this would mean /var/lib/tftpboot/centos7) and the installer repositories can be reached by using FTP protocol on 192.168.1.20/pub network location – in this case the repos are hosted locally because the IP address is the same as the PXE server address).
Also menu label 3 specifies that the client installation should be done from a remote location via VNC (here replace VNC password with a strong password) in case you install on a headless client and the menu label 2 specifies as
installation sources a CentOS 7 official Internet mirror (this case requires an Internet connection available on client through DHCP and NAT).
Important: As you see in the above configuration, we’ve used CentOS 7 for demonstration purpose, but you can also define RHEL 7 images, and following whole instructions and configurations are based on CentOS 7 only, so be careful while choosing distribution.
Step 5: Add CentOS 7 Boot Images to PXE Server
9. For this step CentOS kernel and initrd files are required. To get those files you need the CentOS 7 DVD ISO Image. So, go ahead and download CentOS DVD Image, put it in your DVD drive and mount the image to /mnt system path by issuing the below command.
The reason for using the DVD and not a Minimal CD Image is the fact that later this DVD content would be used to create the
locally installer repositories for FTP sources.
![]() Mount CentOS DVD
Mount CentOS DVD
If your machine has no DVD drive you can also download CentOS 7 DVD ISO locally using wget or curl utilities from a CentOS mirror and mount it.
10. After the DVD content is made available, create the centos7 directory and copy CentOS 7 bootable kernel and initrd images from the DVD mounted location to centos7 folder structure.
![]() Copy CentOS Bootable Files
Copy CentOS Bootable Files
The reason for using this approach is that, later you can create new separate directories in /var/lib/tftpboot path and add other Linux distributions to PXE menu without messing up the entire directory structure.
Step 6: Create CentOS 7 Local Mirror Installation Source
11. Although you can setup Installation Source Mirrors via a variety of protocols such as HTTP, HTTPS or NFS, for this guide, I have chosen FTP protocol because is very reliable and easy to setup with the help of vsftpd server.
Further install vsftpd daemon, copy all DVD mounted content to vsftpd default server path (/var/ftp/pub) – this can take a while depending on your system resources and append readable permissions to this path by issuing the following commands.
![]() Install Vsftpd Server
Install Vsftpd Server ![]() Copy Files to FTP Path
Copy Files to FTP Path ![]() Set Permissions on FTP Path
Set Permissions on FTP Path
Step 7: Start and Enable Daemons System-Wide
12. Now that the PXE server configuration is finally finished, start DNSMASQ and VSFTPD servers, verify their status and enable it system-wide, to automatically start after every system reboot, by running the below commands.
![]() Start Dnsmasq Service
Start Dnsmasq Service ![]() Start Vsftpd Service
Start Vsftpd Service
Step 8: Open Firewall and Test FTP Installation Source
13. To get a list of all ports that needs to be open on your Firewall in order for client machines to reach and boot from PXE server, run netstat command and add CentOS 7 Firewalld rules accordingly to dnsmasq and vsftpd listening ports.
![]() Check Listening Ports
Check Listening Ports ![]() Open Ports in Firewall
Open Ports in Firewall
14. To test FTP Installation Source network path open a browser locally (lynx should do it) or on a different computer and type the IP Address of your PXE server with
FTP protocol followed by /pub network location on URL filed and the result should be as presented in the below screenshot.
![]() Access FTP Files via Browser
Access FTP Files via Browser
15. To debug PXE server for eventual misconfigurations or other information and diagnostics in live mode run the following command.
![]() Check PXE Logs for Errors
Check PXE Logs for Errors
16. Finally, the last required step that you need to do is to unmount CentOS 7 DVD and remove the physical medium.
Step 9: Configure Clients to Boot from Network
17. Now your clients can boot and install CentOS 7 on their machines by configuring Network Boot as primary boot device from their systems BIOS or by hitting a specified key during BIOS POST operations as specified in motherboard manual.
In order to choose network booting. After first PXE prompt appears, press F8 key to enter presentation and then hit Enter key to proceed forward to PXE menu.
![]() PXE Network Boot
PXE Network Boot ![]() PXE Network OS Boot
PXE Network OS Boot
18. Once you have reached PXE menu, choose your CentOS 7 installation type, hit Enter key and continue with the installation procedure the same way as you might install it from a local media boot device.
Please note down that using variant 2 from this menu requires an active Internet connection on the target client. Also, on below
screenshots you can see an example of a client remote installation via VNC.
![]() PXE Menu
PXE Menu ![]() Remote Linux Installation via VNC
Remote Linux Installation via VNC ![]() Remote Installation of CentOS
Remote Installation of CentOS
That’s all for setting up a minimal PXE Server on CentOS 7. On my next article from this series, I will discuss other issues concerning this PXE server configuration such as how to setup automated installations of CentOS 7 using Kickstart files and adding other Linux distributions to PXE menu – Ubuntu Server and Debian 7.
If You Appreciate What We Do Here On TecMint, You Should Consider:
TecMint is the fastest growing and most trusted community site for any kind of Linux Articles, Guides and Books on the web. Millions of people visit TecMint! to search or browse the thousands of published articles available FREELY to all.
If you like what you are reading, please consider buying us a coffee ( or 2 ) as a token of appreciation.

We are thankful for your never ending support.


