- How to Record Your Screen on Windows
- Meetrix.io
- Step 01: Visit ScreenApp
- Step 02: Get Started
- Step 03: Share Your Screen
- Step 04:
- Step 05:
- Step 06:
- Step 07: Start Recording
- Step 08: Stop Recording
- Step 09: Download
- Create and test Windows recorder (V1) flows
- Create a desktop Windows recorder (V1) flow
- Known issues and solutions
- Unsupported application types
- Unsupported configurations
- Unsupported action types and behaviors
- Unreliable behaviors and workarounds for Microsoft Office (desktop)
- Next steps
- How to Record an application window
- Step 1
- Step 2
- Step 3
- Step 4
- Step 5
- Step 6 : Download or Trim
- 1- Download
- 2- Another Recording
- 3- Trim Video
- 4- Crop Video Length
- 5- Download Trimmed Video
How to Record Your Screen on Windows
Record your screen on windows with Screenapp
Meetrix.io
Screenapp.IO is the simplest and the fastest way to capture your screen on Windows and Linux (Ubuntu). No downloads or extensions are required. You can record, edit and share your screen on the web instantly. Screenapp.IO is the best free screen recorder to capture your screen online.
Step 01: Visit ScreenApp
Visit Screenapp.io on your chrome or firefox browser.
Step 02: Get Started
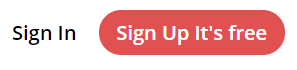
Click on the“Sign up it’s free” button for a basic subscription plan or sign up for Standard/Premium accounts.
Step 03: Share Your Screen
Choose to create an account with
- Google account.
- Facebook account.
- Email and password.
Step 04:
Once you enter your dashboard, click on “New Recording”. 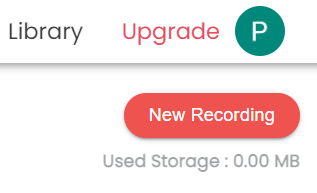
Step 05:
Choose one from the options given :
- Microphone audio
- Browser audio
- No Audio
Click on “Share your screen”.
Step 06:
When the “Share Your Screen” window pops up, select one of the three options below.
1 — Record Your Entire Screen
If you want to record your entire screen with multiple application windows use this option.
 Example: Recording a tutorial with multiple applications on windows.
2 — Record an Application Window
Use this option if you want to record a single application window.
 Example: Recording a Game Screen on windows.
3 — Record a Browser Tab
If you want to record a single browser tab, use this option. You can record one selected Tab opened in Chrome or Firefox.
 Once you have selected the appropriate recording option, click on the “Share” button.
Step 07: Start Recording
If you are all set, click “Start Recording” and the recording will start immediately. 
Step 08: Stop Recording
Once you are done, click “Stop Recording” and it will stop instantly. 
Step 09: Download
Your screen recording file will be available for immediate download. Click “download” for direct download or view the recording in your library. 
Be it windows 7 or windows 10, you can follow the same steps to record your screen on windows.
Create and test Windows recorder (V1) flows
In the following steps, we’ll demonstrate how to automate the calculator app to sum two numbers and then store the result for later use.
Create a desktop Windows recorder (V1) flow
You can automate other Windows desktop apps by following a similar pattern.
Ensure your device is ready to create desktop flows.
Use Microsoft Edge (Version 80 or later) or Google Chrome to open Power Automate, and then sign in with the same work or school account as on your device.
Select My flows > Desktop flows > New.

Click Additional desktop flow options.

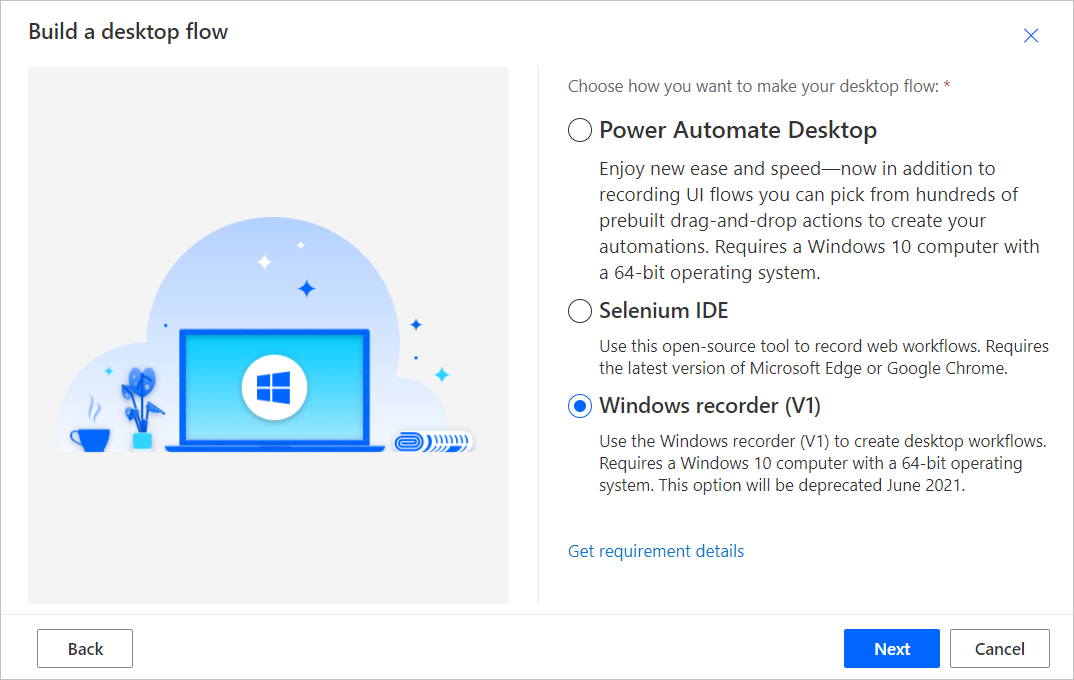
Select Windows recorder (V1), and then click Next.
Enter a name for your Windows recoder (V1) flow into the Flow name field, and then select Next.

Select Next at the bottom to skip the optional Set up inputs screen since we aren’t using inputs in this walkthrough.
Select Download package.
Open the Setup.Microsoft.PowerAutomate.UIflow.exe file. This file is likely in your Downloads folder after you downloaded it in the previous step.
Follow the instructions in the Power Automate Desktop setup installer to complete the installation.
Once the Power Automate Desktop installer completes, go to Microsoft Edge store or Google Chrome store depending on the browser you are using and install Microsoft Windows recorder (V1) and Selenium IDE browser extensions and Enable extensions.
Continue after you’ve installed the extension.
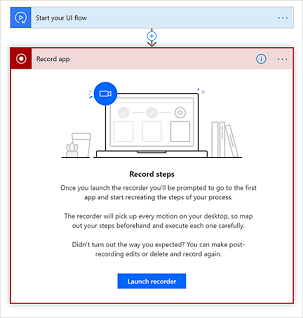
Select the Record app card to expand it.

Select Launch recorder.
The recorder control displays at the top of your screen.

Start the calculator app.
As your mouse hovers over controls in the app, you’ll notice that a blue outline highlights each control. Always wait for the blue highlight before you select a control.
If the blue highlight doesn’t display around the element, it might not be recorded properly.
Select Record from the recorder control.
Select the first number, select +, select the second number, and then select =.

You will improve automation reliability by:
- Opening and maximizing the apps you want to record before before you start recording
- Starting your recording with a click the app title bar to bring it in focus.
Select Done on the recorder control after you complete the actions you want to record.
Close the app that you recorded.
Select the card that starts with «Run script» to view screenshots of the recorded steps.
Select . > Delete to remove any duplicate steps.

Select Next.
Select Next to skip the optional Set up outputs step since we aren’t using outputs in this walkthrough.
Test your desktop flow by selecting the Test now button, and then watch your desktop flow run.
For best results, do not interact with your device for the duration of playback.
- Select Save and exit to save your desktop flow.
Known issues and solutions
You may want to add a Close action at the end of your desktop flow because desktop flows launches a new instance of the applications with each test or run.
Select . > Delete on the recorded actions card to remove any unnecessary/duplicate actions.
Right clicks may not play back correctly. In such case, while recording, click left to focus desktop flows on the target user interface element, and then right click.
If desktop flows no longer records or plays back Windows applications after installing a new version, confirm you have the latest version.
Unsupported application types
Interactions on Windows (File explorer, startup menu, task bar, etc.).
Web browsers (Chrome, IE, Microsoft Edge, Firefox, Mozilla, etc.). Please instead refer to Create a Selenium IDE flow to automate websites.
Click once applications.
Applications with a Web view such as Electron applications.
Microsoft Office 2016 and earlier.
Microsoft Office online.
Unsupported configurations
Recording through a virtual machine client (Remote Desktop, Citrix, etc.).
Multiple instances of an application where the main window titles are identical.
Application windows with identical titles, for example, Microsoft Outlook with multiple Untitled – Message (HTML) new mail windows active at the same time.
Concurrent recording sessions on a given device.
Concurrent playback sessions on a given device. In case of simultaneous desktop flow runs, the first one takes precedence and the subsequent ones fail until the first one completes.
Playback on a device with a different keyboard layout than the device on which it was recorded.
Recording on a device or Windows session while the browser with Power Automate is on a different device or Windows session.
Unsupported action types and behaviors
The following actions will not be recorded:
Touch or pen input.
Open app before recording.
Unreliable behaviors and workarounds for Microsoft Office (desktop)
- Pin the ribbon before you begin playback to avoid issues that may occur if the ribbon is set to auto-hide during playback.
- Do not select items by clicking and dragging. For example, don’t use shift-click to select cells in Microsoft Excel and don’t select text in Microsoft Word or Microsoft PowerPoint by dragging the mouse.
- Some elements may not work correctly in desktop flows for Microsoft Word and Microsoft PowerPoint Desktop applications. For instance, options on the File menu such as starting from blank, or right clicking controls like adding a paragraph in Microsoft Word or changing the layout of slides in Microsoft PowerPoint may not work.
Next steps
Learn how to trigger the desktop flow you just created.
If you want to do more with desktop flows, you can also create desktop flows with input and output parameters.
Can you tell us about your documentation language preferences? Take a short survey.
The survey will take about seven minutes. No personal data is collected (privacy statement).
How to Record an application window
Video Screen Capture
ScreenApp.IO is the simplest and the fastest way to capture your screen on Windows and Linux (Ubuntu). No downloads or extensions are required. You are able to record, edit and share your screen on the web instantly. ScreenApp.IO is the best free screen recorder to capture your screen online.
Step 1
Visit screenapp.io using Chrome or Firefox
Step 2
Click on “Get Started” button

Step 3
When the “Share Your Screen” window pops up,select the option “Application Window”. Then select the desired tab with video and click on “Share” button

Step 4
You will be directed to the video streaming tab, there you need to start the video and go back to your recording window and click “Start Recording” and the recording will start immediately.

Step 5
Once you are done, Click “Stop Recording” and it will stop instantly.

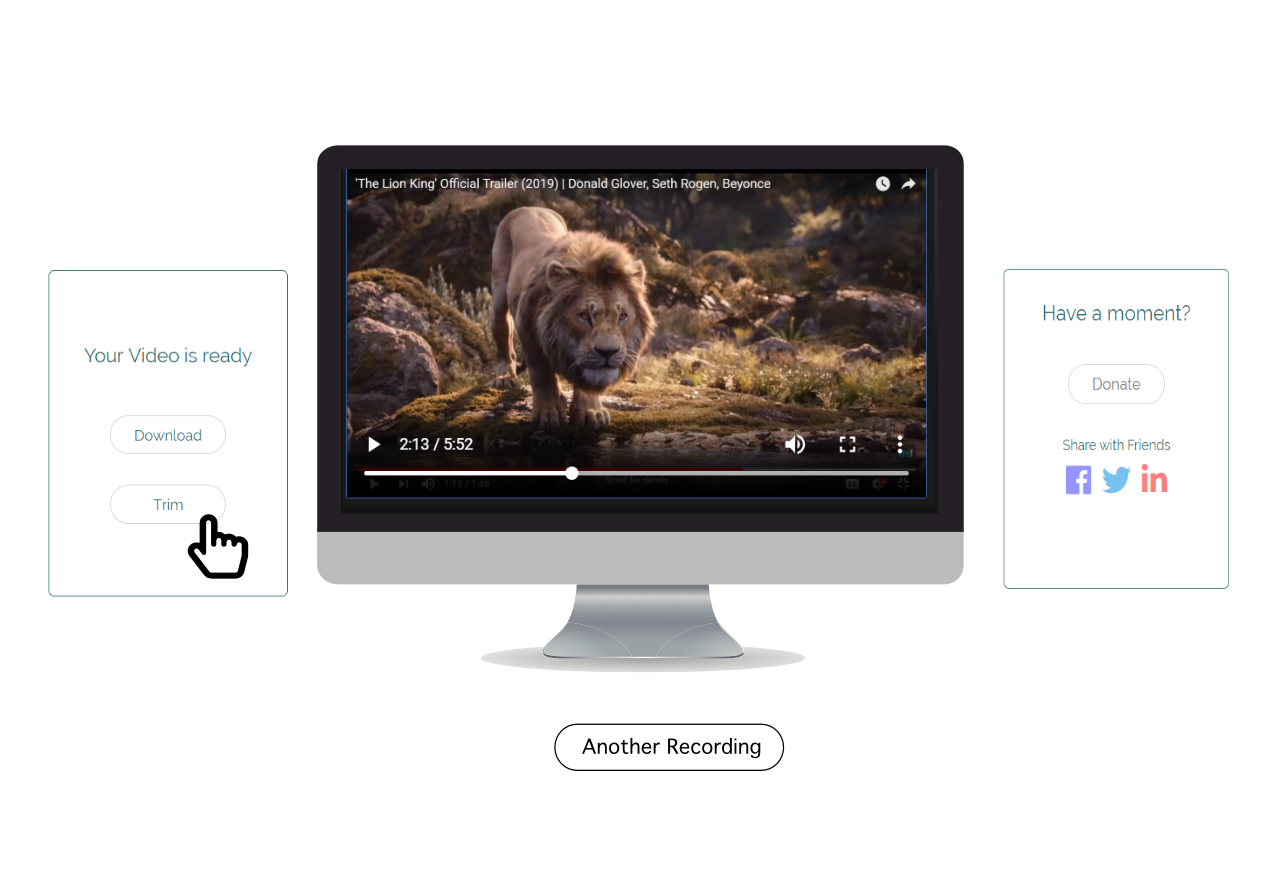
Step 6 : Download or Trim
1- Download
You can see a preview of the video screen recording just after you click on the “Stop Recording” button. If you want to download the recording, click “Download” button and the recording will be downloaded instantly.

2- Another Recording
If not satisfied with your video screen record, you can start a new recording with “Another Recording” button.

3- Trim Video
Once you select “Trim”, you will be directed to a page where you will be able to crop the video length
4- Crop Video Length
you are able to crop the video length by dragging the the two ends to your preferred length. Then select “trim now”.

5- Download Trimmed Video
Once you are done cropping and have clicked trim now, a pop up screen will appear for you to decide whether you want to “undo and trim again/ download trimmed video or delete and record again”. select “download and trim again” and you video will be downloaded instantly.


