- 7 Ways To Generate a List of Installed Programs in Windows
- Using The Windows PowerShell (Get-RemoteProgram)
- Using The Windows PowerShell (WMIC)
- Using Print Screen (Apps & Features)
- Using NirSoft UninstallView
- Using Belarc Advisor
- Using Geek Uninstaller
- CCleaner (Last Resort Option)
- Removing Or Updating Windows Software
- Fix problems that block programs from being installed or removed
- What it fixes
- Windows problem reporting
- Replies (3)
7 Ways To Generate a List of Installed Programs in Windows
Handy if you want to know what to reinstall
If you own a Windows PC, you’ll likely have a list of go-to software that you use all the time, whether it’s Chrome, Outlook, or Steam. Outside of these favorites, there’ll be other programs you’ve forgotten about or have never even used. That can be problematic—forgotten software takes up disk space and can be a security risk.
We absolutely recommend you properly uninstall programs on Windows that you don’t use, but that doesn’t help you if you don’t know what software you have installed, especially if you’re managing multiple PCs at once. Here are several ways to generate a list of installed programs in Windows 10.
Using The Windows PowerShell (Get-RemoteProgram)
If you want a list of installed programs in Windows 10 that you can export, the best solution is to use a built-in tool to create it. Few tools exist to do this, but one option is to use the Windows PowerShell (or command prompt, if you’re feeling old school).
For those who don’t know, the PowerShell has largely replaced the command prompt as the default terminal on Windows PCs. A script exists for PowerShell users to automatically list all installed programs called Get-RemoteProgram. This queries the Windows registry for a full and complete list of installed software on your PC.
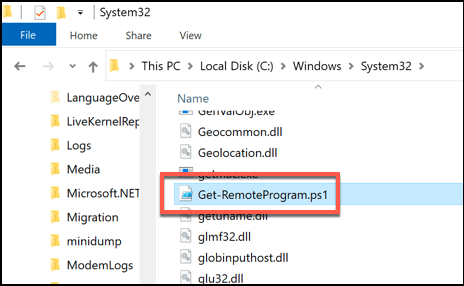
- You’ll need to download the Get-RemoteProgram script for the PowerShell from the Microsoft TechNet website first. Download this, then place the file in your C:\Windows\System32 folder.
- Next, you’ll need to open a PowerShell window. You can do that by right-clicking the Windows Start menu and pressing Windows PowerShell (Admin) to open a new PowerShell window.

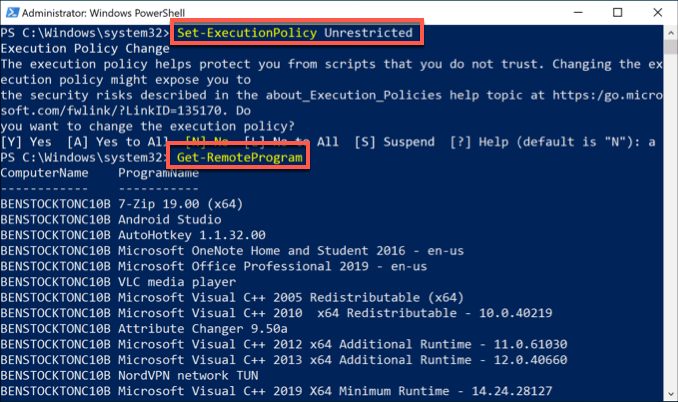
- You’ll need to make sure that Windows can run scripts like this—type Set-ExecutionPolicy Unrestricted to ensure that you can, hit enter, then press A to confirm.
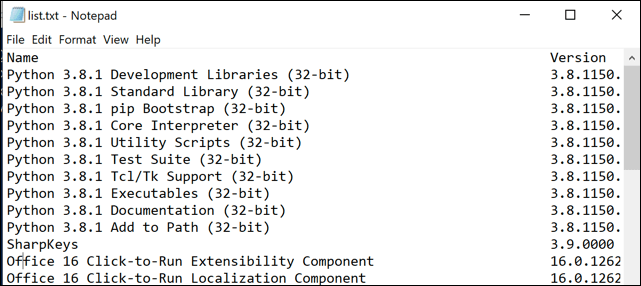
- If that is successful, type Get-RemoteProgram to run the script, then hit enter. If you want to export the list to a file, type Get-RemoteProgram > list.txt instead.
Using The Windows PowerShell (WMIC)
You can use either the PowerShell or cmd to run the Windows Management Instrumentation Command-Line Utility (WMIC) to generate a list of installed programs in Windows 10. As the PowerShell is the default command-line tool for Windows 10 users, we’ll be using that here.
Using the WMIC tool to view or export a list of your installed Windows software will create a similar list to the Get-RemoteProgram script.
- In an open PowerShell window or command line terminal with administrative privileges, type wmic. Once the WMIC prompt opens, type /output:C:\list.txt product get name, version then hit enter. You can replace C:\list.txt with another file name or output directory.
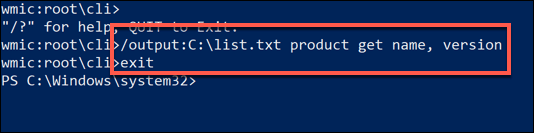
- Type exit to close the WMIC tool once you’re done. A list of your installed software should be available in the text file at the location you provided for the output file.
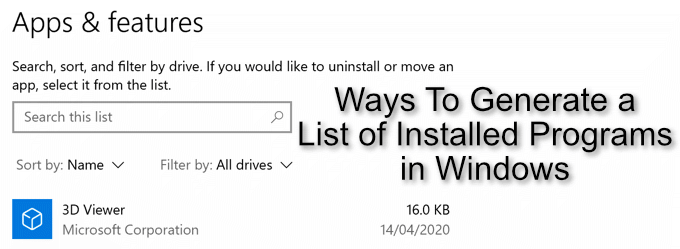
Using Print Screen (Apps & Features)
If you want a visual list of your installed software, you could use the print screen key to take a screenshot in Windows of the Apps & Features menu in Windows Settings, where Windows displays a list of your installed software for you to modify or remove.
- To access this menu, right-click the Windows Start menu and press Settings. From here, press Apps > Apps & features. A list of your installed software will be visible in a scrollable list.
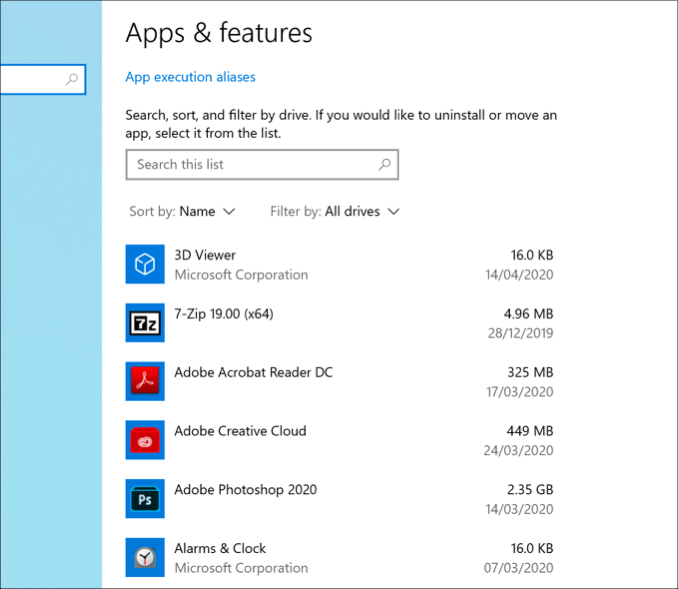
It’s unlikely that your installed PC software will fit in just one screenshot. You’ll need to press the PrtScrn button on your keyboard (or use third-party screenshot tools like Snagit), then paste your screenshots into a third-party image editor to save (or into a Word document).
You’ll need to scroll through the list and repeat this step to make sure you save the full and complete list of installed software on your PC.
Using NirSoft UninstallView
NirSoft UninstallView is a quick, third-party alternative that can help you generate a list of installed programs in Windows 10. Like the Get-RemoteProgram script, it will query the Windows registry for a complete list of installed software.
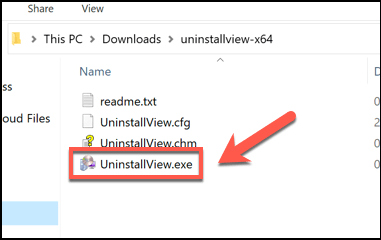
- To start, download NirSoft UninstallView and extract the ZIP file (the 64-bit version is recommended). Once that’s done, run the extracted UninstallView.exe file.
- UninstallView will scan your PC for installed software. Once that process has completed, the full list of software will be available in the UninstallView window. To export the list, press View > HTML Report – All Items.
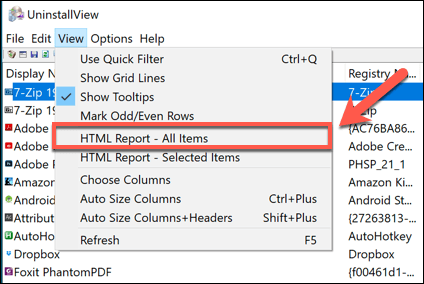
- A file called report.html will be created in the same folder as the UninstallView.exe file, showing a formatted list of your installed software. Pressing HTML Report – All Items will open this file in your default web browser.

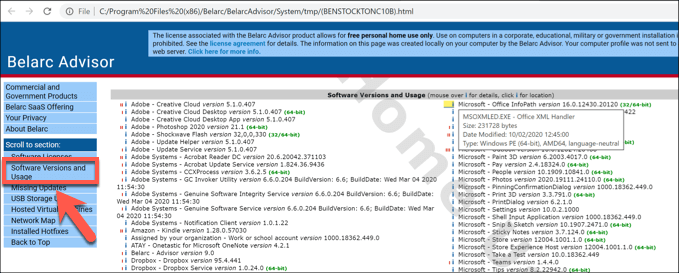
Using Belarc Advisor
Belarc Advisor has been a must-have tool in the arsenal of local PC repair shops for years, and it remains a useful tool for Windows 10 users. It generates a breakdown of your PC software, hardware, settings, installed updates, and more to allow you to fully audit your Windows installation.
Like UninstallView, this will be visible in a formatted HTML file that you can export elsewhere.
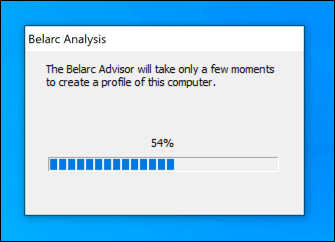
- To start, download Belarc Advisor and install it. Once it’s installed, Belarc Advisor will begin an immediate audit of your PC—this will take a few moments to complete.
- Your default web browser will open once Belarc has finished its audit of your PC. To view a list of your installed software, press the Software Versions and Usage link in the side menu, or scroll to that section manually. This file will be available in the C:\Program Files (x86)\Belarc\BelarcAdvisor\System\tmp folder, should you wish to export it.
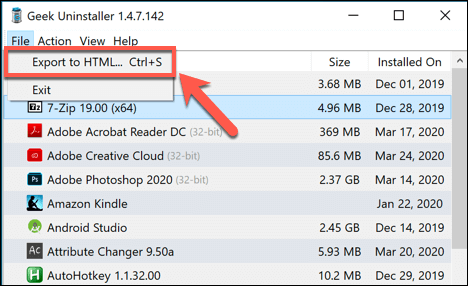
Using Geek Uninstaller
Geek Uninstaller is a third-party tool for uninstalling software. Like UninstallView, however, it also allows you to view and export a list of your installed programs in Windows 10.
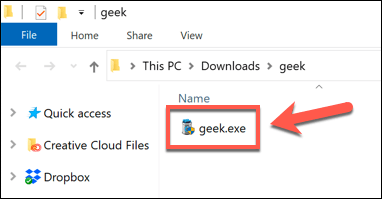
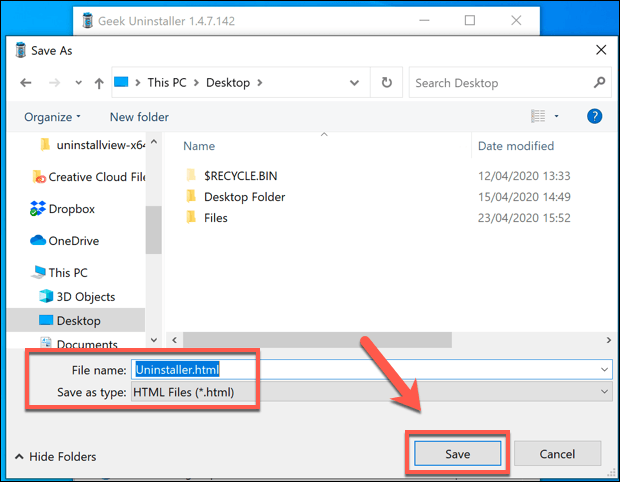
- Download Geek Uninstaller to begin—you can choose the free version or the paid, Pro version. It comes as a ZIP file, so unzip the contents, then run the geek.exe file to launch the tool.
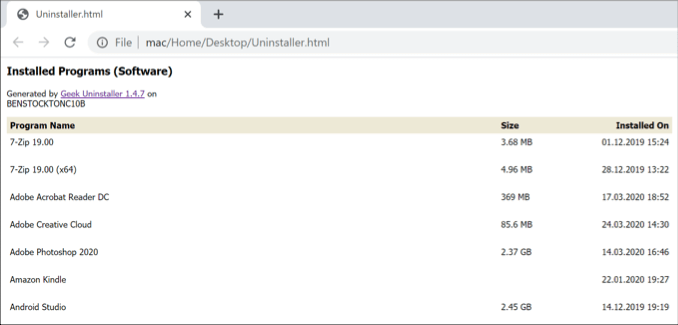
- The Geek Uninstaller window will show your installed software in an alphabetical list. To export the list, press File > Export to HTML or press Ctrl + S on your keyboard.
- Geek Uninstaller will ask you where to save the file—choose a location and a filename, then press Save to save the file.
- The generated list of your installed software will be saved, with the file automatically opened in your default web browser for you to view.
CCleaner (Last Resort Option)
There are plenty of reasons why you shouldn’t download CCleaner anymore. Once a go-to and essential piece of maintenance software for Windows users, many of its core features have been rendered useless or ineffective due to Windows changes, or have been incorporated into Windows itself (or into other, better third-party apps).
CCleaner also suffered a rather unfortunate incident back in 2017, when a malware-injected version of the CCleaner installer was uploaded and installed by millions of users. For most users, the trust is gone and the message is clear—avoid CCleaner.
However, CCleaner can export a list of installed programs, but we’re not going to recommend downloading it to do so. This is a last resort option, but if you already have CCleaner installed, you could use it to generate and export a list of your installed programs. That is, of course, before you rush to remove it.
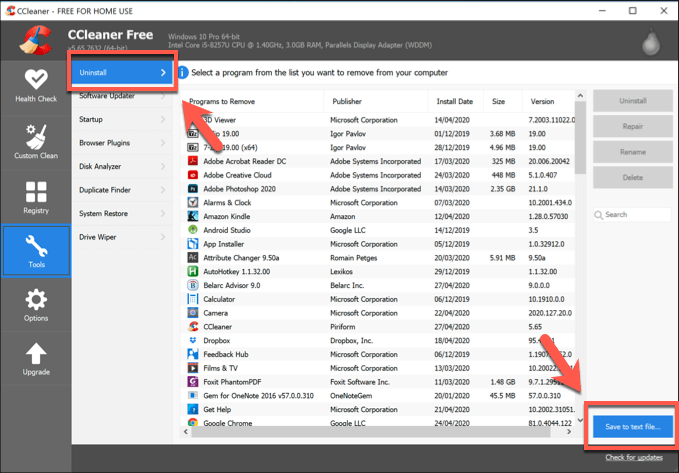
- To do that, open CCleaner and press the Tools tab on the left, then click Uninstall. At the bottom of the window, press the Save to text file button. This will allow you to export a list of your installed software.
- Choose a location and filename for your exported list, then press Save to save it.
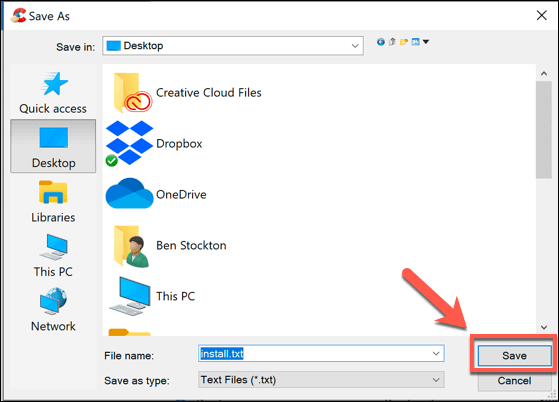
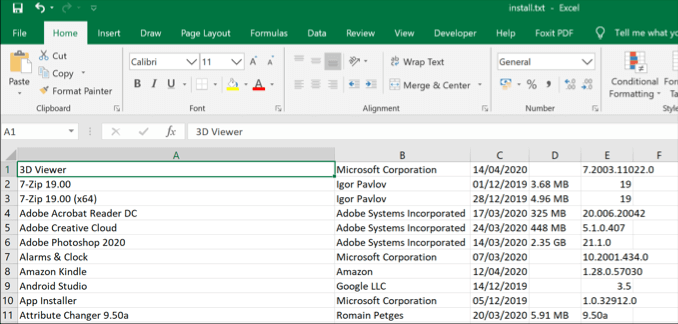
This will export your installed files as a file formatted using tab delimiters. Opening the file using Microsoft Excel will allow you to view the list in a more manageable way.
Removing Or Updating Windows Software
If you prefer to stay organized, or if you have too many PCs to maintain, generating a list of installed programs in Windows 10 can help you find the software you need to remove or update to give you more disk space and improve your security.
If you don’t need to remove it, make sure you find ways to keep your software updated automatically to get the latest security patches and bug fixes. You may end up with software that you just don’t want on your PC, however. If that’s the case, be sure to remove unwanted software from your PC as soon as you find it.
Ben Stockton is a freelance technology writer based in the United Kingdom. In a past life, Ben was a college lecturer in the UK, training teens and adults. Since leaving the classroom, Ben has taken his teaching experience and applied it to writing tech how-to guides and tutorials, specialising in Linux, Windows, and Android. He has a degree in History and a postgraduate qualification in Computing. Read Ben’s Full Bio
Fix problems that block programs from being installed or removed
Note: Use these steps for Windows programs. If you’re having problems with an app you got from Microsoft Store, go to Fix problems with apps from Microsoft Store.
The Program Install and Uninstall troubleshooter helps you automatically repair issues when you’re blocked from installing or removing programs. It also fixes corrupted registry keys.
First, you’ll need to download the troubleshooter.
If you see the File Download box when you start downloading, select Run or Open.
The troubleshooter provides steps for you to follow. If a program isn’t listed in the uninstall options, you’ll be asked for that program’s product code. To access the code, you’ll need a tool for reading MSI files—which is typically available to IT professionals. You’ll find the product code in the property table of the MSI file.
What it fixes
The troubleshooter helps fix problems that:
Corrupt registry keys on 64-bit operating systems.
Corrupt registry keys that control the update data.
Prevent new programs from being installed.
Prevent existing programs from being completely uninstalled or updated.
Block you from uninstalling a program through Add or Remove Programs (or Programs and Features) in Control Panel.
If you’re trying to remove malware, you can use Windows Security (or another antivirus tool), or you can use the Windows Malicious Software Removal tool.
Windows problem reporting
I have to keep opening my task manager so I can end the task «Windows problem reporting». it’s becoming annoying as it takes most of my internet connecting . I have disabled windows error reporting and problem reports and solutions yet every time I open my task manager I see «Windows problem reporting » open and taking alot of my connection it causes lag when gaming and sometimes when it’s open even opening my browser loads long . and I can confirm that’s it’s the «Windows problem reporting » because when I end the task my internet is fine . at first I thought if I let it run it will go away but it will stay open no matter how long I let it run and all it does is take my bandwidth. can someone please tell me how to disable it completely . I’m running Windows 10 pro 64bit
Replies (3)
Recently other people have reported similar problems. Updates causing some Windows sub-programs and services to run wild increasing CPU use and temperature which in turn causes the FAN to run more frequently and faster (noisy!).
Go in to Task Manager, look in the Processes view. Click on the CPU column heading until the tasks using the most CPU cycle sort to the top.
Then you can research (google) and / or ask here questions about the specific tasks that are using the most CPU.
Sometimes all it takes is starting the services dialog (using Run as admin), stopping and restarting the problem service. That seems enough of a «kick in the pants» to make them run sensibly again.
If you feel comfortable editing the registry you could try the tip in this question and reply:
DISABLE ERROR REPORTING
https://superuser.com/questions/950997/disable-.
It appears that the only option available to Home users is to disable Error Reporting via modifying the Disabled key in the registry.
Open Regedit. Navigate to:
HKEY_LOCAL_MACHINE\SOFTWARE\Microsoft\Windows\Windows Error Reporting
Find the value named «Disabled» or add a new DWORD value with this name if it doesn’t exist. The default value of this key is 0. Double click it to edit, change the value to 1 and save.
This disables the automatic appearance of the dialogue where Windows is searching online to try to find a solution. You are instead shown a dialogue stating that the application has crashed, giving you the option to Debug. However, unlike previous versions of Windows, no error code is provided in this dialogue. The specifics of the error must be accessed through:
Control Panel\All Control Panel Items\Security and Maintenance
Under the tab «Maintenance», you can click «View reliability history», which will show a list of all app crashes. You can then click «View technical details» beside each crash to get more detailed information, such as a the error code(s) thrown from the application on crash.
Standard boilerplate legalistic bafflegab disclaimer for any links to non-Microsoft websites:
The link(s) to non MS-page(s) appears to be providing accurate, safe information. I suggest you stick with the “manual” instructions. Unless I explicitly suggest it, avoid downloading their “utilities”. Thoroughly research any product advertised on the site before you decide to download and install it. Sometimes they include 3rd party programs, «unwanted» programs that are automatically installed during a standard install. So, if offered, do a «custom» install and carefully read each step. One of the steps MAY give you an option to install, or NOT, «additional» programs. 99.9% of the time you don’t want to let them be installed. For example, when you install Adobe Player you are given the option of installing 2 additional «free trial» programs: Potentially Unwanted Programs: MacAfee Security Scan and MacAfee Safe Connect. The option to install is turned on, you have to manually turn it off. Those are PUP’s. If you click «OK»/»Next» without paying attention you get the 2 «extra» programs.
As well, watch out for ads on the site. They may advertise products that include PUPs. Thoroughly research any product advertised on the site before you decide to download and install it.
****
Join the crowd
.
Be unique


