- Windows screen capture recorder
- About
- How to Record Screen on Windows 10
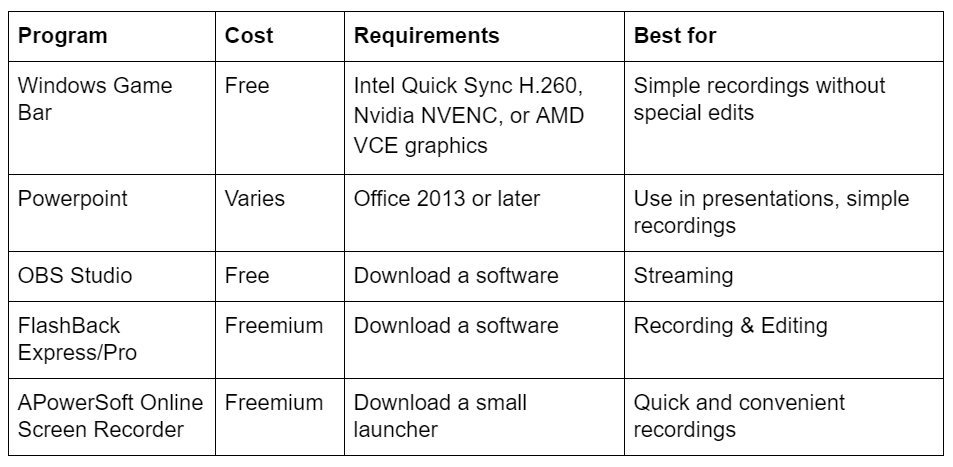
- Quick Summary
- Method 1: Windows Built-In Screen Recorder (through the XBOX app)
- Method 2: Using Microsoft Powerpoint
- Method 3: OBS Studio
- Method 4: FlashBack Express / FlashBack Pro
- Method 5: APowerSoft Online Screen Recorder
- Alternative Methods
- YouTube Live Streaming
- Filmora Scrn
- Camtasia
- Snagit
- CamStudio
- Conclusion
Windows screen capture recorder
or combine it with recording «what you hear» audio [vista/windows 7] (using ffmpeg in this example):
Note also that ffmpeg has a built in «gdigrab» input option you could use instead of screen capture recorder, as well.
The audio device name can be any other dshow audio devices, as well.
Avisynth also works with it. Add it to a filter graph using graphedit, then use DirectShowSource as your input source with that graphedit filename specified.
gstreamer works, as well, ex:
I’ve even had Skype accidentally use it, thinking it was my webcam. Let me know if you want an easier way made for it for anything.
By default, it captures the «full screen» of the main desktop monitor (all windows, overlapping, from there, with aero if vista+, without transparent windows if non aero).
To configure it differently, run the provided «configuration setup utilities/shortcuts» or adjust registry settings before starting a run (advanced users only):
with DWORD keys respected of start_XXX etc … (see the included file
ex: see configuration_setup_utility\incoming.reg file (though NB that those values are in hex, so editing that file is a bit tedious— I always just use regedit or the accompanying script utilities and don’t edit it by hand).
To «reset» a value delete its key.
It’s too slow! (ex: 15 fps)
Run the «benchmark your capture speed» utility to see how slow your system can capture.
If you’re on vista+, turn off aero display manager (esp. if you have dual monitors, this can help). http://www.howtogeek.com/howto/windows-vista/disable-aero-on-windows-vista
It captures much more quickly if aero is turned off (as in with aero, capturing a 650×976 window takes 50ms, without aero, 3ms.
The rest of a single screenshot capture takes about 7ms (sum 10ms without aero), so you can see the relative cost it adds [!].
There’s also a registry setting to have it turned off «automatically».
I have only been able to get max 15 fps when capturing aero [ping me if you want me to look into improving this somewhat, I have some ideas…].
It’s too slow! (ex: 50 fps)
Disabling or enabling «hardware acceleration» for the desktop might help, too, or setting it to one stop above none
Try switching from 32 to 24 bit or 16 bit input (from this), and/or switching your desktop depth itself—or both! fastest is 16 bit display with capture in 16 bit mode—400 fps whoa!).
It starts making the computer sluggish after awhile.
Make sure you have enough RAM available (virtualbox is known to hog some without telling you). Also disable aero if possible.
Note that if your output is, say, going to be 10 fps «actually used» in the end, ex: $ ffmpeg -f dshow -i video=video-capture-recorder -r 10 yo.mp4 -r 10 # output file is only 10 fps
Then to save cpu, a «good» application will also instruct the «source fps» to be 10 fps $ ffmpeg -framerate 10 -f dshow -i video=video-capture-recorder -r 10 yo.mp4 # input and output are set to 10
that they pass on to this filter, and everybody’s in 10 fps and hopefully happy, and cpu is saved. ex: vlc.exe dshow:// … :dshow-fps=10 vlc then passes this in to SetFormat after negotiation, and the device accepts it, and feeds you at 10 fps.
Some «bad» directshow applications don’t pass this parameter in. Most can. So there may be a case where it is wasting cpu somehow, by capturing too many or the like. So for those programs, you’ll want to set the max fps parameter, which will limit its capture frequency.
Setting max fps to greater than 30 also allows you to get fps greater than 30 (the default max). It «enables» them, by giving it a higher max default. I didn’t think people would normally care/want them so there you have.
NB that to use it as an input camera skype, you need to specify that it is a reasonably small capture, see http://betterlogic.com/roger/2012/04/skype-directshow-device-just-shows-circles-for-the-preview-capture/
I can’t capture full screen [like starcraft type windows].
Known limitation, try this thread: https://groups.google.com/forum/#!topic/roger-projects/uxmGV_vW4iY [or pay me a bit of money and I’ll create a front end to the excellent OBS project to provide this functionality]
You can redistribute this. See file LICENSE.TXT. If you do, you may just need to distribute for instance the file PushDesktop.dll If you do, you have to register this device, via registering its dll (like $ regsvr32 PushDesktop.dll—may require administrator rights) as part of your install. Also note that end users also need the MSVC 2010 redistributable previously installed (or you have to make it available in the same dir as your exe) for the dll to work/install, in case end users don’t have it installed). If you change it and redistribute it, you may want to change the GUID’s, so that it won’t clash if somebody also installs this software. See also https://github.com/rdp/screen-capture-recorder-to-video-windows-free/issues/17
The code is gently based on/lifted from («inspired by») this from the Windows 7.1 SDK ….\Microsoft SDKs\Windows\v7.1\Samples\multimedia\directshow\filters\pushsource as well as some other dshow demos around the ‘net (tmhare virtual capture). so you’ll probably want to install the Windows SDK before messing around with the source code. To hack on the code, build the windows SDK directshow baseclasses, then open source_code/*.vcxproj in visual studio 2010 express. This is meant to provide a «directshow filter» you can use in your graph, not a demo of how to do graphs. It outputs a .dll file that you «register» via (in administrator console) $ regsvr32 XXX.dll (and unregister when you’re done with regsvr32 /u XXX.dll) there are also some scripts to set the registry values (written in ruby/jruby currently for the GUI) but you don’t have to adjust those to mess with the filter itself.
I can add features upon reasonable demand.
Basically you want a feature, ping me, you got it.
To build it locally, install VS Express 2010, install Microsoft SDK, open up your equivalent of \Program Files\Microsoft SDKs\Windows\v7.1\Samples\multimedia\directshow\baseclasses\baseclasses.sln build it (debug) now add to your local build (project properties, from the source_code\pushdesktop.sln) adjust the VC++ Directories (Include/Library) to point to your various baseclass directories.
The included speed test utility was originally from http://stereopsis.com/blttest (bitblt is quite hardware dependent, so I’m told, so it’s good to be able to test its speed).
FFmpeg binaries are also included, see their site for licensing details/source: http://ffmpeg.org
http://obsproject.com is open source, doesn’t use FFmpeg but might work for you. May even capture DirectX woot. http://www.ffsplit.com is not open source, but does capture/stream desktop using FFmpeg. http://camstudio.org is open source and free, but requires you to just use your local codecs installed in your windows system, and has some usability issues, which is why I even started this project in the first place 🙂
About
a free open source windows «screen capture» device and recorder (also allows VLC/ffmpeg and others to capture/stream desktop/audio)
How to Record Screen on Windows 10
Print Screen has its own dedicated keyboard button on most Windows computers, but what about when a still image doesn’t cut it? After all, it would be really hard to make a tutorial, stream a game, or film a lesson if you couldn’t capture a screen recording.
Using an external camera is clunky and difficult, so instead, we have compiled a list of built-in methods and available third-party software that will do the trick instead. It may not be as simple as pressing “prt sc”, but these tools are more than capable of doing the job.
Quick Summary
Method 1: Windows Built-In Screen Recorder (through the XBOX app)
Windows 10 has a built-in screen recorder you can use without installing anything extra. However, it’s only available if you have a graphics card with Intel Quick Sync H.260 (2011 models or later), Nvidia NVENC (2012 models or later), or AMD VCE (2012 models or later except Oland), so if you’re having trouble, make sure your computer is up to spec.
For those who do have the proper hardware, here’s how to do it. Now, this feature is meant for gamers, but it can be used with any screen material.
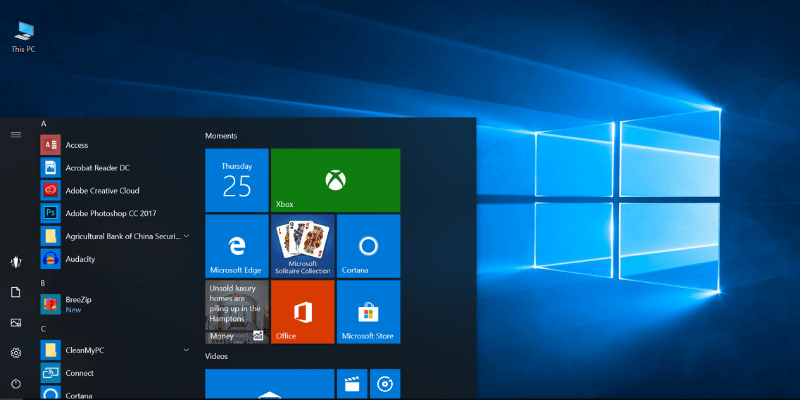
First, press the WINDOWS and G keys. Then, in the pop up choose “Yes, this is a game”. 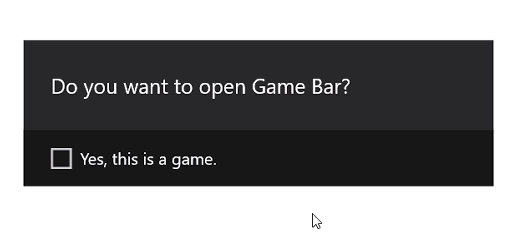
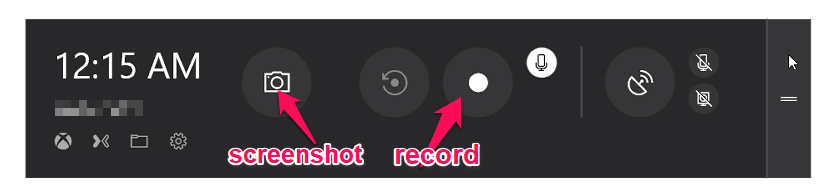
From there, recording is simple. You can use the red button on the bar to start and stop a recording, or use the settings menu to set an automatic cut off time for your recording.
Once you’re done, the file will be saved as an MP4 in your Videos\Captures folder. For more information on using the Game Bar for screen recording, you can check out this youtube video:
Method 2: Using Microsoft Powerpoint
Happen to have Office PowerPoint on your computer? Then you can use the program to create screencasts, not just presentations.
Normally, this will embed the screen recording on a slide, but you can also choose to save it as a file. Here’s how to do it.
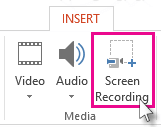
First, open Microsoft PowerPoint. Then choose the Insert tab and Screen Recording.
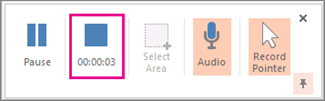
Next, choose which part of your screen you want to record with the Select Area tool. If you’re using Office 2016 or later, you can also use the hotkey WINDOWS + SHIFT + A. Click and drag the cross hairs to select your recording area. If you do not want to record audio, press WINDOWS + SHIFT + U to toggle it.
Once you’re ready, press the Record button.
The small control panel will disappear unless pinned, but you can make it reappear by moving your mouse to the top edge of the screen.
After you’re done, press the Record button again. The video will be automatically embedded in your slide, and you can choose FILE > SAVE AS to save your presentation. If you only want to save the video, choose FILE > SAVE MEDIA AS and then choose the destination folder and video name.
Note: If you are using PowerPoint 2013, you’ll need to follow some special instructions for recording and saving your video. You can find the official tutorial here.
Method 3: OBS Studio
If you’re not a fan of PowerPoint or want a dedicated tool for regular screen recording, OBS Studio is a great video recording software. It’s open source, doesn’t watermark or place time limits on your content, and offers many powerful editing features as well. It also supports live streaming at 60FPS and is a popular choice for this as well.
Before you get started, you’ll need to download OBS Studio from their website here. Since this is a very full-featured program, you’re going to want to run through some basic setup and settings before you get started.
This means you should check out all the settings such as enable/disable automatic recording, streaming setup, bitrate, audio sampling rate, hotkeys, and file naming format among others. What you choose for these will depend on where you plan to show your videos and the capabilities of your computer.
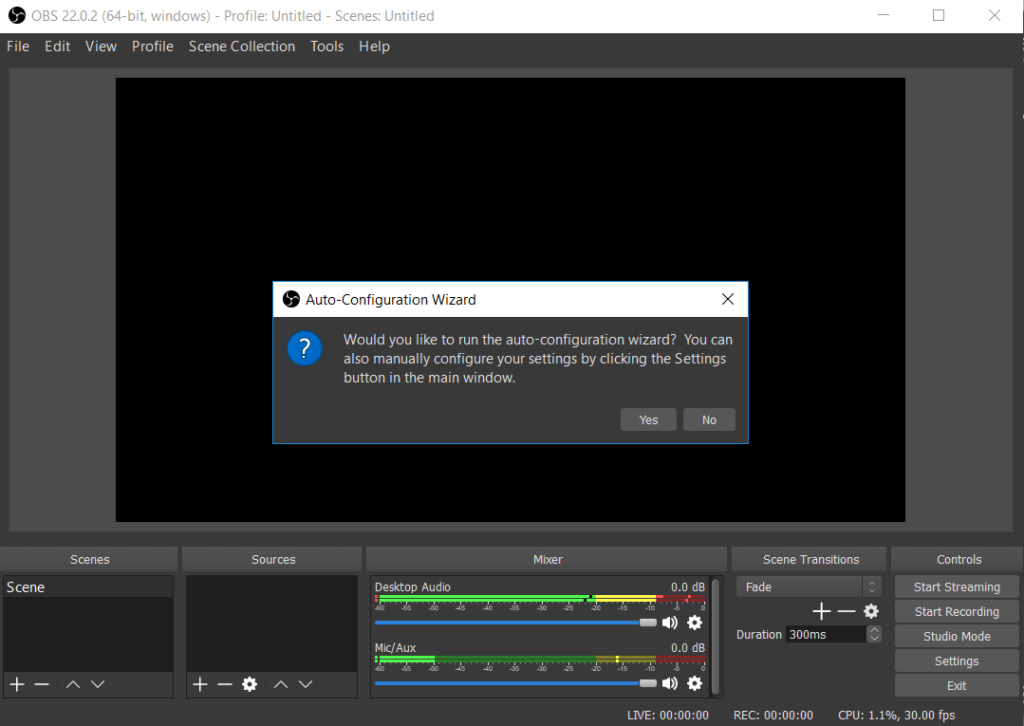
Alternatively, OBS studio does offer an auto-setup wizard that can choose some things for you.
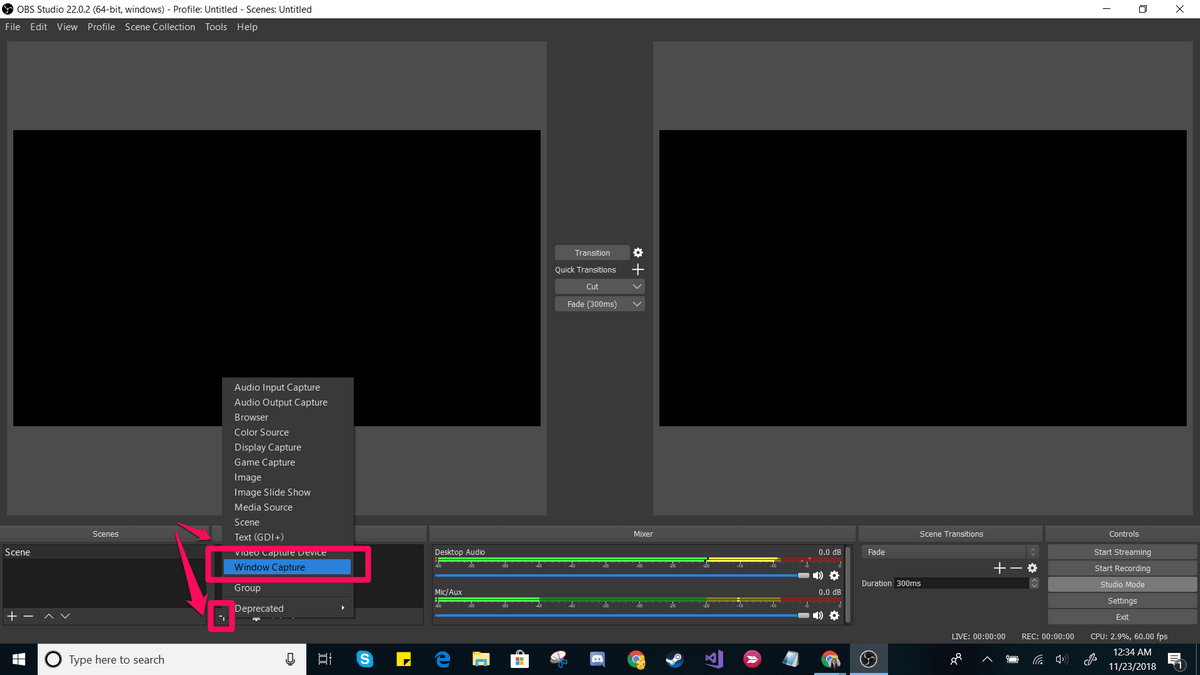
After all the setup, you can get started with a basic screen capture. First, put OBS in “Studio Mode” so that the left side says ‘preview’ and the right side says ‘live’.

To set up a screen capture, choose Sources > + > Window Capture > Create New. In the drop down list that appears, choose the window you want to record.
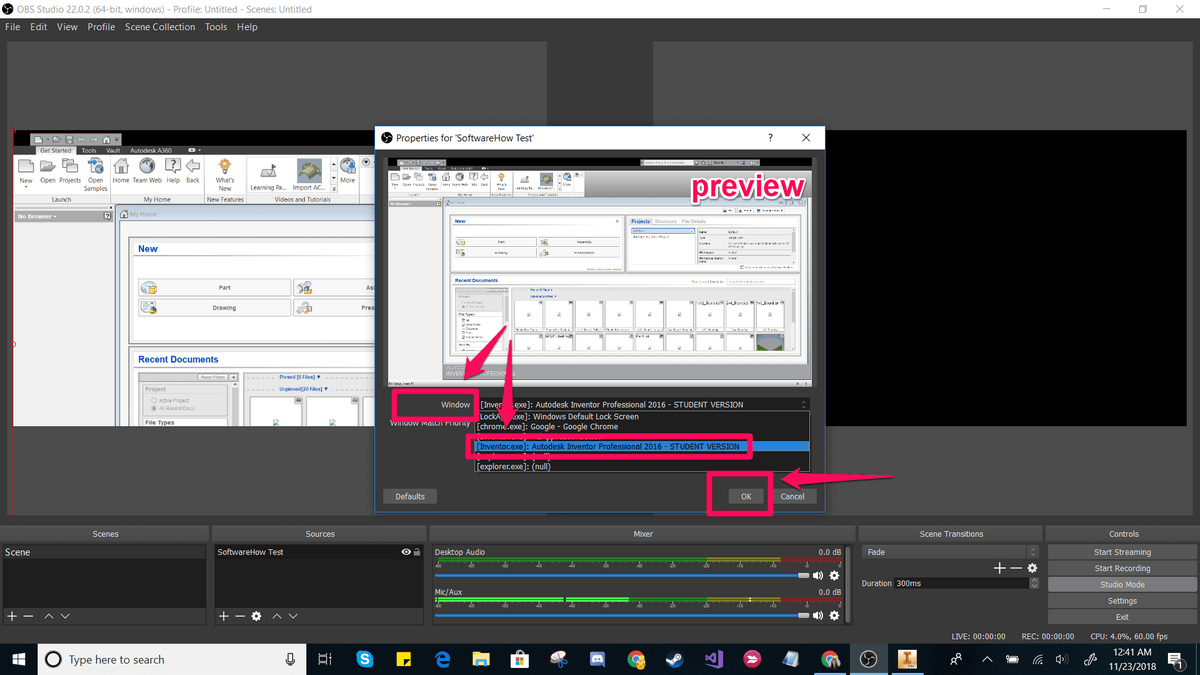
This should place your window in the ‘preview’ panel. If it looks the way you want it to, click transition in the center of the screen. If it doesn’t, drag the red corners until the preview is adjusted to the size you would like.
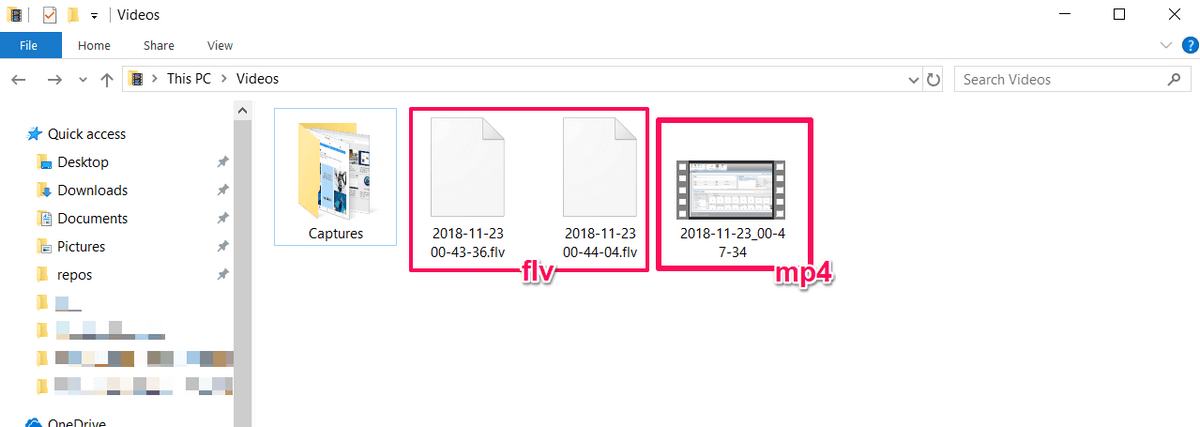
Then, click Start Recording and Stop Recording to create your video. By default, these are saved as flv files in the user/videos folder, but you can alter this path and save type in the settings.
OBS Studio is a very powerful software, and perhaps one of the best free programs for creating screen recordings or streaming. Its features extend far beyond the simple setup shown here. Unfortunately, it doesn’t come with a lot of tutorial materials so you’re going to need to find most of your resources from the online community. Streamers may find that a good place to start is this tutorial from Youtube.
Method 4: FlashBack Express / FlashBack Pro
If you’re looking for a dedicated software that can do both the recording and the editing, FlashBack might be a good choice. You can use their free version just for doing basic captures, but the paid option will allow you to make use of editing tools, save in a variety of formats, and add special content to your videos. It’s also one of the best screen recording software we’ve reviewed.
Here’s how to get started with FlashBack. First, download FlashBack from their site (choose “Express” if you want to start for free).
This will download an exe file. If this makes you uncomfortable, consider a different software. Next, click through the installation process.
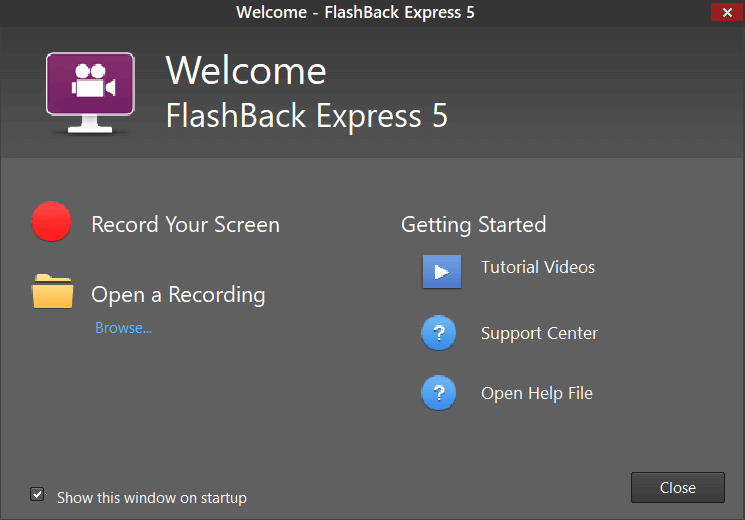
When you reach this startup screen, choose “Record Your Screen”.
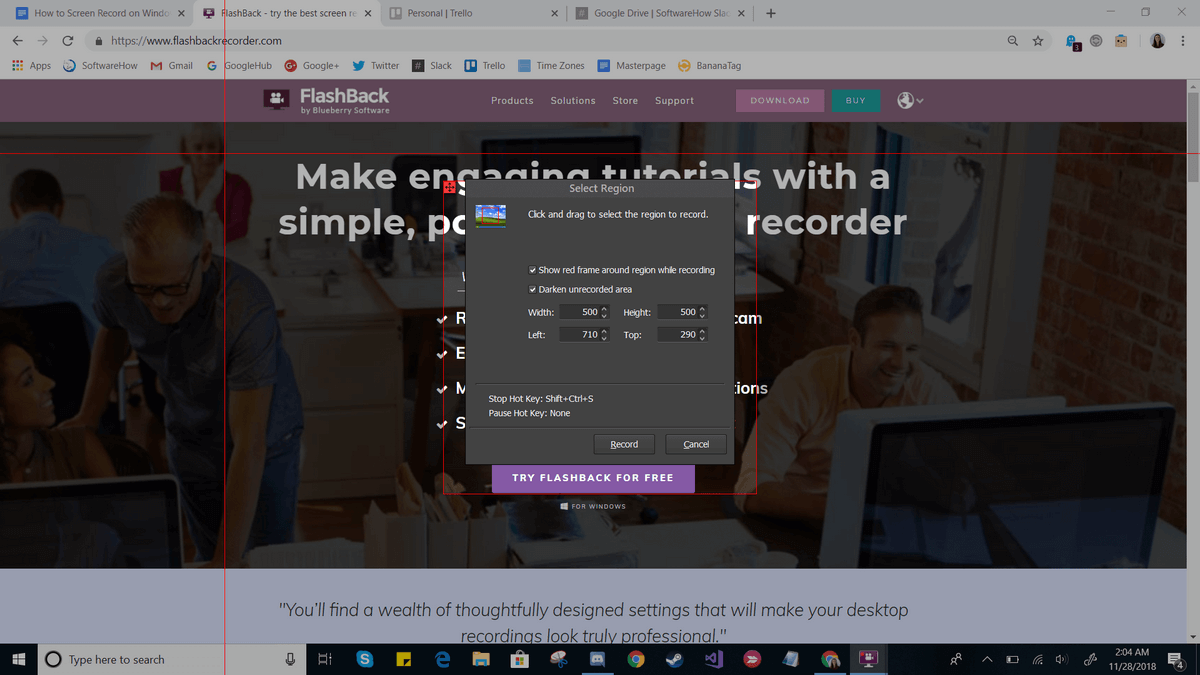
You’ll then have the option to change some settings for your recording, such as the audio source and capture size.
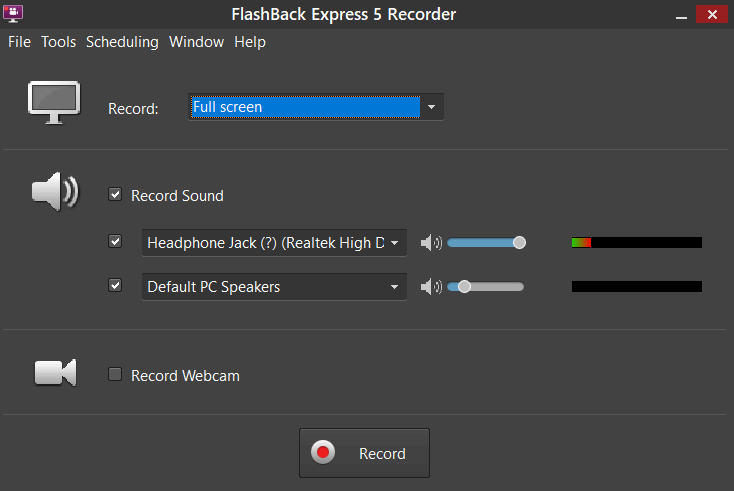
You can also decide whether to capture a window, a region, or the entire screen. If you select region, you’ll see some red cross hairs that you can drag to create a selection.
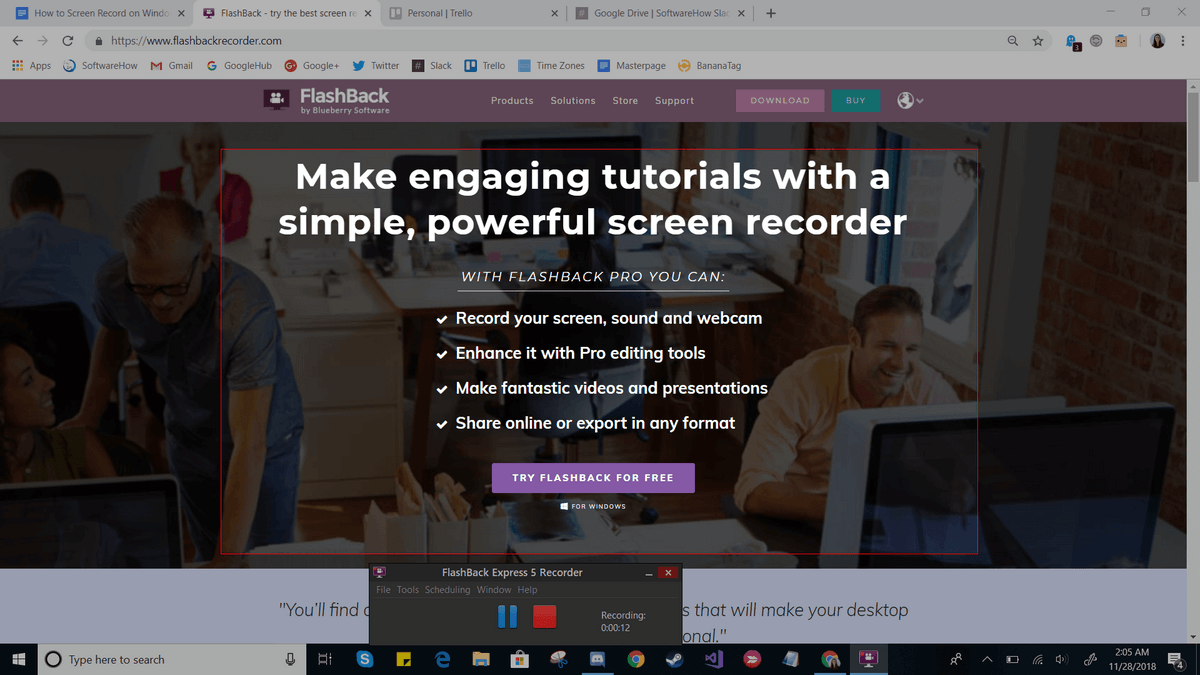
Then, press “Record” and do everything you need to. While recording, you should see a small bar on the bottom with “pause” and “stop” buttons. This bar can be hidden or shown at will.
Once you’re done, you’ll be asked to either review, discard, or save your recording. In Express, you will see a limited editor that will allow you to trim and crop the video as needed. Pro users will have a more full-featured video editor.
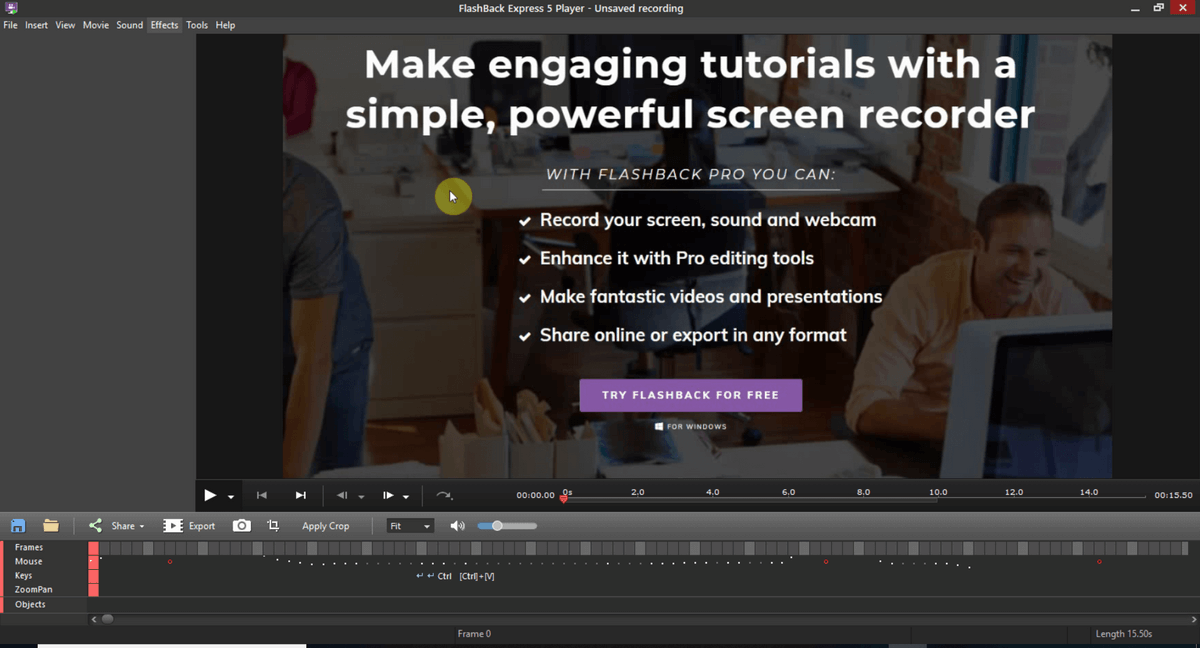
When you’re done editing, you can use the “Save” feature to save your video in a program-specific format. Or, you can use the export feature to save it as a normal file.
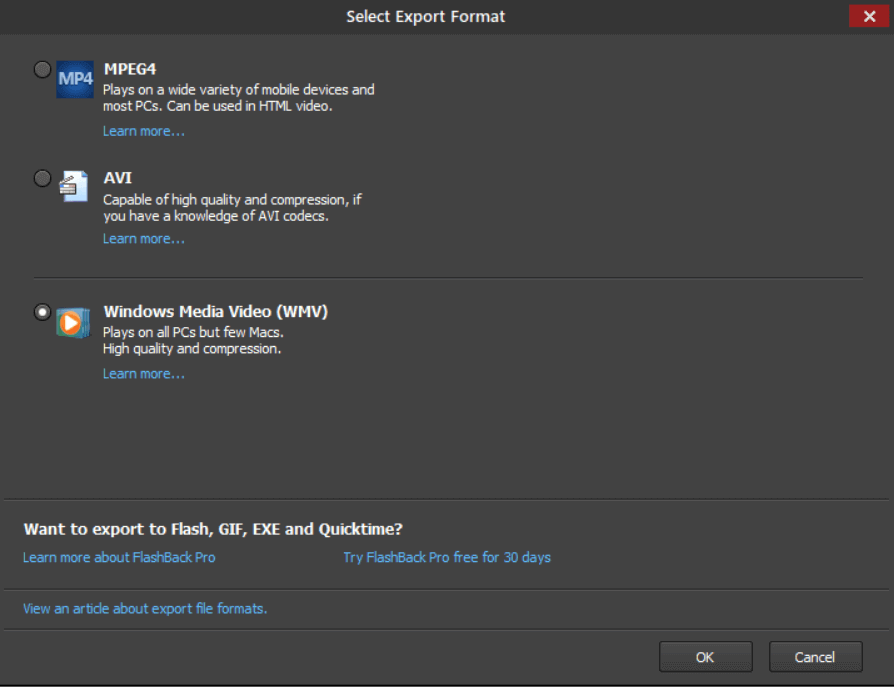
There are quite a few options, such as WMV, AVI, and MPEG4. Additionally, you can choose to export directly to YouTube instead by going to File > Share.
FlashBack Express is a simple solution with a lot of potential for screen recording and editing. It’s very easy to get started, and if you want to get more out of it you can buy a pro license just once (there’s no monthly subscription).
Method 5: APowerSoft Online Screen Recorder
If you prefer a web-based solution, APowerSoft offers an online recorder. The name though, appears to be a bit misleading – when attempting to try the software, we found that it does ask you to download a small package. However, the functionality comes completely from the website.
To use this tool, you’ll need to go the APowerSoft Screen Recorder website. Then, just click the “Start Recording” button in the middle of the screen.
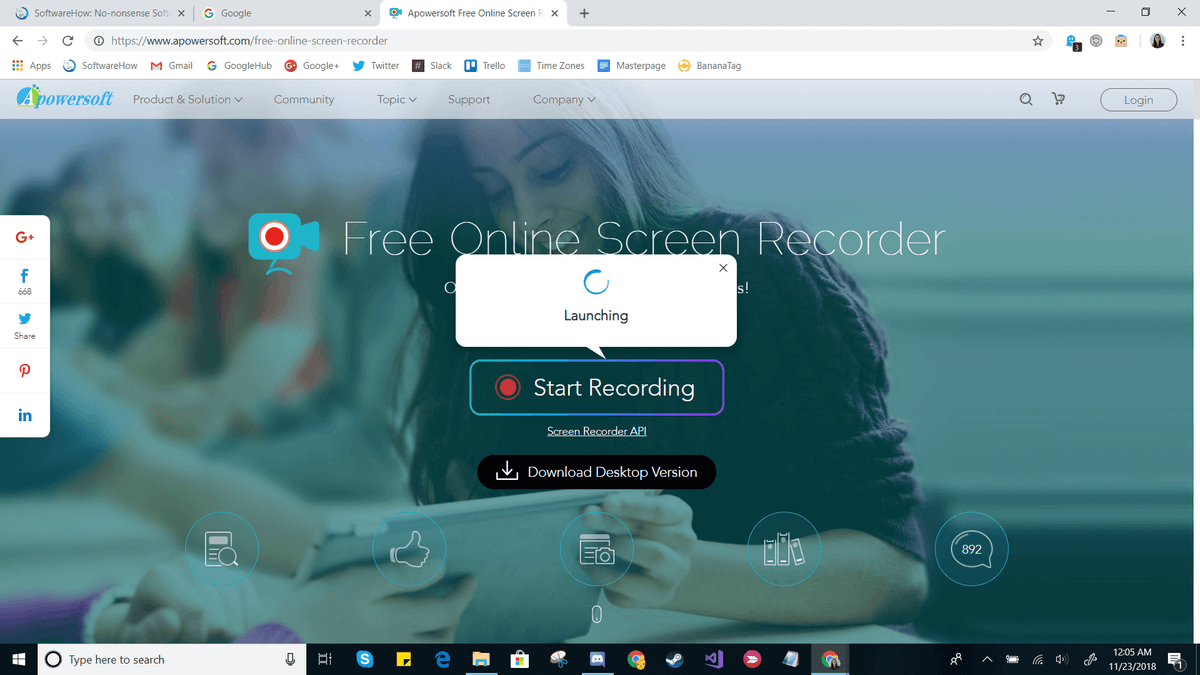
Agree to any prompts that appear, such as “Open APowerSoft Online Launcher”. If you choose not to create an account, you’ll also see the following warning before you get started:
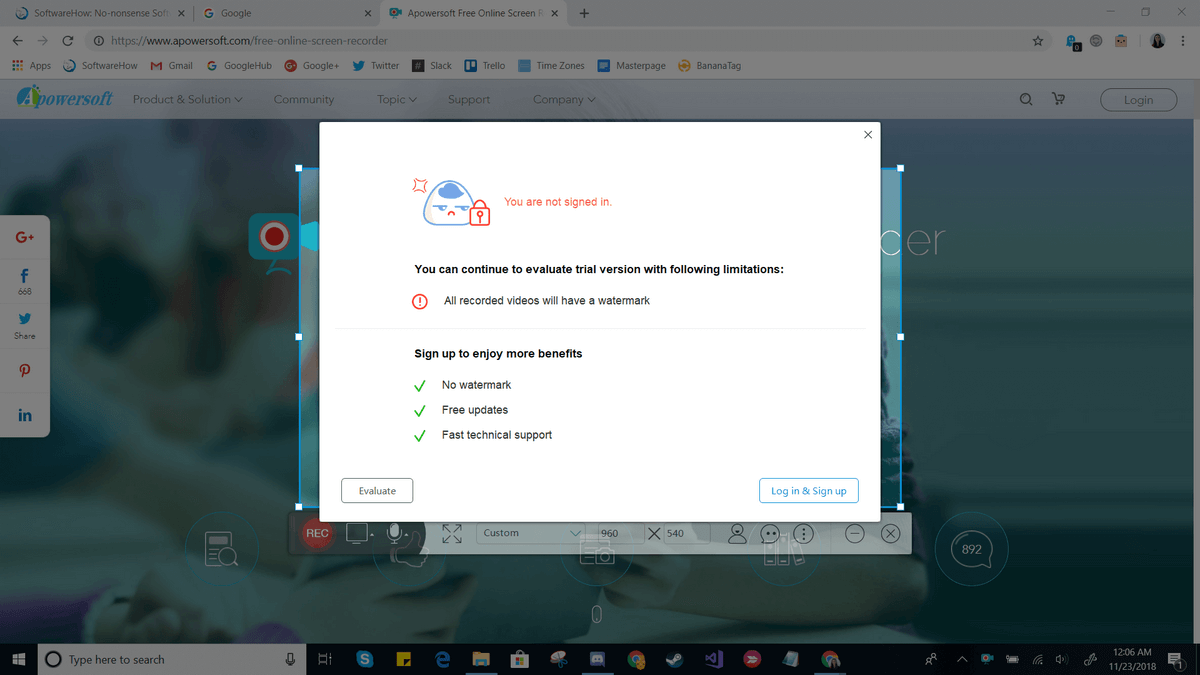
Creating an account is simple enough if you want to remove the watermark, but you can get started without one. Just click the “x” in the top right and you’ll see a new recording window appear. From here, you can resize your capture zone, move it around, or adjust special settings such as hide/show the toolbar, hotkeys, and etc.
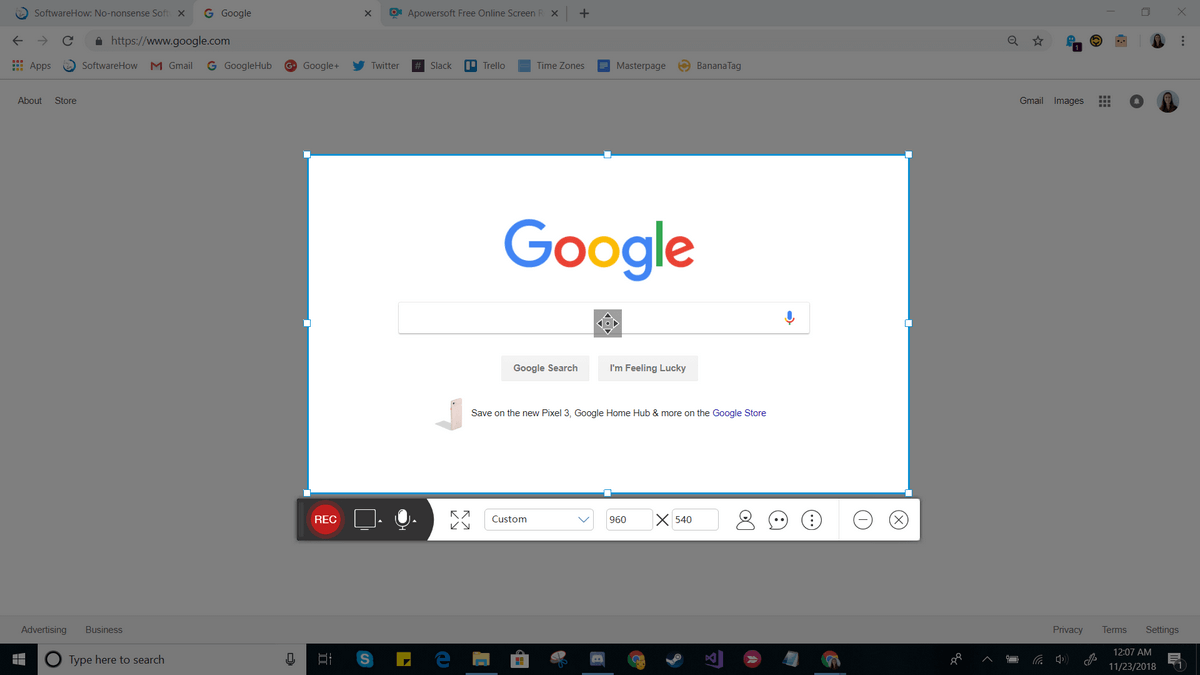
To start and stop recording, just press the red button. When you’re done, you’ll be shown your video clip.
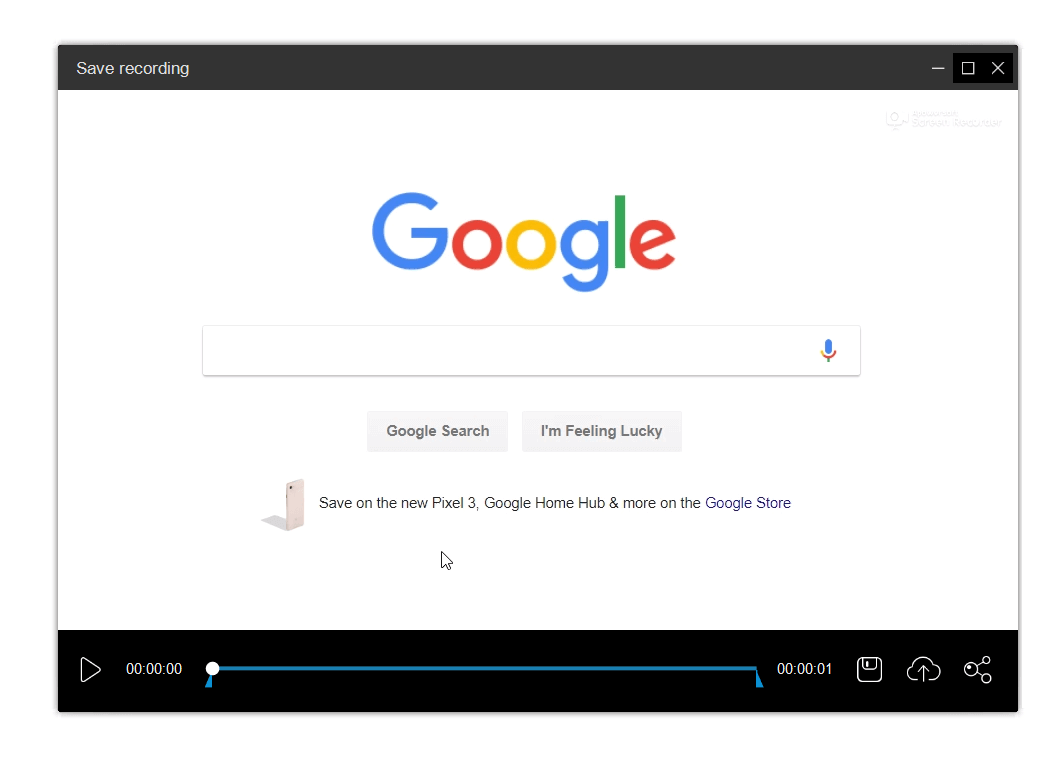
You can use the save icon to save your screencast as a video file or as a GIF, or use the share icon to upload it to YouTube, Vimeo, Drive, or Dropbox.
APowerSoft is a very lightweight program. It does give you some flexibility – for example, you can capture audio from the system, microphone, both or neither – but it is limited as far as editing capabilities unless you buy the paid version. You’d need to use a separate program on your computer if you plan to do any kind of edits. On the other hand, the tool is very quick to use and could be great in a pinch or if you don’t need to make any fancy changes before sharing them.
Alternative Methods
YouTube Live Streaming
If you have a YouTube channel, you can take advantage of the YouTube Creator Studio to film a screen recording. This requires using the live stream feature, so it’s not a great fit for everyone, but it could work out in some cases. To get started with using YouTube for screencasting, check out this tutorial.
Filmora Scrn
Filmora Scrn is a dedicated screen recording software made by Wondershare. It offers dual camera recording (screen and webcam), plenty of export options, and editing tools. Some people prefer it because the interface is a lot cleaner than some competing applications, but as this isn’t a free software, it’s not quite as accessible as some of the other methods listed here. However, if you’re interested in an easy-to-use and specialized screen recording software, you can check out Filmora here. We’ve also reviewed Filmora with more details.
Camtasia
Unlike many of the more specialized programs, Camtasia is a full-featured video editor first and a screen recording software second. It offers the most editing and production capabilities, which makes it a great choice if you want to do more than just record your screen or plan to produce several kinds of videos. The interface is very clean and easy to use. You can check out our full review of Camtasia here.
Snagit
Snagit is a program made by TechSmith, the same company that makes Camtasia. However, Snagit is not an all-in-one tool, and instead is only meant for screen recording. It offers some interesting features such as a magic selection tool that can automatically detect areas to record as well as an editing panel that will let you annotate your final videos. You can learn more about it here or read our detailed Snagit review here. Note: Snagit is a paid software.
CamStudio
CamStudio is a free software, but it’s an older and less well supported software compared to some alternatives. The program is maintained primarily by one individual and definitely has a few bugs that are still being worked out, but if you’re interested in trying it’s worth giving a shot. CamStudio may not be as “shiny” as some alternatives, but it is free and available here should you be interested in it.
Conclusion
Whether you’re making videos for a small classroom, thousands of subscribers, or for your own enjoyment, learning how to record screen on Windows 10 can make a huge difference. Depending on what features are important to you, there’s a variety of options that can meet your needs and no reason why you shouldn’t succeed in making a great video.
Wow! this post is really great. I love the detailed information about the tool. It helps me a lot since I’m looking for another screen recorder that I may use for my project. Besides, I’m using Acethinker Screen Grabber Pro with more than a year, this tool is very easy to use because you don’t need to download any third party app to use it. You may also include it on your List.
Very well written.
I need it. I tried CamStudio. That Didn’t work. Then I tried Gaming Console in Win 10. But that do not have video recording in Win 10 Home.
I will try these.
I have tried Any Video Converter Ultimate to record the video screen on my Windows 10 laptop, and it worked. The paid version allows you to record the video screen for free.


