- How to take and save screenshots on Windows 10 [STEP-BY-STEP GUIDE]
- How do I take screenshots on PC?
- Where does Windows 10 save my screenshots?
- Editor’s choice: Use a dedicated tool for screenshots
- 4 quick methods to take screenshots on PC
- Method 1 – Use Print Screen key
- Method 2 – Use Windows Key + PrtScn shortcut
- Snipping Tool (WIN + Shift + S): Screenshot save location?
- Create a screenshot in Windows 8.1 / 10 and auto-save as a file!
- The new method to create a screenshot in Windows 10 and 8.1 and to auto-save it as a file!
- How to take a screenshot
- General recommendations for Windows
- The Snipping Tool program in Windows 7
- Mac OS
- Android
- Windows screenshot and save
- How to create a screenshot and automatically save it as a file in Windows 8
- Users who read this also read:
How to take and save screenshots on Windows 10 [STEP-BY-STEP GUIDE]


- Download Restoro PC Repair Tool that comes with Patented Technologies (patent available here).
- Click Start Scan to find Windows issues that could be causing PC problems.
- Click Repair All to fix issues affecting your computer’s security and performance
- Restoro has been downloaded by 0 readers this month.
Sometimes you need to quickly share a screenshot with someone online. Creating and sharing them is relatively simple, and today we’re going to show you where your screenshots go on Windows 10.
How do I take screenshots on PC?
Creating screenshots on Windows 10 is fairly simple, and it doesn’t even require you to use a complex software application.
You can easily create screenshots on Windows 10 with built-in tools or with dedicated tools, and today we’re going to show you where your screenshots are saved by default on Windows 10.
Where does Windows 10 save my screenshots?
If you haven’t changed your default settings, you should be able to find your screenshots under the following path: C:Users[User]My PicturesScreenshots.
Of course, you can also create a dedicated folder where you can save your screenshots. You can create the folder on your desktop or use a location of your choice.
Furthermore, you can also upload your screenshots if you need to share them with someone. Follow this article to find out more about how to upload screenshots and what tools to use.
Editor’s choice: Use a dedicated tool for screenshots
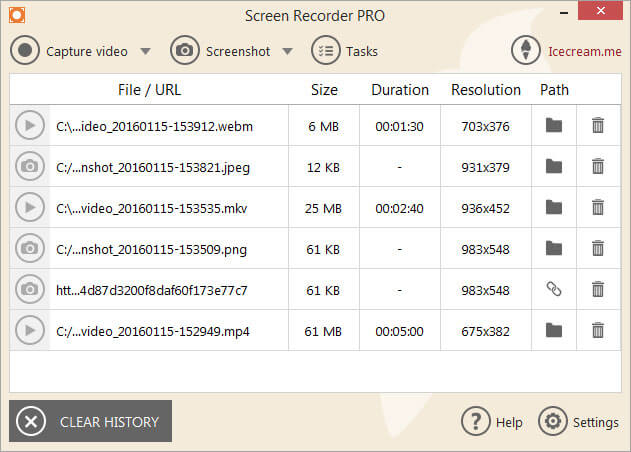
Icecream Screen Recorder is a simple tool, straightforward yet with enough features to accomplish what you want but not confuse you. Keep your screenshots organized, ready to be used right away with this innovative program.
You can save your screenshots straight to your hard drive to the destination of your choosing. And, you will be able to store the screenshots in various file formats.
This software is a viable alternative to typical screen capturing apps that are on the market.
You can easily capture an image in order to highlight particular areas or a specific section.
This tool is ideal if you use multiple browsers during your daily Internet sessions.
Here are just some of its features:
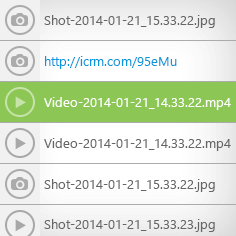
- Project history: you can easily find your past projects
- Screen area selection: select the area you want to be recorded
- Drawing panel: add arrows, lines, and marks to your capture
- You can also record online videos.
- Capture videos with the simple click of a button.
- Change format of the recorded videos
- Schedule screen recording
Icecream Screen Recorder is already the world’s bestseller and you can give it a try for free right now. A fully-functional trial version is available for download.
4 quick methods to take screenshots on PC
Method 1 – Use Print Screen key
This is probably one of the oldest methods of creating screenshots. To create a screenshot simply press the Print Screen or PrtScn key on your keyboard. By pressing this key you’ll create a screenshot of your entire screen.
If you want to create just a screenshot of your current window, you can do so by using Alt + PrtScn shortcut.
By using these shortcuts your screenshot will be saved to your Clipboard. In order to save it to your hard drive, you need to start Paint or any other image editing software and paste the screenshot from the Clipboard by pressing Ctrl + V shortcut.
Although this method is rather simple, we have to warn you that you won’t be able to view any previously made screenshots. Clipboard saves only one entry at the time, and if you accidentally copy something else into Clipboard you’ll remove your screenshot.
If you use this method, it’s recommended to paste the screenshot to your image editor as soon as you can in order not to lose it. By using any image editing tool you can save the screenshot to any folder that you want.
We have to mention that you can somewhat avoid the problem with Clipboard simply by using a clipboard manager tool. These types of tools allow you to view all items that were copied to your Clipboard so you won’t ever lose your unsaved screenshots again.
If you’re having trouble with copy-paste on Windows 10, this complete guide will help you solve any issues with it.
Method 2 – Use Windows Key + PrtScn shortcut
Print Screen shortcut was available in previous versions of Windows, but with Windows 8 Microsoft introduced a new shortcut. In Windows 8 we got Windows Key + PrtScn shortcut, and this one made its way to Windows 10.
We have to mention that some laptops might use a slightly different shortcut, so be sure to check your laptop’s instruction manual for details.
By using this shortcut your screen will become dim for a half second and you’ll hear the shutter sound. This means that you successfully created a screenshot.
Snipping Tool (WIN + Shift + S): Screenshot save location?
When I took a screenshot, Windows told me I wanted to try: WIN + Shift + S
So, I did. But, where is this screenshot other than the clipboard?
I can paste directly into OneNote, or whatever image program, but I don’t want that. I want a timestamped screenshot or the «Shortcut» is not for what I need to do.
Is there a fourth button in the combo to actually save the screenshot? This is so weird to me. Not an improvement. Would be an improvement IF it were saved automatically. Is there really not a folder somewhere that these shots are stored automatically?
Shift+WinKey+S opens Snip & Sketch. Make your snip, which goes into the Clipboard. A notice of it also immediately goes into the Action Center. Click that notice, & the snip will reopen into Snip & Sketch. Draw on it, if desired. Click the Save icon (disk) at top right to save it to the Pictures folder. Its name will be a timestamp.
To get it into a post here, click the Insert Image icon (2nd from right) above your post which opens to the same folder.
18 people found this reply helpful
Was this reply helpful?
Sorry this didn’t help.
Great! Thanks for your feedback.
How satisfied are you with this reply?
Thanks for your feedback, it helps us improve the site.
How satisfied are you with this reply?
Thanks for your feedback.
The Snip & Sketch tool copies to the clipboard but will also save the image to a temp file. The temp file of the image is stored at following locations:
If you don’t want to go above locations to find captured screenshot, simply press Windows key + PrtScr to take screenshot.
Now either open MS Paint program and press Ctrl+V. Edit and save your screenshot.
Or open File Explorer and locate Pictures library. Under Screenshots folder, you’ll find the captured screenshot.
Hope this helps!
Note: Reddit.com is a non-Microsoft website. The page appears to be providing accurate, safe information. Watch out for ads on the site that may advertise products frequently classified as a PUP (Potentially Unwanted Products). Thoroughly research any product advertised on the site before you decide to download and install it.
Microsoft MVP (Windows IT Pro), since 2014 · Windows Insider MVP · Windows Help (www.kapilarya.com)
33 people found this reply helpful
Was this reply helpful?
Sorry this didn’t help.
Great! Thanks for your feedback.
How satisfied are you with this reply?
Thanks for your feedback, it helps us improve the site.
Create a screenshot in Windows 8.1 / 10 and auto-save as a file!
The new method to create a screenshot in Windows 10 and 8.1 and to auto-save it as a file!
Via keyboard shortcut [Window-Logo + PrtScn] Windows-8 auto-saved inside the screenshot file in «Screenshots» folder, created in your My Pictures folder. This location is %UserProfile%\Pictures\Screenshots. ( . see Image-1 Arrow-1).
The old method to create a screenshot in Windows and copy a screenshot into the clipboard works also on Windows-8. [Alt+PrtScn] for the active Window or [PrtScn] for the complete Desktop. You can use mspaint.exe to save a screenshot to a file!
1. To start ms-paint in Windows 8, press the key combination [Win-Logo+R],
2. Then simply type the command mspaint.exe. ( . see Image-2 Arrow-1)
3. In MS-Paint press the key combination [CTRL+V] to paste the screenshot from the clipboard
( . see Image-2 Arrow-2)
Screenshots are suitable for a variety of purposes: to quickly send something funny from the Internet to friends, to show the colleague the preliminary design for the new web project — or to add explanatory material to a text like this. Taking such screenshots has never been a problem on Microsoft operating systems. And since Windows 8, it’s even easier than ever — thanks to the addition of keyboard shortcuts and the snipping tool.

Take a screenshot (print your screen)
Sometimes it’s easier to show someone what’s on your screen than it is to explain it. Windows makes it easy to take a picture of the screen so you can save, print, or share it. This is referred to taking a screenshot or screen capture.
You can take a screenshot and automatically save it as a file, take a screen shot without saving it as a file, or take a screenshot of only one window (instead of the whole screen).
How to take a screenshot
A screenshot (or screen capture) is a picture of the screen on your computer or mobile device that you can make using standard tools or a special program:
Take a screenshot using Yandex.Disk (for Windows and Mac OS operating systems)
General recommendations for Windows
Press the Print Screen button on your keyboard (sometimes it is called PrtScn , PrtScr , or PrtSc ) — this copies a picture of the entire screen to the clipboard.
To take a screenshot of only the active window, press Alt + PrtScn .
Open any image editor, such as “Paint” : Start → All Programs → Accessories → Paint .
In the menu, choose Edit → Paste (Windows XP and Windows Vista) or click the Paste button in the program’s home menu (Windows 7 and later).
The picture will be inserted in the image editor from the clipboard.
Save the screenshot on your computer: File → Save As ; or click .
The Snipping Tool program in Windows 7
The “Windows Snipping Tool” lets you take a screenshot of any part of your desktop or the entire screen. This program is launched from Start → All Programs → Accessories .
Launch the program from the Start menu: type Snipping Tool in the search box and click the name of the program.
In the program window, click the New button and select the desired area: a rectangular or free-form shape, a separate window, or a full-screen capture.
Save the image: click the Save As button and choose where to save the file.
Mac OS
To take a screenshot in Mac OS, press ⌘ Cmd + Shift + 3 . A file with a full-screen capture will appear on the desktop.
If you want to take a screenshot of a specific part of the screen, press ⌘ Cmd + Shift + 4 and select the desired area of the screen using the cursor.
To take a screenshot of only the active window, press ⌘ Cmd + Shift + 4 + Space .
To save the screenshot to the clipboard, hold down the Ctrl key when creating it.
The iOS platform allows taking a screenshot with standard tools starting from 2.x versions. To take a screenshot, press and hold the Sleep/Wake and Home buttons together. Your screenshots are saved in the standard Photos app.
Android
- Android 4.x
- Android 3.2 and later
- Android 1.x and 2.x
- Samsung
- HTC
Press Volume Down and Power together and hold down for a couple of seconds.
Press the Recent programs button and hold it down.
Versions 2.x and earlier of the Android platform do not support taking screenshots using standard tools. You need to use third-party apps installed from Google Play.
Press Home and Power or Back and Home (depending on the device) and hold them down for a couple of seconds.
Press Home and Power together and hold down for a couple of seconds.
Windows screenshot and save

- Home
- Tutorials & Tech Support Guides
- Windows 8 Tutorials
- How to create a screenshot and automatically save it as a file in Windows 8
How to create a screenshot and automatically save it as a file in Windows 8
Lawrence Abrams
- November 27, 2012
- Read 259,964 times
In the past, the built-in method to create a screenshot in Windows was to use + or to copy a screenshot into the clipboard. You would then have to paste that image into another program that has the ability to save it as an image file. Though this method works, it was inconvenient, required an extra program, and was confusing for less experienced computer users. With the release of Windows 8, Microsoft included a really useful feature where you can automatically take a screen shot and save it as a file. There is only one issue with this method and that is to automatically create a file you will be taking a screenshot of the entire screen and not just a particular Window.
To take a screenshot and automatically save it as a file in Windows 8 you can use the new Windows+PrintScreen ( + ) keyboard combination. When you hold those two keys down at the same time, Windows 8 will dim the screen to indicate that you took the screenshot. The file will then be saved inside a folder called Screenshots, which will be created in your My Pictures folder. This location is C:\Users\ \My Pictures\Screenshots .
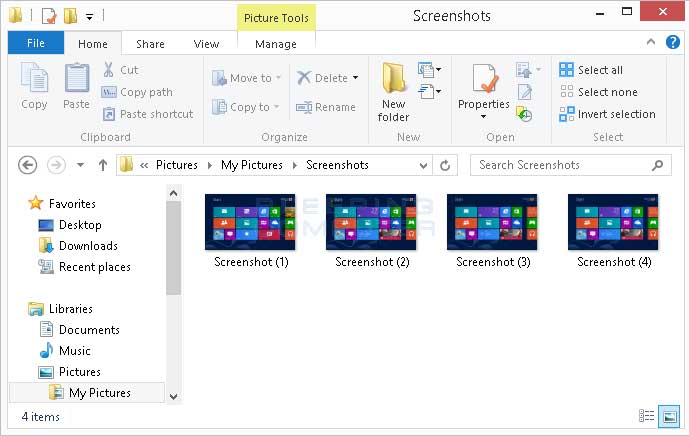
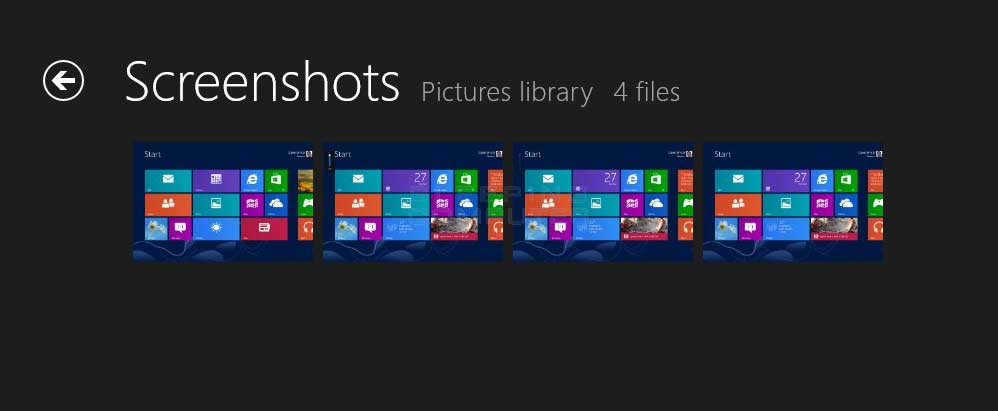
You can also access these screenshots from your Pictures library by navigating to the screenshots folder.
Now that you know how to quickly and easily create screenshots, you will be able to more effectively show off your Windows 8 computer online.
Users who read this also read:
How to take and share a screen shot in Windows
Windows gives you the ability to take a snapshot of what is shown on your computer screen and save it as a file. You can then view this image at a later date to see what your screen looked like or share this image with other people to view. You may be asking why this is important and why you would want to share screen shots of your computer.
How to create a start screen tile for a web site in Windows 8
In Windows 8 you are able to create a Start Screen tile, or pinned site, that is associated with a particular web site. You can then click on the pinned site tile and Internet Explorer will automatically open to that site. When launching a web site in this way, the Internet Explorer 10 Pin button may become a jump list button which contain common tasks for that web site that help you navigate the .
How to add Gmail to Windows 8 Mail
This tutorial will explain how to add Gmail to the Windows 8 Mail app. This tutorial will also walk you through troubleshooting issues you may encounter when using 2-step verification on your Google account.
How to download and create a bootable Windows 8 Upgrade DVD
If you had upgraded Windows 8 using the Windows8-Setup.exe executable, rather than through a DVD, it can be difficult to troubleshoot your computer in the event that it is not starting properly or you cannot access the Advanced Startup Options menu. This tutorial will walk you through creating a Windows 8 DVD on another computer that can be used to troubleshoot problems starting or using Windows .

How to add a Start Menu to Windows 8 using Classic Shell
Windows 8 no longer includes the traditional Start Menu that Windows users have become associated with using. Instead they replaced it with a new interface called the Windows Start Screen that many people find to be not as intuitive as the traditional Start Menu. This is especially the case if you are not using a touch screen. With this in mind, a free program called Classic Shell has been updated .


