- Windows script create folders
- Методы объекта FSO для работы с папками
- Свойства объекта Folder для работы с папками
- Методы объекта Folder для работы с папками
- Windows: Create Folders From Command Line
- You Might Also Like
- Create a Folder Using CMD in Windows
- Create a Folder Using CMD in Windows
- Create Multiple Folders Using CMD in Windows
- How to create a file or folder (C# Programming Guide)
- Example
- .NET Security
Windows script create folders
 В этой статье я расскажу про работу с папками при помощи объекта FSO, а так же объекта Folder. Данные объекты Windows Script Host позволяют нам создавать, удалять, проверять наличие папки, копировать или перемещать папки по шаблону, не используя циклов. Всё это будет подкреплено примерами VBScript.
Как было уже сказано ранее, для работы с файловой системой, vbs требуется объект FileSystemObject. В начале работы запишем копию объекта FSO в одноимённую переменную, что бы не запутаться. А теперь приступим к работе.
Методы объекта FSO для работы с папками
CreateFolder — Создаёт указанную папку в указанном каталоге.
CopyFolder — Рекурсивно копирует одну или несколько папок. Для данного метода мы можем использовать подстановочные знаки: «*» — любое количество символов и «?» — любой один символ. Это позволяет не использовать циклы в сценарии.
Синтаксис: CopyFolder(Source, Destination [, Overwrite])
- Sourse — Путь к папке, которую копируем. Можно использовать подстановочные знаки (смотрите выше).
- Destination — Путь, куда копировать папку.
- Overwrite — Необязательный параметр. Перезаписывать существующие файлы (True) или нет (False). По умолчанию True. Если копируемый файл в папке имеет атрибут Read-Only, то возникает ошибка.
MoveFolder — Рекурсивно перемещает одну или несколько папок. Если перемещаемая папка уже существует или является файлом в Destination, то выдаст ошибку. Можно использовать подстановочные знаки.
Синтаксис: MoveFolder(Source, Destination)
DeleteFolder — удаляет указанную папку или папки. Возможно использование подстановочных знаков.
Синтаксис: DeleteFolder(Folderspec [, Force])
- Folderspec — Путь к удаляемой папке.
- Force — Не обязательный параметр. Удалять (True) или нет (False) файлы с атрибутом read-only. По умолчанию False.
А теперь пример:
В данном примере вроде всё понятно. Обратите внимание на использование подстановочных знаков. Объяснять не буду. Идём дальше.
BuildPath — Добавляет к указанному пути указанный подкаталог или имя файла. Если требуется, то добавляется «\» между ними.
Синтаксис: BuildPath(Path, Name)
- Path — Путь.
- Name — Имя папки или файла
По сути, данный метод можно спокойно отнести в категорию «для работы с файлами».
GetAbsolutePathName — Вернёт полный путь для указанного относительного пути.
В первом варианте мы получим путь к папке с запущенным сценарием, но на одну папку вверх. Во втором варианте мы получим полный путь до папки, в которой запущен наш сценарий VBS. В третьем мы получим путь до файла «test.vbs» даже если он не существует.
GetParentFolderName — Вернёт путь к указанному файлу без самого файла.
FolderExists — Проверяет существование папки. Вернёт True, если она существует и False в противном случае.
GetSpecialFolder — Возвращает путь к трём специальным папкам (Объект Folder): Windows, System32 и папки с временными файлами.
GetFolder — Вернёт объект «Folder» по указанному пути.
А теперь собственно и об объекте Folder.
Свойства объекта Folder для работы с папками
Создание объекта приведено выше (GetFolder).
Attributes — Возвращает набор флагов атрибутов папки. Обратите внимание на то, что вы получите сумму атрибутов папки, если просто используете Folder.Attributes. Что бы разобрать атрибуты нам понадобится условный оператор If … End If.
- 0 — Normal. Обычный файл (нет атрибутов).
- 1 — ReadOnly. Файл только для чтения. Чтение и запись.
- 2 — Hidden. Скрытый. Чтение и запись.
- 4 — System. Системный. Чтение и запись.
- 8 — Volume. Диск. Только чтение.
- 16 — Directory. Папка или файл. Только чтение.
- 32 — Archive. Архивный. Чтение и запись.
- 1024 — Alias. Ссылка или ярлык. Только чтение.
- 2048 — Compressed. Сжатый. Только чтение.
Вот таким интересным способом это всё разбирается. От большего атрибута к меньшему! Теперь идём дальше.
DateCreated — Возвращает дату создания папки.
DateLastAccessed — вернёт дату последнего доступа к папке.
DateLastModified — возвращает дату последнего изменения в папке.
Drive — Возвращает название диска (Объект Drive) с двоеточием.
IsRootFolder — проверяет, является ли папка корневой.
Name — Вернёт имя папки.
ParentFolder — Вернёт путь в родительского каталога (Объект Folder).
Path — полный путь к папке.
ShortName — укороченное имя папки в формате 8.3
ShortPath — короткий путь к папке в формате 8.3
Size — вернёт размер всех файлов и подкаталогов в папке в байтах.
Type — тип папки.
А вот и пример для всех этих свойств:
Размер папки ProgramData мы не узнаем, т.к. нам откажут в доступе. Двигаемся дальше.
SubFolders — Содержит все подкаталоги данной папки (объект-коллекция «Folders»), включая системные, а так же скрытые.
Files — Возвращает наименование файлов с форматом (объект-коллекция «Files»), которые содержатся в данной папке. По сути, данное свойство работает не только с папками, но и с файлами, что очень удобно.
В данном примере сценария VBScript показан перебор всех папок в папке ProgramData и вывод находящихся в них файлов. К сожалению, в некоторые папки мы не можем проникнуть и нам выдаст ошибку. По этой причине пришлось производить обработку ошибок.
Вот более простой пример:
Методы объекта Folder для работы с папками
Copy — Копирует папку в указанное место.
Синтаксис: Copy(Destination [, Overwrite])
- Destination — Куда переместить папку.
- Overwrite — Не обязательный параметр. Заменить папку если она существует (True) или нет (False).
Move — Перемещает папку в указанное место.
Delete — удаляет указанную папку.
Имеет один не обязательный параметр. Число. Удалять файл если он имеет атрибут только для чтения (Read Only) – True; нет – False.
Копирование, перемещение и удаление происходит и для всех содержащихся в папке файлов и подкаталогов. Во время копирования и перемещения можно изменять название папки.
Надеюсь, мы разобрались с данной темой программирования VBScript. Всего вам хорошего, до новых встреч!
Windows: Create Folders From Command Line
Posted on August 13, 2019 by Mitch Bartlett 7 Comments
The command line is still a powerful thing to use in Microsoft Windows. You may need to learn how to create a directory from the command line if you’re writing a script, or want a simpler way to create multiple folders. Here’s how it’s done.
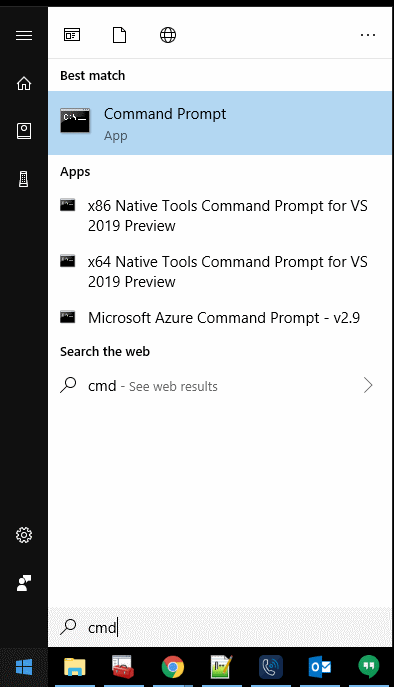
- Select the “Start” button,type cmd then choose “Command Prompt” in the list that appears.

- To switch to another drive, simply type the drive letter followed by a colon, then press “Enter“.
- To switch to another directory, type cd followed by the path to the directory, then press “Enter“.
- Type mkdir followed by the name of the folder you wish to create, then press “Enter“.
Example: mkdir mynewfolder
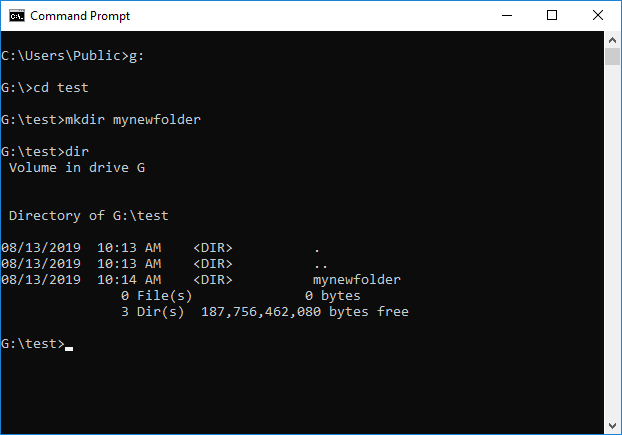 Example showing switching to the G drive, then to the test folder and the creation of a folder called “mynewfolder”.
Creating multiple folders is easier from the command line. You can type mkdir followed by the names of each folder, separated by a space to do this.
mkdir mynewfolder1 mynewfolder2 testfolder1

Note: Alternately, you can use the md command in place of mkdir. They do the same thing.
You Might Also Like
Filed Under: Windows Tagged With: Windows 10
Create a Folder Using CMD in Windows

Not many Windows users are familiar with CMD. The common misconception is that only programmers and computer geeks use CMD. Basically, CMD is a tool that you can use to communicate with your Windows computer. Though the user interface and other input methods are introduced, CMD is one tool that you cannot take for granted. Some commands, such as creating folders, are easier to execute using CMD. You may laugh and think that it is harder to create a folder using CMD instead of using your mouse and the “Right click > New folder” method. You may have a point, but what if you are asked to create 10 folders or more? CMD would greatly simplify the task. Creating a folder using CMD is easy. This article will show you how.
Create a Folder Using CMD in Windows
To use CMD to create a folder on your Windows computer, follow these steps:
1. Click on the Search button located on the lower-left part of your computer’s screen.
2. In the Search box, type in CMD.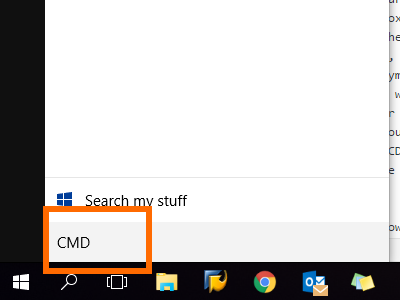
3. Open CMD from the results.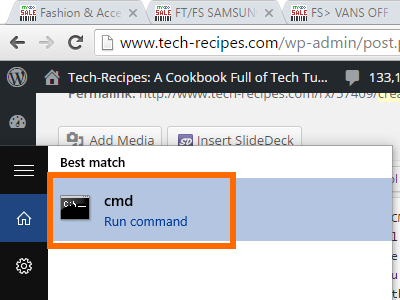
4. With CMD opened, go to the drive where you want to put the folder. To go to the drive, type in the name of the drive followed by the colon (:) symbol. In this case, we want to go to Drive D so we input D:. 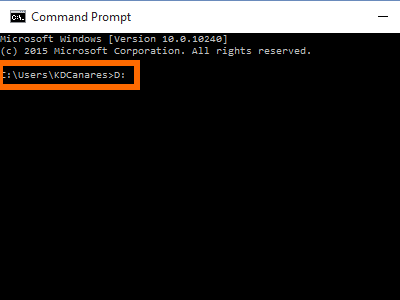
5. CMD’s directory will change to the chosen drive. Type in the MKDIR command to create a directory or folder. In this case, we want to make a folder named TECHRECIPE, so we type in mkdir TECHRECIPE into CMD.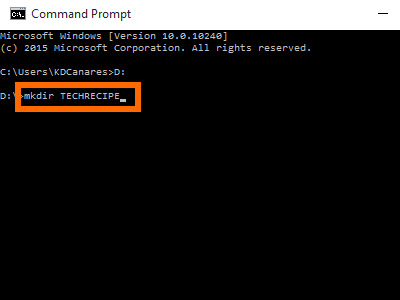
6. You are done. You can go to the newly created folder using CMD by typing in the command CD followed by name of the folder. In this case, type in CD TECHRECIPE in CMD.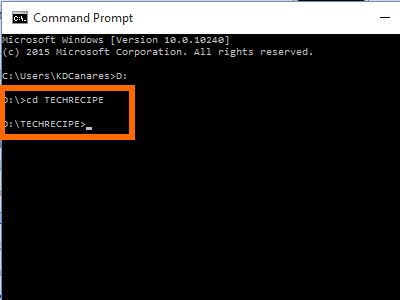
7. You can also use your computer’s user interface to see that the folder has been created.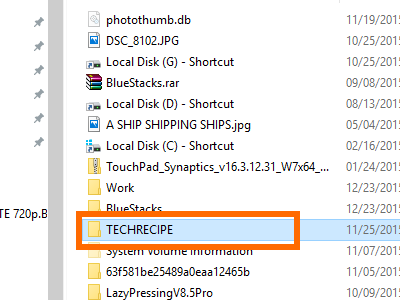
Create Multiple Folders Using CMD in Windows
To create multiple folders using CMD, follow these steps:
1. Open CMD on your Windows computer.
2. Go to the directory or folder where you want to create the multiple folders. In this case, we will go to the newly created folder.
3. Type in the MD command, followed by the names of the folders that you want to create. In this case, we want to create four folders named TR1, TR2, TR3 and TR4. Therefore, we input md TR1 TR2 TR3 TR4.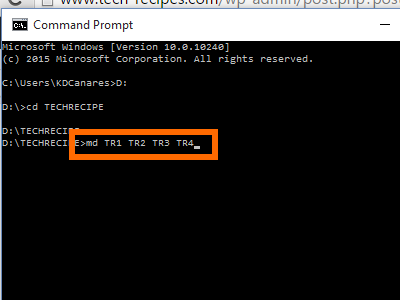
4. The subfolders will be created. You can go to the folder using your computer’s user interface, and you will see that all the subfolders have been created.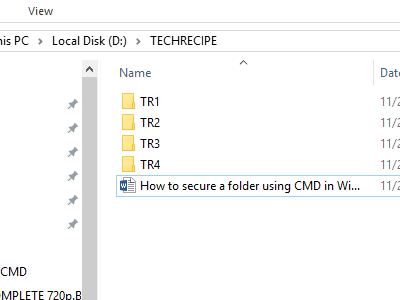
5. You are done.
Learning CMD is easy. If you want to know more about using CMD or if you have questions concerning any of the steps above, let us know in the comments section.
How to create a file or folder (C# Programming Guide)
You can programmatically create a folder on your computer, create a subfolder, create a file in the subfolder, and write data to the file.
Example
If the folder already exists, CreateDirectory does nothing, and no exception is thrown. However, File.Create replaces an existing file with a new file. The example uses an if — else statement to prevent an existing file from being replaced.
By making the following changes in the example, you can specify different outcomes based on whether a file with a certain name already exists. If such a file doesn’t exist, the code creates one. If such a file exists, the code appends data to that file.
Specify a non-random file name.
Replace the if — else statement with the using statement in the following code.
Run the example several times to verify that data is added to the file each time.
For more FileMode values that you can try, see FileMode.
The following conditions may cause an exception:
The folder name is malformed. For example, it contains illegal characters or is only white space (ArgumentException class). Use the Path class to create valid path names.
The parent folder of the folder to be created is read-only (IOException class).
The folder name is null (ArgumentNullException class).
The folder name is too long (PathTooLongException class).
The folder name is only a colon, «:» (PathTooLongException class).
.NET Security
An instance of the SecurityException class may be thrown in partial-trust situations.
If you don’t have permission to create the folder, the example throws an instance of the UnauthorizedAccessException class.


