- Windows server 2012 snapshot
- Создание и удаление снапшота в SnapDrive.
- Создание и удаление снапшота в OnCommand System Manager 3
- Windows server 2012 snapshot
- Checkpoints and Snapshots Overview
- Considerations
- Checkpoint files
- Checkpoint Process
- Creating a checkpoint
- Deleting a checkpoint
- Applying a checkpoint
- Frequently asked questions
- I’ve taken multiple checkpoints and now my virtual machine pauses automatically. Hyper-V Manager shows the status as вЂpaused-critical’. How can I fix this?
- I’ve tried to delete checkpoints, but they failed to merge because there is not enough space on the disk (error 0x80070070). What can I do?
- Should checkpoints be used as a substitute for backups?
Windows server 2012 snapshot
 В предыдущих статьях мы установили и настроили наш SnapDrive, теперь немного его по эксплуатируем, а именно разберемся что такое snapshot и как его делать.
Снимок файловой системы или снапшот (от англ. SnapShot, [мгновенный снимок] ) — моментальный снимок, копия файлов и директорий файловой системы на определённый момент времени.
Создание и удаление снапшота в SnapDrive.
Открываем диспечер сервера-Управление дисками, SnapDrive. Выбираем понравившийся нам диск, либо правым кликом-Create Snapshot либо тот же пункт меню справа в панели Действия.
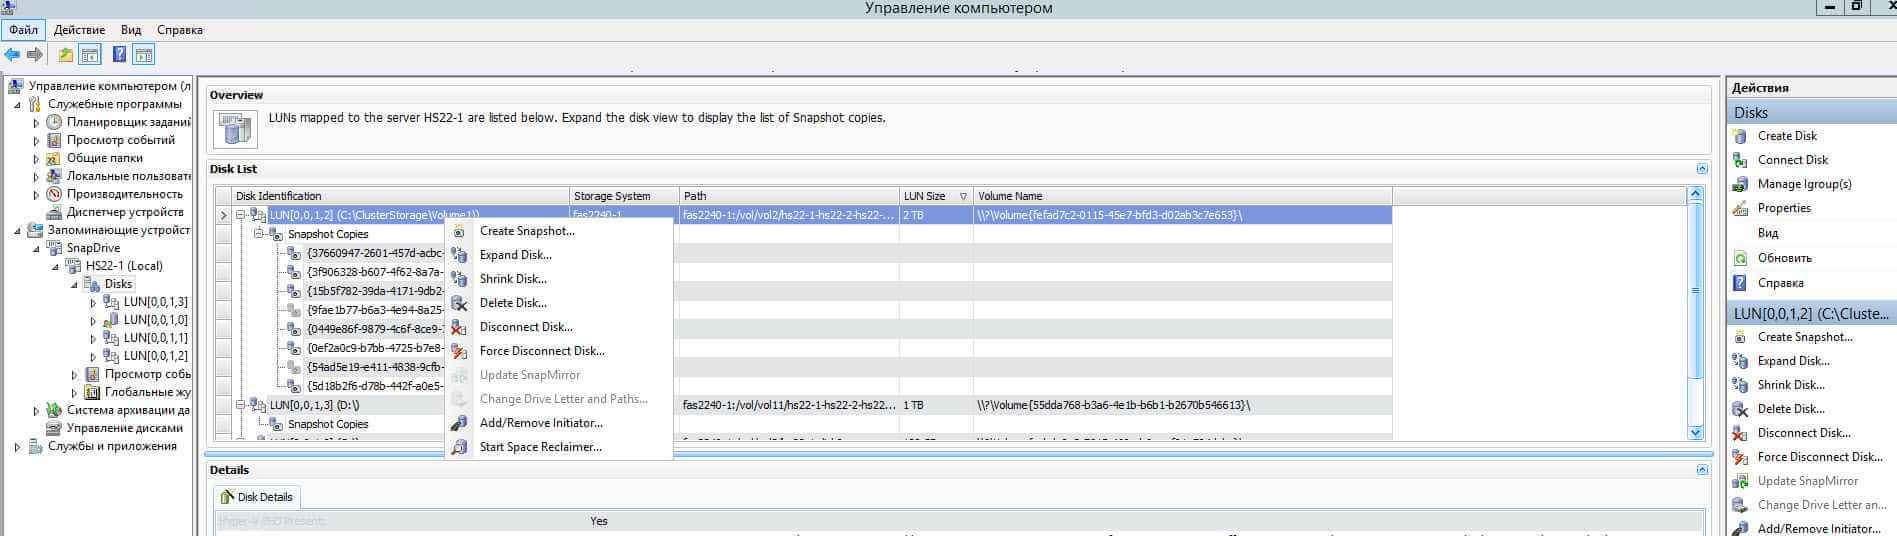
Как создать и удалить snapshot в SnapDrive и OnCommand System Manager в Windows Server 2008-02012 R2-01
Вводим имя, вводите понятные обдуманные имена.

Как создать и удалить snapshot в SnapDrive и OnCommand System Manager в Windows Server 2008-02012 R2-02
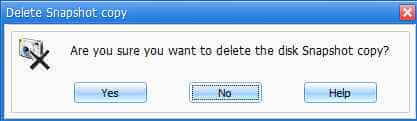
Видим, что наша операция выполнена успешно. Теперь удалим наш снимок, для этого действия теже правый клик или пункт меню Действия, Delete.
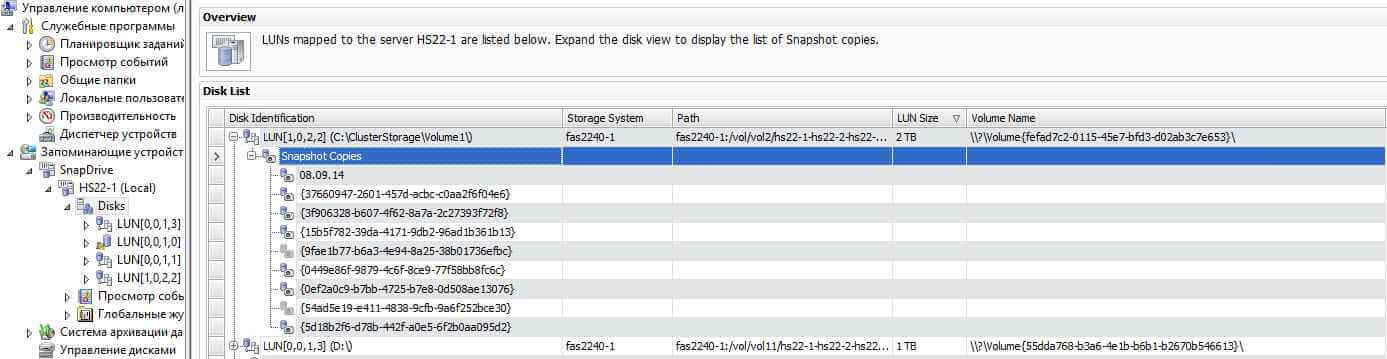
Как создать и удалить snapshot в SnapDrive и OnCommand System Manager в Windows Server 2008-02012 R2-03
Как создать и удалить snapshot в SnapDrive и OnCommand System Manager в Windows Server 2008-02012 R2-05
Как создать и удалить snapshot в SnapDrive и OnCommand System Manager в Windows Server 2008-02012 R2-06
Создание и удаление снапшота в OnCommand System Manager 3
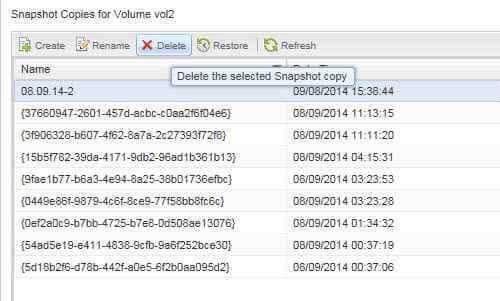
Открываем OnCommand System Manager идем в меню Storage-Volumes и выбираем нужный volume. Переходим в нем в меню snapshot.

Как создать и удалить snapshot в SnapDrive и OnCommand System Manager в Windows Server 2008-02012 R2-07
В snapshot Copies выбираем Create.
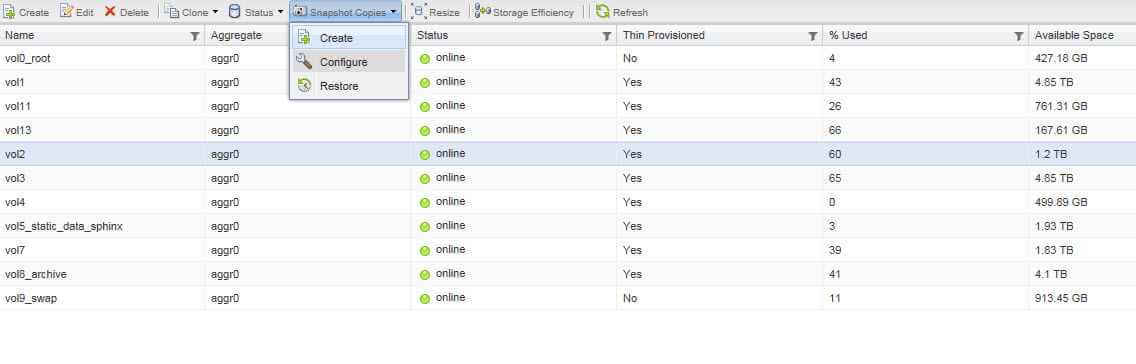
Как создать и удалить snapshot в SnapDrive и OnCommand System Manager в Windows Server 2008-02012 R2-08
Также вводим понятное имя.
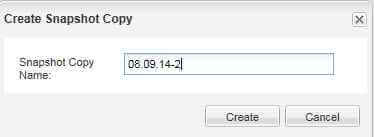
Как создать и удалить snapshot в SnapDrive и OnCommand System Manager в Windows Server 2008-02012 R2-09
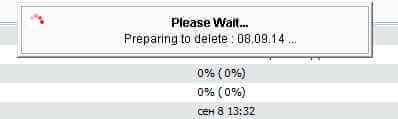
Видим что все создалось
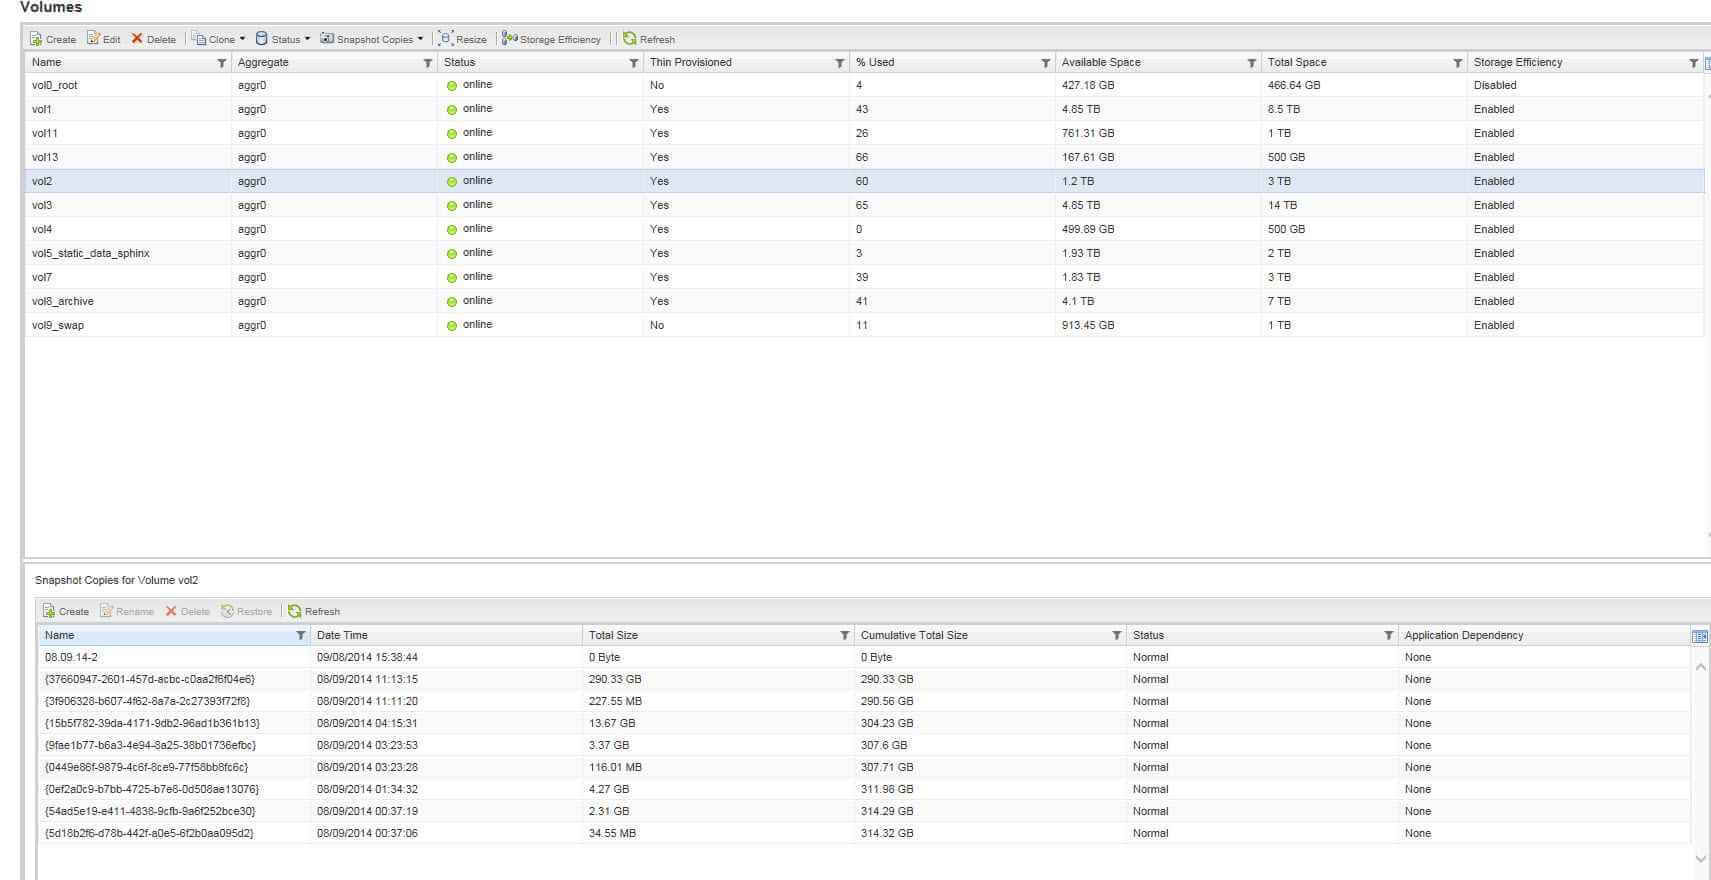
Как создать и удалить snapshot в SnapDrive и OnCommand System Manager в Windows Server 2008-02012 R2-10
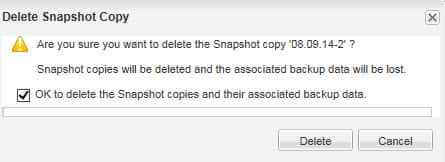
Для того чтобы удалит, выбирем нужный snapshot и жмем Delete.
Как создать и удалить snapshot в SnapDrive и OnCommand System Manager в Windows Server 2008-02012 R2-11
Как создать и удалить snapshot в SnapDrive и OnCommand System Manager в Windows Server 2008-02012 R2-12
Windows server 2012 snapshot
Служба теневого копирования томов – Volume Shadow Copy Service (VSS) впервые на платформе Windows появилась целых десять лет назад еще в Windows Server 2003, однако до сих пор далеко не все администраторы Windows используют функционал данной службы. Даже существует мнение, что при наличии грамотной политике резервного копирования использовать теневое копирование тома нецелесообразно. Однако это далеко не всегда так.
Возьмем в качестве примера файловый сервер с множеством каталогов и большим количеством пользователей, бэкап которого выполняется, допустим, ежедневно. Представим ситуацию, что пользователь в начале рабочего дня внес важные изменения в некий сверхкритичный документ, а в течении рабочего дня, случайно его модифицировал или удалил. Восстановить данный документ из резервной копии не получится, т.к. он в нее просто не попал. Настроить традиционный бэкап файлового сервера в течении рабочего дня технически затруднительно (да и сама процедура создания и восстановления из такого бэкапа может занять довольно много времени, усугубляющаяся использованием инкрементального или дифференциального бэкапа). В такой ситуации «спасти» положение может теневое копирование данных с помощью службы Volume Shadow Copy Service.
Эта статья посвящена настройке теневого копирования томов (Volume Shadow Copy) в новой серверной ОС Windows Server 2012.
Рассмотрим основные преимущества службы VSS по сравнению с классическими средствами резервного копирования данных:
Высокая скорость создания резервных копий
Возможность самостоятельного восстановления файлов пользователями (при наличии прав на запись в каталог)
Возможность копирования используемых (заблокированных) пользователями файлов
Небольшой размер копий (по информации MS около 30 Мб на 1 Гб данных)
Основные особенности работы службы теневого копирования томов
Что же такое теневая копия? По сути это снапшот (снимок) всей информации, хранящейся на диске. После создания теневой копии служба VSS начинает отслеживать изменение данных на диске. VSS разбивает все данные на блоки по 16Кб каждый, и если данные в таком блоке были изменены, служба записывает в файл теневой копии этот блок целиком. Таким образом получается, что при создании следующей теневой копии данных система не копирует данные целиком, а только лишь блочные изменения. Благодаря этому система теневого копирования позволяет существенно сэкономить место на диске. Теневые копии могут храниться на том же диске, на котором хранятся данные, либо на отдельном (решение для высоконагруженных систем с большой частотой изменения данных). Все файлы теневых копий хранятся в служебном каталоге System Volume Information. Эти файлы можно отличить по имени, все они содержат в имени идентификатор службы VSS — 3808876b-c176-4e48-b7ae-04046e6cc752.
Еще несколько особенностей VSS:
По-умолчанию максимальное количество хранимых снапшотов для диска – 64. При превышении этого значения, служба VSS начинает циклическую перезапись теневых копий, удаляя самые ранние снапшоты.
Под теневые копии система выделяет 10% емкости раздела, однако это значение можно изменить.
Теневое копирование включается для тома целиком, и включить его для отдельной общей папки невозможно.
Microsoft не рекомендует создавать снапшоты чаще, чем раз в час (однако, это всего лишь рекомендации).
Настройка теневого копирования сетевого каталога в Windows Server 2012
Попробуем настроить теневое копирование данных общей сетевой папки, расположенной на отдельном диске сервера с ОС Windows Server 2012.
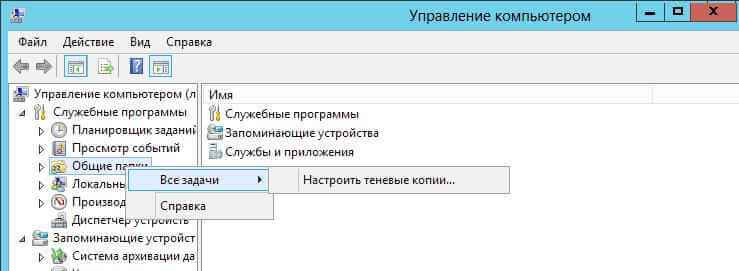
Откройте оснастку «Управление компьютером» («Computer Management»), разверните блок «Служебные программы», щелкните правой кнопкой мыши по элементу Общие папки и выберите Все задачи -> Настроить теневые копии.
Служба теневого копирования в Windows Server 2012R2-01
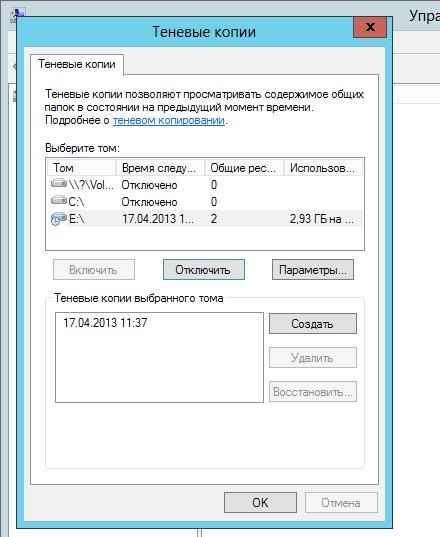
Затем нужно включить теневое копирование для раздела, на котором хранятся общие сетевые папки. Для этого выберите нужный том и нажмите кнопку «Включить». В этот момент будет создана первая теневая копия раздела (снапшот).
Служба теневого копирования в Windows Server 2012R2-02
Далее необходимо задать максимальный размер копий и периодичность (расписание) их создания. Нажмите кнопку Параметры.
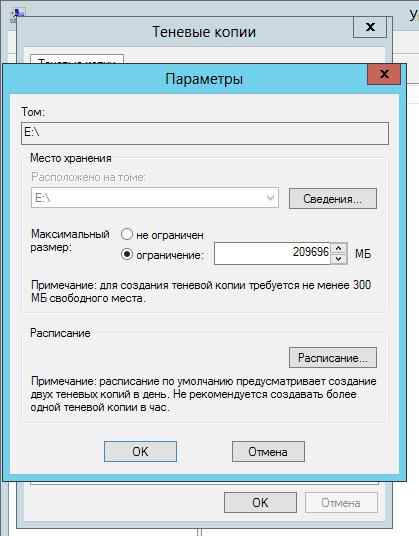
Служба теневого копирования в Windows Server 2012R2-03
В данном примере настроим создание теневых копий по следующей схеме: снапшоты общих папок должны создаваться ежедневно в течении рабочего дня (с 9:00 до 19:00) каждые 10 минут. Вы, естественно, основываясь на особенности бизнес-процессов компании, можете настроить собственное расписание.
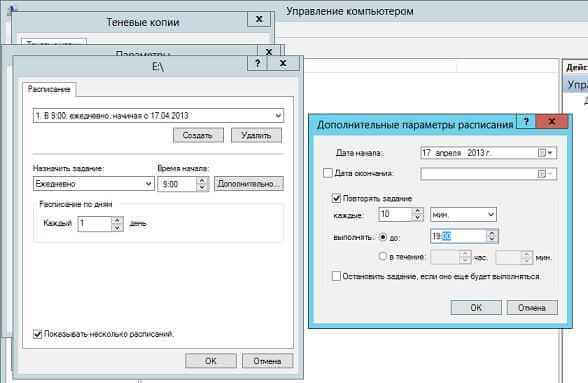
Служба теневого копирования в Windows Server 2012R2-04
Если через некоторое время открыть свойства общей папки и перейти на вкладку «Предыдущие версии», то можно увидеть список доступных на данный момент теневых копий.
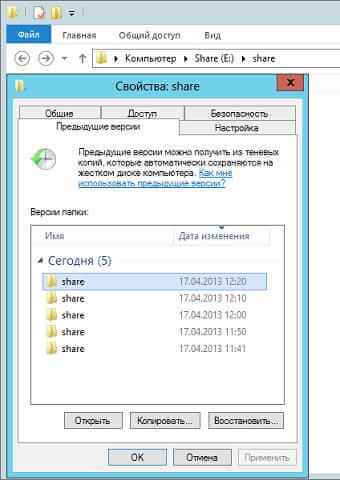
Служба теневого копирования в Windows Server 2012R2-05
Далее у пользователя есть три варианта действия: просмотреть содержимое копии (Открыть), скопировать данные из копии в другое место (Копировать) или восстановить данные с перезаписью (Восстановить)
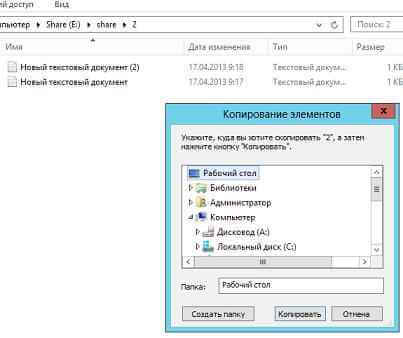
Служба теневого копирования в Windows Server 2012R2-06
При попытке восстановить содержимое копии на момент снапшота появится соответствующее предупреждение.
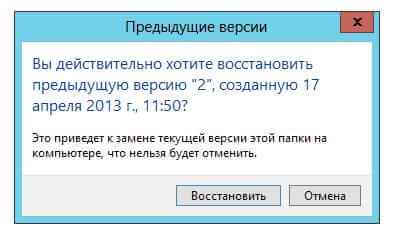
Служба теневого копирования в Windows Server 2012R2-07
VSS – отличное средство, позволяющее пользователям в течении дня оперативно и в удобной форме восстановить удаленный файл или откатиться к предыдущей версии документа. Нужно не забывать, что теневое копирование не отменяет необходимость выполнения классического резервного копирования данных, позволяющего восстановить данные даже в случае аппаратного сбоя.
Отметим также, что функция теневого копирования в Windows 8 была заменена на функцию File History
Checkpoints and Snapshots Overview
Applies To: Windows Server 2012 R2
Virtual machine checkpoints (formerly known as virtual machine snapshots) capture the state, data, and hardware configuration of a running virtual machine.
In Windows Server 2012 R2, virtual machine snapshots were renamed to virtual machine checkpoints in Hyper-V manager to match the terminology used in System Center Virtual Machine Management. For clarity, this document will refer to virtual machine snapshots as checkpoints. For information about the new production checkpoints in the Windows Server® 2016 Technical Preview and Windows 10®, see What’s New in Hyper-V in Technical Preview: Production checkpoints.
Checkpoints provide a fast and easy way to revert the virtual machine to a previous state. For this reason, virtual machine checkpoints are intended mainly for use in development and test environments. Having an easy way to revert a virtual machine can be very useful if you need to recreate a specific state or condition so that you can troubleshoot a problem.
There are certain circumstances in which it may make sense to use checkpoints in a production environment. For example, you can use checkpoints to provide a way to revert a potentially risky operation in a production environment, such as applying an update to the software running in the virtual machine.
For information about a new type of checkpoints in Windows Server 2016 Technical Preview and Windows 10 that were created for use in a production environment, see What’s New in Hyper-V in Technical Preview: Production checkpoints. For the most current version of this content, see Choose between standard or production checkpoints in Hyper-V and Enable or disable checkpoints in Hyper-V.
This topic contains the following information about standard checkpoints:
Considerations
Keep the following considerations in mind, especially if you plan to use checkpoints on a virtual machine in a production environment:
The presence of a virtual machine checkpoint reduces the disk performance of the virtual machine.
We do not recommend using checkpoints on virtual machines that provide time-sensitive services, or when performance or the availability of storage space is critical.
Microsoft does not support the use of checkpoints on virtual machines running the Active Directory Domain Services role (also known as “domain controllers”) or the Active Directory Lightweight Directory Services role in Windows Server 2008 or Windows Server 2008 R2. For more information, see Operational Considerations for Virtualized Domain Controllers (https://go.microsoft.com/fwlink/?LinkId=159631).
Checkpoint files
Checkpoint files are stored in several locations:
| VM Setting | Default location | Contents |
|---|---|---|
| Checkpoint File Location | %systemroot%\ProgramData\Microsoft\Windows\Hyper-V\Snapshots | This folder will contain the .xml configuration file for each checkpoint using the checkpoint GUID as the file name. There will also be sub-folder created using the checkpoint GUID as the name (\Snapshots\GUID). — If the virtual machine was not running when the checkpoint was created, this folder will be empty. If the virtual machine has no checkpoints, you can change where these checkpoint files are stored. |
| The path specified in the VM settings under Virtual Hard Disk > Hard Drive | Location: C:\Users\Public\Documents\Hyper-V\Virtual Hard Disks\ for Windows Server 2012 R2 and Windows 8.1 В C:\ProgramData\Microsoft\Windows\Hyper-V\New Virtual Machine\Virtual Hard Disks for Windows Server 2012 and Windows 8. | This is the path to the folder containing the original .vhdx file and an .avhdx file for each checkpoint. You can specify any location for the .vhdx and the .avhdx files are always created in the same location as their parent .vhdx files. |
Checkpoint Process
.jpeg)
Creating a checkpoint
.jpeg)
Deleting a checkpoint
.jpeg)
Applying a checkpoint
.jpeg)
Frequently asked questions
I’ve taken multiple checkpoints and now my virtual machine pauses automatically. Hyper-V Manager shows the status as вЂpaused-critical’. How can I fix this?
This problem occurs when you have run out of space on the physical storage where the virtual machine snapshot files are stored. Note that this may be on a different drive than where the virtual hard disk is stored.
To fix the problem, create additional space on the drive by deleting unused data. For example, if you do not need to keep some of the checkpoints, you can delete the checkpoints individually. Make sure to use Hyper-V Manager to delete the checkpoints. Do not delete the .ahvd files directly.
I’ve tried to delete checkpoints, but they failed to merge because there is not enough space on the disk (error 0x80070070). What can I do?
If possible, free up storage space on the volume where the .vhdx file is located. If you cannot free up space on the current volume, you can use storage migration to move the storage to a location with more space while the virtual machine is still running. For more information, see Storage migration.
You can also export the virtual machine to a volume that has sufficient disk space to allow the merge to complete. The process of exporting the virtual machine to delete checkpoints consists of the following steps:
Export the virtual machine to a location that has sufficient storage space. The location should be a different volume on the same host to avoid configuration problems.
Delete the virtual machine from the Hyper-V Management console.
Import the virtual machine using the Register import type. This imports the virtual machine in-place and keeps the same unique ID.
If you want to move the virtual machine back to the original location, free up additional space on the original volume.
Import the virtual machine back to the original location. For this, you can use the Restore import type, which copies the virtual machine files to the default location for the host.
For more information about exporting and importing virtual machines, see: Export and import VM.
Should checkpoints be used as a substitute for backups?
No, because virtual machine checkpoints are not the same as backups created by a Volume Shadow Copy Service (VSS) writer. We do not recommend using virtual machine checkpoints as a permanent data or system recovery solution. A backup solution helps provide protection that is not provided by checkpoints.
Even though virtual machine checkpoints provide a convenient way to store different points of system state, data, and configuration, there are some inherent risks of unintended data loss if they are not managed appropriately. Checkpoints do not protect against problems that may occur on the host, such as a hardware malfunction on the physical computer or a software-related issue in the management operating system. Also, applications that run in a virtual machine are not aware of the snapshot, and will not be able to adjust appropriately. For example, if you used a virtual machine snapshot to restore an Exchange server, the server would expect the same set of client connections that were present when the snapshot was taken.
For more information about backing up Hyper-V and its virtual machines, see Back up and restore.


