- Install OpenSSH
- Install OpenSSH using Windows Settings
- Install OpenSSH using PowerShell
- Start and configure SSH Server
- Connect to SSH Server
- Uninstall OpenSSH using Windows Settings
- Uninstall OpenSSH using PowerShell
- Установка сервера OpenSSH на Windows Server
- Установка пакета OpenSSH
- SSH авторизация в Windows по паролю
- SSH с аутентфикацией по ключу
- Подключение с клиента через модуль Posh-SSH
- Подключение к Windows по SSH с помощью встроенного OpenSSH
- Установка сервера OpenSSH в Windows
- Настройка SSH сервера в Windows
- Sshd_config: Конфигурационный файл сервера OpenSSH
- Подключение к Windows 10 через SSH
- Download and install OpenSSH
- Allow access in Windows Firewall
- Connect to Windows via SSH
- Accessing files via SFTP
Install OpenSSH
Applies to Windows Server 2019, Windows 10
OpenSSH is a connectivity tool for remote login that uses the SSH protocol. It encrypts all traffic between client and server to eliminate eavesdropping, connection hijacking, and other attacks.
OpenSSH can be used to connect Window 10 clients to Windows Server 2019. OpenSSH Client is available to install on Windows 10 build 1809 and later, while OpenSSH Server is available to install on Windows Server 2019 and later.
If you downloaded OpenSSH from the GitHub repo at PowerShell/openssh-portable, follow the instructions listed there, not the ones in this article.
Install OpenSSH using Windows Settings
Both OpenSSH components can be installed using Windows Settings. OpenSSH Server is installed on Windows Server and OpenSSH Client is installed on Windows 10 devices.
To install the OpenSSH components:
Open Settings, select Apps > Apps & Features, then select Optional Features.
Scan the list to see if the OpenSSH is already installed. If not, at the top of the page, select Add a feature, then:
- On Windows 10, find OpenSSH Client, then click Install
- On Windows Server 2019, find OpenSSH Server, then click Install
Once setup completes, return to Apps > Apps & Features and Optional Features and you should see OpenSSH listed.
Installing OpenSSH Server will create and enable a firewall rule named OpenSSH-Server-In-TCP . This allows inbound SSH traffic on port 22. If this rule is not enabled and this port is not open, connections will be refused or reset.
Install OpenSSH using PowerShell
To install OpenSSH using PowerShell, run PowerShell as an Administrator. To make sure that OpenSSH is available, run the following cmdlet:
This should return the following output:
Then, install the server or client components as needed:
Both of these should return the following output:
Start and configure SSH Server
To start and configure OpenSSH server for initial use, open PowerShell as an administrator, then run the following commands to start the SSHD service :
Connect to SSH Server
Once installed, you can connect to OpenSSH Server from a Windows 10 device with the SSH client installed using PowerShell as follows. Be sure to run PowerShell as an administrator:
Once connected, you get a message similar to the following:
Selecting yes adds that server to the list of known ssh hosts on your Windows client.
You are prompted for the password at this point. As a security precaution, your password will not be displayed as you type.
Once connected, you will see the Windows command shell prompt:
Uninstall OpenSSH using Windows Settings
To uninstall OpenSSH using Windows Settings:
- Open Settings, then go to Apps > Apps & Features.
- Go to Optional Features.
- In the list, select OpenSSH Client or OpenSSH Server.
- Select Uninstall.
Uninstall OpenSSH using PowerShell
To uninstall the OpenSSH components using PowerShell, use the following commands:
You may need to restart Windows afterwards if the service was in use at the time it was uninstalled.
Установка сервера OpenSSH на Windows Server
В этой статье мы рассмотрим, как установить SSH сервер (OpenSSH) на Windows Server и использовать его для удаленного управления сервером с помощью PowerShell по протоколу SSH.
Для удаленного управления компьютерами и серверами через PowerShell можно воспользоваться возможностями протокола WinRM, однако для более гладкого стыка с Linux системами удобнее использовать единый протокол удаленного управления — SSH. Одним из проектов команды Microsoft, занимающейся разработкой функционала PowerShell, является портирование популярного открытого сервера OpenSSH на Windows системы. Проект называется Win32-OpenSSH
Установка пакета OpenSSH
Сервер Win32-OpenSSH для Windows можно установить, скачав дистрибутив с GitHub (https://github.com/PowerShell/Win32-OpenSSH), либо (гораздо проще), установив его через менеджер пакетов Chocolatey.
Если Chocolatey еще не установлен, установить его можно следующими командами PowerShell:
Set-ExecutionPolicy Unrestricted
iwr https://chocolatey.org/install.ps1 -UseBasicParsing | iex
Установка OpenSSH сервера после этого выполняется командой:
choco install openssh -params ‘»/SSHServerFeature /KeyBasedAuthenticationFeature»‘ –y
Данная команда выполнит установку как SSH сервера, так и клиента. Если нужно установить только клиент, нужно убрать аргумент param.
Сценарий установки автоматически создаст правило файервола, разрешающее подключение на 22 порт, и запустит службы sshd и ssh-agent.
Примечание. Если правило по каким-то причинам не создалось, вы можете создать его командой:
New-NetFirewallRule -Protocol TCP -LocalPort 22 -Direction Inbound -Action Allow -DisplayName SSH
Для перезагрузки переменных окружения, выполните команду:
SSH авторизация в Windows по паролю
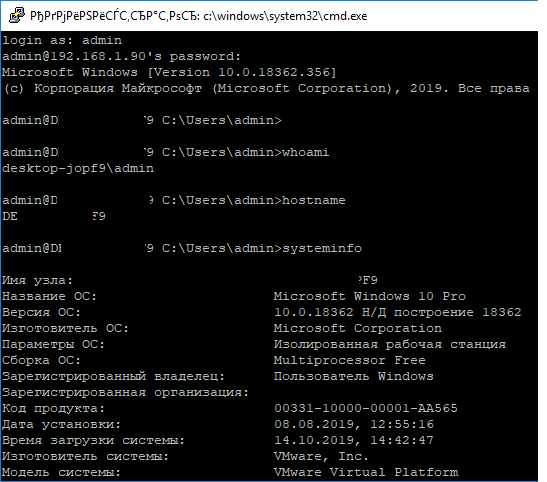
Для удаленного подключения к данному SSH серверу под локальным пользователем user1, воспользуйтесь такой командой:
После запуска команды, для авторизации нужно указать пароль пользователя user1. Если SSH-сервер включен в домен, можно авторизоваться и под пользователем Active Directory. Имя пользователя в этом случае указывается в формате domain\domain_user_name или domain_user_name@domain.
ssh –l domain_user_name@domain remotehost
SSH с аутентфикацией по ключу
Для беспарольного входа можно использовать авторизацию на сервере SSH по ключу. Сначала нужно сгенерировать ключ на клиенте (в процессе нужно указать ключевую фразу)
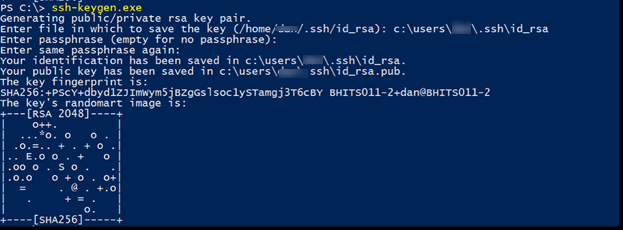
В результате в каталоге пользователя c:\users\username\.ssh появится два файла id_rsa и id_rsa.pub.
Теперь нужно запустить службу ssh-agent
И добавить в настройки агента путь к нашему закрытому ключу:
Затем нужно разрешить аутентфикацию по этому ключу на стороне сервера. Для этого, скопируйте файл открытого ключа(id_rsa.pub) на SSH сервер в файл C:\users\username\.ssh\authorized_keys. Либо, при наличии администартивного доступа сразу на обоих системах, скопировать файл можно так:
cat c:\users\username\.ssh\id_rsa.pub | Add-Content ‘\\192.168.1.100\c$\users\username\.ssh\authorized_keys’
Теперь службе сервера SSH нужно дать право на чтение данных их каталога.ssh.
icacls C:\users\username\.ssh /grant «NT Service\sshd:R» /T
Теперь можно подключится SSH-клиентом к серверу, указав параметр –i и путь к закрытому ключу:
Ssh –I c:\users\username\.ssh\id_rsa –l user@domain 192.168.1.100 
По умолчанию открывается командная строка cmd, но можно запустить и PowerShell:

Подключение с клиента через модуль Posh-SSH
Для удаленного подключения к SSH серверу, модуль Posh-SSH используется следующим образом:
Подключаемся к серверу с сохранением сессии и указанием ключа:
New-SSHSession myclient -KeyFile «c:\data\MyKeyPair.pem»
Выполним команду ifconfig в сессии с ID 0.
Invoke-SSHCommandStream «ifconfig» -SessionId 0
Для завершения сеанса, выполните:
Invoke-SSHCommand -SessionId 0 -Command «logout»
Подключение к Windows по SSH с помощью встроенного OpenSSH
Начиная с Windows 10 1809 и Windows Server 2019 в операционной системе имеется встроенный SSH сервер, основанный на OpenSSH. В этой статье мы покажем, как установить и настроить OpenSSH сервер в Windows 10 и подключиться к нему удаленно по защищенному SSH протоколу (ну прям как в Linux 🙂 ).
Установка сервера OpenSSH в Windows
Рассмотрим, как установить компонент OpenSSH Server в Windows 10 1903 (Windows Server 2019 все выполняется аналогично).
Пакет OpenSSH (как и RSAT) уже включен в данные версии Windows в виде Feature on Demand (FoD).
При наличии прямого Интернет-подключения вы можете установить сервер OpenSSH с помощью PowerShell
Add-WindowsCapability -Online -Name OpenSSH.Server*
Или при помощи DISM:
dism /Online /Add-Capability /CapabilityName:OpenSSH.Server
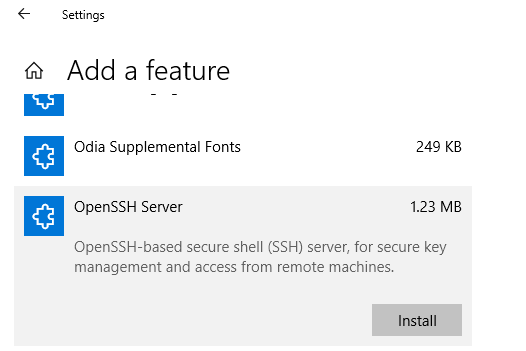
В Windows 10 этот компонент также можно установить через панель Параметры (Приложения -> Управление дополнительными компонентами -> Добавить компонент). Найдите в списке Open SSH Server и нажмите кнопку Install).
Чтобы проверить, что OpenSSH сервер установлен, выполните:
Get-WindowsCapability -Online | ? Name -like ‘OpenSSH.Ser*’

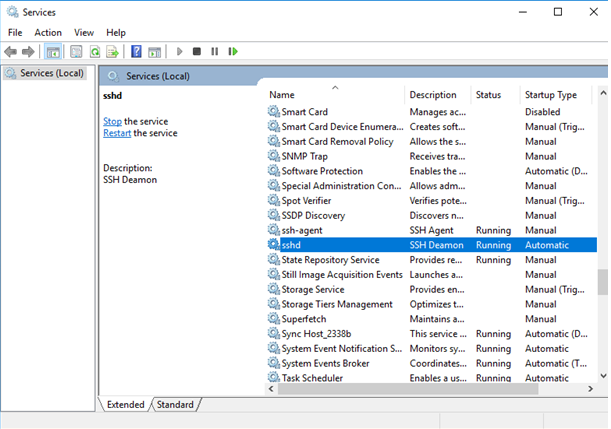
Настройка SSH сервера в Windows
После уставной сервера OpenSSH в Windows вам нужно изменить тип запуска службы sshd на автоматический и запустить службу с помощью PowerShell:
Set-Service -Name sshd -StartupType ‘Automatic’
Start-Service sshd

С помощью nestat убедитесь, что теперь в системе запущен SSH сервер и ждет подключений на 22 порту:
netstat -na| find «:22»

Проверьте, что включено правило брандмауэра (Windows Defender Firewall), разрешающее входящие подключения к Windows по порту TCP/22.
Get-NetFirewallRule -Name *OpenSSH-Server* |select Name, DisplayName, Description, Enabled

Если правило отключено (состоянии Enabled=False) или отсутствует, вы можете создать новое входящее правило командой New-NetFirewallRule:
New-NetFirewallRule -Name sshd -DisplayName ‘OpenSSH Server (sshd)’ -Enabled True -Direction Inbound -Protocol TCP -Action Allow -LocalPort 22
По умолчанию важным компоненты OpenSSH хранятся в следующих каталогах:
- Исполняемые файлы OpenSSH Server: C:\Windows\System32\OpenSSH\
- Конфигурационный файл sshd_config (создается после первого запуска службы): C:\ProgramData\ssh
- Журнал OpenSSH: C:\windows\system32\OpenSSH\logs\sshd.log
- Файл authorized_keys и ключи: %USERPROFILE%\.ssh\
При установке OpenSSH сервера в системе создается новый локальный пользователь sshd.
Sshd_config: Конфигурационный файл сервера OpenSSH
Вы можете изменить настройки сервере OpenSSH в конфигурационном файле %programdata%\ssh\sshd_config.
Например, чтобы запретить SSH подключение для определенного доменного пользователя (и всех пользователей указанного домена), добавьте в конце файле директивы:
Чтобы разрешить подключение только для определенной доменной группы:
Либо можете разрешить доступ для локальной группы:
Можно запретить вход под учетными записями с правами администратора, в этом случае для выполнения привилегированных действий в SSH сессии нужно делать runas.
Следующие директивы разрешают SSH доступ по ключам (доступ к Windows через SSH по ключам рассмотрим подробно в следующей статье) и по паролю:
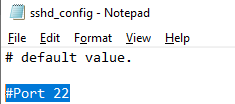
Вы можете изменить порт, на котором принимает подключения OpenSSH в конфигурационном файле sshd_config в директиве Port.
Подключение к Windows 10 через SSH
Теперь вы можете попробовать подключиться к своей Windows 10 через SSH клиент (я использую putty, но можно пользоваться встроенным ssh клиентом Windows).
При первом подключении появится стандартный запрос на добавление узла в список известных SSH хостов.
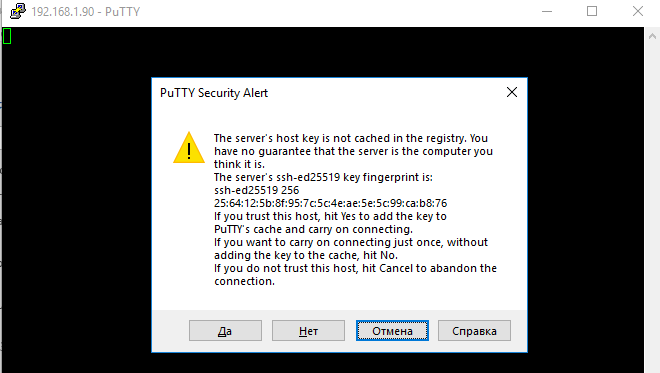
Нажимаем Да, и в открывшееся окне авторизуемся под пользователем Windows.
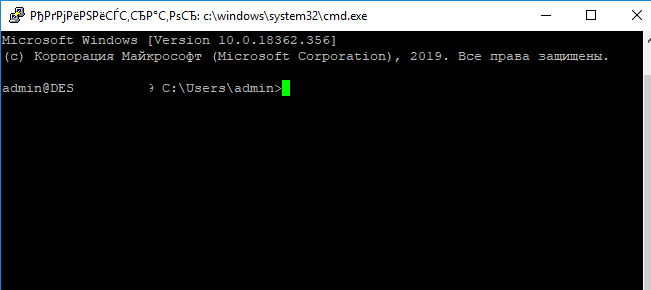
При успешном подключении запускается командная оболочка cmd.exe со строкой-приглашением.
В командной строке вы можете выполнять различные команды, запускать скрипты и программы.
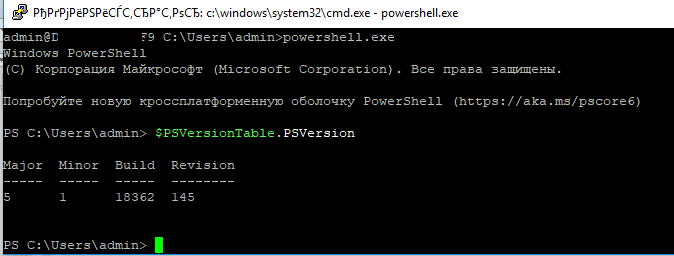
Я предпочитаю работать в командной строке PowerShell. Чтобы запустить интерпретатор PowerShell, выполните:
Чтобы изменить Shell по умолчанию в OpenSSH с cmd.exe на PowerShell, внесите изменение в реестр такой командой:
New-ItemProperty -Path «HKLM:\SOFTWARE\OpenSSH» -Name DefaultShell -Value «C:\Windows\System32\WindowsPowerShell\v1.0\powershell.exe» -PropertyType String –Force
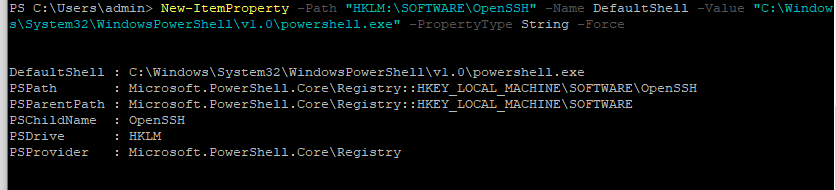
Осталось перезапустить SSH подключение и убедиться, что при подключении используется командный интерпретатор PowerShell (об этом свидетельствует приглашение PS C:\Users\admin> ).
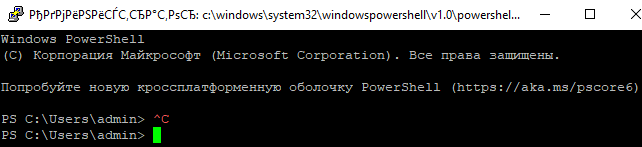
В SSH сессии запустилась консоль PowerShell, в которой работают привычные функции: авто дополнение, раскраска модулем PSReadLine, история команд и т.д. Если текущий пользователь входит в группу локальных администраторов, то все команды в его сессии выполняются с повышенными правами даже при включенном UAC.
Download and install OpenSSH
Log in to your VM via RDP
Download the newest OpenSSH server from GitHub ( https://github.com/PowerShell/Win32-OpenSSH/releases )
In our case it is v8.1.0.0p1-Beta, 64-bit version. 
If you can not download the file you can change security settings. 
Go to «Control Panel» → «Network and Internet» → «Internet Options» and choose «Security» tab. 
Click the Custom level. button. 
Find the «Downloads» section and change the «File download» option to «Enable» then click OK. 
Confirm by clicking Yes then click Apply. 
Now you can download the file. 
Open the downloaded file and copy the «OpenSSH-Win64» folder to «C:\Program Files». 
Go to «C:\Program Files\OpenSSH-Win64» and edit the «sshd_config_default» file. 

Find and uncomment following lines by removing the «#» at the beginning then save the file.
After the changes it should be:
Now you have to modify system environment variable.
To do it run Windows PowerShell as administrator . 
. and type the following command:
You should see the output «SUCCESS: Specified value was saved.». 
Change to the OpenSSH directory and run the install script.

Enable automatic startup and start «sshd» and «ssh-agent» services.
Allow access in Windows Firewall
We have to add new firewall rule to open port which we will use to connect via SSH, default is 22.
To add the rule just run the following command in Windows PowerShell.

Connect to Windows via SSH
From Linux
Connect to the VM by typing the following command in terminal. Remember to type your VM’s IP address.
Type the password.
If you are connected you should be in Administrator’s home directory.

From Windows (via Putty)
Open Putty and create new session. Complete the fields as below.
Host Name for IP address: Administrator@
Port: 22
Connection type: SSH
Saved Sessions:
Click Save button.

Double click on your new saved session to connect then click Yes.

Now you are connected to your Windows VM via SSH. 
Accessing files via SFTP
WinSCP
Prerequirements
- WinSCP must be installed
Open WinSCP and click New Session. 
Complete fields as below and click Save.
Host name:
Port number: 22
User name: Administrator
Password:

Click OK. You can also save your password. 
Confirm by clicking Yes. 
Now you can browse your files. 


