- DHCP Server Migration: Migrating the DHCP Server Role
- Migrating DHCP Server to the destination server
- To migrate DHCP Server to the destination server
- Migrating DHCP Server from the source server
- To migrate DHCP Server from the source server
- Destination server final migration steps
- Linux и Windows: помощь админам и пользователям
- Администрируем и настраиваем Windows, Linux.
- Пошаговая инструкция по миграции DHCP сервера с Windows server 2003 на Windows server 2008
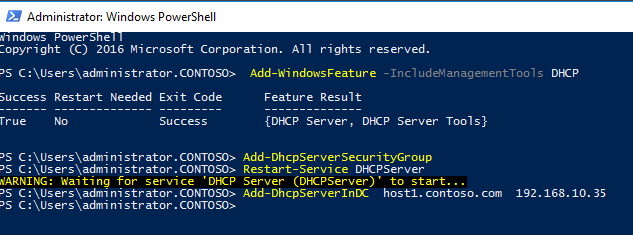
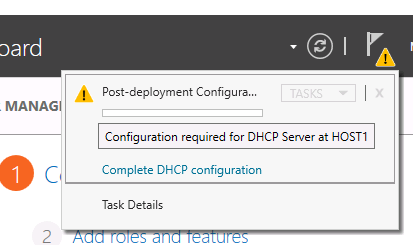
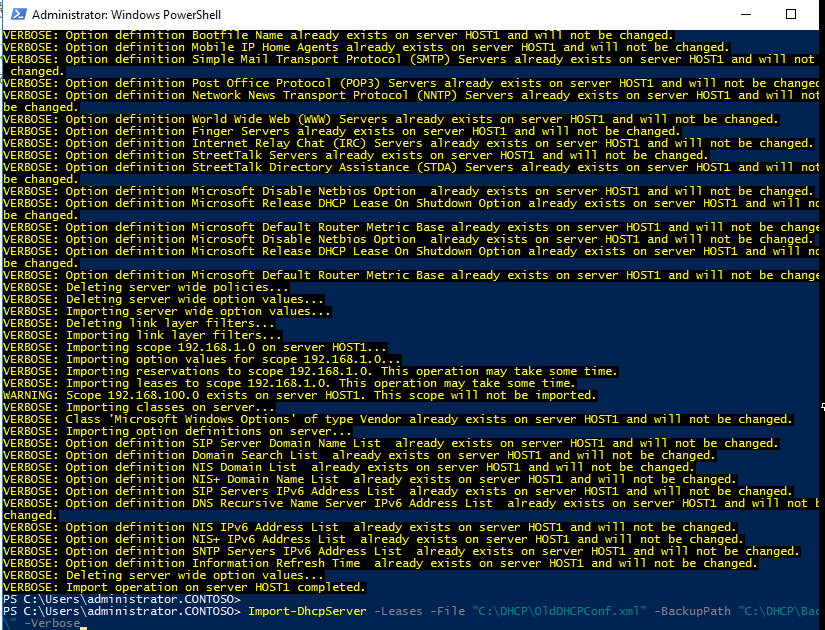
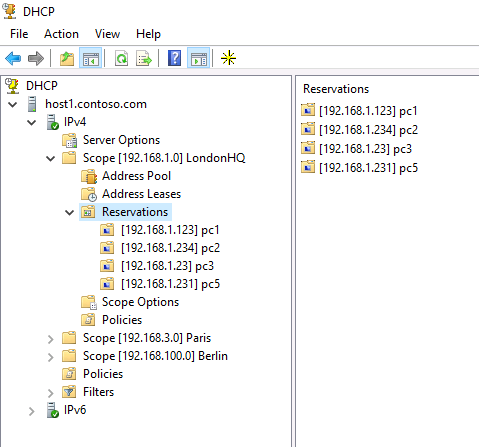
- Миграция DHCP сервера на Windows Server 2016
DHCP Server Migration: Migrating the DHCP Server Role
Applies To: Windows Server 2008, Windows Server 2012 R2, Windows Server 2012
Complete the following procedures to migrate a DHCP Server.
Migrating DHCP Server to the destination server
Membership in Domain Administrators or equivalent is the minimum required to complete these procedures. Review details about how to use the appropriate accounts and group memberships at Run a program with administrative credentials (https://go.microsoft.com/fwlink/?LinkId=131210).
To migrate DHCP Server to the destination server
If it is not already installed, install DHCP Server on the destination server, as previously described in the “Prepare the destination server” section in DHCP Server Migration: Preparing to Migrate.
If it is running, stop the DHCP Server service by running the following command:
If you are unsure whether the service is running, you can check its state by running the following command:
Migrating DHCP Server from the source server
Follow these steps to migrate DHCP Server from the source server.
To migrate DHCP Server from the source server
Open a Windows PowerShell session with elevated user rights. To do this, click Start, click All Programs, click Accessories, open the Windows PowerShell folder, right-click Windows PowerShell, and then click Run as administrator.
Load Windows Server Migration Tools into your session.
If you opened the current session by using the Windows Server Migration Tools shortcut on the Start menu, skip this step, and go to step 3. Only load the Windows Server Migration Tools snap-in in a session that was opened by using some other method, and into which the snap-in has not already been loaded. To load Windows Server Migration Tools, type the following, and then press Enter.
Collect data from the source server by running the Export-SmigServerSetting cmdlet as an administrator. The Export-SmigServerSetting cmdlet parameters can collect all source DHCP server data in a single file (Svrmig.mig). Or, the Export-SmigServerSetting cmdlet can be run multiple times, with each iteration using one or more parameters to collect and store data in multiple Svrmig.mig files. For more information, see DHCP Server Migration: Preparing to Migrate. Before you run this command, review the following:
When you run the command in step 4, you are prompted to provide a password to encrypt the migration store data. You must provide this same password to import from the migration store.
The path parameter can be an empty or nonempty directory. The actual data file in the directory (Svrmig.mig) is created by the Export-SmigServerSetting cmdlet. Therefore, the user does not have to specify a file name.
If the path is not a shared location that the destination server can read from, you must manually copy the migration store to the destination server or a location that the destination server can access.
If a migration store location already exists and you want to rerun the Export-SmigServerSetting cmdlet, you must move the Svrmig.mig file from that location and store it elsewhere, rename or first delete the migration store.
You can perform both IP and DHCP Server migration at the same time from a Windows PowerShell prompt by using the Export-SmigServerSetting cmdlet combined with the IPConfig switch, on a single command line.
Additional command line parameter information:
-Users and -Group parameters
The -Users parameter must be specified only if the DHCP Administrators group includes local users. Otherwise, you can use the -Group parameter and all members of DHCP administrators will be migrated. Administrator group members can include domain users.
If the source server is a domain controller, but the destination server is not, Domain Local groups are migrated as local groups, and domain users are migrated as local users.
The -IPConfig parameter collects IP information when it is used with the Export-SmigServerSetting cmdlet on the source server; the -IPConfig parameter applies settings when the Import-SmigServerSetting cmdlet is used on the destination server.
If the source DHCP Server has multiple network adapters and the DHCP server service is bound to more than one network adapter and serving IP addresses on different subnets, the destination DHCP Server must also have multiple network adapters so that it can serve the same subnets as the source DHCP Server. For more information, see Migrate IP Configuration to Windows Server 2012. Because IP configuration details will be used later when importing IP configuration settings to the destination server, it is a best practice to save the IP configuration settings by using the following command:
The Import-SmigServerSetting cmdlet requires you to map the source physical address to the destination physical address.
The destination server can be assigned the same static IP address as the source server, unless other roles on the source server must continue to run on it. In that case, the static IP address of the destination server can be any unallocated static IP address in the same subnet as the source server.
On the source server, run the Export-SmigServerSetting cmdlet, where is the path that will contain the Svrmig.mig file after this step is completed. An example of the path is \\fileserver\users\username\dhcpstore.
For more information about how to export IP configuration settings, see Migrate IP Configuration to Windows Server 2012.
On the source server, delete the DHCP authorization for the source DHCP server by running the following command, where Server FQDN is the fully qualified domain name (FQDN) of the DHCP server and Server IPAddress is the IP address of the server. The command parameters are case-sensitive and must appear exactly as shown.
Destination server final migration steps
Return to the destination server and follow these steps to complete the migration.
Before you use the Import-SmigServerSetting cmdlet to import the DHCP server settings, be aware of the following conditions:
You can either use a single command line with all the parameters to import DHCP settings (as when you export data from the source server) or you can use the Import cmdlet multiple times to import data one parameter at a time.
If you decide to run the Import-SmigServerSetting cmdlet separately to import the IP settings, see Migrate IP Configuration to Windows Server 2012. Use the source IPSettings.txt file, referred to in step 3 of the previous procedure. You will map the source physical addresses to the destination physical addresses in step 3 of this procedure.
If you will be importing role and IP settings separately, you should import IP settings first to avoid any IP conflicts. You can then import the DHCP role.
If the DHCP Administrators group includes local users, then use the -Users parameter combined with the -Group parameter to import local users into the DHCP Administrators group. If it only contains domain users, then use only the -Group parameter.
.jpeg) Security Note Security Note |
|---|