- How to Use Disk Management in Windows Server 2012?
- Content
- Overview of Disk Management in Windows Server 2012
- How to use Disk Management in Windows Server 2012?
- Windows Server 2012 DM alternative: AOMEI Partition Assistant Server
- Conclusion
- How to Effectively Use Disk Management in Windows Server 2016пјџ
- Content
- Open Disk Management in Windows Server 2016
- Method 1: Open it from the Quick Start Menu
- Method 2: Launch Disk Management from Run box
- Method 3: Access Disk Management from Computer Management
- How to use Windows Server 2016 Disk Management?
- Windows 2016 Disk Management alternative
How to Use Disk Management in Windows Server 2012?
This article will introduce you the Disk Management in Windows Server 2012. Here you can learn how to open it and how to use it for partitioning hard drive.

By Cherry  / Last Updated August 5, 2020
Content
Overview of Disk Management in Windows Server 2012
Want to partition hard dive in Windows Server 2012 with the disk partition tool Disk Management? You need to know it before using.
Windows Server 2012 Disk Management is a built-in tool for users to manage hard drive on the Server 2012. Its main features are listed below:
Connect and initialize disks.
Create a basic, spanned, or striped partition.
Delete volumes or partitions.
Format a volume or partition with ExFAT, NTFS, or ReFS.
Convert the empty basic disk to dynamic or to GPT/MBR partition style.
Extend and shrink NTFS volumes or partitions.
With all the features, it is convenient for Windows Server 2012 users to manage hard drives. Most of the operations can be finished without reboot or interruption.
How to use Disk Management in Windows Server 2012?
But how to use Disk Management in Windows Server 2012? First, you need to open this tool. To open Disk Management in Server 2012, here provides you three different ways.
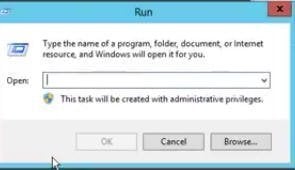
1. Right-click Start menu. Select Run program. In the Run dialog, type diskmgmt.msc and press Enter key. It will show you the Disk Management window.
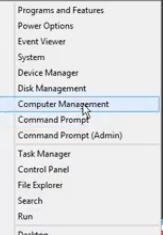
2. You can also right-click the Start menu, select Computer Management program here directly and click it. The Disk Management tool will be opened immediately.
3. Or you can open the Windows File Explorer, in the following window, right-click Computer, select Manage.
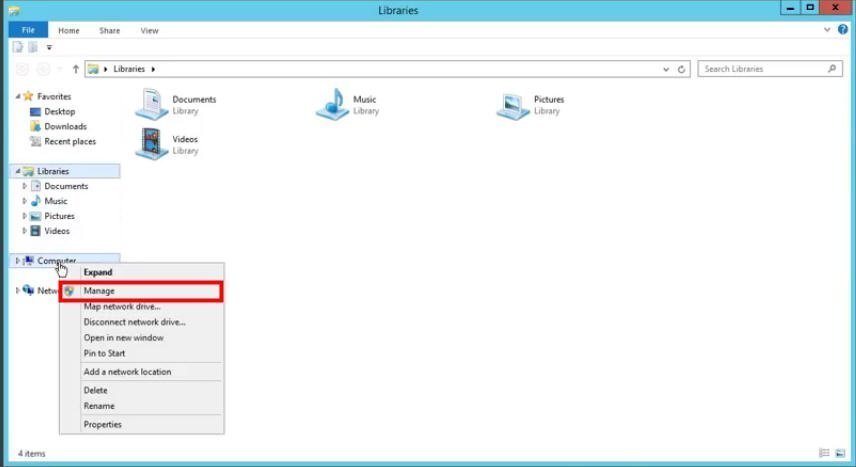
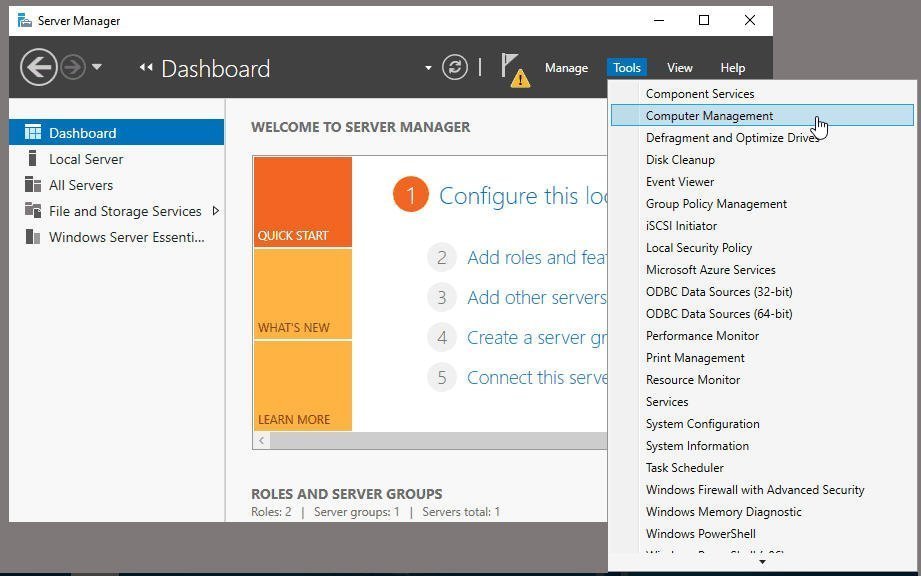
It will show you a Server Manager window, click Tools -> Computer Management to open the program.
After opening the Disk Management, you can start to use it to partition hard drive for Server 2012. You can right-click on a disk or partition, and then, it will display a menu listing all options for different operations. For example, to extend partition with Disk Management:
In the following screenshot, we are going to extend E: drive with the unallocated space behind it. Right-click E: drive, select Extend Volume.
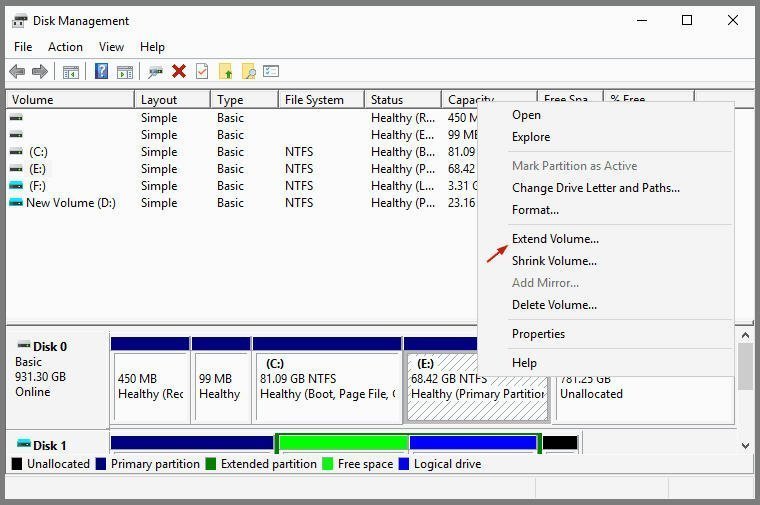
In the Extend Volume Wizard window, select the unallocated space and click Next. Then, the E: drive will be extended with the unallocated space in seconds.
However, using Windows Server 2012 Disk Management is not always so easy. Sometimes, you will find out the option greyed out. The Extend Volume greyed out, the Shrink Volume greyed out, the convert to MBR Disk option greyed out, etc. Disk Management in Windows Server 2012 still has restrictions. It can only extend a partition when there is a contiguous unallocated space on the right side of the partition that should be extended. You can only use it to convert an empty disk to MBR disk, what worse is, Windows won’t allow you to delete any system related partitions, so you can’t convert system disk to MBR/GPT with Disk Management.
Fortunately, there is an alternative to Windows Server 2012 Disk Management, the AOMEI Partition Assistant Server, which has left all restrictions of Disk Management and provides many other excellent functions.
Windows Server 2012 DM alternative: AOMEI Partition Assistant Server
AOMEI Partition Assistant Server should be the best alternative to the Windows Disk Management. It can be used on Windows Server 2019, 2016, 2012 (R2), 2008 (R2), 2003, and Windows 10/8/7/Vista/XP. Compared with Disk Management in Windows Server, AOMEI Partition Assistant Server provides more flexible and more advanced features:
Resize Partition. You can use this feature to extend/shrink partitions or volumes no matter the contiguous unallocated space is on the left or right side.
Move Partition. This function is still missing in Windows Disk Management.
Merge Partitions. Merge two partitions into one without losing data.
Wipe Hard Drive.
Convert MBR to GPT Disk/Convert GPT to MBR Disk. You can convert disk between MBR and GPT without losing data including the system disk.
Create Bootable Media.
Migrate OS to SSD.
There are so many excellent features in AOMEI Partition Assistant Server. You can download the demo version of it to have a try.
It provides you an easy-to-use interface. For example, use AOMEI Partition Assistant Server to extend or shrink partition:
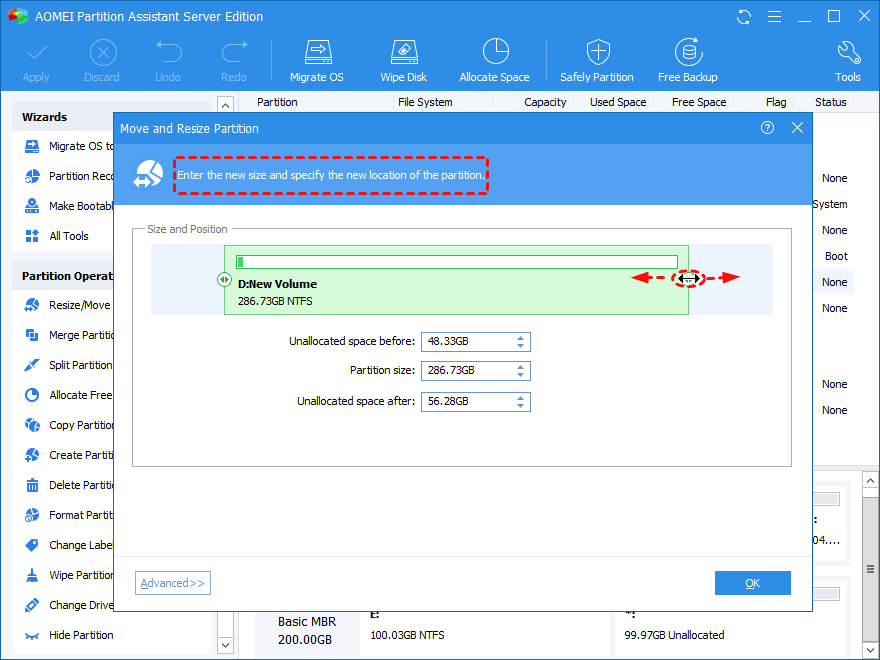
Step 1. Install the program on your Windows Server 2012 and launch it. It will show you its main interface with the basic environment of your hard disk(s). to extend or shrink a partition, here you need to right-click the partition, select Resize Partition.

Step 2. Then, you can drag the slider to move and resize the partition.
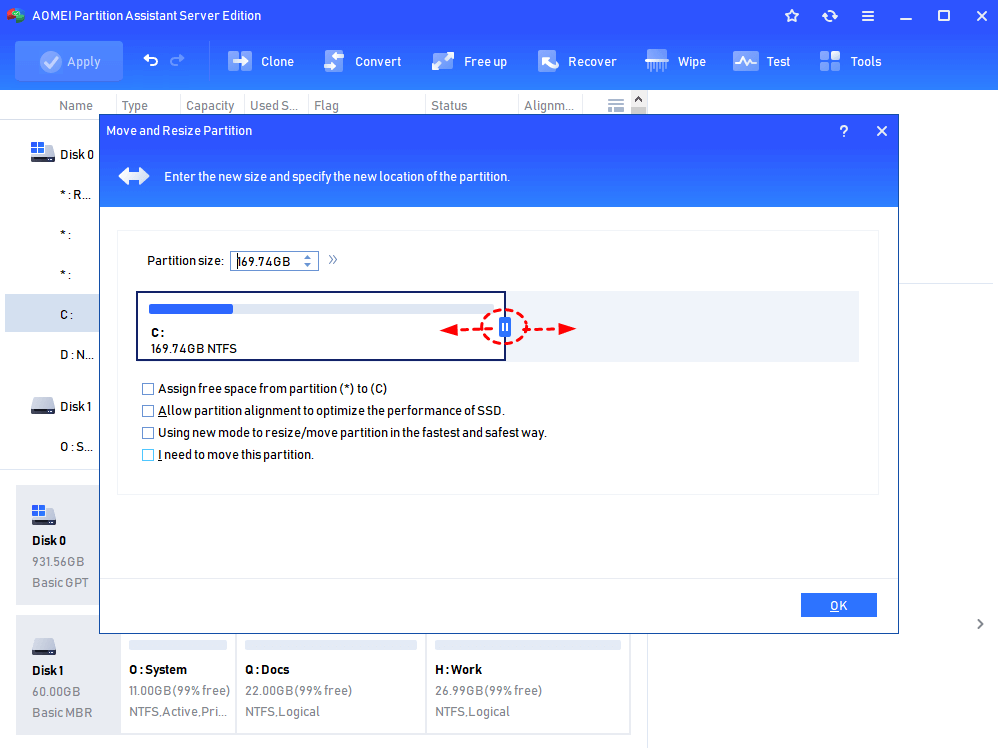
Step 3. When you get the unallocated space from resizing partition, you can use the unallocated space to extend another partition or create a new partition. Here we right-click the C: drive, select Resize Partition again.
Step 4. In the window below, drag the slider to decide how much you want to extend the partition.
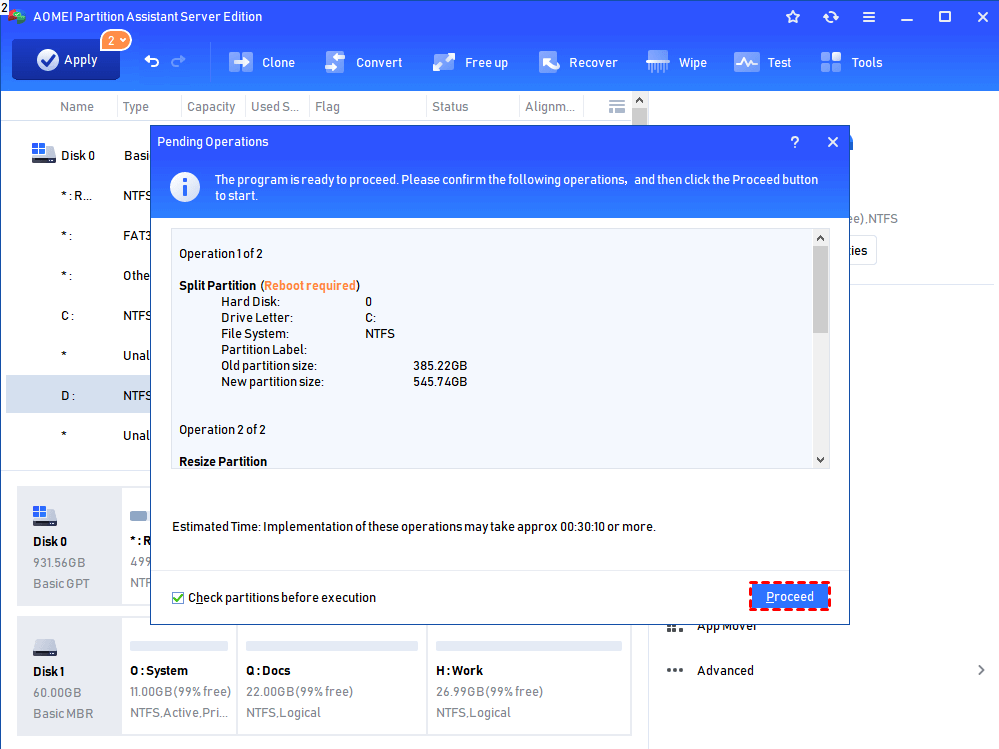
Step 5. Before executing the operation, you can preview all operations. If there is no problem, click Apply to submit.
Conclusion
AOMEI Partition Assistant Server is such a powerful disk partition tool for Windows Server. It should be the best alternative to Disk Management in Windows Server 2012. By the way, if you need to use this software for service providers to solve disk partition problem of their clients or install it on multiple PCs, you can consider the AOMEI Partition Assistant Technician edition or Unlimited edition based on your needs.
How to Effectively Use Disk Management in Windows Server 2016пјџ
What is Disk Management Windows Server 2016? How to open Server 2016 Disk Management? Or how to use Disk Management to manage hard disk partition? You can get all information in this post..

By AOMEI / Last Updated October 27, 2020
Content
Open Disk Management in Windows Server 2016
First introduced in Windows XP, Disk Management is a Windows built-in utility that enables you to manage hard disk drives and the associating partitions or volumes. To partition hard drive with Disk Management in Windows Server 2016 is very convenient. You can access it via one of the following methods:
Method 1: Open it from the Quick Start Menu
Right-click the bottom-left corner (or Start button) on the desktop to open Quick Access Menu, and then choose Disk Management.
Method 2: Launch Disk Management from Run box
Press Windows+R to open Run, type “diskmgmt.msc” in the box and press Enter.
Method 3: Access Disk Management from Computer Management
1. Right-click the Start menu and select Server Manager.
2. In the Server Manager interface, under Tools tab, choose Computer Management.
3. In the next screen, click Disk Management on the left panel.
How to use Windows Server 2016 Disk Management?
To manage disks in Windows Server, Disk Management can be of great help. The main features of Disk Management are listed below:
Connect and initialize disks.
Create a basic, spanned, or striped partition.
Format a volume or partition with exFAT, NTFS, FAT32 or ReFS.
Convert the empty basic disk to dynamic or to GPT/MBR partition style.
Extend and shrink NTFS volumes or partitions.
In the main interface of Disk Management, you can right-click on a disk or partition, and then it will display a menu listing all the options for the item. Disk Management allows you to do most of the operations without reboot or interruption, and it is quite relatively effective.
For example, to shrink partition with Disk Management:
1. Within the Disk Management interface, right-click on a partition and select Shrink Volume in the drop-down menu.
2. Enter the amount of shrink space that you need and click “OK”.
It will generate a block of unallocated space, which you can use to extend partition.
To extend partition:
1. Right-click on the partition which needs extending and select “Extend Volume”.
2. In the Extend Volume Wizard window, select the unallocated space and click “Next”.
In seconds, Disk Management will complete resizing partitions. However, there is much more to be desired. Sometimes, you will find out the option grayed out, which is because Disk Management can only extend a partition when there is contiguous unallocated space at the right side of the target partition.
Since the Move Partition feature is still missing in Windows Server 2016, generally, you may have to delete a partition before you can extend a partition. Besides, it has some other restrictions: it can only convert an empty disk (without any partitions on) to MBR or GPT, otherwise, the Convert to GPT disk will greyed out. Disk Management won’t allow you to delete any system related partitions, so to convert system disk to MBR/GPT is not possible. Fortunately, there is a third party free partition manager software for Windows Server that lifts all the restrictions of Disk Management and provides many other excellent features.
Windows 2016 Disk Management alternative
AOMEI Partition Assistant Server i s a disk partition tool for Windows Server 2019, 2016, 2012 R2, 2012, 2008 R2, 2008, 2003. Compared with Disk Management, AOMEI Partition Assistant provides a more flexible and convenient way of managing disks and partitions.
This tool enables you to preview the partition layout before applying any changes to a hard drive so that you don’t need to worry about accidental file deletion. Besides, It brings the user-friendly interface, so managing disks and partitions or volumes can be easy for you. And here is the example of resizing partition with AOMEI Partition Assistant:
в†’ You can download its demo version to have a try.
Step 1. Install and run the software. On the main interface, right-click on the partition to be shrunk and select “Resize Partition”.
Step 2. In the next screen, you can shrink the partition from either end of the partition by dragging the slider.
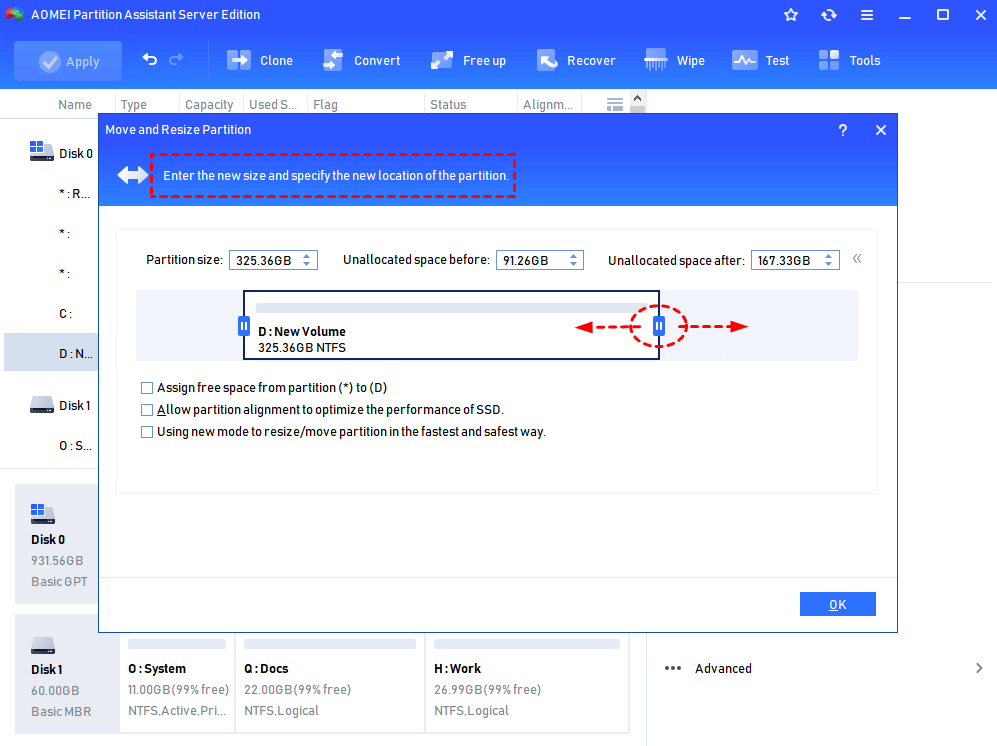
Step 3. Right-click on the partition you want to extend and select “Resize Partition” as before.
Step 4. In the pop-out window, drag the slider to decide how much father you want to extend the partition.
Step 5. Preview the partition layout, and click “Apply” to apply these operations if it contents you.
Besides that, AOMEI Partition Assistant also has many other useful features listed below:
вњ” Allocate free space from one partition to another.
вњ” Convert disks between GPT and MBR without deleting partitions/data loss.
вњ” Convert dynamic disk to basic disk without affecting OS.
вњ” Migrate OS to SSD without reinstalling windows.
вњ” Copy disk to another storage devices to save data in the case of system crash.
вњ” Quickly partition a hard drive with the preset partition size, type, and volume label.
✔ Delete or wipe partitions on the hard drive, even the partitions like recovery partition that Disk Management doesn’t have permission to delete.
вњ” Create Windows 10/8 to Go disk, so you can boot windows 10 or 8 from an external hard drive.
вњ” Run disk surface test to find and fix bad sectors.
вњ” More other useful features .
Therefore, if you think the Disk Management in Windows Server 2016 is not enough for you or you need even more advanced features regarding disk and partition management, be free to try AOMEI Partition Assistant Server. If you need to install this software on multiple PCs and Servers, you can consider the AOMEI Partition Assistant Technician or Unlimited edition based on your needs.


