- Руководство по установке Windows Server Windows Server Installation Guide
- Включение подсистемы Windows для Linux Enable the Windows Subsystem for Linux
- Скачивание дистрибутива Linux Download a Linux distribution
- Извлечение и установка дистрибутива Linux Extract and install a Linux distribution
- What type of installation is right for you?
- Installation: Types
- Installation: Supported operating systems
- Installation: Supported web browsers
- Management target: Supported operating systems
- High availability
- Password Recovery
- Устанавливаем GUI на Windows Server Core
- Оболочка сторонними средствами
- 1. Сложный, но наиболее экономичный способ
- Способ 2. Запускаем родной Explorer
Руководство по установке Windows Server Windows Server Installation Guide
Подсистема Windows для Linux доступна для установки на Windows Server 2019 (версия 1709) и более поздних версий. The Windows Subsystem for Linux is available for installation on Windows Server 2019 (version 1709) and later. В этом руководстве рассматриваются действия по включению WSL на компьютере. This guide will walk through the steps of enabling WSL on your machine.
Включение подсистемы Windows для Linux Enable the Windows Subsystem for Linux
Перед запуском дистрибутивов Linux в Windows необходимо включить дополнительный компонент «Подсистема Windows для Linux» и перезагрузить компьютер. Before you can run Linux distros on Windows, you must enable the «Windows Subsystem for Linux» optional feature and reboot.
Запустите PowerShell с правами администратора и выполните следующую команду. Open PowerShell as Administrator and run:
Скачивание дистрибутива Linux Download a Linux distribution
Выполните эти инструкции, чтобы скачать избранный дистрибутив Linux. Follow these instructions to download your favorite Linux distribution.
Извлечение и установка дистрибутива Linux Extract and install a Linux distribution
После загрузки дистрибутива Linux для извлечения его содержимого и установки вручную выполните следующие действия. Now that you’ve downloaded a Linux distribution, in order to extract its contents and manually install, follow these steps:
Извлеките содержимое пакета .appx , с помощью PowerShell: Extract the .appx package’s contents, using PowerShell:
Запустите средство запуска приложения дистрибутива в целевой папке. Run the distribution launcher application in the target folder. Средство запуска обычно называется .exe (например, ubuntu.exe ). The launcher is typically named .exe (for example, ubuntu.exe ).

Сбой установки с ошибкой 0x8007007e. При возникновении этой ошибки система не поддерживает WSL. Installation failed with error 0x8007007e: If you receive this error, then your system doesn’t support WSL. Убедитесь, что вы используете сборку Windows 16215 или более позднюю версию. Ensure that you’re running Windows build 16215 or later. Проверьте используемую сборку. Check your build. Также убедитесь, что WSL включен и ваш компьютер перезагружен после включения этой функции. Also check to confirm that WSL is enabled and your computer was restarted after the feature was enabled.
3. Добавьте путь дистрибутива в путь среды Windows (в этом примере: C:\Users\Administrator\Ubuntu ), с помощью PowerShell: 3.Add your distro path to the Windows environment PATH ( C:\Users\Administrator\Ubuntu in this example), using PowerShell:
Теперь вы можете запустить дистрибутив из любого пути, введя .exe . You can now launch your distribution from any path by typing .exe . Например: ubuntu.exe . For example: ubuntu.exe .
После установки необходимо инициализировать новый экземпляр дистрибутива, прежде чем его можно будет использовать. Now that it is installed, you must initialize your new distribution instance before using it.
What type of installation is right for you?
This topic describes the different installation options for Windows Admin Center, including installing on a Windows 10 PC or a Windows server for use by multiple admins. To install Windows Admin Center on a VM in Azure, see Deploy Windows Admin Center in Azure.
We don’t recommend using Windows Admin Center for local management of the same server on which it’s installed. To manage a server, use Windows Admin Center to connect to the server remotely from a management PC or other server.
Installation: Types

| Local client | Gateway server | Managed server | Failover cluster |
|---|---|---|---|
| Install on a local Windows 10 client that has connectivity to the managed servers. Great for quick start, testing, ad-hoc or small scale scenarios. | Install on a designated gateway server and access from any client browser with connectivity to the gateway server. Great for large-scale scenarios. | Install directly on a managed server for the purpose of remotely managing the server or a cluster in which it’s a member node. Great for distributed scenarios. | Deploy in a failover cluster to enable high availability of the gateway service. Great for production environments to ensure resiliency of your management service. |
Installation: Supported operating systems
You can install Windows Admin Center on the following Windows operating systems:
| Platform | Installation mode |
|---|---|
| Windows 10 | Local client |
| Windows Server Semi-Annual Channel | Gateway sever, managed server, failover cluster |
| Windows Server 2016 | Gateway sever, managed server, failover cluster |
| Windows Server 2019 | Gateway sever, managed server, failover cluster |
To operating Windows Admin Center:
- In local client scenario: Launch the Windows Admin Center gateway from the Start menu and connect to it from a client web browser by accessing https://localhost:6516 .
- In other scenarios: Connect to the Windows Admin Center gateway on a different machine from a client browser via its URL, e.g., https://servername.contoso.com
Installing Windows Admin Center on a Domain controller is not supported. Read more about domain controller security best practices.
Installation: Supported web browsers
Microsoft Edge (including Microsoft Edge insider) and Google Chrome are tested and supported on Windows 10. Other web browsers—including Internet Explorer and Firefox—are not currently part of our test matrix and are therefore not officially supported. These browsers may have problems running Windows Admin Center. For example, Firefox has it’s own certificate store, so you must import the Windows Admin Center Client certificate into Firefox to use Windows Admin Center on Windows 10. For more details, see browser-specific known issues.
Management target: Supported operating systems
You can manage the following Windows operating systems using Windows Admin Center:
| Version | Manage node via Server Manager | Manage via Cluster Manager |
|---|---|---|
| Windows 10 | Yes (via Computer Management) | N/A |
| Windows Server Semi-Annual Channel | Yes | Yes |
| Windows Server 2019 | Yes | Yes |
| Windows Server 2016 | Yes | Yes, with latest cumulative update |
| Microsoft Hyper-V Server 2016 | Yes | Yes |
| Windows Server 2012 R2 | Yes | Yes |
| Microsoft Hyper-V Server 2012 R2 | Yes | Yes |
| Windows Server 2012 | Yes | Yes |
Windows Admin Center requires PowerShell features that are not included in Windows Server 2012 and 2012 R2. If you will manage these with Windows Admin Center, you will need to install Windows Management Framework (WMF) version 5.1 or higher on those servers.
Type $PSVersiontable in PowerShell to verify that WMF is installed, and that the version is 5.1 or higher.
If WMF is not installed, you can download WMF 5.1.
High availability
You can enable high availability of the gateway service by deploying Windows Admin Center in a active-passive model on a failover cluster. If one of the nodes in the cluster fails, Windows Admin Center gracefully fails over to another node, letting you continue managing the servers in your environment seamlessly.
Ready to install Windows Admin Center? Download now
Password Recovery
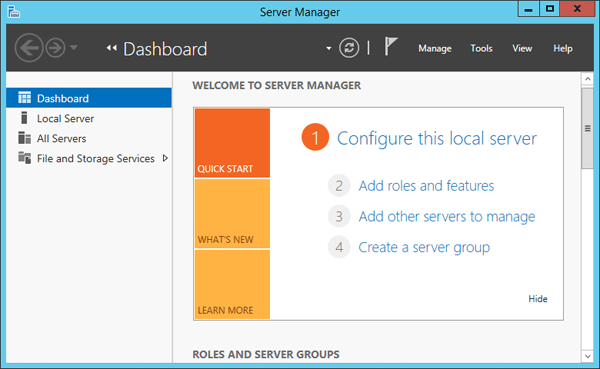
Server Manager is a management console (MMC) in Windows Server 2012 that allows you to add server roles / features, manage and deploy server remotely. In this tutorial we’ll show you 5 ways to launch Server Manager in Windows Server 2012.
Method 1: Launch Server Manager from Command Line
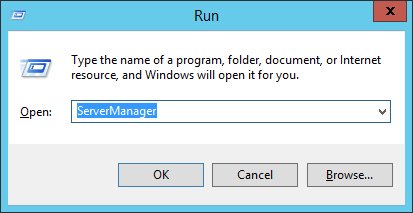
Press the Windows key + R to open the Run box, or open the Command Prompt. Type ServerManager and press Enter.
This should be the most common and quickest way to open Server Manager in Windows Server 2012 / 2008.
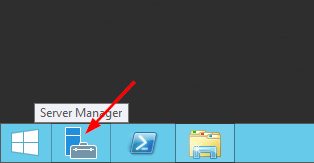
Method 2: Launch Server Manager from Taskbar
By default, the Server Manager shortcut is pinned to the taskbar. Just click the Server Manager icon and you can run Server Manager immediately.
Method 3: Launch Server Manager from Start Screen
Click the Start button to open the Start Screen.

As you can see in the picture above, the Metro interface gives you access to Server Manager.
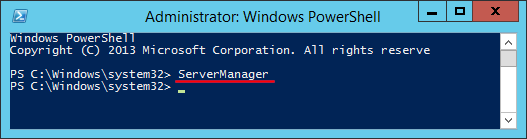
Method 4: Launch Server Manager Using PowerShell
Open PowerShell in Windows Server 2012. Type ServerManager and press Enter.
Method 5: Create a Desktop Shortcut to Launch Server Manager
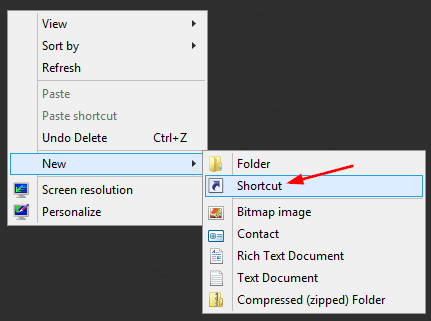
Right-click on any empty space on your desktop. Select New -> Shortcut from the context menu.
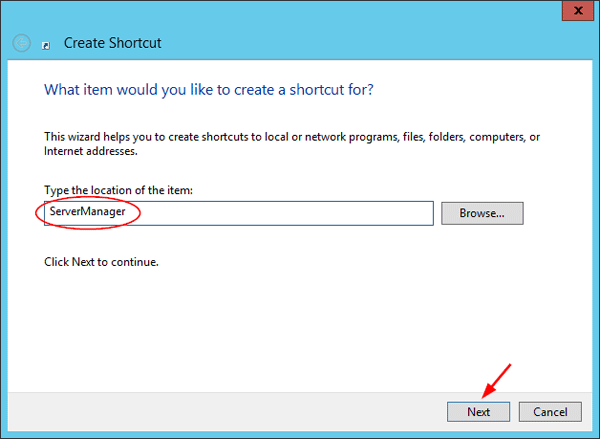
Type ServerManager in the shortcut location box and click Next.
Give a name for the shortcut and click Finish.

You should now see a new desktop shortcut on the desktop. Double-click it and you can launch Server Manager quickly.
Устанавливаем GUI на Windows Server Core
В прошлом нашем посте мы рассказали как готовим стандартные клиентские виртуальные машины и показали на примере нашего нового тарифа с Ultralight windows vds за 99 рублей, как мы создавали стандартный образ Windows Server 2019 Core.
В службу поддержки стали поступать заявки как работать с Server 2019 Core без привычной графической оболочки. Мы решили показать работу с Windows Server 2019 Core и как установить на него GUI.

Не повторяйте это на рабочих машинах, не используйте Server Core как рабочий стол, отключите RDP, обезопасьте свою информационную систему, именно безопасность — это главная фишка «Core» инсталляции.
В одной из следующих наших статей мы рассмотрим таблицу совместимости программ с Windows Server Core. В этой статье мы затронем то, как установить оболочку.
Оболочка сторонними средствами
1. Сложный, но наиболее экономичный способ
В Server Core из коробки нет привычного нам explorer.exe, чтобы облегчить нам жизнь, мы скачаем explorer++. Он заменяет все, что умеет оригинальный explorer. Рассматривался только explorer++, но подойдет почти любой файловый менеджер, в том числе Total Commander, FAR Manager и другие.
Сначала нам нужно скачать файл на сервер. Это можно сделать через SMB (общую папку), Windows Admin Center и Invoke-WebRequest, он работает с параметром -UseBasicParsing.
Где -uri это URL файла, а -OutFile полный путь куда его скачивать, указывая расширение файла и
C помощью Powershell:
На сервере создаём новую папку:
Расшариваем общую папку:
На вашем ПК папка подключается как сетевой диск.

Через Windows Admin Center создаем новую папку выбрав пункт в меню.
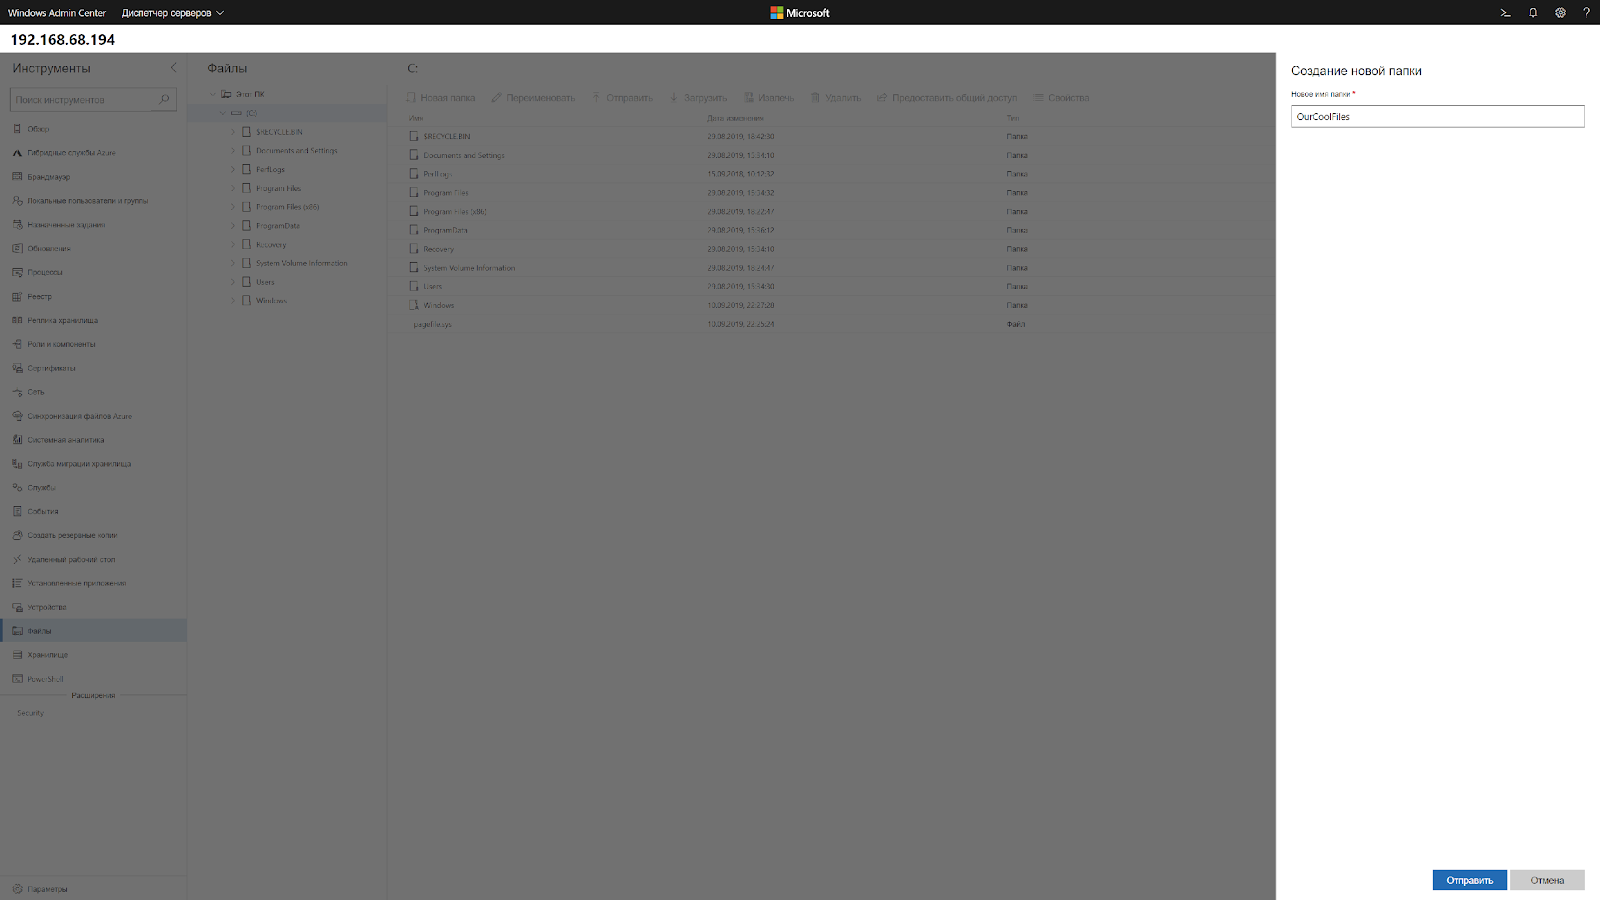
Переходим в общую папку и жмем кнопку отправить, выбираем файл.

Добавляем оболочку в планировщик.
Если вы не хотите запускать оболочку вручную при каждом входе в систему, то нужно добавить её в планировщик задач.
Без планировщика можно запустить через CMD:
Способ 2. Запускаем родной Explorer
Remember, no GUI
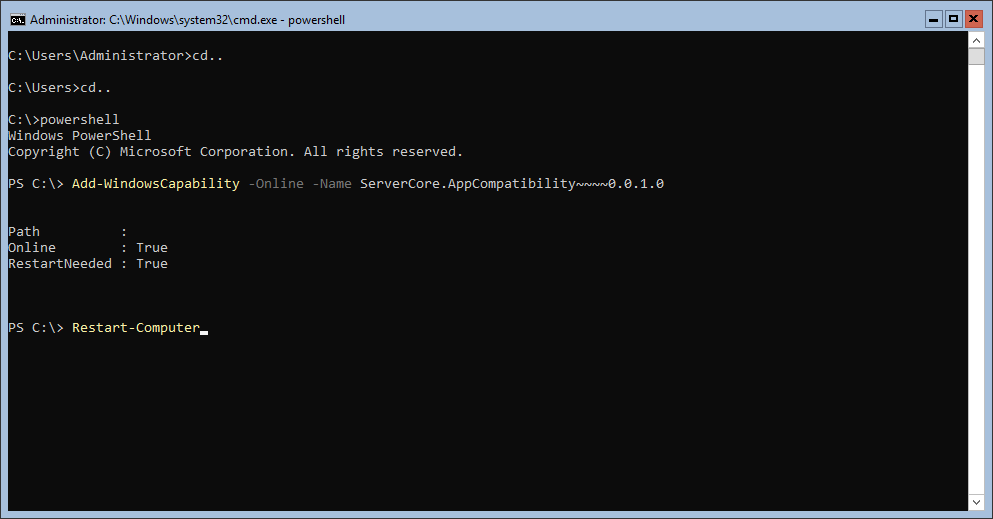
Server Core App Compatibility Feature on Demand (FOD), вернет в систему: MMC, Eventvwr, PerfMon, Resmon, Explorer.exe и даже Powershell ISE. Подробнее можете ознакомиться на MSDN. Существующий набор ролей и компонентов он не расширяет.
Запустите Powershell и введите следующую команду:
Затем перезагрузите сервер:
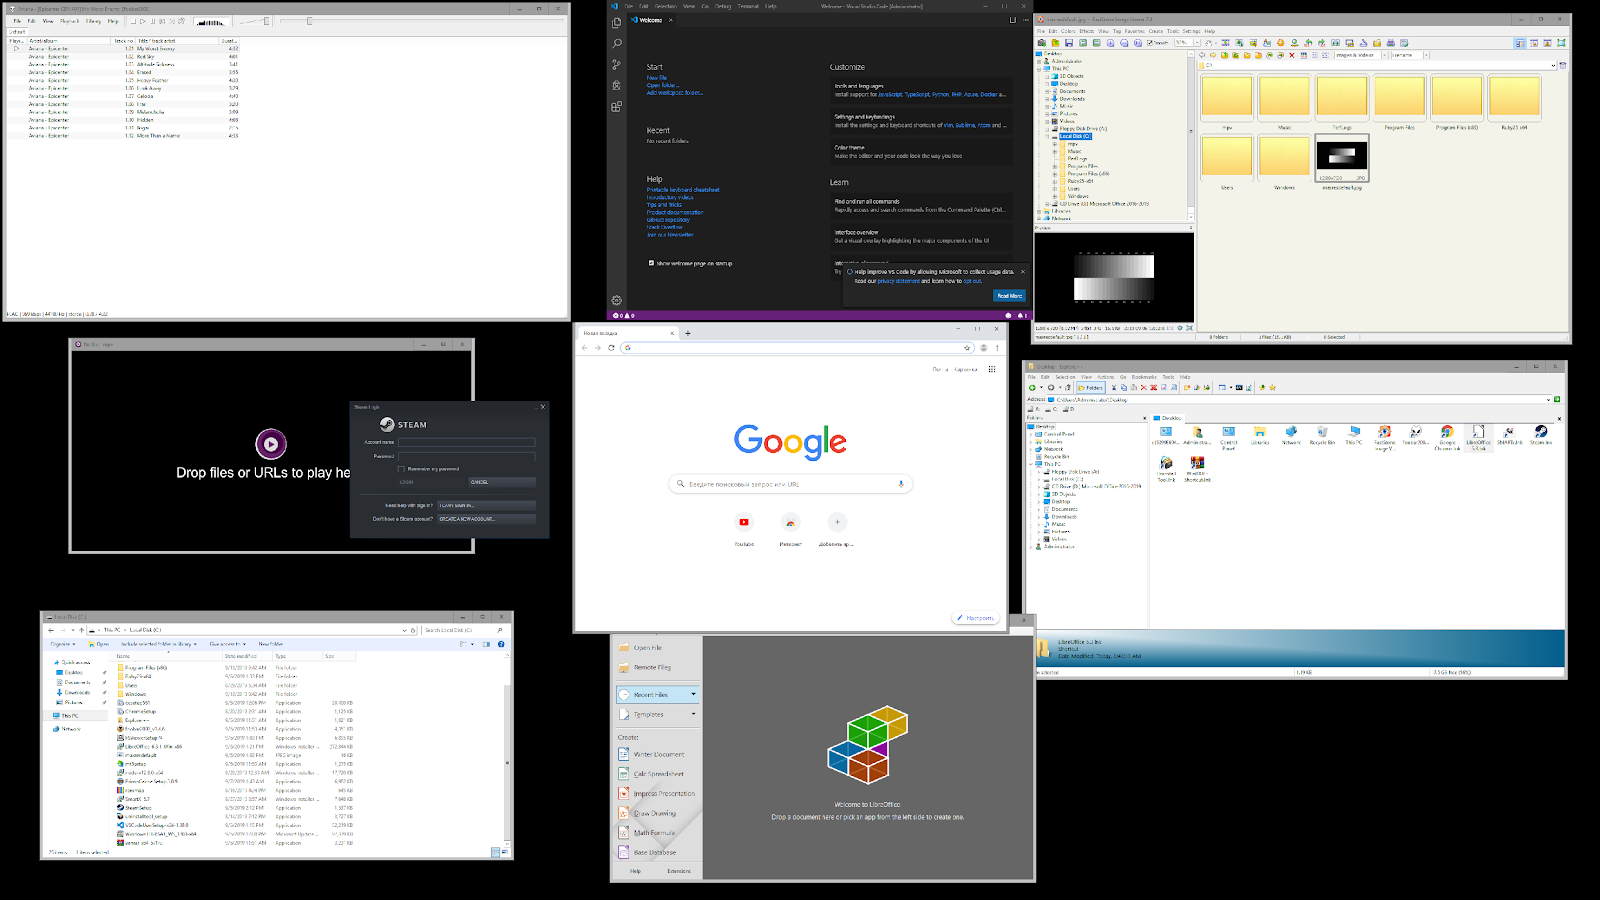
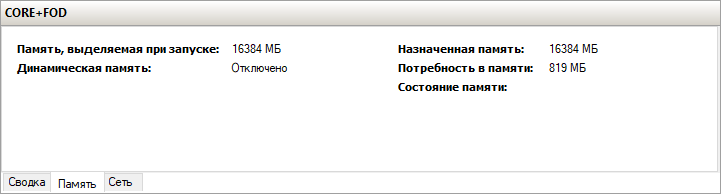
После этого вы сможете запускать даже Microsoft Office, но потеряете примерно 200 мегабайт ОЗУ навсегда, даже если в системе нет активных пользователей.
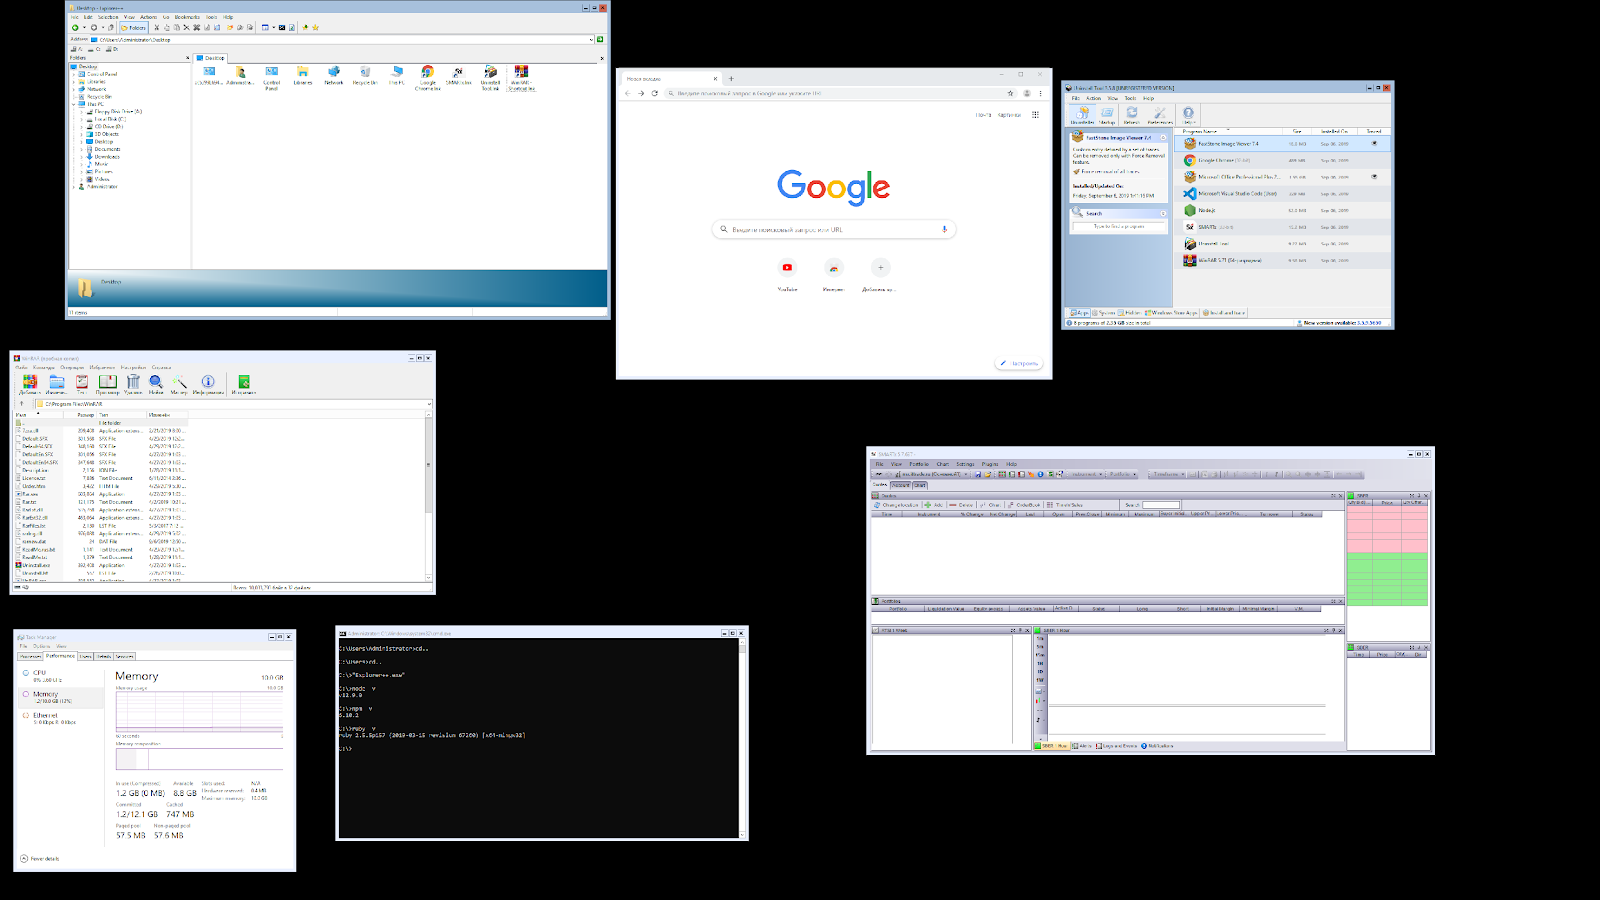
Windows Server 2019 c установленным Features on Demand

Windows Server 2019 CORE
На этом всё. В следующей статье мы рассмотрим таблицу совместимости программ с Windows Server Core.
Предлагаем обновлённый тариф UltraLite Windows VDS за 99 рублей с установленной Windows Server 2019 Core. 


