- Windows server multi language
- Причина русификации Windows Server 2019
- Как сделать русский интерфейс в Windows Server 2019
- Локализация Windows Server 2019 через установку пакета KB
- Как установить русский язык через lpksetup.exe
- Build Multi-Language Client Restore Media
- To build a multi-language client restore media
- Add language packs to a Windows 10 multi-session image
- Prerequisites
- Create a content repository for language packages and features on demand
- Create a custom Windows 10 Enterprise multi-session image manually
- Create a custom Windows 10 Enterprise multi-session image automatically
- Finish customizing your image
- Enable languages in Windows settings app
- Next steps
Windows server multi language
Добрый день! Уважаемые читатели и гости крупного IT блога России Pyatilistnik.org. В прошлый раз я вам показал решение проблемы, когда диск защищен от записи и вы не можете его отформатировать. Сегодня мы переключимся от темы утилит и рассмотрим вопрос по русификации Windows Server 2019. Данная серверная операционная система на текущий момент флагманская у Microsoft и думаю многие столкнуться с данной задачей, так что приступаем. Подразумевается, что у вас уже установлена Windows 2019.
Причина русификации Windows Server 2019
Русификация — это локализация операционной системы на родной язык пользователя. Из основных моментов, которые могут у человека решившего это выполнить можно выделить:
- Лично мне, как русскому человеку приятнее видеть родной язык, давно уже прошел тот момент, когда русские версии Windows Server были глючные и из-за этого их не хотели ставить, так как бывали ситуации, что вы получали ошибку, спрашивали, о ней на зарубежном форуме, а там такую и не видели, так как у них стоит английская.
- Некоторое отечественное программное обеспечение может либо не работать или плохо работать на английской версии системы
- Из чувства патриотизма
Как сделать русский интерфейс в Windows Server 2019
Как и в предыдущих версиях операционной системы, будь то клиентская или серверная версия, компания Micriosoft для установки русского языка (Локализация) предоставляет два варианта:
- Первый вариант, это классический метод, заключающийся в том, что вы скачиваете KB-обновление содержащее языковой пакет. Скачивание происходит либо из интернета, либо из вашего центрального, локального сервера обновлений WSUS. Если вы знаете номер KB, то вы легко можете ее скачать отдельно из каталога обновлений, после чего спокойно ее применить на разных серверах.
- 2. Второй метод, подходит для автономной локализации Windows Server 2019, когда у вас может не быть выхода в интернет и сервер может не являться частью домена Active Directory, что подразумевает невозможность обратиться к WSUS. В таком случае на него подключают ISO образ с пакетами lp, который за счет утилиты lpksetup.exe устанавливает его в систему и русифицирует систему.
Локализация Windows Server 2019 через установку пакета KB
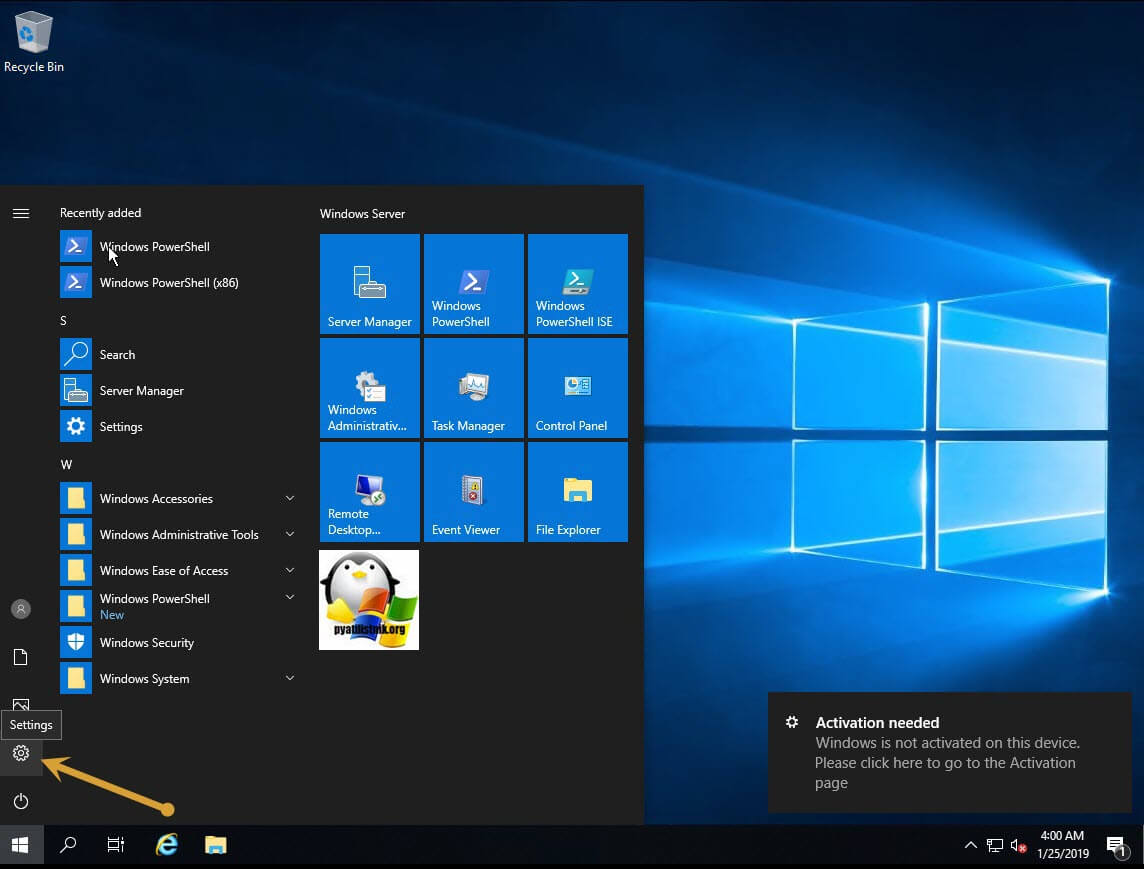
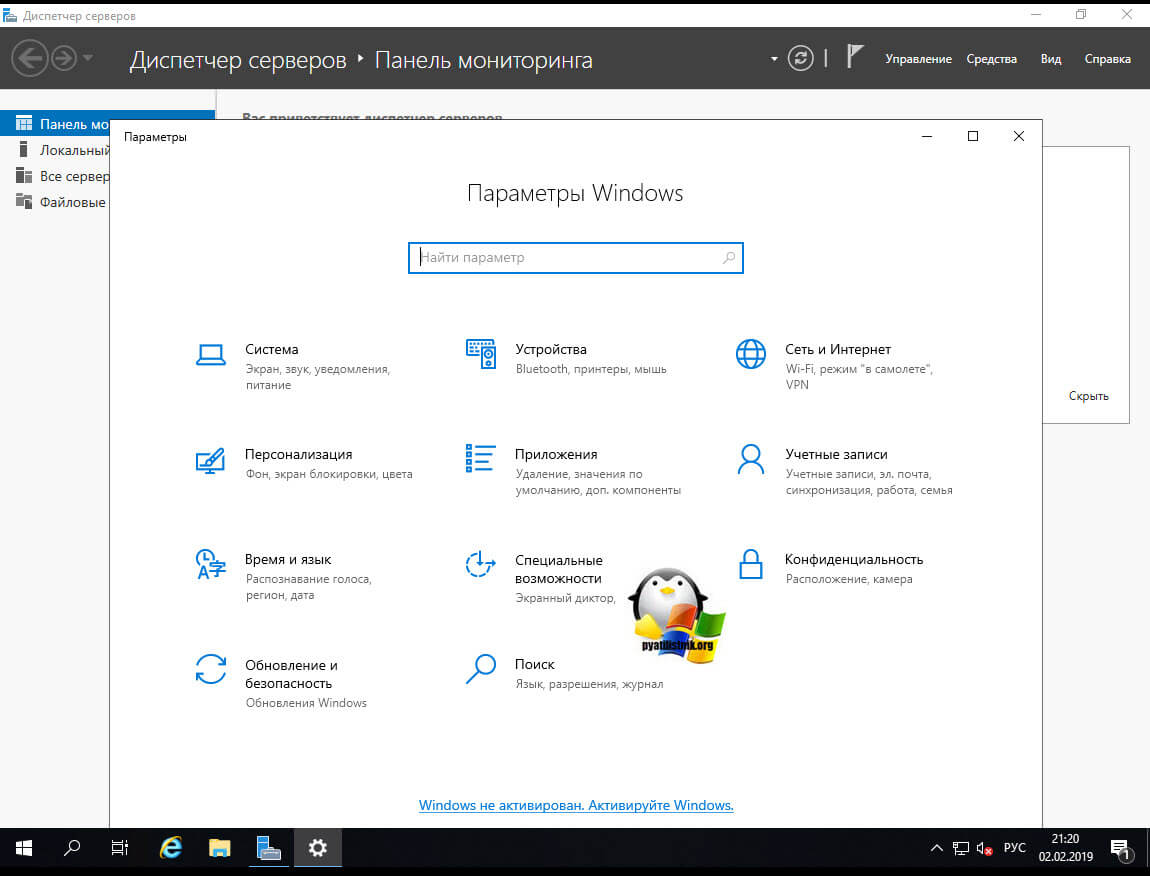
Данный метод установки русского языка, на мой взгляд самый простой и подойдет самым ленивым администраторам, особенно у тех у кого в компании есть WSUS-сервер, позволяющий его адрес закинуть в политику и распространить ее на нужные сервера. И так нам нужно попасть в языковые настройки системы. Сделать, это можно очень просто, открыв кнопку пуск и кликнув по шестеренке «Settings», либо нажав полезную комбинацию клавиш WIN и I.
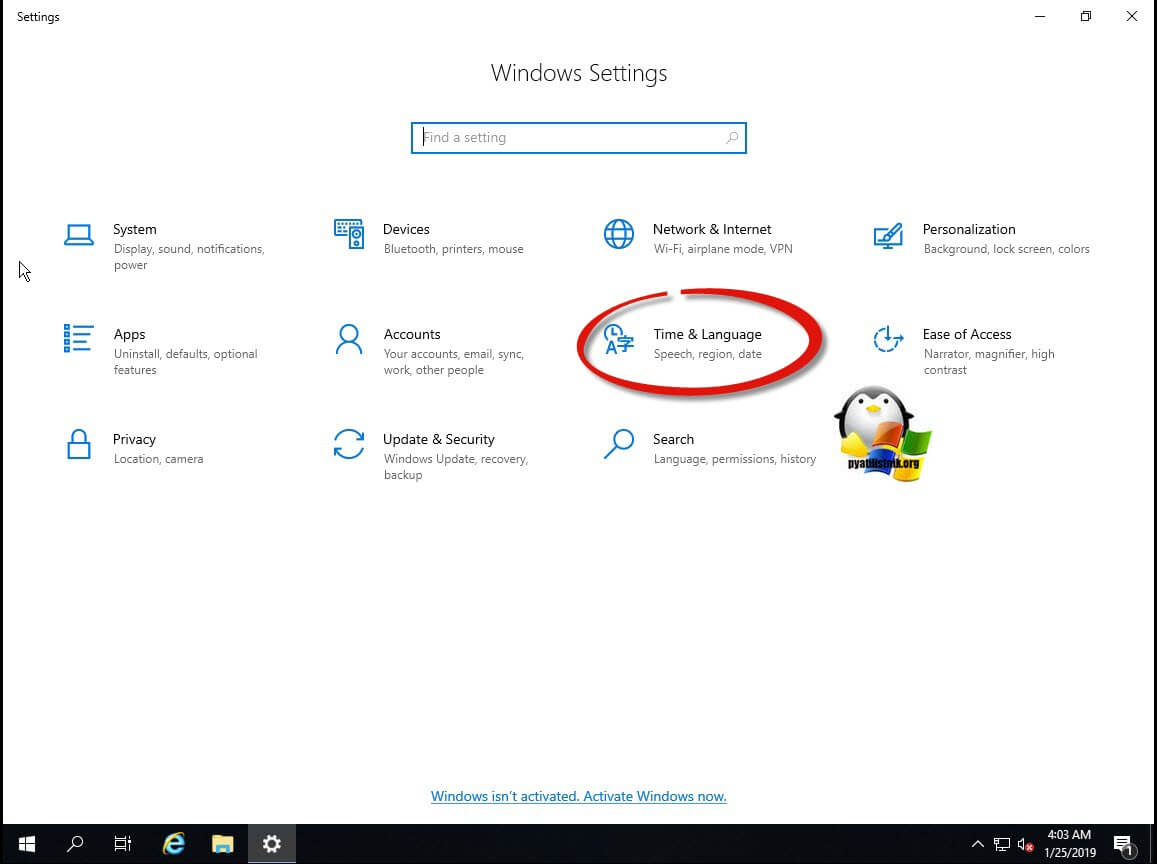
В результате у вас откроется со всеми настройками в системе (Windows Settings). Вам необходимо найти пункт «Время и язык (Time & language)»
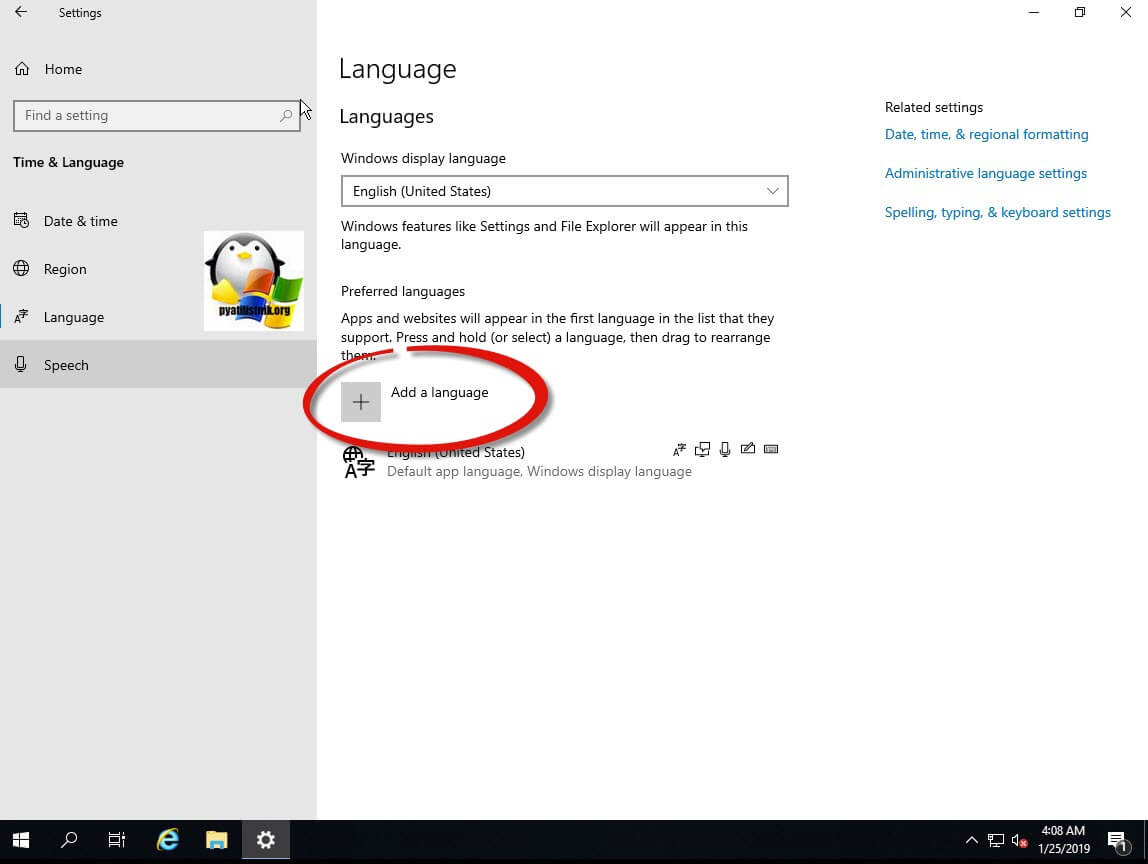
Переходим в пункт «Язык (Language)». Тут у вас будет список установленных языков в системе. Так как у меня это английская версия, то и есть только он. Чтобы добавить в меню выбора еще и русский язык, вам необходимо нажать соответствующую кнопку «Add a language». Именно она позволит выбрать дополнительные языковые пакеты.
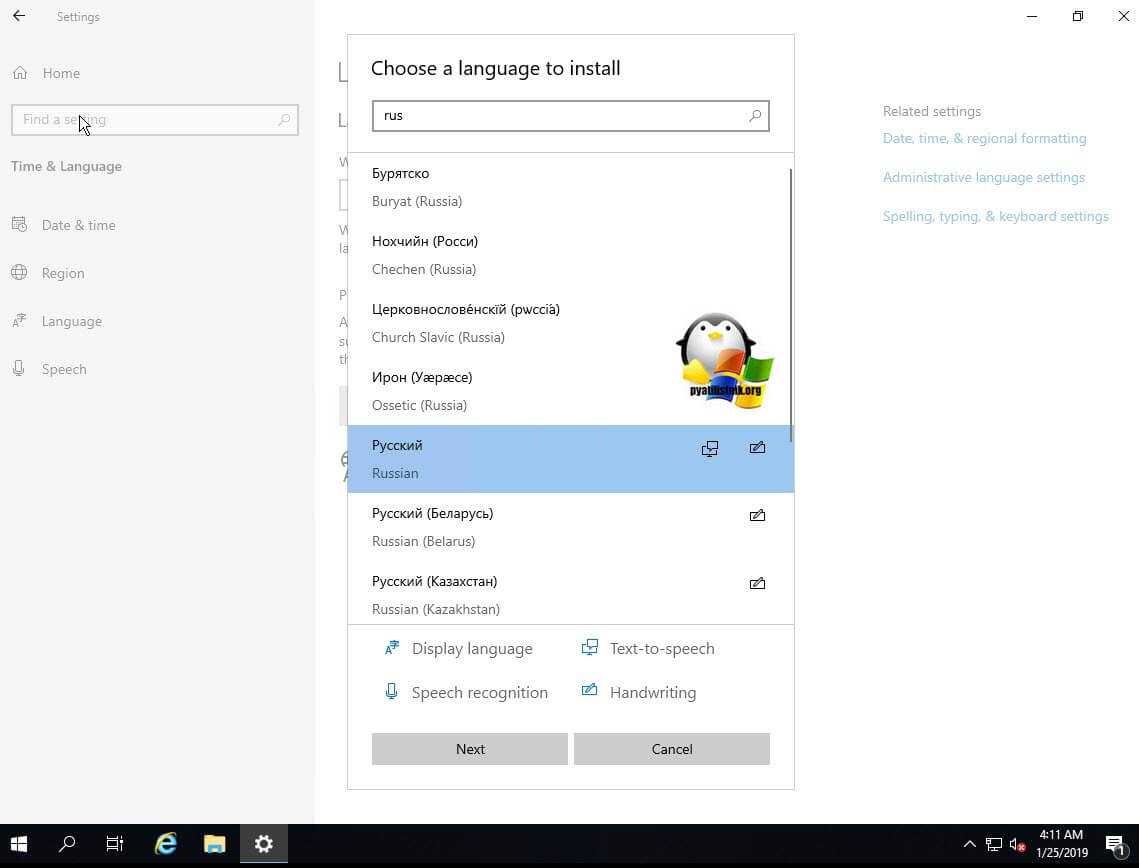
У вас откроется окно выбора пакетов «Choose a language to install». Хочу отметить, что языков и диалектов очень много, поэтому советую в поисковой строке в самом верху вбить аббревиатуру RUS, вы сразу найдете пакет русской локализации. Нажимаем «Next».
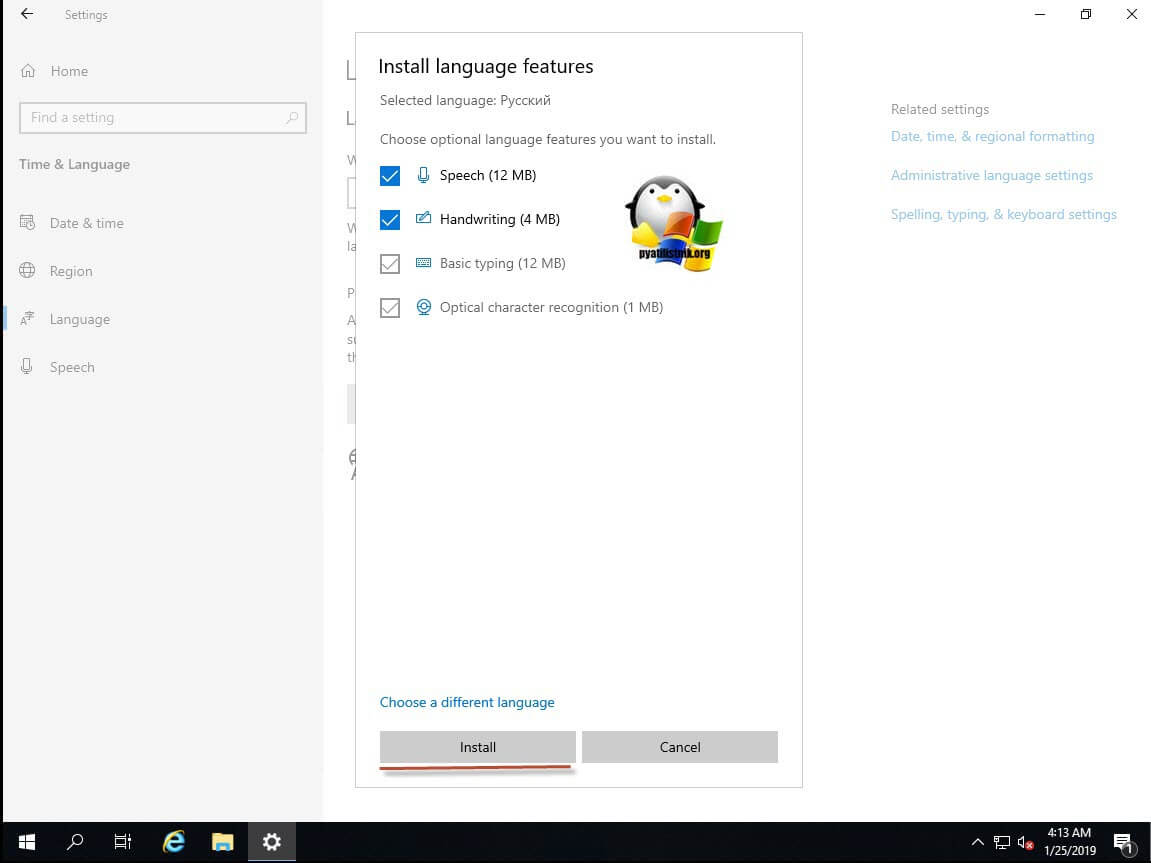
Далее мастер установки языковых компонентов «Install language features», попросит вас выбрать компоненты, я советую оставить все .так как они весят не много:
- Speech 12 МБ
- Handwriting 4 МБ
- Basic typing 12 МБ
- Optical character recognition 1 МБ
Для продолжения установки нажмите кнопку «Install».
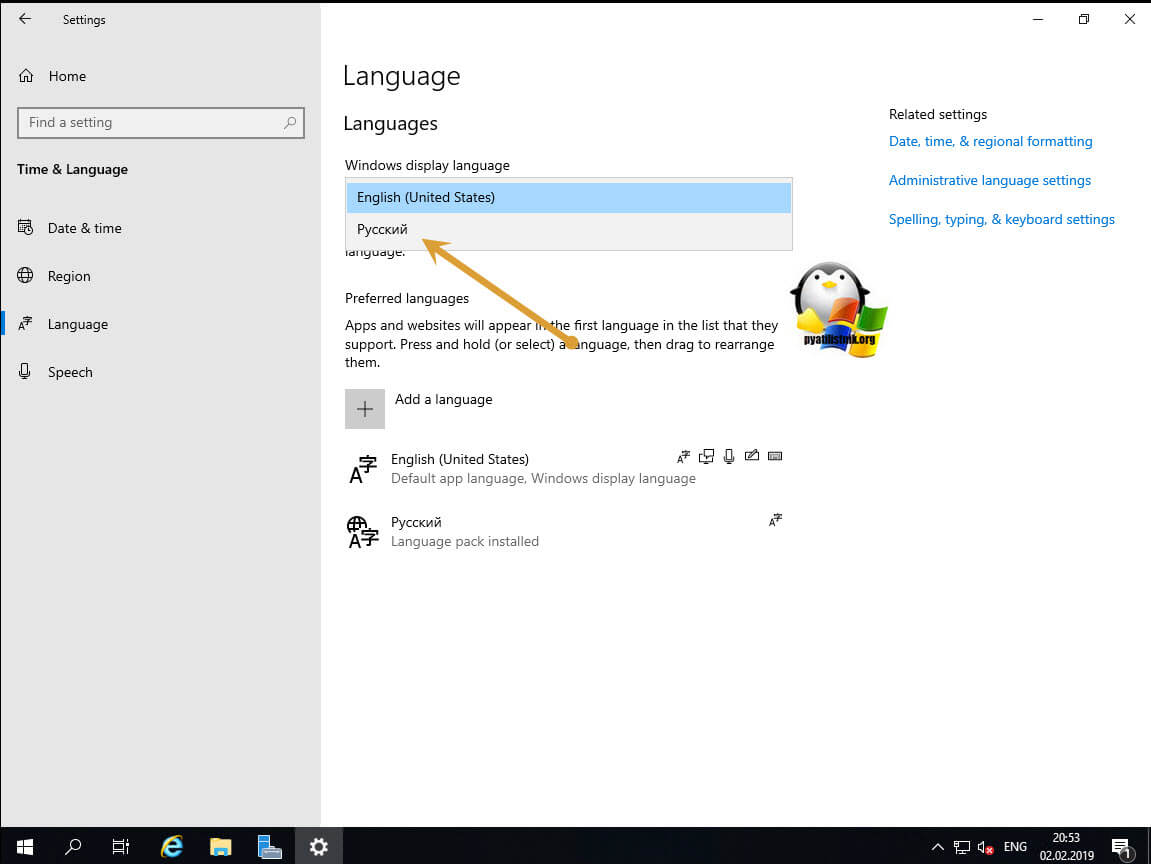
В итоге на окне выбора языков, у вас появится русский пакет.
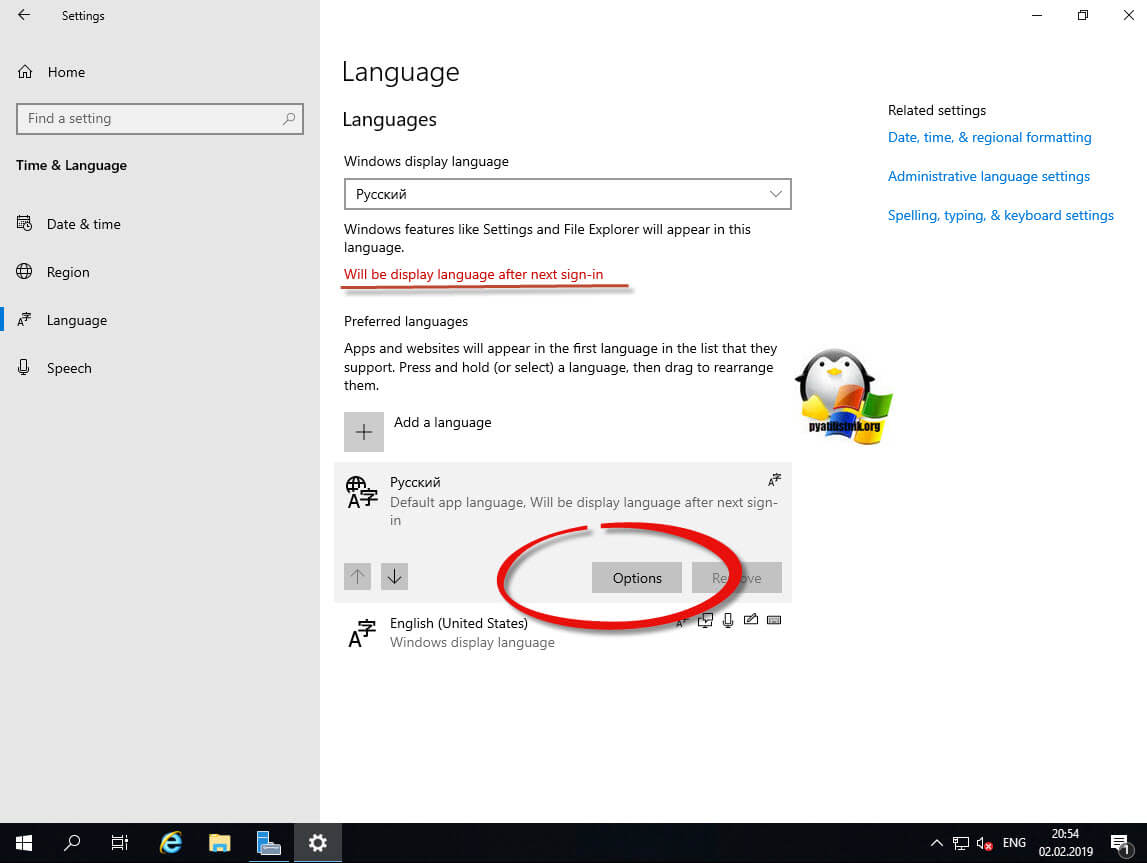
Обратите внимание, что вам тут говорят, что изменения интерфейса будут после перезагрузки «Will be display language after next sign-in». Выберите его и нажмите кнопку «Параметры (Options)».
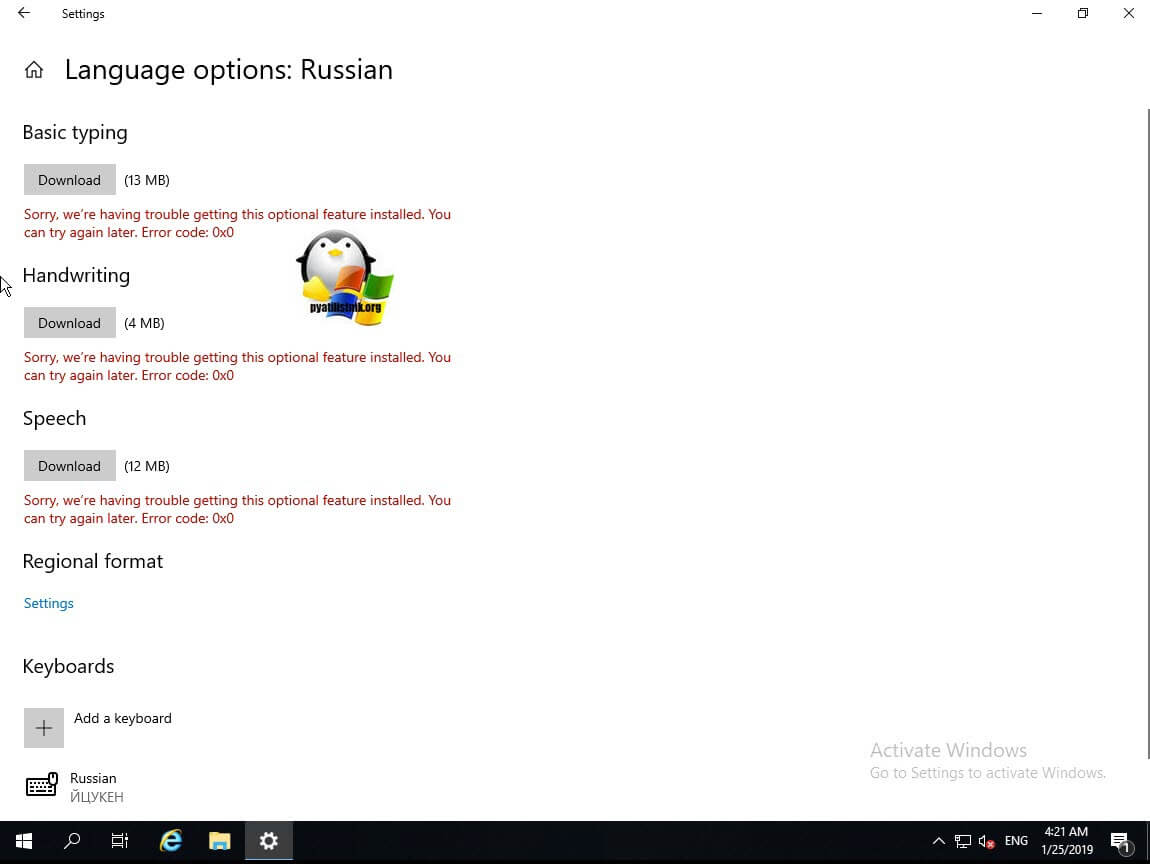
Удостоверьтесь, что у вас установлены все компоненты языкового пакета. В некоторых случаях может возникать ошибка «Error code: 0x0«.
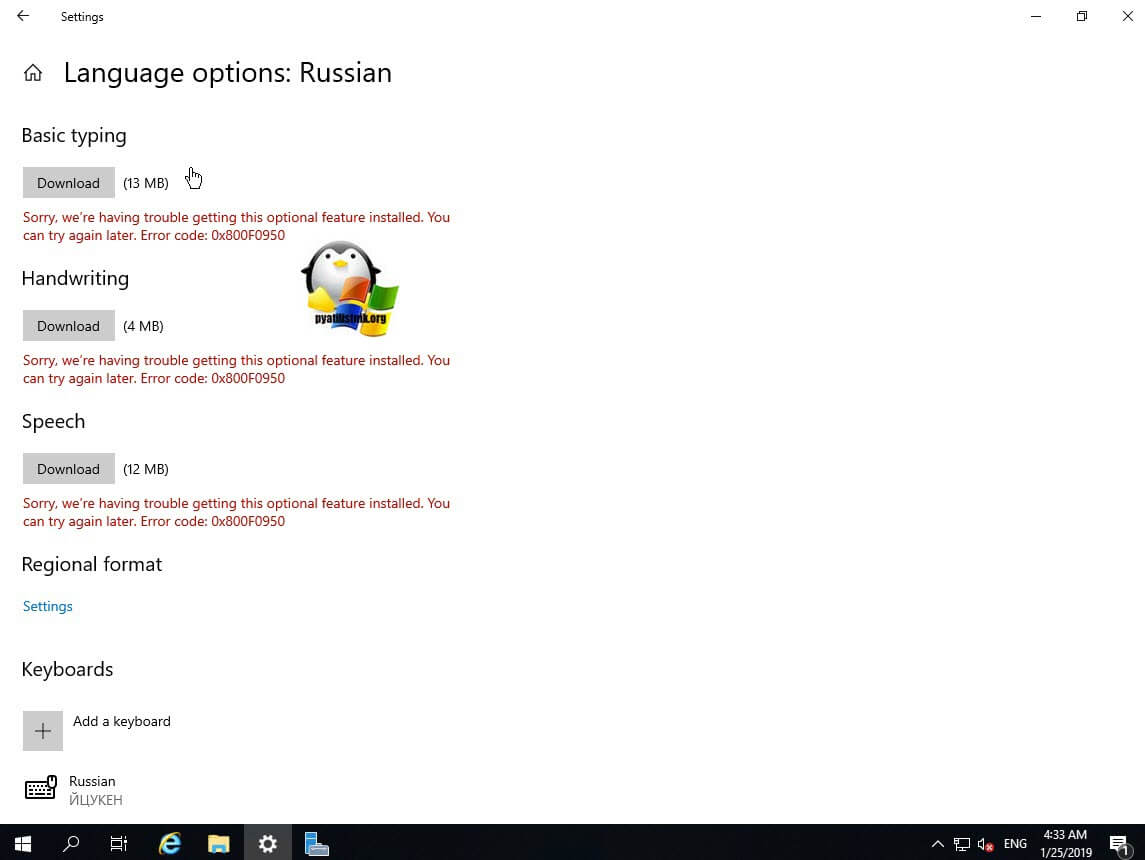
Или ошибку 0x00F0950, если она у вас появилась, то вам нужно приступать ко второму методу, так как это недоработка Microsoft, о которой они пишут вот тут (https://support.microsoft.com/ru-ru/help/4466511/cannot-configure-language-pack-for-windows-server-2019).
Далее вам нужно сделать русский язык по умолчанию, для этого выберите его и стрелкой переместите вверх. Переходим в пункт «Регион (Region)». Тут выставите в:
- Country or region — регион русский (Russian)
- Region format — Форматы региона русский (Russian (Russia))
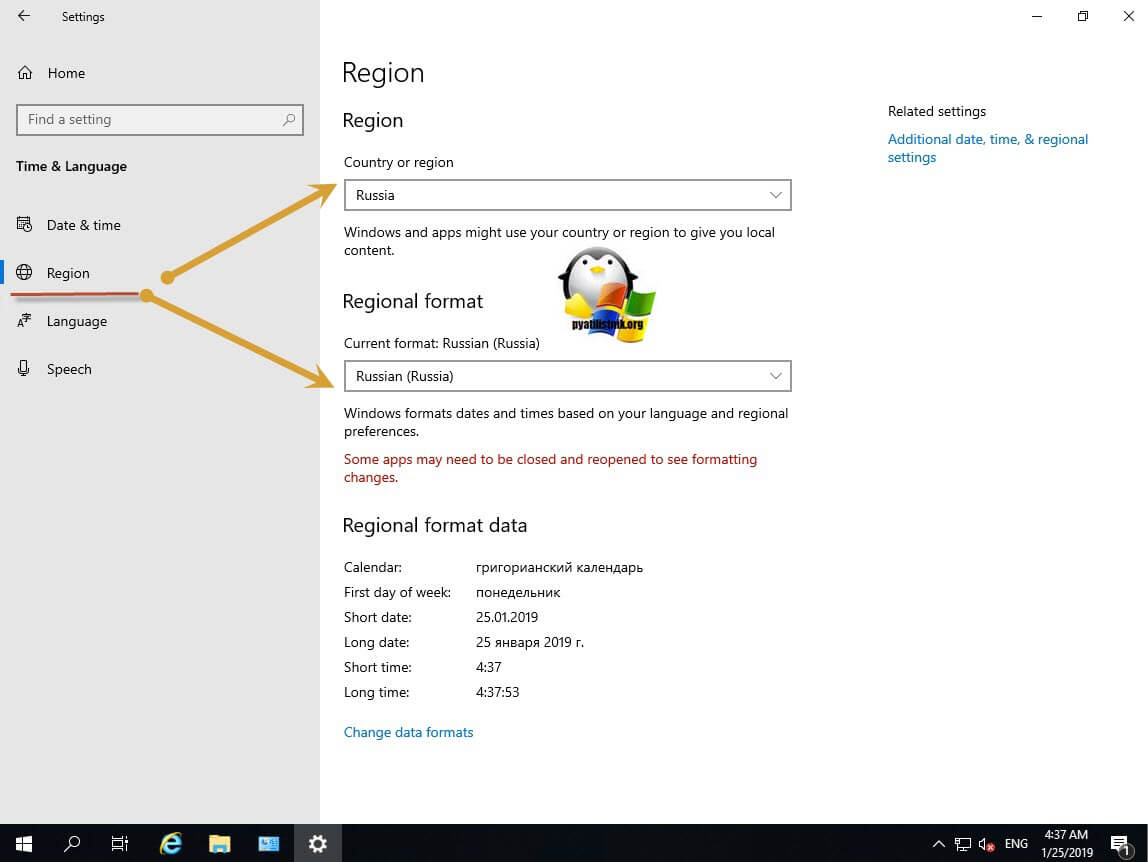
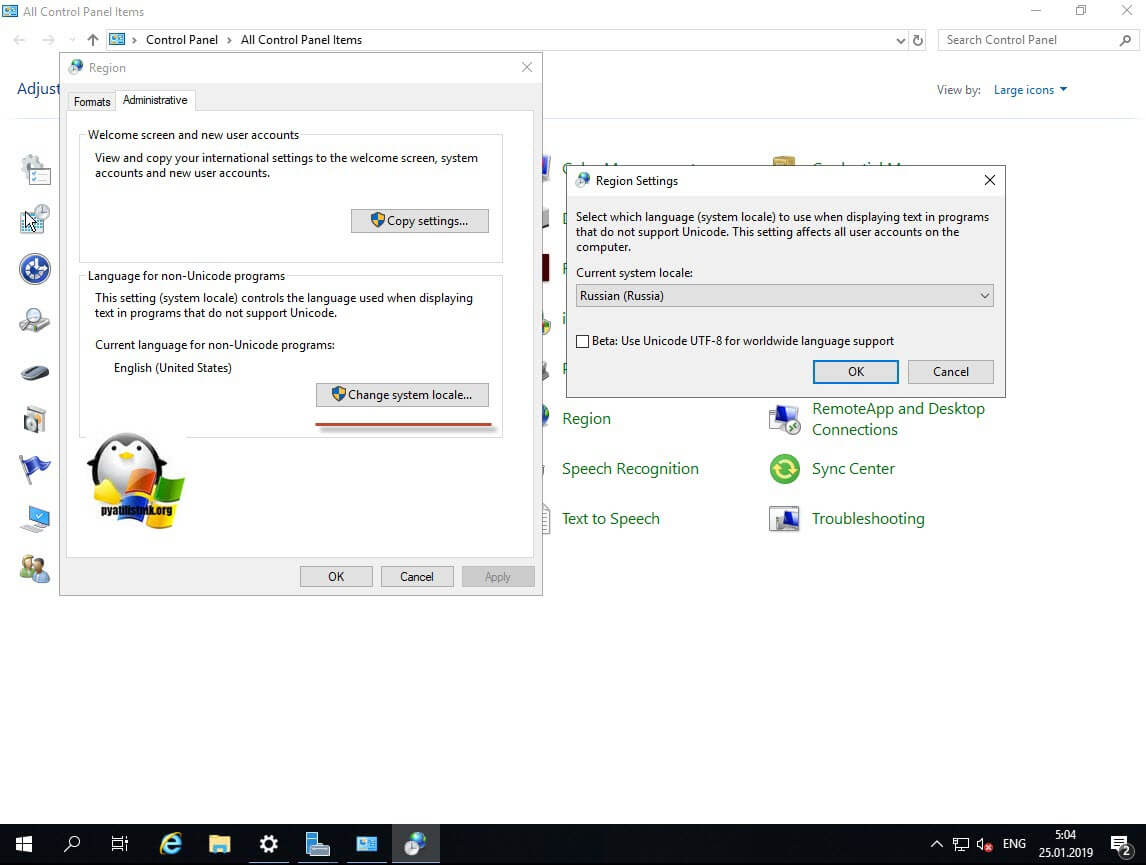
В правом верхнем углу будет ссылка на дополнительные настройки для времени и региональных форматов (Additional date, time & regional settings). Его так же можно найти в панели управления (Control Panel), это пункт Region. Обратите внимание, что тут теперь нет пункта Language, через который так же можно было менять и локализовывать интерфейс Windows Server.
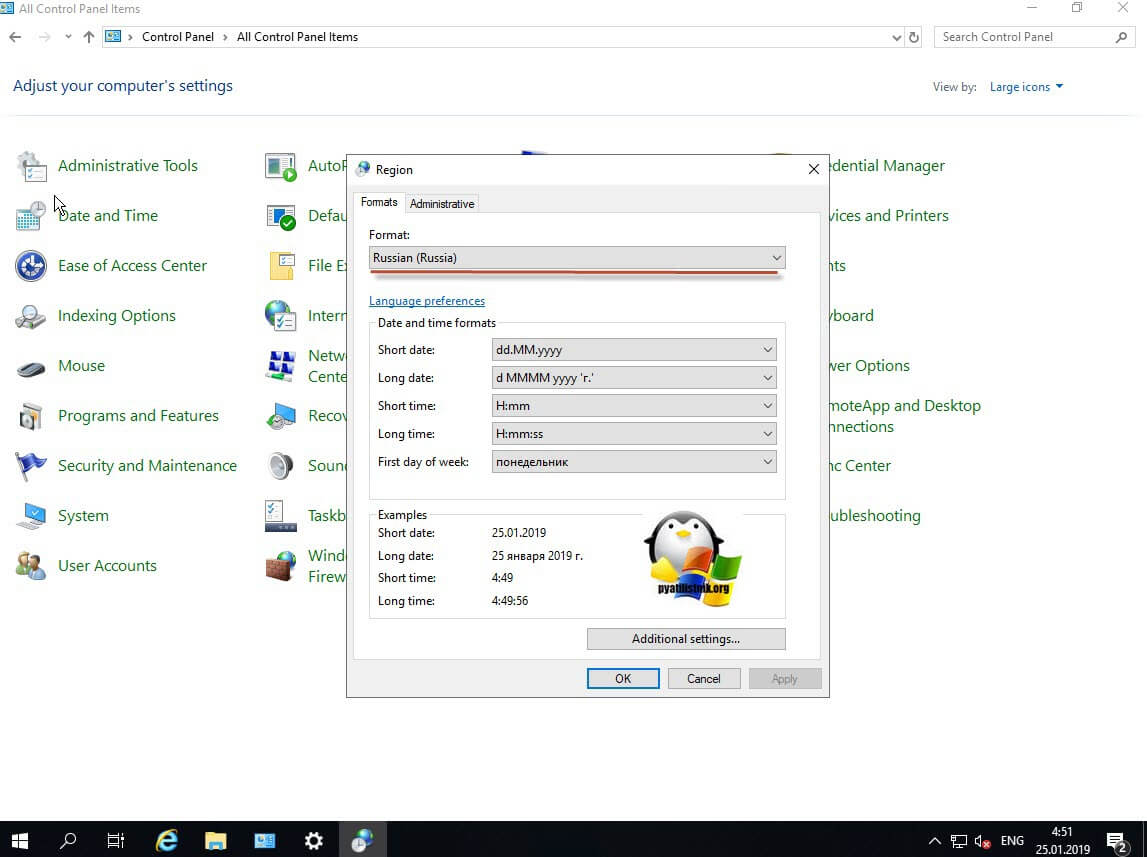
Убедитесь, что на вкладке «Formats» установлен русский формат. На вкладке «Administrative» нажмите кнопку «Copy settings». Поставьте в самом низу две галки:
- Welcome screen and system accounts — чтобы экран приветствия был русским
- New user accounts — чтобы новые пользователи получали русский язык по умолчанию.
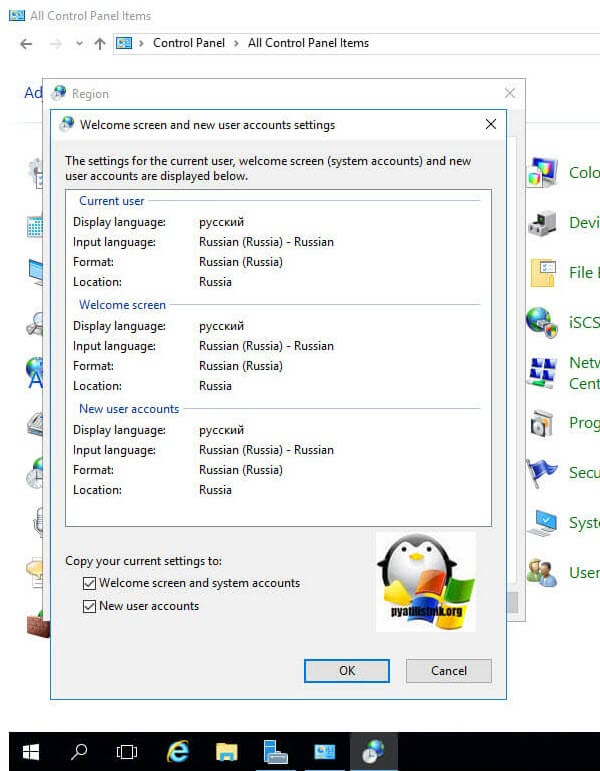
Следующим шагом нажмите кнопку «Change system locate» и выставите там Russian (Russia), после чего перезагрузите сервер.
В итоге мы получили русский интерфейс в Windows Server 2019.
Как установить русский язык через lpksetup.exe
Если вы в окне параметры Windows получили ошибку установки русского языка с кодом 0x00F0950, то вам для русификации Windows Server 2019 нужно воспользоваться ISO образом Language pack.
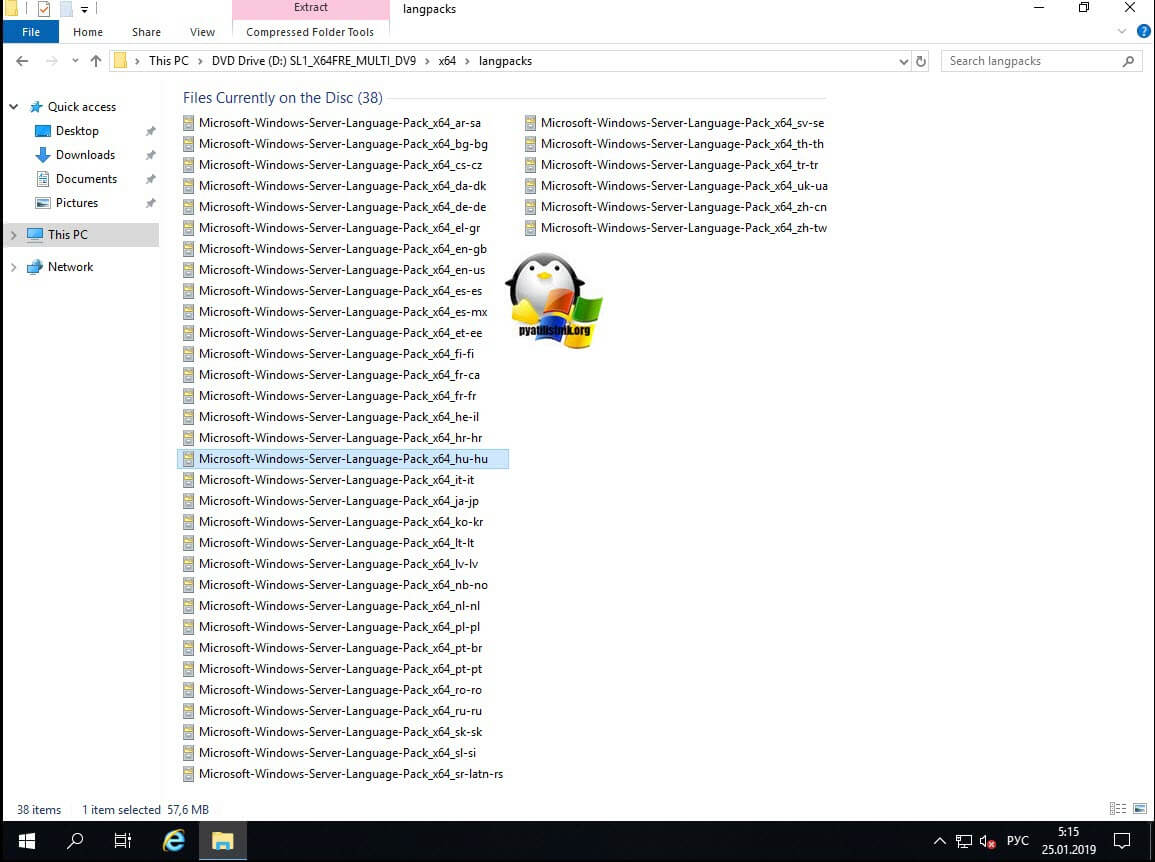
Если посмотреть содержимое диска Language pack Windows Server 2019, то вы там обнаружите список пакетов Microsoft-Windows-Server-Language-Pack_x64_ru-ru.lp.
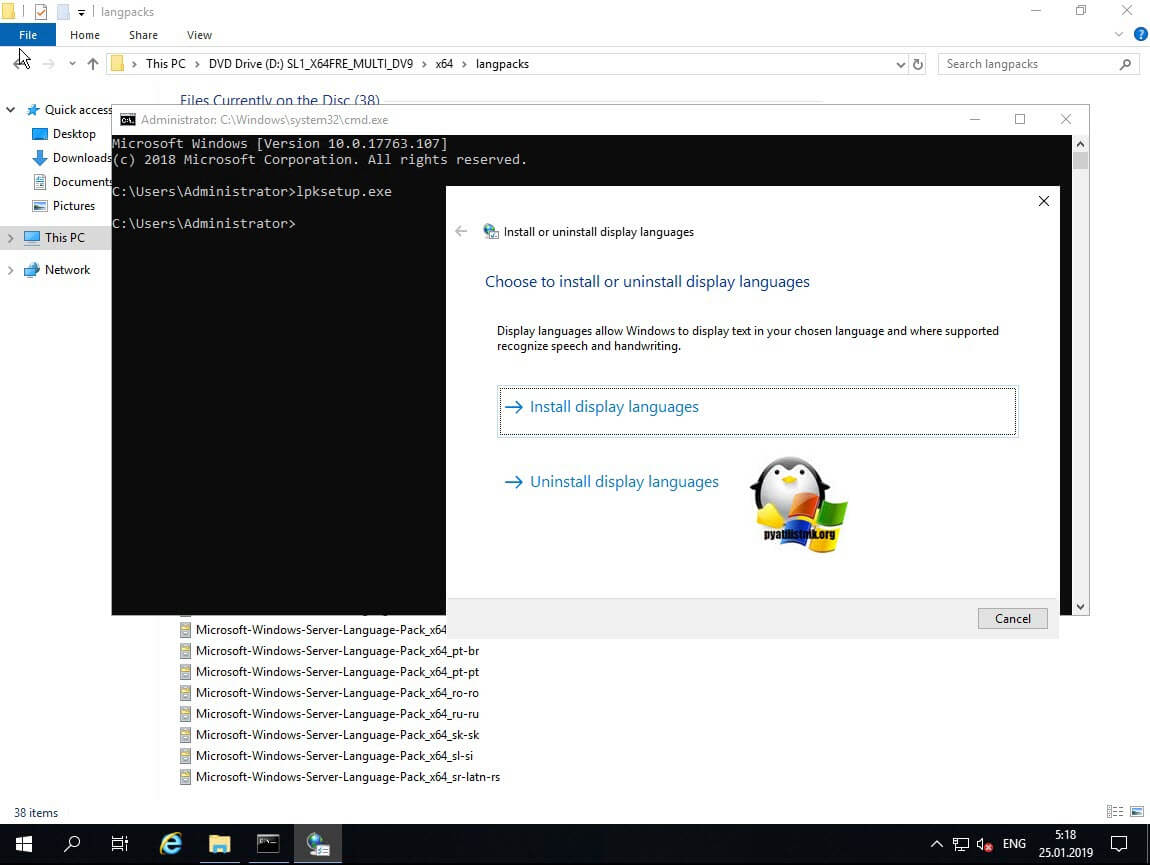
Что нам нужно выполнить для локализации сервера. Откройте cmd от имени администратора и введите команду lpksetup.exe. У вас появится окно мастера установки других языков «Choose to install or uninstall display languages». Тут можно как установить, так и удалить лишний язык. Выбираем пункт «Install display languages».
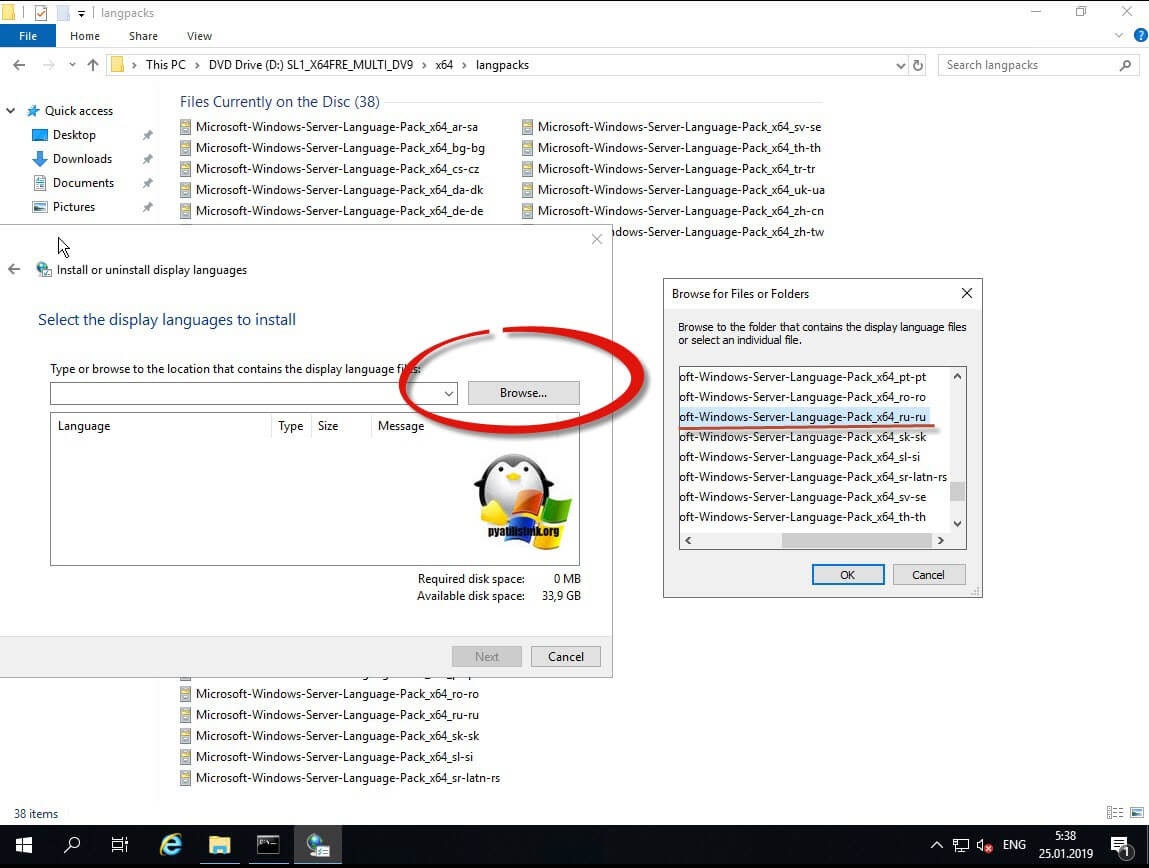
Через кнопку «Browse» выберите ваш пакет Microsoft-Windows-Server-Language-Pack_x64_ru-ru.
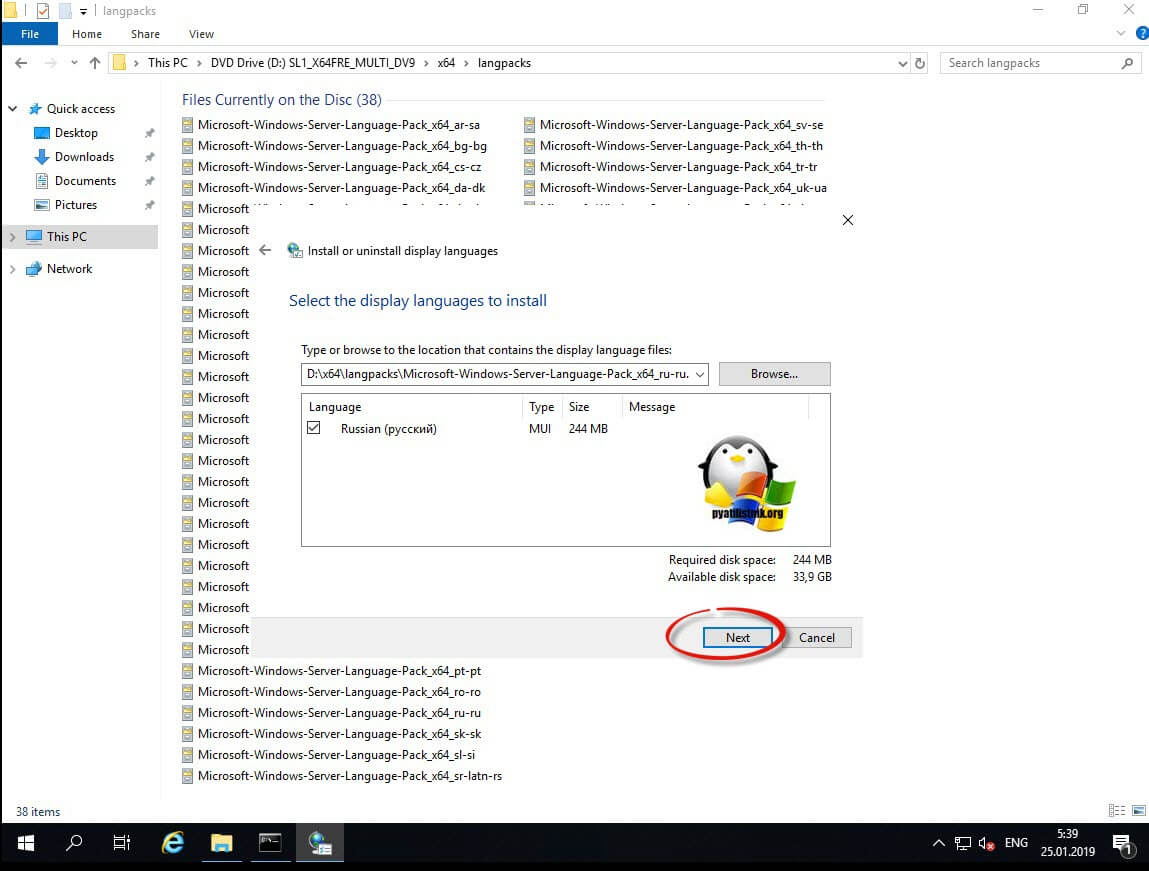
Видим, что выбран русский язык, размером 244 МБ. Нажимаем «Next».
Принимаем лицензионное соглашение. оставляем выбор на «I accept the license terms» и нажимаем next.

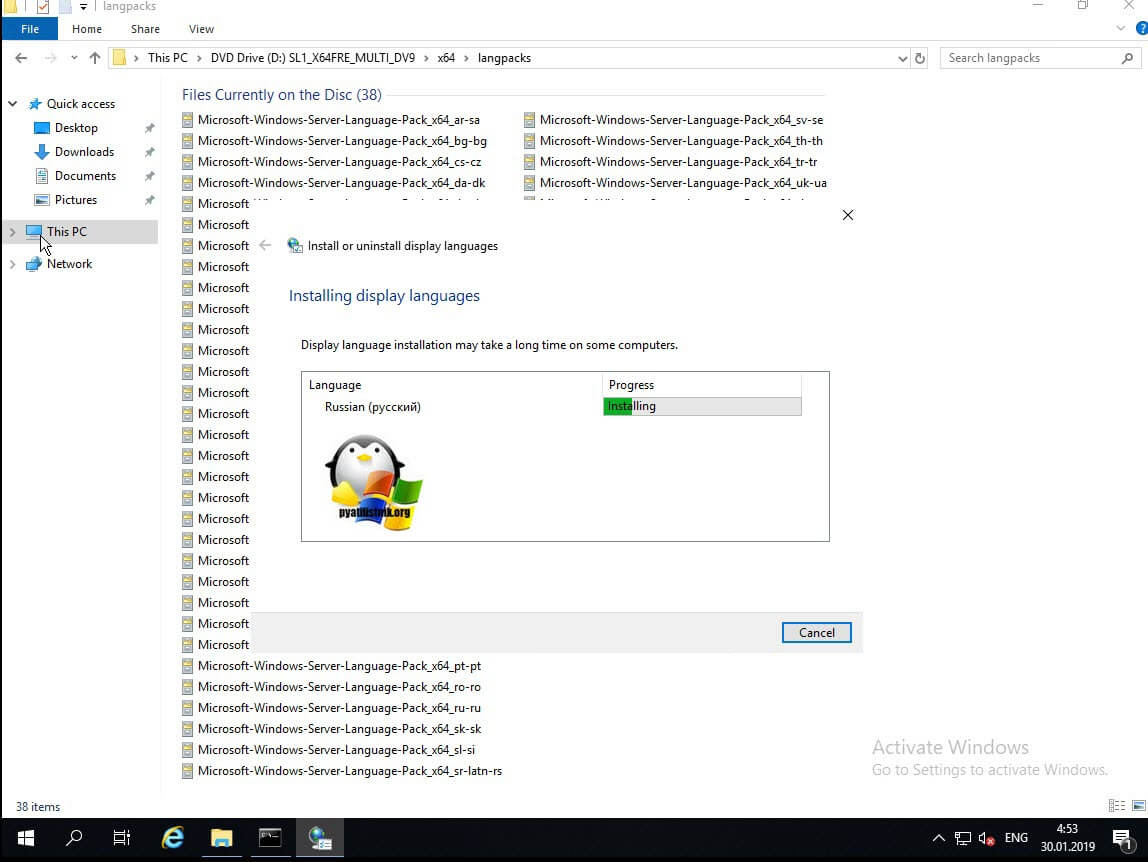
Начнется процесс установки русского MUI пакета на вашу Windows Server 2019. Сама русификация занимает минуты 3-4.
Дожидаемся окончания установки языкового пакета и нажимаем кнопку «Close»
Build Multi-Language Client Restore Media
Applies To: Windows Server 2016 Essentials, Windows Server 2012 R2 Essentials, Windows Server 2012 Essentials
You must first create a multilingual Windows image as described in the Walkthrough: Multilingual Windows Image Creation before you add the Windows Server Essentials langauage pack into install.wim.
When building the multi-language server installation DVD, the language packs will be installed for Server install.wim. The localized resources for restore wizard will be installed as part of language pack.
To build a multi-language client restore media
Mount install.wim at c:\mount, we call c:\mount\Program Files\Windows Server\bin\ClientRestore folder as root of client restore media: [RestoreMediaRoot] below:
Mount the client restore WIM file at [RestoreMediaRoot]\Sources\Boot.wim (Same steps need to be performed for boot_x86.wim too). The command line is:
Add WinPE-Setup.cab package to the restore media, by running:
Use notepad to edit c:\mountRestore\windows\system32\winpeshl.ini, fill with following content:
Add language packs to the restore media. Adding language packs can be done by running following command:
Following language packs need to be added:
WinPE language pack (lp.cab)
WinPE-Setup language pack (WinPE-Setup_[lang].cab, for example, WinPE-Setup_en-us.cab)
For Asian fonts, including zh-cn, zh-tw, zh-hk, ko-kr, ja-jp, additional font pack need to be installed (winpe-fontsupport-[lang].cab, for example, winpe-fontsupport-zh-cn.cab)
Generate new Lang.ini file, by running:
Commit and unmount the image, by running:
Repeat step 2 to Step 7 for [RestoreMediaroot]\Sources\Boot_x86.wim.
Add language packs to a Windows 10 multi-session image
Windows Virtual Desktop is a service that your users can deploy anytime, anywhere. That’s why it’s important that your users be able to customize which language their Windows 10 Enterprise multi-session image displays.
There are two ways you can accommodate the language needs of your users:
- Build dedicated host pools with a customized image for each language.
- Have users with different language and localization requirements in the same host pool, but customize their images to ensure they can select whichever language they need.
The latter method is a lot more efficient and cost-effective. However, it’s up to you to decide which method best suits your needs. This article will show you how to customize languages for your images.
Prerequisites
You need the following things to customize your Windows 10 Enterprise multi-session images to add multiple languages:
An Azure virtual machine (VM) with Windows 10 Enterprise multi-session, version 1903 or later
The Language ISO, Feature on Demand (FOD) Disk 1, and Inbox Apps ISO of the OS version the image uses. You can download them here:
If you use Local Experience Pack (LXP) ISO files to localize your images, you will also need to download the appropriate LXP ISO for the best language experience
An Azure Files Share or a file share on a Windows File Server Virtual Machine
The file share (repository) must be accessible from the Azure VM you plan to use to create the custom image.
Create a content repository for language packages and features on demand
To create the content repository for language packages and FODs and a repository for the Inbox Apps packages:
On an Azure VM, download the Windows 10 Multi-Language ISO, FODs, and Inbox Apps for Windows 10 Enterprise multi-session, version 1903/1909, and 2004 images from the links in Prerequisites.
Open and mount the ISO files on the VM.
Go to the language pack ISO and copy the content from the LocalExperiencePacks and x64\langpacks folders, then paste the content into the file share.
Go to the FOD ISO file, copy all of its content, then paste it into the file share.
Go to the amd64fre folder on the Inbox Apps ISO and copy the content in the repository for the inbox apps that you’ve prepared.
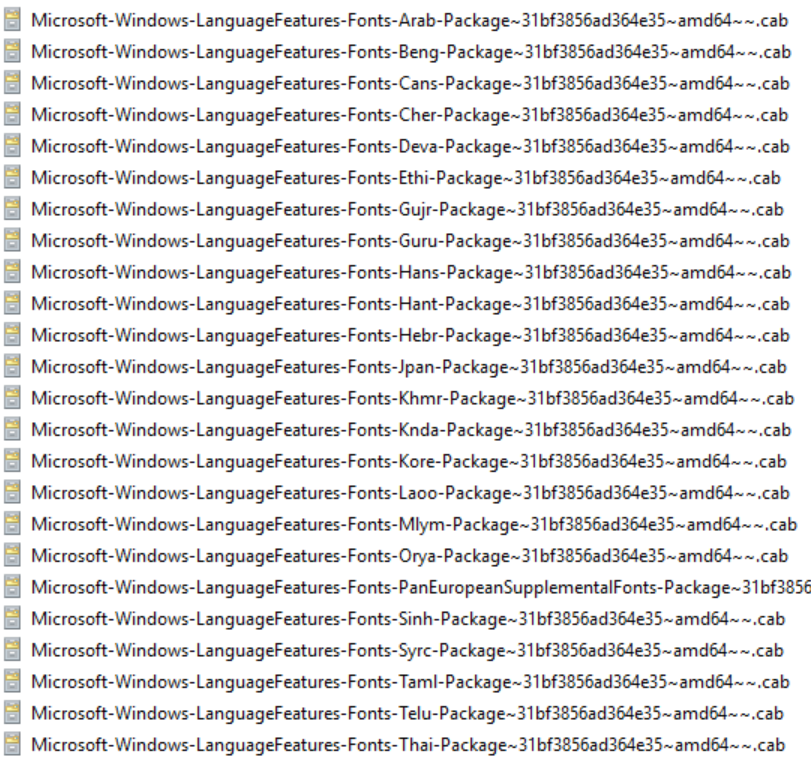
If you’re working with limited storage, only copy the files for the languages you know your users need. You can tell the files apart by looking at the language codes in their file names. For example, the French file has the code «fr-FR» in its name. For a complete list of language codes for all available languages, see Available language packs for Windows.
Some languages require additional fonts included in satellite packages that follow different naming conventions. For example, Japanese font file names include “Jpan.»
Set the permissions on the language content repository share so that you have read access from the VM you’ll use to build the custom image.
Create a custom Windows 10 Enterprise multi-session image manually
To create a custom Windows 10 Enterprise multi-session image manually:
- Deploy an Azure VM, then go to the Azure Gallery and select the current version of Windows 10 Enterprise multi-session you’re using.
- After you’ve deployed the VM, connect to it using RDP as a local admin.
- Make sure your VM has all the latest Windows Updates. Download the updates and restart the VM, if necessary.
- Connect to the language package, FOD, and Inbox Apps file share repository and mount it to a letter drive (for example, drive E).
Create a custom Windows 10 Enterprise multi-session image automatically
If you’d rather install languages through an automated process, you can set up a script in PowerShell. You can use the following script sample to install the Spanish (Spain), French (France), and Chinese (PRC) language packs and satellite packages for Windows 10 Enterprise multi-session, version 2004. The script integrates the language interface pack and all necessary satellite packages into the image. However, you can also modify this script to install other languages. Just make sure to run the script from an elevated PowerShell session, or else it won’t work.
The script might take a while depending on the number of languages you need to install.
Once the script is finished running, check to make sure the language packs installed correctly by going to Start > Settings > Time & Language > Language. If the language files are there, you’re all set.
After adding additional languages to the Windows image, the inbox apps are also required to be updated to support the added languages. This can be done by refreshing the pre-installed apps with the content from the inbox apps ISO. To perform this refresh in a disconnected environment (no Internet Access from the VM possible), you can use the following PowerShell script sample to automate the process.
The inbox apps included in the ISO aren’t the latest versions of the pre-installed Windows apps. To get the latest version of all apps, you need to update the apps using the Windows Store App and perform an manual search for updates after you’ve installed the additional languages.
When you’re done, make sure to disconnect the share.
Finish customizing your image
After you’ve installed the language packs, you can install any other software you want to add to your customized image.
Once you’re finished customizing your image, you’ll need to run the system preparation tool (sysprep).
Open an elevated command prompt and run the following command to generalize the image:
Stop the VM, then capture it in a managed image by following the instructions in Create a managed image of a generalized VM in Azure.
You can now use the customized image to deploy a Windows Virtual Desktop host pool. To learn how to deploy a host pool, see Tutorial: Create a host pool with the Azure portal.
Enable languages in Windows settings app
Finally, after you deploy the host pool, you’ll need to add the language to each user’s language list so they can select their preferred language in the Settings menu.
To ensure your users can select the languages you installed, sign in as the user, then run the following PowerShell cmdlet to add the installed language packs to the Languages menu. You can also set up this script as an automated task or logon script that activates when the user signs in to their session.
After a user changes their language settings, they’ll need to sign out of their Windows Virtual Desktop session and sign in again for the changes to take effect.
Next steps
If you have any other questions about Windows 10 Enterprise multi-session, check out our FAQ.


