- How to Shadow (Remote Control) a User’s RDP session on RDS Windows Server 2016/2019?
- Shadow Connection Options in the Windows RDP Client (mstsc.exe)
- Using Remote Desktop Shadow from the Windows GUI
- Configuring RDS Shadow Rules on Windows Using GPO
- Shadowing RDP Session with PowerShell
- How-to Allow Non-admin Users to Shadow RDS Sessions?
- query session
- Syntax
- Parameters
- Remarks
- Examples
- Log off or Disconnect User Sessions
- Logging off or disconnecting a session
- Suspending or ending a user’s session
How to Shadow (Remote Control) a User’s RDP session on RDS Windows Server 2016/2019?
Shadow session mode allows RDS administrators to view and interact with the user’s desktop. Remote Desktop Shadowing mode works on all modern versions of Windows starting from Windows Server 2012 R2 and Windows 8.1 (except for Windows Server 2012, due to the transfer of the RDP stack from kernel to user mode). In this article, we’ll look at how to configure and use RDS Shadowing to connect and manage active RDP user sessions on Windows Server 2016 and Windows 10.
Shadow Connection Options in the Windows RDP Client (mstsc.exe)
On Windows Server 2016/Windows 10, the built-in RDP client ( mstsc.exe ) has several special options that can be used to remotely shadow connect to an active RDP session of any user:
Mstsc.exe [/shadow:sessionID [/v:Servername] [/control] [/noConsentPrompt] [/prompt]]
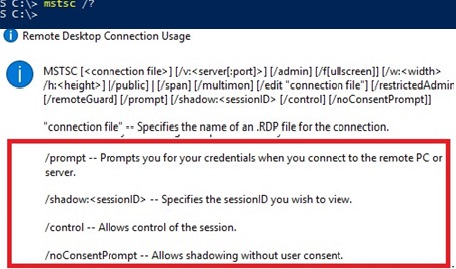
- /shadow:ID – connect to the user’s RDP session with the specified ID;
- /v:servername – you can specify the hostname or IP address of the remote RDP/RDS host. If not set, connections are made to local user sessions on the current host;
- /control – allows to interact with the user session (desktop). The administrator can control the user’s mouse, input data from the keyboard. If this parameter is not set, the user’s session view mode is used;
- /noConsentPrompt – the option allows the administrator to force the connection to any session without asking the user to confirm the connection;
- /prompt – allows to connect with other credentials. The user name and password are requested to connect to the remote computer.
Shadow sessions can be used to connect to user sessions on computers and servers in both an Active Directory domain and a workgroup. In addition, it is not necessary to have administrator privileges on the RDS host on this the user’s RDP session is running . Administrators can delegate RDS Shadowing permissions to any user account, even for non-admins (more on this below).
Using Remote Desktop Shadow from the Windows GUI
You can connect to a user session using mstsc.exe or directly from Server Manager graphical console. To do it, open the Server Manager console on the RDS server, go to the Remote Desktop Services section -> select your collection, for example QuickSessionCollection .
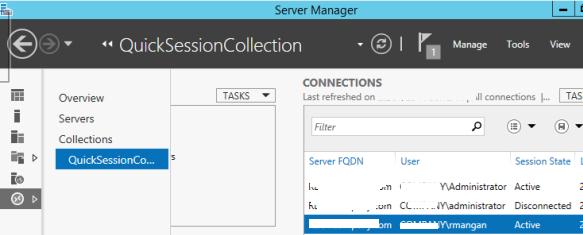
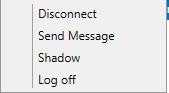
The list on the right will contain a list of users who have sessions on this RDS server. Right-click on the user session you want, select Shadow from the drop-down menu.
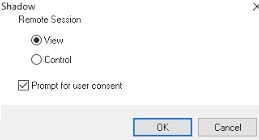
A window with Shadow connection parameters will appear. You can either View or Control a user’s RDP session. You can also check Prompt for user consent option.
If this option is checked, the following request appears in the user’s RDP session:
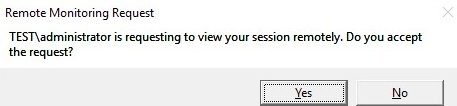
If the user confirms the connection, the administrator will see his desktop in View mode, but won’t be able to interact with it.
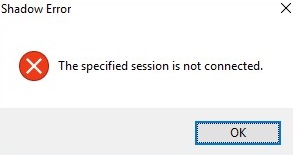
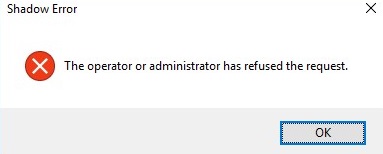
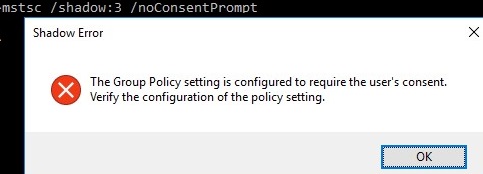
If a user rejects the administrative Shadow RDS connection, the following message appears:
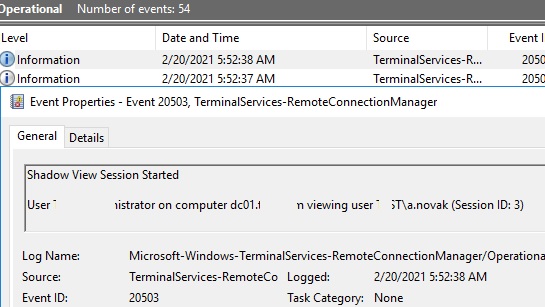
If you need to audit RDS shadow connection events for user sessions, use the following filtered events from the Microsoft-Windows-TerminalServices-RemoteConnectionManager/Operational log:
- Event ID 20508: Shadow View Permission Granted;
- Event ID 20503: Shadow View Session Started;
- Event ID 20504: Shadow View Session Stopped.
Configuring RDS Shadow Rules on Windows Using GPO
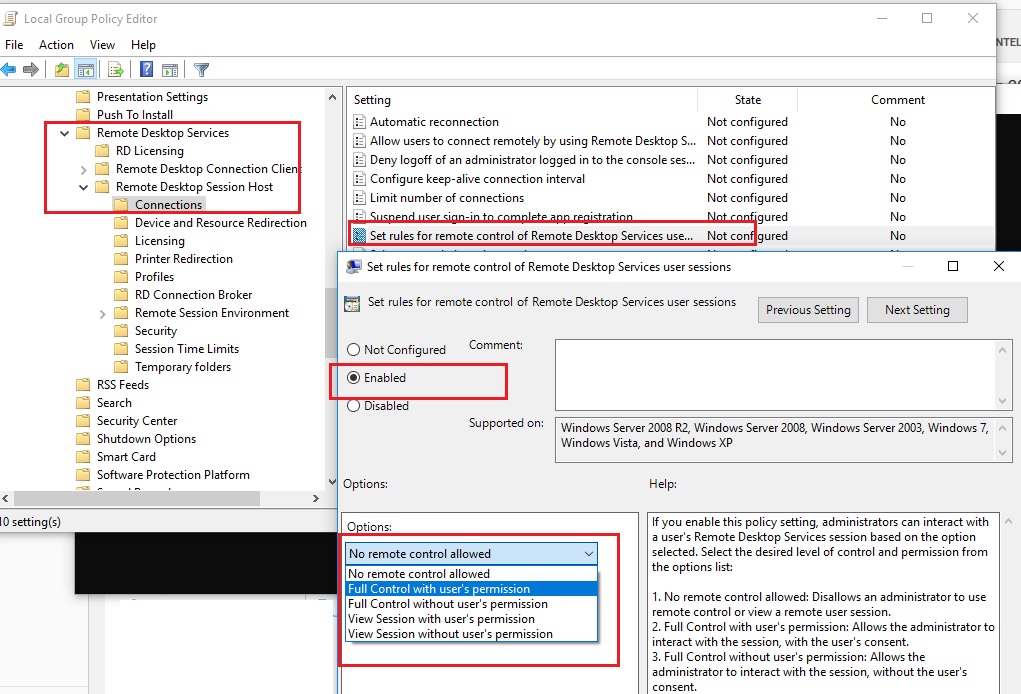
The settings for remote connections to RDS user sessions are configured using the Group Policy parameter Set rules for remote control of Remote Desktop Services user sessions, which is located under the User and Computer sections of the GPO: Policies -> Administrative Templates -> Windows components -> Remote Desktop Services -> Remote Session Host -> Connections. This policy corresponds to the DWORD Shadow parameter under the registry key HKLM\SOFTWARE\Policies\Microsoft\Windows NT\Terminal Services (the values of this parameter corresponding to the policy settings are specified in brackets).
This policy can be used to configure the following RD Shadow connection options:
- No remote control allowed (corresponds to the value of the registry parameter Shadow = 0 );
- Full Control with user’s permission ( 1 );
- Full Control without user’s permission ( 2 );
- View Session with user’s permission ( 3 );
- View Session without user’s permission ( 4 ).
reg add «HKEY_LOCAL_MACHINE\SOFTWARE\Policies\Microsoft\Windows NT\Terminal Services» /v Shadow /t REG_DWORD /d 4
You can configure rules for remote shadow connections in the AD domain from the gpmc.msc console using the policy parameter described above, or by using Group Policy Preferences, which directly modify the registry parameter (the latter option allows you to more accurately target the policy to specific computers using the Group Policy Item Level Targeting).
Shadowing RDP Session with PowerShell
You can also use the Remote Desktop Services Shadow features to connect to a user’s session from PowerShell. First of all, you need to get a list of sessions on the RDS host (user sessions will be grouped according to their state):
Get-RDUserSession | ft Username, UnifiedSessionId, SessionState, HostServer, ApplicationType -GroupBy Sessionstate 
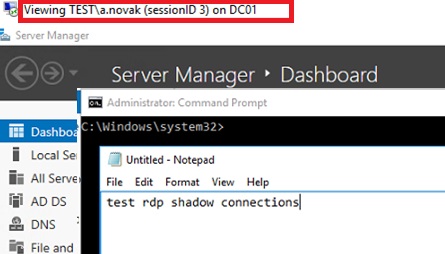
There are three active RDP user sessions on this server. Let’s connect to the user session with the session ID 3:
Mstsc /shadow:3 /control
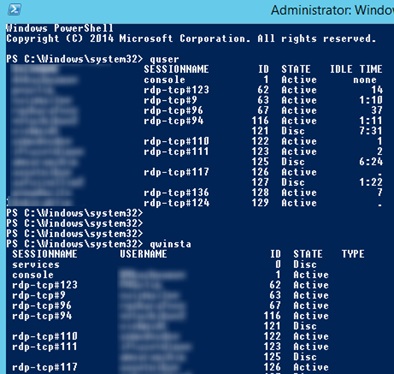
Also, to get a list of all RDP sessions on the server (or on the Windows 10 desktop to which multiple RDP connections are allowed), you can use the command:
The screen will display a list of RDP user sessions, their IDs and states: Active or Disconnected .
To show the list of sessions on a remote server, run the following command:
query session /server:servername
To connect to a user session on a remote server, use the command:
mstsc /v:rdsh2:3389 /shadow:3 /control
For more convenient shadow connection to RDP user sessions, you can use the following batch script. It prompts you to enter the name of the remote RDS server, displays a list of all sessions and prompts you to specify the session (ID) to which you want to connect to:
shadow.bat
@echo off
set /P rcomp=»Enter name or IP of a Remote PC: »
query session /server:%rcomp%
set /P rid=»Enter RDP user ID: »
start mstsc /shadow:%rid% /v:%rcomp% /control
You can save this bat file in the %Windir%\System32 directory. As a result, you just need to run the shadow command to start the shadow connection.
You can also use the following PowerShell script with a simple GUI (shadow_user_rdp_session.ps1) for shadow connection:
Add-Type -assembly System.Windows.Forms
$Header = «SESSIONNAME», «USERNAME», «ID», «STATUS»
$gForm = New-Object System.Windows.Forms.Form
$gForm.Text =’Shadow Session Connect’
$gForm.Width = 400
$gForm.AutoSize = $true
$dBttn = New-Object System.Windows.Forms.Button
$dBttn.Text = ‘Control’
$dBttn.Location = New-Object System.Drawing.Point(15,10)
$gForm.Controls.Add($dBttn)
$dList = New-Object System.Windows.Forms.ListView
$dList.Location = New-Object System.Drawing.Point(0,50)
$dList.Width = $gForm.ClientRectangle.Width
$dList.Height = $gForm.ClientRectangle.Height
$dList.Anchor = «Top, Left, Right, Bottom»
$dList.MultiSelect = $False
$dList.View = ‘Details’
$dList.FullRowSelect = 1;
$dList.GridLines = 1
$dList.Scrollable = 1
$gForm.Controls.add($dList)
foreach ($column in $Header) <
$dList.Columns.Add($column) | Out-Null
>
$(qwinsta.exe | findstr «Active») -replace «^[\s>]» , «» -replace «\s+» , «,» | ConvertFrom-Csv -Header $Header | ForEach-Object <
$dListItem = New-Object System.Windows.Forms.ListViewItem($_.SESSIONNAME)
$dListItem.Subitems.Add($_.USERNAME) | Out-Null
$dListItem.Subitems.Add($_.ID) | Out-Null
$dListItem.Subitems.Add($_.STATUS) | Out-Null
$dList.Items.Add($dListItem) | Out-Null
>
$dBttn.Add_Click(
<
$SelectedItem = $dList.SelectedItems[0]
if ($SelectedItem -eq $null) <
[System.Windows.Forms.MessageBox]::Show(«Select a user session to connect «)
>else <
$session_id = $SelectedItem.subitems[2].text
$(mstsc /shadow:$session_id /control)
#[System.Windows.Forms.MessageBox]::Show($session_id)
>
>
)
$gForm.ShowDialog()
This script displays a simple graphical form with a list of active RDP sessions on the local host. You just need to select a user account and click the Connect button.
You can use the shadow user connection not only on Windows Server with the Remote Desktop Services role, but also to connect to users’ desktops running Windows 10 (Using Remote Desktop Session Shadowing Mode in Windows 10).
How-to Allow Non-admin Users to Shadow RDS Sessions?
In the examples above, using the shadow connection to RDS user sessions requires local administrator privileges on the RDS server. However, you can allow a non-admin user to shadow RDP sessions without granting local admin permissions on the computer/server.
For instance, you want to allow members of the AllowRDSShadow group to use a shadow connection to RDP user sessions. Open the elevated command prompt (cmd.exe) and run the command:
wmic /namespace:\\root\CIMV2\TerminalServices PATH Win32_TSPermissionsSetting WHERE (TerminalName=”RDP-Tcp”) CALL AddAccount “woshub\AllowRDSShadow”,2
query session
Applies to: Windows Server (Semi-Annual Channel), Windows Server 2019, Windows Server 2016, Windows Server 2012 R2, Windows Server 2012
Displays information about sessions on a Remote Desktop Session Host server. The list includes information not only about active sessions but also about other sessions that the server runs.
Syntax
Parameters
| Parameter | Description |
|---|---|
| Specifies the name of the session that you want to query. | |
| Specifies the name of the user whose sessions you want to query. | |
| Specifies the ID of the session that you want to query. | |
| /server: | Identifies the rd Session Host server to query. The default is the current server. |
| /mode | Displays current line settings. |
| /flow | Displays current flow-control settings. |
| /connect | Displays current connect settings. |
| /counter | Displays current counters information, including the total number of sessions created, disconnected, and reconnected. |
| /? | Displays help at the command prompt. |
Remarks
A user can always query the session to which the user is currently logged on. To query other sessions, the user must have special access permission.
If you don’t specify a session using the , , or sessionID parameters, this query will display information about all active sessions in the system.
When query session returns information, a greater than (>) symbol is displayed before the current session. For example:
- SESSIONNAME specifies the name assigned to the session.
- USERNAME indicates the user name of the user connected to the session.
- STATE provides information about the current state of the session.
- TYPE indicates the session type.
- DEVICE, which isn’t present for the console or network-connected sessions, is the device name assigned to the session.
- Any sessions in which the initial state is configured as DISABLED won’t show up in the query session list until they’re enabled.
Examples
To display information about all active sessions on server Server2, type:
To display information about active session modeM02, type:
Log off or Disconnect User Sessions
MultiPoint Services users can log on and log off of their desktop sessions as they would with any Windows session. Users can also disconnect or suspend their session so that the MultiPoint Services station is not being used, but their session remains active in the MultiPoint Services system’s computer memory.
In addition, administrative users can end a user’s session if the user has stepped away from their MultiPoint Services session or has forgotten to log off of the system.
Logging off or disconnecting a session
The following table describes the different options that you or any user can use to log off, suspend, or end a session.
| Action | Effect |
|---|---|
| Click Start, click Settings, click the user name (top-right corner), and then click Sign out. | The session ends and the station is available for log on by any user. |
| Click Start, click Settings, click Power, and then click Disconnect. | Your session is disconnected and your session is preserved in computer memory. The station becomes available for log on by the same user or a different user. |
| Click Start, click Settings, click the user name (top-right corner), and then click Lock | The station is locked and your session is preserved in computer memory. |
Suspending or ending a user’s session
The following table describes the different options that you, as an administrative user, can use to disconnect or end a user’s session.


