- Audio Service cannot start Error 0x80070005 Access is denied in Windows 10
- Fix-1 Change Log On settings-
- Fix-2 Modify Permission from Registry Editor-
- How to fix — Error 5: Access is Denied in Windows 10
- Replies (13)
- Access is denied Windows 10 error [FIX]
- How to fix Access is denied message on Windows 10?
- 1. Take ownership of the directory
- 2. Add your account to the Administrators group
- 3. Enable the hidden Administrator account
- 4. Check your permissions
- 5. Use Command Prompt to reset permissions
- 6. Set your account as administrator
- 7. Use Reset Permissions tool
- 8. Close Google Drive and reinstall it
- 9. Edit your registry
- 10. Turn off User Account Control
- 11. Disable your antivirus software
Audio Service cannot start Error 0x80070005 Access is denied in Windows 10
August 2, 2020 By Sambit Koley
In case if you are facing an audio service problem stating ‘Audio Service cannot start Error 0x80070005 Access is denied‘ error message when you are trying to play some audio on your computer, there is no need to worry. Simply, follow the fixes of this article and the problem will be solved very quickly. But before going ahead for the main solutions, try these simpler workarounds-
Workarounds–
1. If this is the first time you are facing this kind of issue with your audio devices, restarting your computer may help you to solve it.
2. At first, unplug your audio device and then plug it to your computer again. Check if you are still facing the problem.
If any of these workarounds didn’t work out for you, check out these solutions-
Fix-1 Change Log On settings-
Changing the Log On settings of the problematic service will solve this problem on your computer.
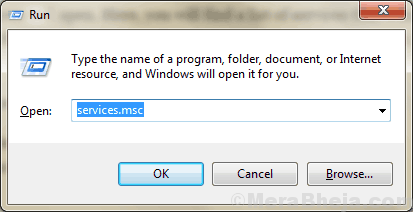
1. At first, press Windows key + R together. The Run window will open.
2. Then, you have to type “services.msc” and then hit Enter to open the Services window.
3. When the Services window has opened, scroll down and double click on “Windows Audio“.
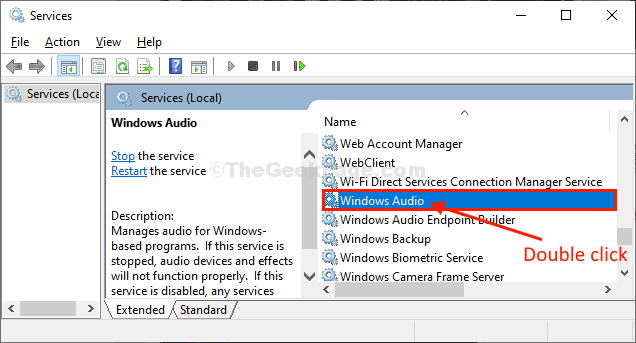
Windows Audio Properties will be opened.
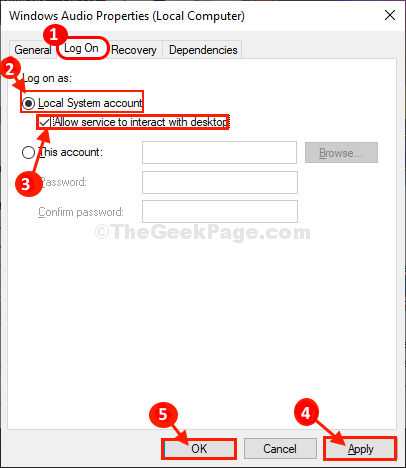
4. In the Windows Audio Properties window, go to the “Log On” tab and then click on the “Local System account” to select it.
5. Now, check the option “Allow service to interact with desktop“.
6. Finally, click on “Apply” and “OK” to save the changes on your computer.
Finally close the Services window on your computer.
Try to check if you can use the audio device on your computer or not.
Fix-2 Modify Permission from Registry Editor-
This problem may happen if your account doesn’t have full control over the audio service. To change the permission follow these steps-
1. Press Windows key+S and then type “regedit“.
2. Now, you have to click on the “Registry Editor” which will appear in the elevated search results.
3. Once the Registry Editor has opened, click on “File” on the menu bar and then click on “Export“.
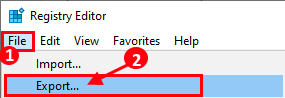
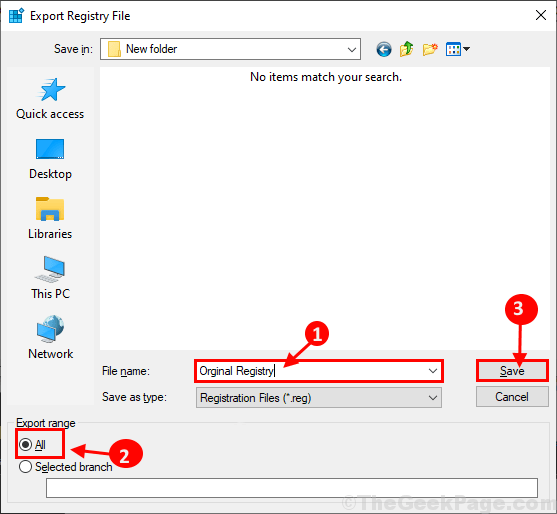
4. In the Export Registry File window, choose a location to store the backup.
5. Then, make sure that the file is named “Original Registry“.
6. Next, set the ‘Export Range‘ to “All” and then click on “Save” to save the registry backup on your computer.
During the process, if anything goes wrong, you will be able to recover your registry.
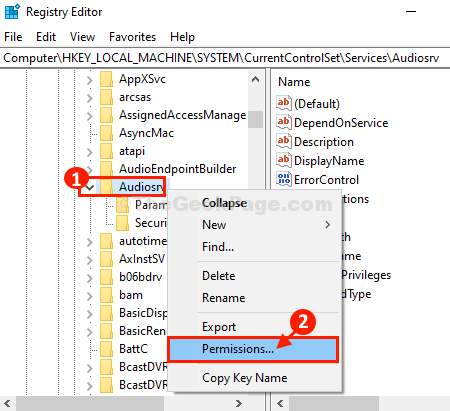
7. In Registry Editor window, on the left pane, navigate to this location-
Computer\HKEY_LOCAL_MACHINE\SYSTEM\CurrentControlSet\Services\Audiosrv
8. Now, right-click on the “Audiosrv” key and then click on “Permissions…“.
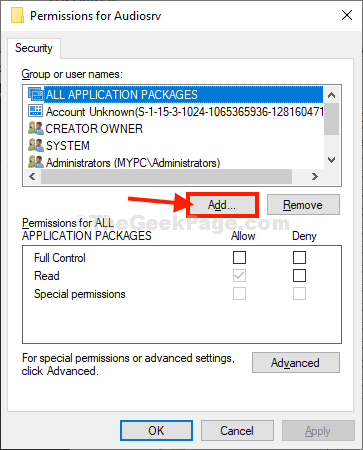
9. In Permissions for Audiosrv window, click on “Add…” .
10. Now, click on the “Advanced“.
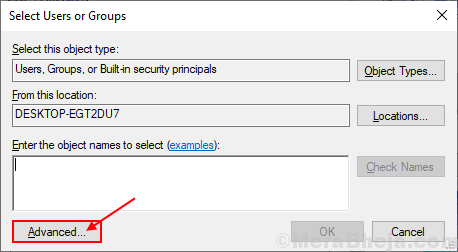
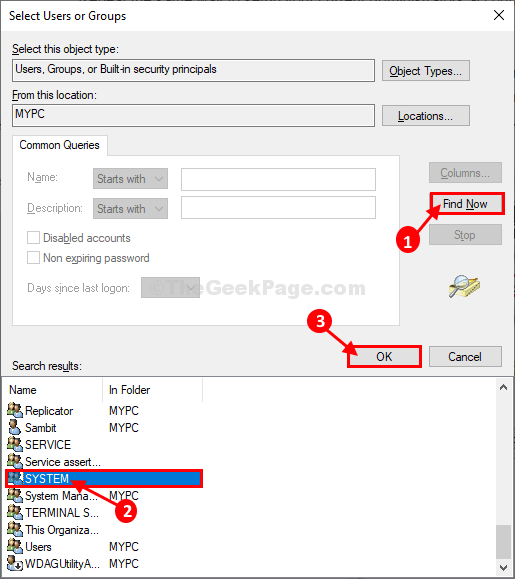
11. In Select Users Or Groups window, click on “Find Now” and then select “SYSTEM” from the ‘Search Results:‘ tab.
Finally, click on “OK“.
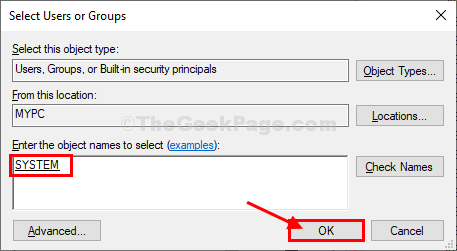
12. Next, check if “SYSTEM” appears in the ‘Enter the object names to select (examples);‘ section. Click on “OK” to save the changes.
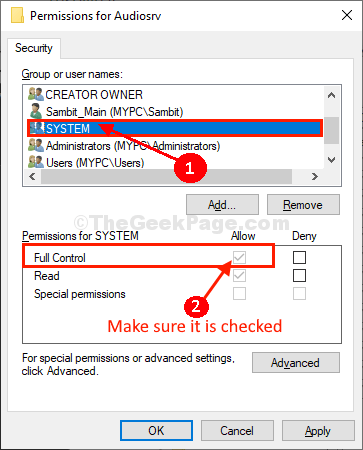
13. Coming back to Permissions for Audiosrv window, click on “System” in the ‘Group or user names:‘, check the box under “Allow” beside “Full Control” to allow full control of the key on your computer.
14. In Permissions for Audiosrv window, again click on “Add…” .
15. Click on the “Advanced“.
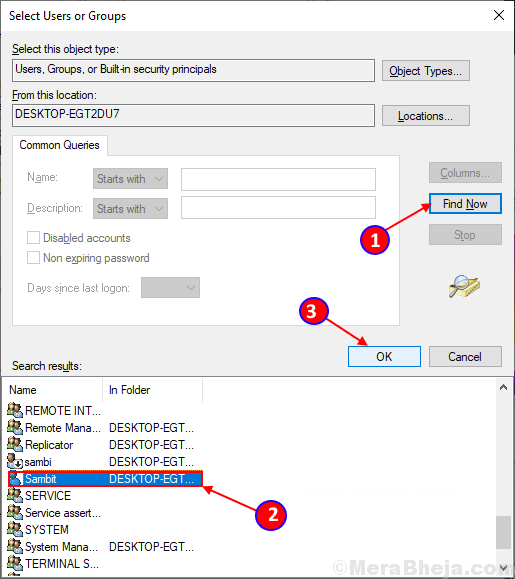
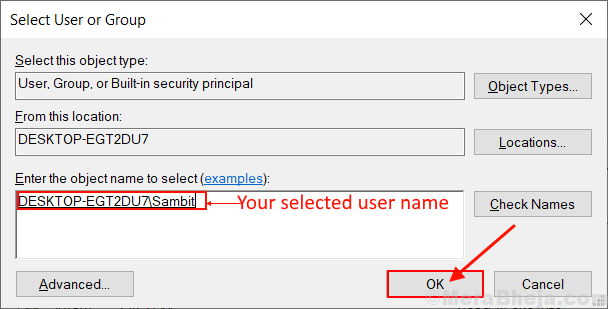
16. Now, in Select Users or Groups window, click on “Find Now” and select your username from the ‘Search results‘ box. Now, click on “OK“.
[Example– The username for this device is “Sambit“. So, we have selected it.]
17. Now, you will be able to see your selected username in the ‘Enter the object name to select‘ box. Click on “OK“.
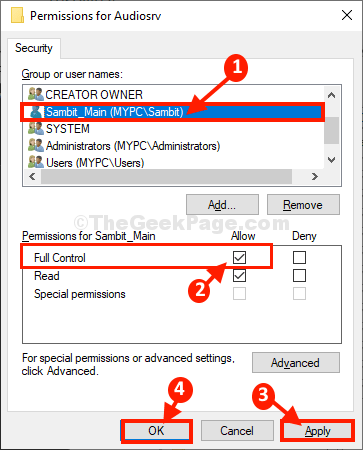
18. In Permissions for Audiosrv window, click on the username you have just added ( For us, it will be “Sambit_Main(MYPC\Sambit)” ) in the ‘Group or user names:‘,
19. Check the box under “Allow” beside “Full Control” to allow full control of the key on your computer.
20. Finally, click on “Apply” and “OK” to save the changes on your computer.
Close Registry Editor window.
You may need to reboot your computer to witness the changes.
Once rebooted, audio services should be working perfectly again on your computer. Your problem should be solved.

Sambit is a Mechanical Engineer By qualification who loves to write about Windows 10 and solutions to weirdest possible problems.
How to fix — Error 5: Access is Denied in Windows 10
Replies (13)
* Please try a lower page number.
* Please enter only numbers.
* Please try a lower page number.
* Please enter only numbers.
![]()
Thank you for posting your query in Microsoft Community.
Error indicates that you wont have required privileges to install the application to that particular system drive. Right-click on the application(.exe) file and select Run as administrator installing the same. Do f ollow the below mentioned steps and heck if it helps.
Method 1:
Open the properties of the main User Profile folder where the files are located (such as Documents, Pictures, etc.). You can open the properties of a particular folder by Right-clicking on it and select Properties from context menu.
Go to the Security tab and click Advanced. Check the box at the bottom of this window. It is labeled «Replace all child object permissions with inheritable permissions from this object» and then click Ok.
This does a one-time action that replaces the security on all the files/subfolders. It’s one-time, so you won’t find that box checked if you peek at it later. Please let us know if it’s working
Method 2:
* Press Windows Key + R , type netplwiz
* Click and highlight the User profile, which you want to make administrator
* Click on Properties , then select the Group Membership tab
* Select the Administrator, Click apply/ok
Access is denied Windows 10 error [FIX]

- Any message stating that access is denied can’t be good. If you stumble across it while using your Windows 10 running device, it’s actually worse.
- Since this can interfere with your work by not allowing you to access certain directories or apps, here’s a complete list of tested solutions to fix it.
- Speaking about solutions, do explore more on the topic by checking our File Explorer Support Guides.
- Visit the Windows 10 Troubleshooting Hub for more handy fixes that will help keep your PC in pristine condition at all times.

- Download Restoro PC Repair Tool that comes with Patented Technologies (patent available here).
- Click Start Scan to find Windows issues that could be causing PC problems.
- Click Repair All to fix issues affecting your computer’s security and performance
- Restoro has been downloaded by 0 readers this month.
Access is denied message can appear while trying to access certain directories or applications thus interfering with your work.
Although this message can cause problems, you should be able to fix it on Windows 10 by using one of our solutions.
How to fix Access is denied message on Windows 10?
Fix – Access is denied Windows 10
1. Take ownership of the directory
This error usually appears when you try to access a file or a directory while having insufficient privileges. This happens if you’re not an administrator or if you don’t have ownership over a folder.
To fix the problem you just have to assign ownership to your account, and you can do that by following these instructions:
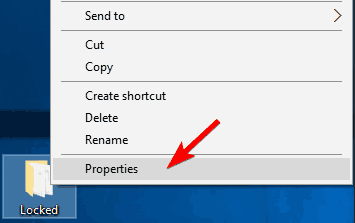
- Locate the problematic folder, right-click it and choose Properties from the menu.

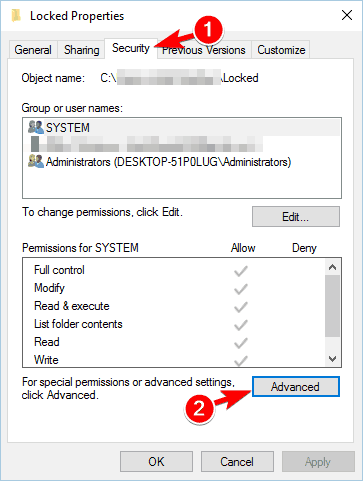
- Navigate to the Security tab and click the Advanced button.
- Locate the Owner section at the top and click on Change.
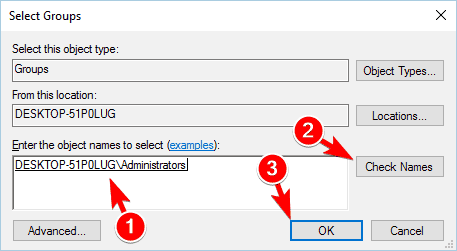
- Select User or Group window will now appear. In the Enter the object name to select field enter Administrators or enter your user name. Now click the Check Names button. If everything is in order your input will change. Click OK to save changes.
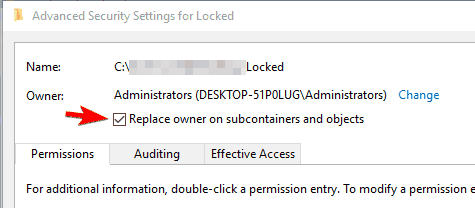
- The owner section will now change. Check Replace owner on subcontainters and objects and click Apply and OK to save changes. Some users are suggesting to check Replace all child object permission entries option, so you might do that as well.

In some cases, you might have to manually assign permissions to your account. To do that, follow these simple steps:
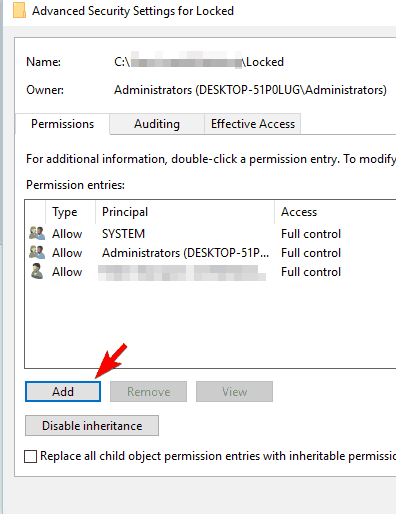
- Navigate to Advanced Security Settings.
- A list of all users will appear. If your user account isn’t listed, click the Add button.
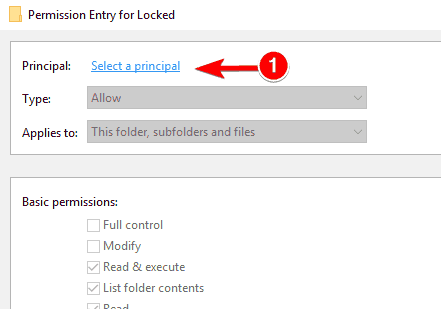
- Click on Select a principal.
- Now enter your user account name, click Check Names, and then OK. We already showed you how to do that in Step 5 above, so be sure to check it out.
- Set Type to Allow and Applies toThis folder, subfolders, and files and check Full control. Now click the OK button.

If your user name is already available, simply double click it and perform Step 5.
Another way to take ownership is to use Command Prompt. To do that, start Command Prompt as administrator and enter the following lines:
Of course, be sure to replace path_to_folder with an actual path to the inaccessible folder. After running these two commands you should have full access to the problematic folder.
2. Add your account to the Administrators group
Sometimes Access is denied message appears if you try to access a folder while not having administrator privileges. This can be a problem, but you can fix it by adding your account to the Administrators group.
To do that on Windows 10, follow these steps:
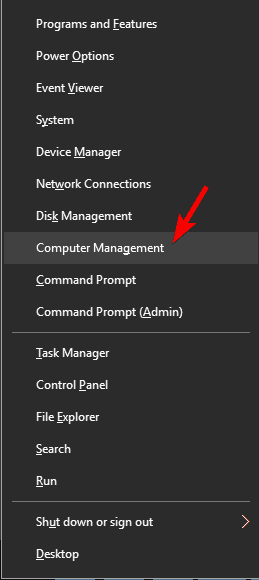
- Press Windows Key + X to open Win + X menu. Select Computer Management from the list.
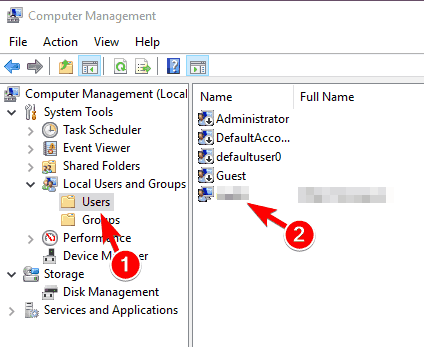
- When the Computer Management window opens, navigate to Local Users and Groups -> Users. Now double click your account in the left pane.
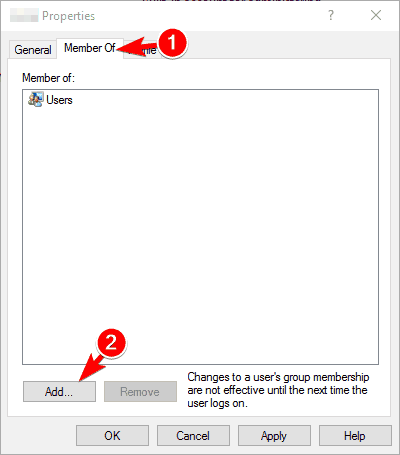
- Navigate to the Member Of tab and click the Add button.
- In Enter the object names to select field enter Administrators and click Check Names. If everything is in order, click OK.
- Select Administrators and click Apply and OK.
- After doing that, restart your PC and check if the problem is resolved.

3. Enable the hidden Administrator account
Windows 10 by default has a built-in Administrator account that you can use. By using this account you should have unrestricted access to your PC.
Due to security measures, this account isn’t easily accessible, but you can enable it by doing the following:
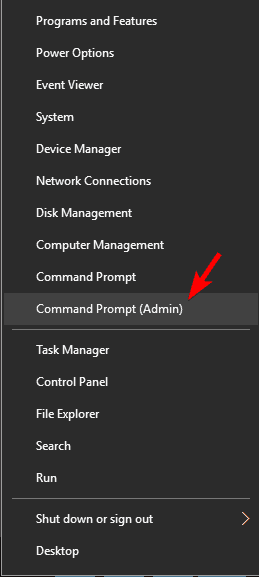
- Press Windows Key + X and select Command Prompt(Admin) from the menu.
- When Command Prompt starts, run net user administrator /active: yes command. By doing so you’ll unlock the administrator account.
- Now log off of your account and switch to the newly enabled Administrator account. From there you should be able to access your files without any problems.
- After you’re done using the Administrator account, go back to your main account and start Command Prompt as administrator again. Now enter net user administrator /active: no to disable the Administrator account.
Keep in mind that after switching back to your main account the issue might still persist. If needed, you can use the Administrator account to make the necessary changes to your system and fix the problem.
4. Check your permissions
Sometimes you’ll get Access is denied message if you lack certain permissions to access the desired directory. However, you should be able to fix the problem by following these steps:
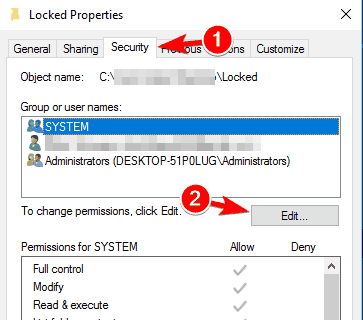
- Locate the problematic directory, right-click it and choose Properties from the menu.
- Navigate to the Security tab and click the Edit button.
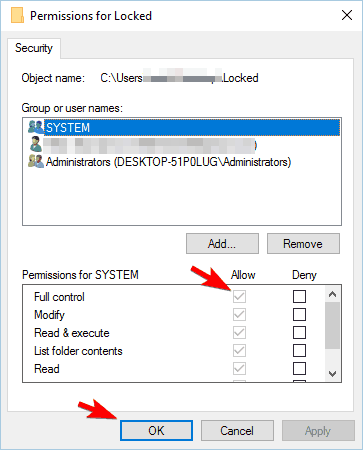
- Select your user name from the list and make sure that you check Full control for Allow column in Permissions section.
This is a simple solution, but if your user name isn’t on the list you’ll have to add it manually and then change its permissions.
Several users reported that you need to grant Full control to both Administrators and Users over the problematic folder, so be sure to try that as well.
In some cases, you might even want to give Full Control to Everyone in order to fix the problem.
5. Use Command Prompt to reset permissions
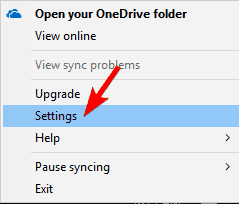
According to users, they encountered this problem while trying to access the Pictures folder. It seems that OneDrive is causing this issue, so to fix it you need to do the following:
- Right-click OneDrive icon in the bottom right corner and choose Settings from the menu.
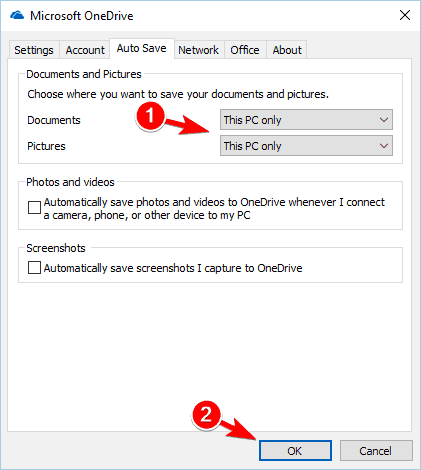
- Go to Auto Save tab and set both Documents and Pictures to This PC only. Click OK to save changes.
If that doesn’t solve the problem, you’ll need to perform the following steps as well:
- Start Command Prompt as administrator.
- When Command Prompt opens, enter the following commands:
- After doing that, restart your PC.
If the problem still persists, you might have to repeat this solution and disable OneDrive until Microsoft fixes the problem.
6. Set your account as administrator
If you’re getting Access is denied message, you might be able to fix it simply by setting your account as an administrator. This is rather simple and you can do it by following these steps:
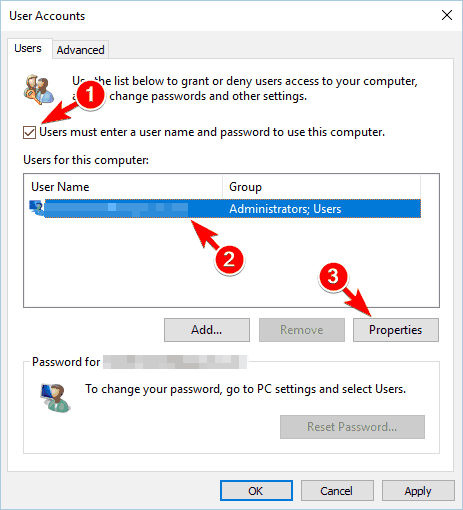
- Press Windows Key + R and enter control userpasswords2. Press Enter or click OK.
- User Accounts window will now appear. Check Users must enter a user name and password to use this computer. Now select your account and click on Properties.
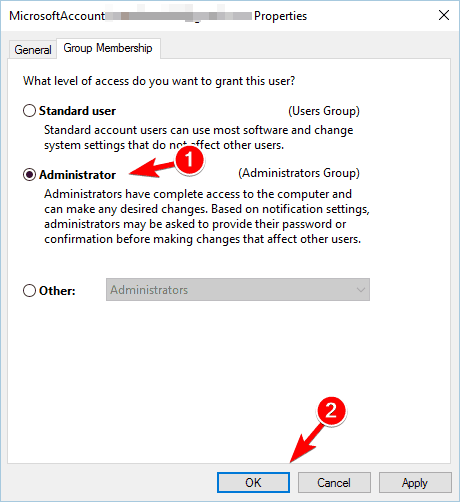
- Navigate to the Group Membership tab. Select Administrator and click Apply and OK.
- After doing that, restart your PC and check if the issue still persists.

7. Use Reset Permissions tool
According to users, you might be able to fix this problem simply by using Reset Permissions tool. Simply download the tool, run it, select the problematic directory, and check all available options.
After doing that, you should be able to access the directory without any problems.
8. Close Google Drive and reinstall it
Access is denied message sometimes appears while using Google Drive. To fix the issue, you need to completely close Google Drive and end all processes associated with it. To do that, follow these steps:
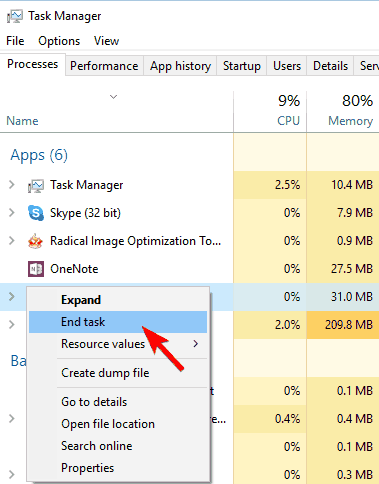
- Press Ctrl + Shift + Esc to open Task Manager.
- When Task Manager opens, locate all Google Drive processes, right-click them and choose End Task from the menu.
- After ending all Google Drive processes, uninstall the application.
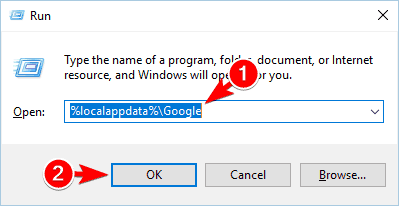
- Now press Windows Key + R and enter %localappdata%Google. Press Enter or click OK.
- Locate the Drive folder and rename it to Drive.old.
- Install Google Drive again and check if the problem is resolved.
9. Edit your registry
According to users, this error message can appear if you try to access a network shared directory. This can be a big problem, but you can resolve it by making a few changes to your registry.
Modifying the registry can cause certain issues, so be extra cautious and export your registry just in case. To modify your registry, do the following:
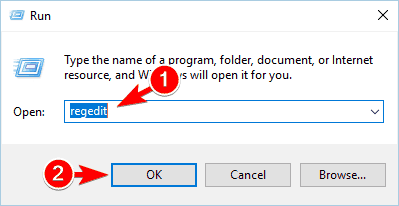
- Press Windows Key + R and enter regedit. Press Enter or click OK.
- When Registry Editor opens, in the left pane navigate to this key:
- In the right pane, right-click the empty space and choose:
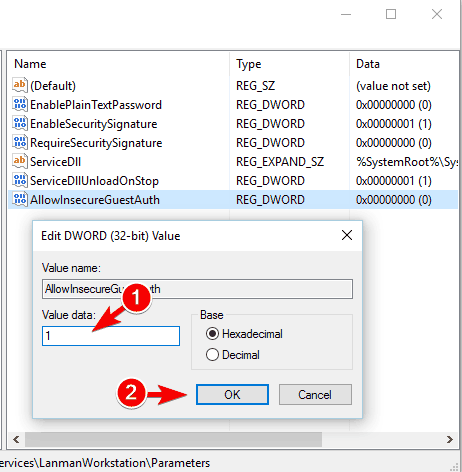
- Enter AllowInsecureGuestAuth as the name of the new DWORD.
- Double click the newly created AllowInsecureGuestAuth DWORD to open its properties. Set Value data to 1 and click OK to save changes.
- After doing that, restart your PC and check if the problem is resolved.

Keep in mind that this solution only applies to network shared folders, so it won’t work with local folders.
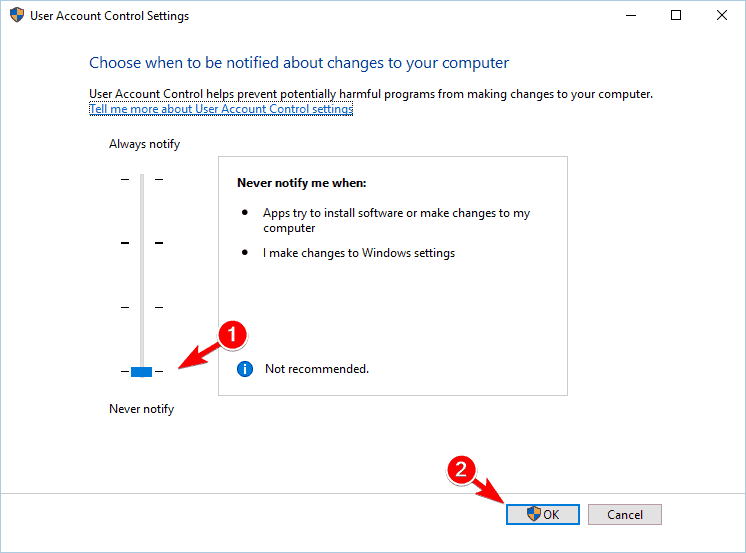
10. Turn off User Account Control
User Account Control is a useful feature that will prevent applications and users from running commands that require administrative privileges.
This is a useful feature, but sometimes it can cause Access is denied message to appear, especially when installing new software. To fix the issue, you need to do the following:
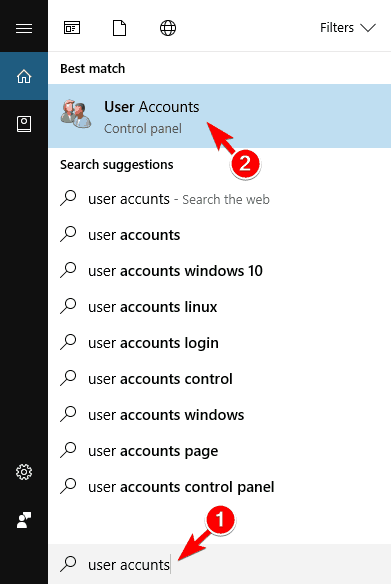
- Press Windows Key + S and enter user accounts. Now select User Accounts from the list of results.
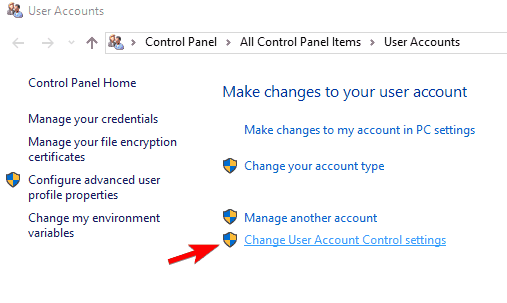
- When the User Accounts window opens, click on Change User Account Control settings.
- Move the slider all the way down and click the OK button to save changes.
- After doing that, try to install the application again.
11. Disable your antivirus software
Antivirus software is rather important, but sometimes third-party antivirus can cause this error to appear.
According to users, they got Access is denied message while trying to install certain applications, and the cause was their security software.
To fix this issue you just need to temporarily disable your security software and try to install the application again.
If the problem doesn’t appear, it means that the issue was caused by your antivirus software, so you should consider updating or replacing it.
Best antiviruses at the moment are Bitdefender, BullGuard (free download), and Panda. We strongly recommend Bitdefender for its highly-rated features that will keep your PC safe and optimized.


