- Windows 7 SP1 and Windows Server 2008 R2 SP1 update history
- Current status of Windows 7 SP1 and Windows Server 2008 R2 SP1
- Notes and messages
- General
- Extended security update (ESU)
- Установка Service Pack 1 на Windows 7 – пошаговая инструкция
- Что такое RTM версия Windows 7?
- Что такое Service Pack?
- Зачем нужен Service Pack в Windows 7, и нужно ли его устанавливать?
- Как узнать какой у меня Service Pack?
- Узнаем версию Windows и номер Service Pack с помощью окна «Система»
- Узнаем версию Windows и номер Service Pack с помощью встроенной программы WinVer
- Узнаем версию Windows и номер Service Pack, используя окно «Сведения о системе»
- Где скачать Service Pack 1 для Windows 7?
- Установка Service Pack 1 на Windows 7
- Troubleshoot issues installing Windows 7 Service Pack 1
- Summary
- Uninstall display languages
- System Restore
- Resolve Error 0x80073701, Error 0x800f0a136, or Error 0x800f0826
- Resolve Error 0x800F0A12
Windows 7 SP1 and Windows Server 2008 R2 SP1 update history
Windows 7 SP1, Windows Server 2008 R2 SP1, Windows Embedded Standard 7 SP1, Windows Embedded POSReady 7, and Windows Thin PC
Learn about the security and non-security updates that are published for Windows 7 SP1 and Windows Server 2008 R2 SP1 through Windows Update. These updates address issues and improve the overall reliability of the operating system.
Windows 7 Service Pack 1 rollups (monthly rollups and security-only updates) are applicable by default to the following Windows 7-based embedded products:
Windows Embedded Standard 7 Service Pack 1.
Windows Embedded POSReady 7.
Windows Thin PC.
If a rollup is not applicable to an embedded product, we will explicitly state that it is not applicable.
The left column of this page lists all the updates that have been released for this version of Windows. We recommend that you install all the updates for Windows that are available for your device. Installing the most recent update means that you also get all the previous updates, including important security fixes.
Current status of Windows 7 SP1 and Windows Server 2008 R2 SP1
For the most up-to-date information about Known Issues for Windows and Windows Server, please go to the Windows release health dashboard.
Notes and messages
General
IMPORTANT Starting in July 2020, all Windows Updates will disable the RemoteFX vGPU feature because of a security vulnerability. For more information about the vulnerability, seeCVE-2020-1036 and KB4570006. After you install this update, attempts to start virtual machines (VM) that have RemoteFX vGPU enabled will fail, and messages such as the following will appear:
If you re-enable RemoteFX vGPU, a message similar to the following will appear:
“The virtual machine cannot be started because all the RemoteFX-capable GPUs are disabled in Hyper-V Manager.”
“The virtual machine cannot be started because the server has insufficient GPU resources.”
«We no longer support the RemoteFX 3D video adapter. If you are still using this adapter, you may become vulnerable to security risk. Learn more (https://go.microsoft.com/fwlink/?linkid=2131976)”
IMPORTANT WSUS scan cab files will continue to be available for Windows 7 SP1 and Windows Server 2008 R2 SP1. If you have a subset of devices running these operating systems without ESU, they might show as non-compliant in your patch management and compliance toolsets.
IMPORTANT Starting on January 15, 2020, a full-screen notification will appear that describes the risk of continuing to use Windows 7 Service Pack 1 after it reaches end of support on January 14, 2020. The notification will remain on the screen until you interact with it. This notification will only appear on the following editions of Windows 7 Service Pack 1:
Note The notification will not appear on domain-joined devices or devicess in kiosk mode.
Professional. If you have purchased the Extended Security Update (ESU), the notification will not appear. For more information, see How to get Extended Security Updates for eligible Windows devices and Lifecycle FAQ-Extended Security Updates.
Extended security update (ESU)
IMPORTANT Customers who have purchased the Extended Security Update (ESU) for on-premises versions of these operating systems must follow the procedures in KB4522133 to continue receiving security updates after extended support ends. Extended support ends as follows:
For more information about ESU and which editions are supported, see KB4497181.
For Windows 7 Service Pack 1 and Windows Server 2008 R2 Service Pack 1, extended support ends on January 14, 2020.
For Windows Embedded Standard 7, extended support ends on October 13, 2020.
IMPORTANT Some customers who use Windows Server 2008 R2 SP1 and have activated their ESU multiple activation key (MAK) add-on before installing the January 14, 2020 updates might need to re-activate their key. Re-activation on the affected devices should only be required once. For information on activation, see this blog post.
Установка Service Pack 1 на Windows 7 – пошаговая инструкция
Если у Вас установлена RTM версия операционной системы Windows 7, то Вам необходимо (рекомендовано) обновить ее до Service Pack 1, поэтому в сегодняшнем материале я подробно расскажу и покажу, как это можно сделать и для чего это вообще нужно.
Прежде чем переходить к рассмотрению процесса установки Service Pack 1 на Windows 7, я хочу начать с ответов на такие вопросы (если они у Вас возникли) как: Что подразумевается под RTM версией? Что такое Service Pack? Как узнать установлен ли он у меня? Зачем нужен Service Pack, и нужно ли его устанавливать?
Что такое RTM версия Windows 7?
RTM (Release To Manufacturing) — это финальная версия программного продукта, т.е. это версия, которая готова к распространению.
В процессе разработки программное проходит несколько стадий и обычно к названию программы на каждой из этих стадий добавляют префикс, который обозначает текущую версию, т.е. стадию, для того чтобы пользователи знали, какую версию они используют, т.е. полностью доработанную или предварительную, которая будет еще дорабатываться. Например, существуют следующие стадии:
- Alpha (Альфа) – стадия внутреннего тестирования, т.е. Alpha версия;
- Beta (Бета) – стадия публичного тестирования, т.е. Beta версия;
- RC (Релиз-кандидат) – программа на этой стадии практически полностью готова к выпуску, но существует вероятность обнаружения дополнительных ошибок, которые не были замечены при тестировании на предыдущих стадиях, т.е. это версия RC;
- RTM (Финальный релиз) – финальная версия готовая к выпуску.
Другими словами, Windows 7 RTM — это та версия, которая поступила в продажу сразу после объявления о готовности Windows 7 к выпуску, т.е. чистая Windows 7 без всяких обновлений.
Что такое Service Pack?
Service Pack (SP) – это пакет обновлений, исправлений и улучшений программы, который выпускается в виде единого установочного файла. Обычно Service Pack выпускают тогда, когда накапливается достаточно большое количество обновлений, которые оказывают значительное влияние на безопасность, производительность и стабильность работы программного обеспечения.
У пакета обновления есть номер, и чем он выше, тем новее и лучше программа. Пакеты обновлений обычно обозначаются как SP1, SP2, SP3 и так далее.
Зачем нужен Service Pack в Windows 7, и нужно ли его устанавливать?
Service Pack в Windows 7 нужен для поддержания всех компонентов операционной системы в актуальном состоянии. Другими словами, установив Service Pack, Вы обновите все компоненты операционной системы до последних версий (на момент выхода Service Pack), а также добавите новый функционал. Если отвечать на вопрос «Нужно ли его устанавливать?» то ответ, конечно же, нужно, так как установка Service Pack повышает безопасность и стабильность работы операционной системы. Также многие современные программы для установки на ОС Windows 7 требуют, чтобы она была с установленным Пакетом обновления 1, иначе программа просто не установится, например, это относится к Internet Explorer 11 (это последняя версия браузера Internet Explorer).
Еще хочу отметить то, что поддержка Windows 7 RTM, т.е. без Service Pack 1 уже завершена (начиная с 9 апреля 2013 года) и поэтому если Вы хотите получать обновления безопасности, то необходимо обязательно установить Service Pack 1.
К сведению! Основная поддержка Windows 7 даже с Service Pack 1 была завершена 13 января 2015 года, а расширенная поддержка, в которую как раз и входят обновления безопасности, продлится до 14 января 2020 года.
Как узнать какой у меня Service Pack?
Узнать номер Service Pack, а также установлен ли он у Вас вообще можно несколькими способами, сейчас мы их рассмотрим.
Узнаем версию Windows и номер Service Pack с помощью окна «Система»
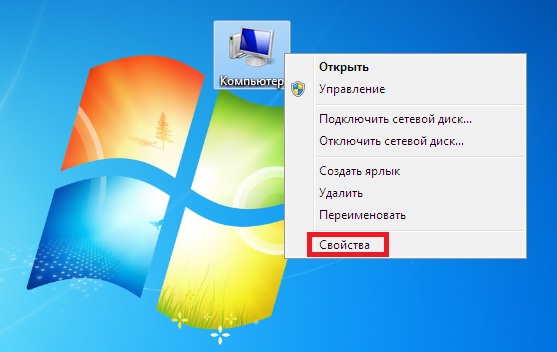
Наверное, самый простой способ — это вызвать окно «Система», в котором можно увидеть установлен ли Service Pack и если да, то какой. Для этого можно нажать правой кнопкой мыши по ярлыку «Компьютер» на рабочем столе и выбрать «Свойства»
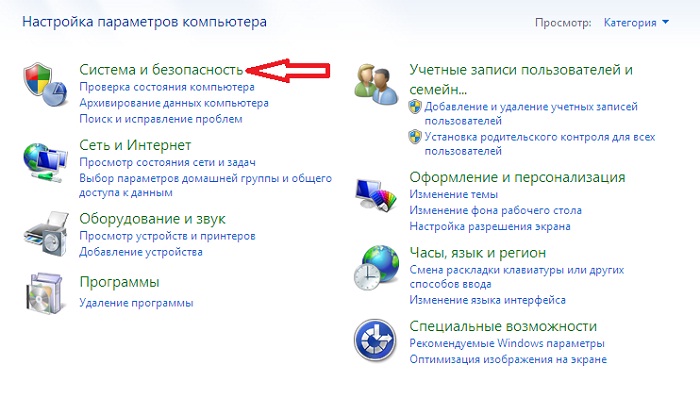
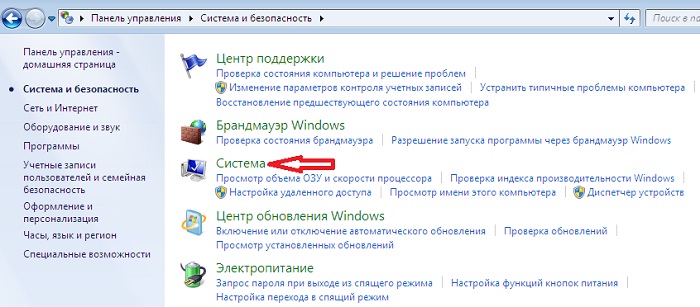
или также можно открыть «Панель управления» (например, также с рабочего стола), затем найти и открыть категорию «Система и безопасность», а после нажать на пункт «Система»
Примечание! Если у Вас на рабочем столе не отображается ярлык «Компьютер» или «Панель управления», то можете использовать меню «Пуск» или прочитать материал «Как отобразить ярлыки Компьютер, Панель управления, Корзина на рабочем столе в Windows?». Если у Вас в меню «Пуск» нет этих ярлыков, то поместить их туда Вам поможет материал «Как добавить новые пункты в меню Пуск Windows?».
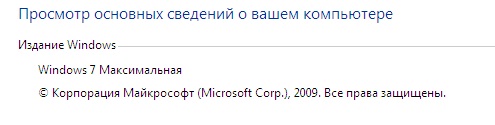
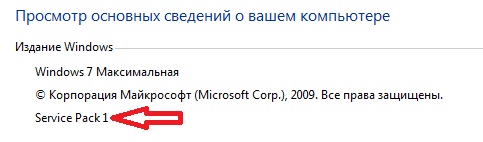
После этих действий у Вас откроется окно «Система», в котором будет отображена информация о версии и редакции Windows.
Редакция Windows 7 Максимальная без установленного Service Pack
Редакция Windows 7 Максимальная с установленным Service Pack 1
Узнаем версию Windows и номер Service Pack с помощью встроенной программы WinVer
Также узнать версию Windows можно с помощью встроенной программы WinVer, для ее запуска нажмите меню «Пуск -> Выполнить» или используйте сочетание клавиш Win+R, затем в поле «Открыть» введите команду WinVer.
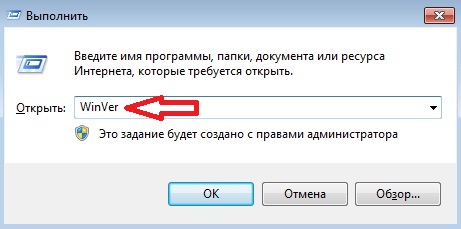
Откроется окно, в котором мы увидим версию Windows (в примере ниже она с Service Pack 1)
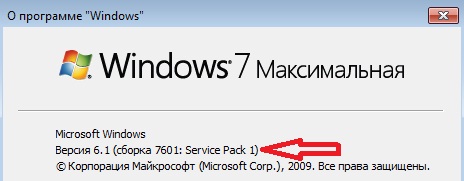
Если надписи Service Pack 1 нет, значит, Пакет обновления 1 у Вас в Windows 7 не установлен.
Узнаем версию Windows и номер Service Pack, используя окно «Сведения о системе»
Окно «Сведения о системе» можно открыть из меню «Пуск», для этого нажимаем «Пуск ->Все программы ->Стандартные ->Служебные ->Сведения о системе» (в примере ниже Windows 7 с Service Pack 1)

Где скачать Service Pack 1 для Windows 7?
Существует несколько способов установить Service Pack 1 на Windows 7, а именно используя «Центр обновления Windows» (он в самой операционной системе) или скачать самим необходимый пакет (бесплатно), т.е. своего рода дистрибутив и установить его вручную. В этом материале я покажу, как установить Service Pack 1 вручную, т.е. мы его сначала скачаем с официального центра загрузки Microsoft, а затем выполним установку (это на самом деле не сложно).
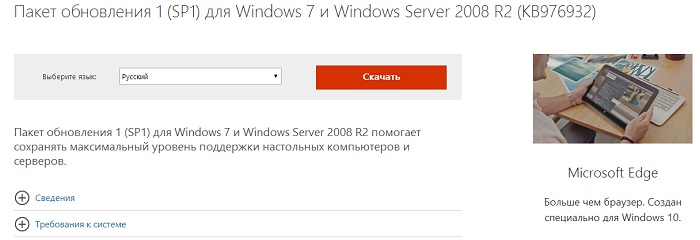
Для того чтобы загрузить Service Pack 1 для Windows 7, переходим в центр загрузки Microsoft по следующей ссылке — https://www.microsoft.com/ru-ru/download/details.aspx?id=5842 и нажимаем «Скачать»
Затем я выбираю файл windows6.1-KB976932-X86.exe (т.е. ставлю галочку), так как у меня 32 разрядная версия операционной системы, но если у Вас 64 разрядная, то выбирайте файл windows6.1-KB976932-X64.exe. Если вдруг Вы не знаете, какая разрядность у Вашей Windows 7, то это можно легко посмотреть в окне «Система», т.е. там же, где мы смотрели наличие Service Pack (самый первый способ только пункт «Тип системы»). И жмем «Next».
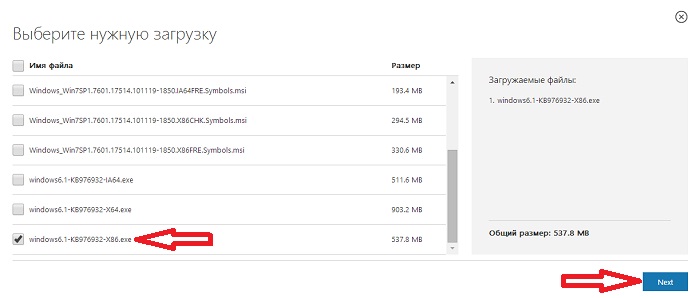
В итоге загрузится файл windows6.1-KB976932-X86.exe размером 537,8 мегабайт.
Установка Service Pack 1 на Windows 7
Для установки SP1 потребуется как минимум 4 гигабайта свободного пространства на системном диске (обычно диск C), поэтому перед установкой рекомендую проверить есть ли у Вас свободное место на этом диске.
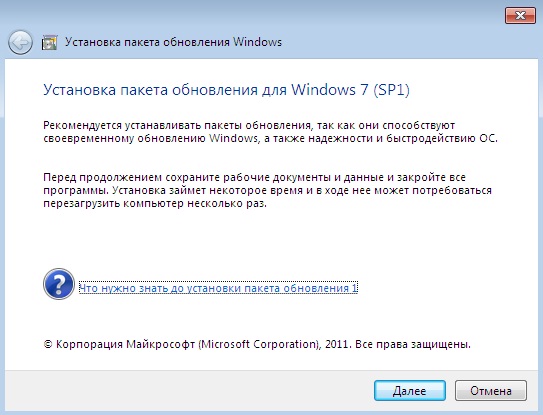
Запускаем файл windows6.1-KB976932-X86.exe. Откроется окно, в котором мы нажимаем «Далее»
Затем жмем «Установить»
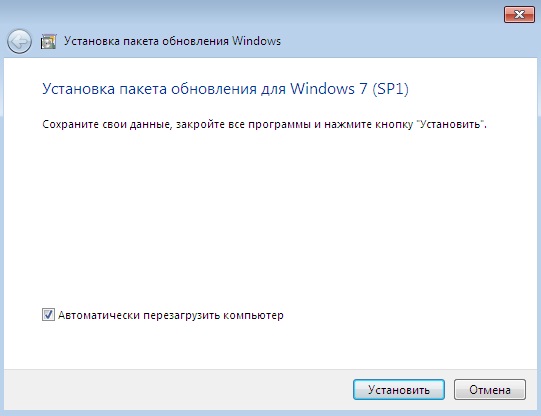
В итоге начнется установка Service Pack 1.
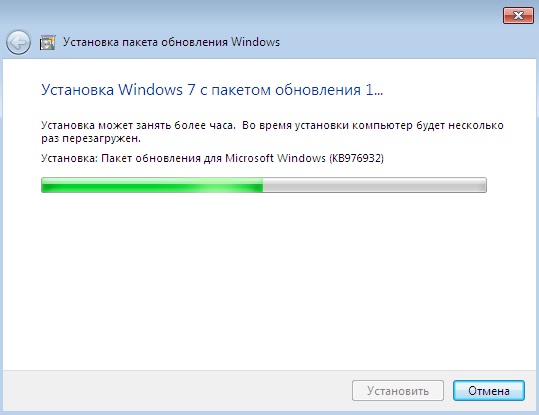
Установка будет завершена, когда перезагрузится компьютер и появится следующее окно
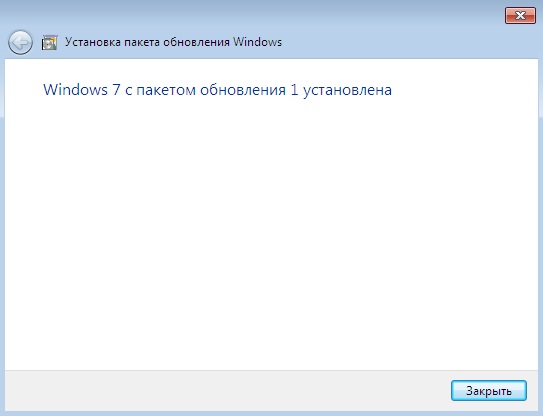
Теперь у нас операционная система Windows 7 с установленным Пакетом обновления 1.
Troubleshoot issues installing Windows 7 Service Pack 1
Summary
When you try to install for Windows 7 Service Pack 1 (SP1) , errors occur that prevent the installation. Use the following methods to find a solution for these installation errors.
Uninstall display languages
Uninstall display languages that you do not use
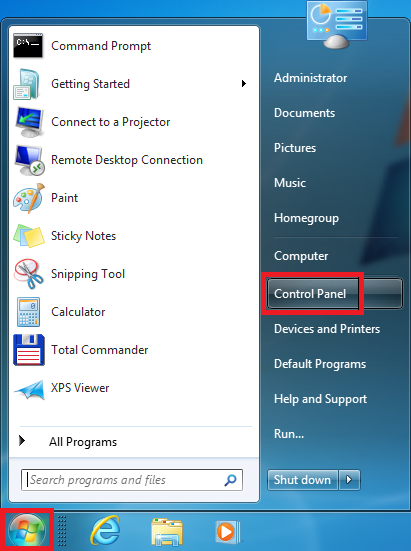
Click Start, and then click Control Panel.
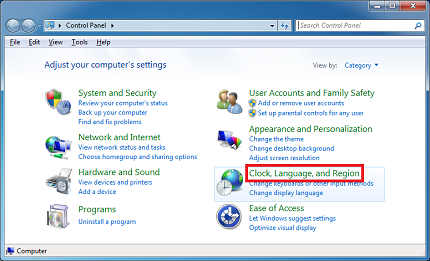
Click Clock, Language, and Region.
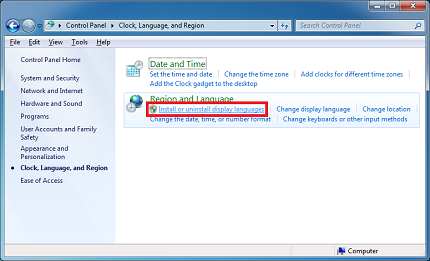
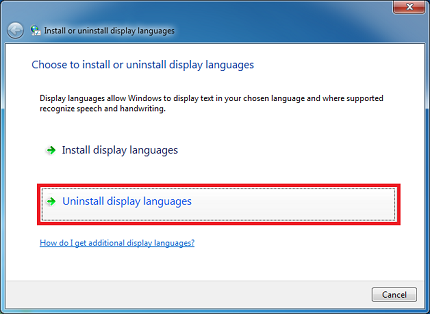
Under Regional and Language, click Install or uninstall display languages.
In the Install or uninstall languages to display window, click Uninstall display languages.
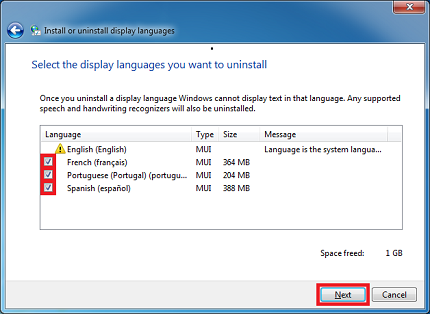
Select the languages that are installed but do not correspond to the language that you use on your computer, and then click Next.
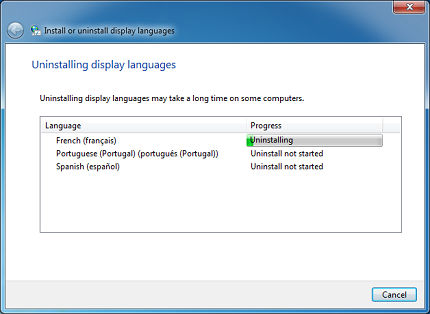
After you uninstall the display languages, try installing Windows 7 SP1.
 Note: If you are asked for an administrator password or confirmation, type the password or provide confirmation.
Install Windows 7 SP1.
System Restore
Use System Restore to return your system files and settings to an earlier point in time
You can use System Restore to fix Error C0000034 or other issues that may prevent Windows 7 SP1 from installing. This tool uses restore points to return the operating system to an earlier point in time, before the problem started.
Note Running system restore removes any programs and updates that you installed after the restore point date.
To restore the operating system to an earlier point in time, follow these steps:
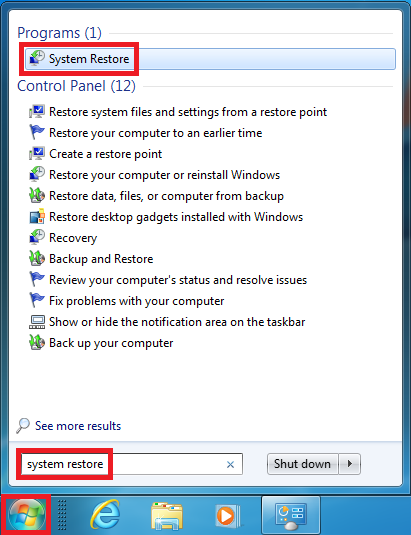
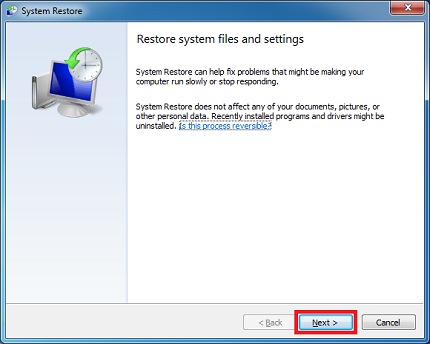
Click Start, type system restore in the search box, and then click System Restore in the Programs list.
In the System Restore window, click Next.
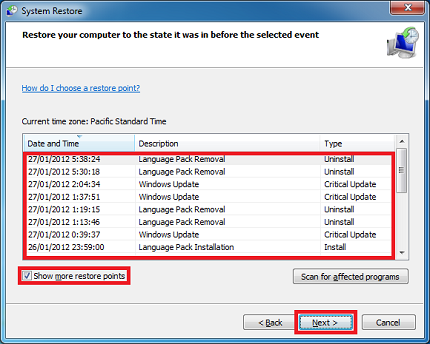
Select the Show more restore points check box, select the most recent restore point that was created before the problem started, and then click Next.
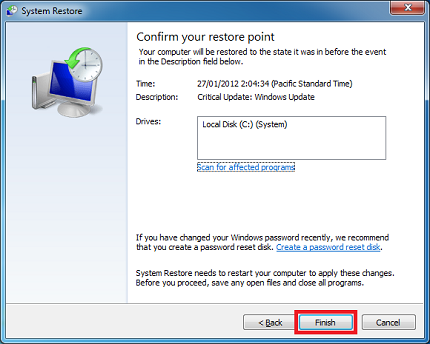
The computer then restarts and System Restore returns your computer to the state that it was in before the restore point that you chose.Note If you are asked for an administrator password or confirmation, type the password or provide confirmation.
Install Windows 7 SP1.
Resolve Error 0x80073701, Error 0x800f0a136, or Error 0x800f0826
Use the Microsoft System Update Readiness Tool
The System Update Readiness Tool can help fix problems that might prevent Windows updates and service packs from installing. For example, an update might not install if a damaged system file prevents the update from recognizing the version of Windows that’s running on your computer. If your computer is having problems installing an update or a service pack, download and install the tool, which runs automatically. Then, try installing the update or service pack again.
Go to the What is the System Update Readiness Tool? article, and then follow the instructions to download and install the Microsoft System Update Readiness Tool for your version of Windows.
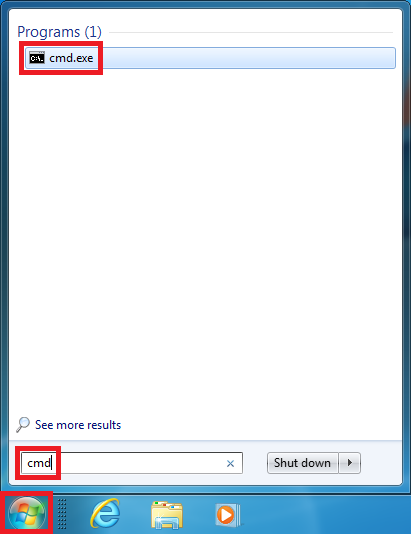
After the installation completes, click Start, type cmd in the search box, and then click cmd in the Programs list.
At the command prompt, type sfc/scannow, press ENTER, and then wait for the process to finish.
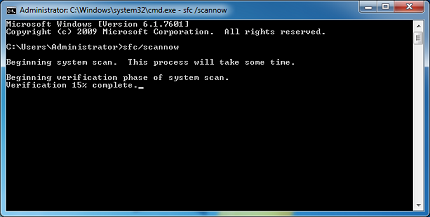
Restart the System Update Readiness Tool to make sure that there are no more error logs. To do this, type sfc/scannow, press ENTER, and then wait for the process to finish.
Install Windows 7 SP1.
Resolve Error 0x800F0A12
Resolution 1 for Error 0x800F0A12
Error 0x800F0A12 can occur if Windows 7 is not on an active partition. The Windows 7 SP1 installation program performs a test to verify that Windows 7 can start itself from the active partition. To resolve this error, follow these steps:
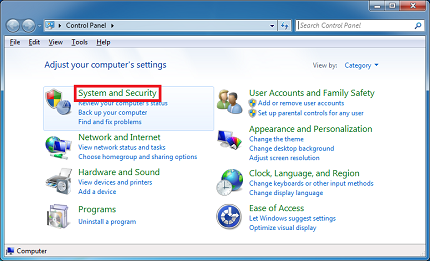
Click Start, and then click Control Panel.
Click System and Security.
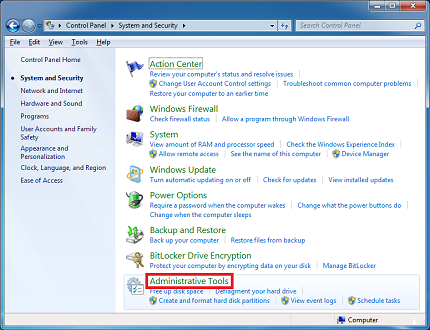
Click Administrative Tools.
Click Computer Management.
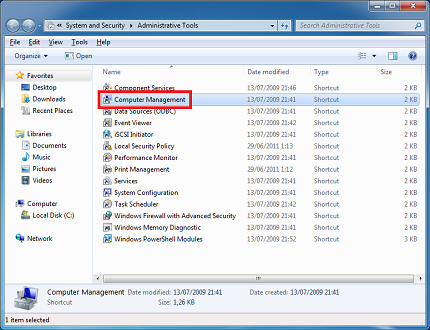
In the navigation pane, under Storage, click Disk Management.
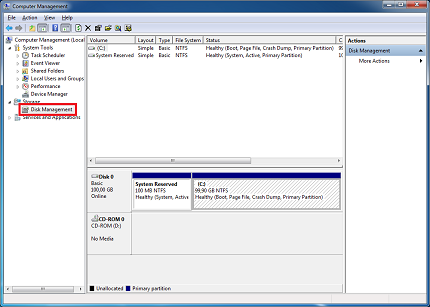
Right-click the disk partition where Windows 7 is installed, and then click Mark Partition as Active.
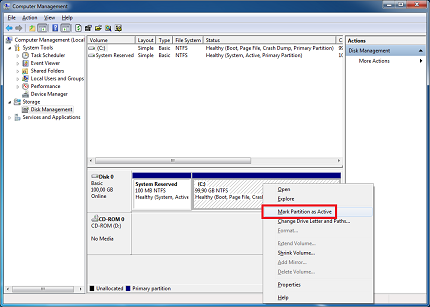
Install Windows 7 SP1.
Resolution 2 for Error 0x800F0A12
If the system partition is not mounted during startup, you can use mountvol in a command prompt to re-enable automatic mounting of all volumes.
Note Before continuing, contact the system administrator to learn why the access to the system partition is disabled.
Click Start, type Command Prompt in the search box. Then, right-click command prompt, and then click Run as administrator.
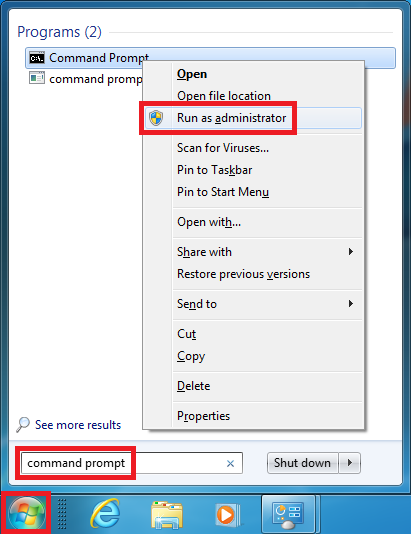
Note If you are asked for an administrator password or confirmation, type the password or provide confirmation.
At the command prompt, type mountvol/E, and then press ENTER.
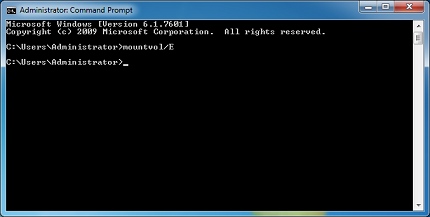
Restart the computer.
Install Windows 7 SP1.
Your opinion counts: Please send us your feedback in the comments field below. This helps to improve our content.


