- Fix: Windows Could Not Connect to the System Event Notification Service
- What is causing the Windows Could Not Connect to the System Event Notification Service error?
- Method 1: Restarting the Windows Font Cache Service
- Method 2: Resolving the issue via an elevated Command prompt
- Method 3: Enabling the DHCP service and set it to Automatic
- Method 4: Upgrade Symantec Endpoint Protection to the latest version (if applicable)
- Ошибка Службы уведомления о системных событиях Windows
- Служба уведомления о системных событиях
- Что же происходит?
- Не удаётся подключиться к службе Windows
- Как починить компьютер при этой ошибке
- 1. Открываем командную строку (консоль) с правами администратора в Windows.
- 2. Вводим команду route -f и нажимаем Enter
- Что же делает команда route -f ?
- 3. Вводим команду netsh winsock reset и нажимаем Enter
- Что же делает команда netsh winsock reset ?
- 4. Перезагружаем компьютер или ноутбук
- Как «лечить» компьютер ещё быстрее (в стиле ВЖУХ)
- Инструкция по созданию «лечащего» bat-файла:
- Windows Could Not Connect to the System Event Notification Service…
- 1. Check Your Computer’s Setting for the System Event Notification Service
- To correct the settings, follow these steps:
- 2. Reset the Winsock Catalog
- Here’s how to reset it:
- 3. Update Video Card Drivers
- Here’s how to use Auslogics Driver Updater:
- Resolve PC Issues with Driver Updater
- 4. Uninstall the Windows KB2952664 update
- Here’s how to do it:
- 5. Optimize Windows 7 for Faster Performance
- Follow these steps:
Fix: Windows Could Not Connect to the System Event Notification Service
Several users report seeing the Windows Could Not Connect to the System Event Notification Service error when trying to log-in into their Windows machines. The issue is mostly reported to occur on Windows Vista and Windows 7.
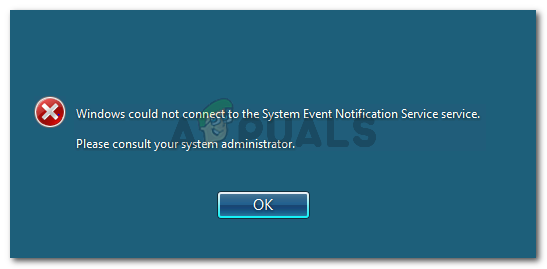 Windows could not connect to the System Event Notification Service
Some affected users report that they are able to log-in using an admin account only to be greeted by another error that spawns from the taskbar menu.
What is causing the Windows Could Not Connect to the System Event Notification Service error?
We investigated this particular issue by looking at various user reports. Based on what they reported and based on the methods that they used to get the issue resolved, there are several potential culprits that might trigger this particular error message:
- SENS service is corrupted – This is known to happen on older Windows versions (Windows 7, Vista, XP) due to bad shutting down practices. If the service is corrupted, Windows will not be able to connect to the SENS local server.
- Windows Font Cache Service is glitched – This is a well-known glitch on Windows 7. Since a lot of other services are dependent on the Font Cache Service, you can expect some malfunctioning once the service is halted. In this case, you can resolve the problem quite easily by restarting the service.
- A Windows update (KB2952664) is creating the issue – It seems like this particular update has the potential to break the SENS component on Windows 7 and Windows Vista. Several users have managed to resolve the issue by uninstalling it.
- Symantec Endpoint Protection is interfeering with the SENS service – Several users have reported that the issue was fixed after they reinstalled (or updated to the latest version) the security client.
- DHCP client service is disabled – If the DHCP client service is disabled, Windows will be unable to register and update IP addresses and DNS records. This interferes with how the SENS service operates.
If you’re struggling to resolve this particular issue, this article will provide you with a collection of verified troubleshooting guides. Below you have a collection of methods that other users in a similar situation have used to get the issue resolved.
For the best results, follow the methods below in order until you encounter a fix that resolves the problem for your particular scenario.
Method 1: Restarting the Windows Font Cache Service
Several users have managed to resolve the issue by restarting the Windows Font Cache Service. Users speculate that this service works closely together with the SENS service, it ends up causing general system instability whenever it crashes or remains in a limbo state. The SENS service can also be affected.
If that’s the case, you can typically resolve the issue by restarting the Windows Font Cache Service. Here’s a quick guide on how to do this:
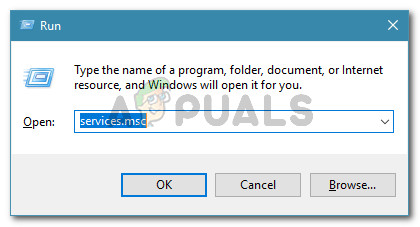
- Press Windows key + R to open up a Run dialog box. Then, type “services.msc” and press Enter to open up the Services screen.
 Run dialog: services.msc
 - Inside the services screen, scroll down through the Local list of services and locate Windows Font Cache service. Once you see it, double-click on it to expand the menu options. Double-click on Windows Font Cache service
- In the Windows Font Cache Service Properties, go to the General tab. If the Service status is set to Running, press the Stop button and wait a couple of seconds.
- Press the Start button to re-enable the service and wait until the procedure is complete. Start the Windows Fond Cache Service» width=»427″ height=»489″ srcset=»https://cdn.appuals.com/wp-content/uploads/2018/11/Start.jpg 427w, https://cdn.appuals.com/wp-content/uploads/2018/11/Start-131×150.jpg 131w, https://cdn.appuals.com/wp-content/uploads/2018/11/Start-262×300.jpg 262w» sizes=»(max-width: 427px) 100vw, 427px»/> Stop > Start the Windows Fond Cache Service
- Attempt to use the SENS service again and see if it’s reachable.
 Run dialog: services.msc
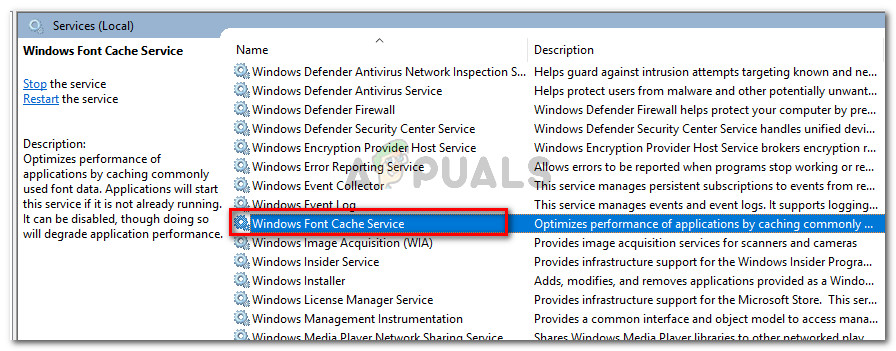 Double-click on Windows Font Cache service
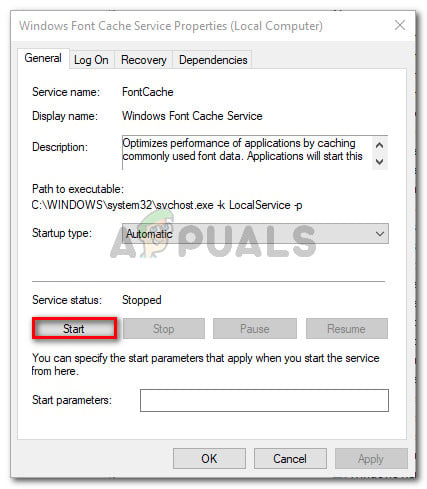 Start the Windows Fond Cache Service» width=»427″ height=»489″ srcset=»https://cdn.appuals.com/wp-content/uploads/2018/11/Start.jpg 427w, https://cdn.appuals.com/wp-content/uploads/2018/11/Start-131×150.jpg 131w, https://cdn.appuals.com/wp-content/uploads/2018/11/Start-262×300.jpg 262w» sizes=»(max-width: 427px) 100vw, 427px»/> Stop > Start the Windows Fond Cache Service
If you’re still encountering the windows could not connect to the system event notification service error, move down to the next method below.
Method 2: Resolving the issue via an elevated Command prompt
If the issue is occurring due to a bad Windows update or because of an improper shutdown of the computer, chances are you’re experiencing this behavior because two registry key was changed, triggering the issue.
Several users struggling to resolve the same issue have managed to get this fixed by changing a couple of registry keys to their default values. We’re going to feature a batch file that can do this changes automatically when if you run it from an elevated Command prompt.
Note: This method is only confirmed to work for Windows 7.
Here’s what you need to do:
- Press Windows key + R to open up a Run dialog box. Then, type “cmd” and press Ctrl + Shift + Enter to open an elevated Command Prompt. When prompted by the UAC (User Account Control), click Yes to grant administrative privileges. Run dialog: cmd , then press Ctrl + Shift + Enter
- Paste the following command in the elevated Command Prompt and press Enter to change the registy keys to their default values:
- When the operation has been successful, type the following command and press Enter to reset your network components:
- Restart your machine and see if the issue has been resolved.
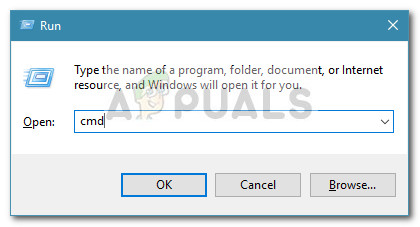 Run dialog: cmd , then press Ctrl + Shift + Enter
If you’re still encountering the same error message, move down to the next method below.
Method 3: Enabling the DHCP service and set it to Automatic
Several users have reported that the issue was resolved indefinitely after they discovered that the DHCP Client service was stopped and the startup type was set to Manual.
Here’s a quick guide on making sure that the DHCP service is enabled:
- Press Windows key + R to open up a Run dialog box. Then, type “services.msc” and press Enter to open up the Services screen. Run dialog: services.msc
- In the Services screen, look through the list of services and double-click on the DHCP Client. Accessing the DHCP client service
- In the properties screen of DHCP, go to the General tab and make sure that the Service status is set to Running. If it isn’t, click the Start button to start it. Then, make sure that the Startup type is set to Automatic before clicking Apply. Making sure that the DHCP client service is running properly
- Restart your machine and see if the issue has been resolved.
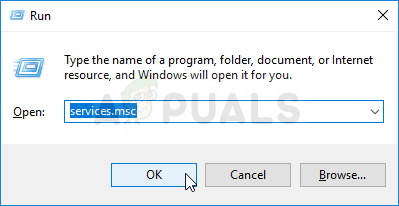 Run dialog: services.msc
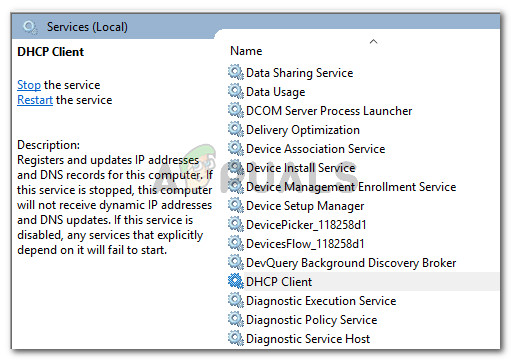 Accessing the DHCP client service
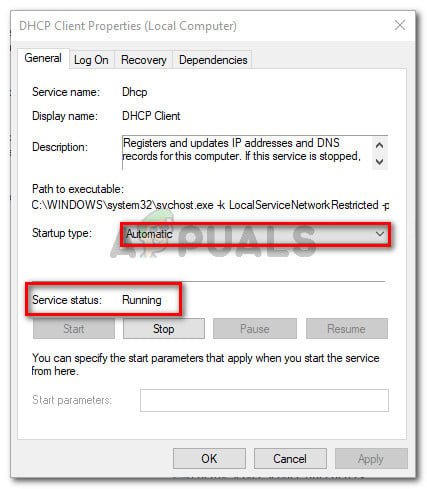 Making sure that the DHCP client service is running properly
If you’re still encountering the Windows Could Not Connect to the System Event Notification Service error, move down to the next method below.
Method 4: Upgrade Symantec Endpoint Protection to the latest version (if applicable)
If you’re using Symantec Endpoint Protection, you might want to update the client to the latest version. Several users encountering this problem who where using Symantec Endpoint Protection reported that the issue was resolved after they upgraded to the latest build or after they reinstalled the client.
If this scenario is applicable to your situation, see whether uninstalling Symantec Endpoint Protection makes the error message go away. If it does, try installing the latest version or reinstall the latest build and see if the issue is fixed.
Ошибка Службы уведомления о системных событиях Windows

Случается так, что работает компьютер или ноутбук, работает и вот однажды при включении что-то в нём переглючивает и он выдаёт ошибку: «Не удаётся подключиться к службе Windows». Печалька, особенно, если тот, кто «чистит комп» находится далеко-далёко, а то и вовсе отсутствует. Но, если в тексте ошибки есть слова «Служба уведомления о системных событиях», но ниже я покажу, как это исправить самостоятельно. ; )
Немного теории. Для тех, кому скучно — решение в конце ; )
Служба уведомления о системных событиях
Служба уведомления о системных событиях — ведет наблюдение за системными событиями и уведомляет подписчиков системы событий COM+ об этих событиях. Так написано в описании этой службы в Windows 7. Глубже не полезем. Нам нужно «починить» комп, а не стать системным администратором.
Что же происходит?
Как только компьютер готов выдать ошибку: «Не удаётся подключиться к службе Windows», он странным образом загружает Windows. И всё становится серым, скучным и нагоняющим тоску. Именно это и не даёт продолжать спокойно зависать ВКонтакте, Одноклассниках или на каких-нибудь сайтах с видео. =)
А выглядит это примерно так. Строка с кнопкой «Пуск» становится похожей на сломанную:

И ещё и ошибка всплывает:
И пишут страшно непонятные вещи:
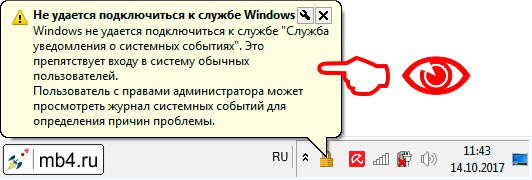
Не удаётся подключиться к службе Windows
Windows не удаётся подключиться к службе «Служба уведомления о системных событиях». Это препятствует входу в систему обычных пользователей.
Пользователь с правами администратора может посмотреть журнал системных событий для определения причин проблемы.
Как починить компьютер при этой ошибке
Итак, что же делать?
1. Открываем командную строку (консоль) с правами администратора в Windows.
2. Вводим команду route -f и нажимаем Enter
Именно для этой команды требуются права администратора.
Что же делает команда route -f ?
Очищает таблицу маршрутизации от всех записей, которые не являются узловыми маршрутами (маршруты с маской подсети 255.255.255.255), сетевым маршрутом замыкания на себя (маршруты с конечной точкой 127.0.0.0 и маской подсети 255.0.0.0) или маршрутом многоадресной рассылки (маршруты с конечной точкой 224.0.0.0 и маской подсети 240.0.0.0).
3. Вводим команду netsh winsock reset и нажимаем Enter
После выполнения этой команды Windows предложит перезагрузить компьютер.
Что же делает команда netsh winsock reset ?
Winsock расшифровывается как Windows Sockets. Это ключевой механизм в сетевой подсистеме Windows, с его помощью приложения могут достаточно просто выйти в сеть без необходимости низкоуровневой работы с сетевыми драйверами. Так вот, Winsock это модульная штука, и в него можно встраивать обработчики самых разных протоколов и сетевых интерфейсов. В частности, в него встраиваются антивирусы, перехватывающие и сканирующие сетевой трафик. И никто не мешает туда встроиться и вирусу тоже. Фишка в том, что такой обработчик должен быть исправен и должен обеспечивать пропуск пакета. Если же обработчик повреждён и не обеспечивает передачу пакета дальше по цепочке обработчиков, то пользователь получит неработающий интернет, который можно вылечить сбросом стека Winsock в дефолтное состояние, что и делает команда netsh winsock reset .
4. Перезагружаем компьютер или ноутбук
После перезагрузки наблюдаем, что всё наладилось и снова приобрело объём! =)

Как «лечить» компьютер ещё быстрее (в стиле ВЖУХ)
Если эта ошибка регулярно повторяется, то снова искать ту инструкцию будет долго и утомительно. Поэтому советую создать bat-файл и поместить его в месте, где его всегда можно найти.
Инструкция по созданию «лечащего» bat-файла:
1. Как создать bat-файл (пакетный файл) ← это ссылка на статью для тех, кто хочет понять, как это сделать
Содержимое bat-файла должно быть таким:
3. Запускать батник куда быстрее, чем пользоваться командной строкой. Рекомендую ; )
Ну и если чего осталось непонятным, спрашивайте и делитесь полезными сведениями с подругами, друзьями и родителями. ; )
Windows Could Not Connect to the System Event Notification Service…
Is your computer starting up too slowly? Are you unable to log in with your standard user account on Windows? And even when you log in using an administrator account, you find this error message:
“Failed to connect to a Windows service. Windows could not connect to the System Event Notification Service service.”
Don’t worry; it’s probably not a hardware issue. Don’t buy a new PC.
The problem can be solved by either one or more of these solutions:
- check your computer’s setting for the System Event Notification Service
- reset the Winsock Catalog
- update video card drivers
- uninstall the Widows KB2952664 update
- optimize Windows for faster performance
These solutions can apply on Windows 7, 8 and 10. So, here’s how to fix ‘Windows could not connect to the System Event Notification Service on Windows 10, 8 and 7.’
1. Check Your Computer’s Setting for the System Event Notification Service
The error message you got may be caused by incorrect settings of the System Event Notification Service.
To correct the settings, follow these steps:
- On your keyboard, press both the Windows logo and R keys.
- Once the Run box pops up, type: services.msc. Press Enter.
- Right-click System Event Notification Service. Select Restart or Start (if Restart is inactive).
- Again, right-click System Event Notification Service. Select Properties.
- On the Properties window, change the Startup type to Automatic.
- Click Apply, and then OK.
Once you restart your computer, the error message should be gone.
2. Reset the Winsock Catalog
If the first solution didn’t work, you could also try resetting the Winsock Catalog. This will deal with the problem of interference of your Winsock Catalog settings.
Here’s how to reset it:
- On your keyboard, press both the Windows and R keys. The run box will pop up.
- Type cmd. Now, press these three keys together: Shift, Ctrl, and Enter.
- This opens an elevated Command Prompt.
- Type netsh winsock reset. Finally, press Enter.
Now, restart your computer. Most likely, the error message won’t appear anymore.
3. Update Video Card Drivers
If the error message still appears on startup, your video card driver may be outdated, corrupted or incompatible. Updating the driver will fix your problem.
A convenient and safe method to update the driver is using Auslogics Driver Updater. Using this software, you’ll update all your PC drivers in one click, which ensures smooth hardware operation and prevents device conflicts.
More importantly, Auslogics Driver Updater only downloads and installs official driver versions specifically suited to your device. Hence, you get compatible drivers and avoid corrupt ones.
It takes away the headache of figuring out which driver suits your computer and even what type of hardware you have. The software automatically detects your particular device and finds the most up-to-date driver compatible with it.
The free version lets you scan your PC for missing or outdated drivers, and the pro version lets you download and install all drivers with one click. And it backs up your system while doing so.
Here’s how to use Auslogics Driver Updater:

Resolve PC Issues with Driver Updater
Unstable PC performance is often caused by outdated or corrupt drivers. Auslogics Driver Updater diagnoses driver issues and lets you update old drivers all at once or one at a time to get your PC running smoother
- Download the software from the Auslogics Driver Updater page, and then install it.
- When you run the program, it starts scanning your system for missing or outdated drivers.
- You’ll get a list of all drivers to update. Click Update All to update them at once (this will open a payment page, where you can purchase the pro version and update your drivers with one click).
After restarting your computer, the error message should be gone.
4. Uninstall the Windows KB2952664 update
In case the previous solutions didn’t work, you can try one last option.
Windows KB2952664 Update may be causing the error message. So, you have to uninstall it.
Here’s how to do it:
- On your keyboard, press both the Windows logo and R keys.
- The Run box opens up.
- Type control. Press Enter.
- Under Programs, select Uninstall a program.
- Click to view installed updates.
- Find KB2952664. Right-click on it and select Uninstall.
Restart your computer to apply those changes. When it starts up, the error message should be gone.
However, the delay in the startup needs fixing too.
5. Optimize Windows 7 for Faster Performance
The slow start of your PC could be a performance issue. This can be sorted out using Windows’ Performance Troubleshooter to find and fix the problem automatically.
The troubleshooter checks such issues as how many users are logged in and whether you have multiple programs running simultaneously. These are issues which can slow down your computer.
Follow these steps:
- Click Windows’ Start button.
- Search in the Start menu, and click on Control Panel.
- Type troubleshooter in the search box.
- Select Troubleshooting.
- Go to System and Security and click on Check for Performance Issues.
Once the troubleshooter is done, your computer should be back to its normal speed.
Combine this with limiting how many programs run at startup. Go to any application that runs at startup and change the settings.
Defragmenting your hard disk also helps. Disk defragmenting ensures maximum efficiency of your hard drive, so it doesn’t waste time locating related data spread out in different parts. To find the disk defragmenting tool in Windows, search for disk defrag in the Windows Start page.
Finally, adding more RAM capacity will help, as well as restarting your PC.
Which of these fixes have you tried and which one worked for you? Share in the comments below.


