- Start or stop Windows service from command line (CMD)
- 25 Run Commands in Windows You Should Memorize
- How to open the Run dialog?
- #1. Access System Configuration — “msconfig”
- #2. Access Resource Monitor — “resmon”
- #3. Open System Information — “msinfo32”
- #4. Access Backup and Restore window — “sdclt”
- #5. Access mouse properties — “main.cpl”
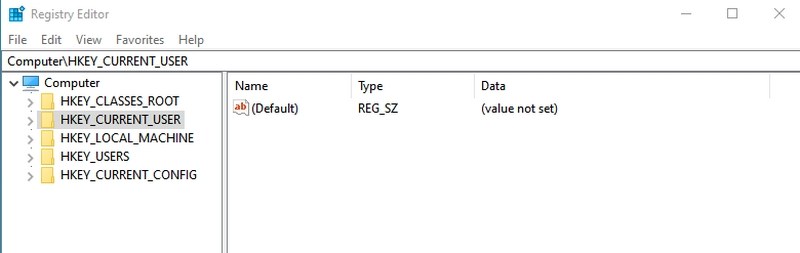
- #6. Open Windows Registry — “regedit”
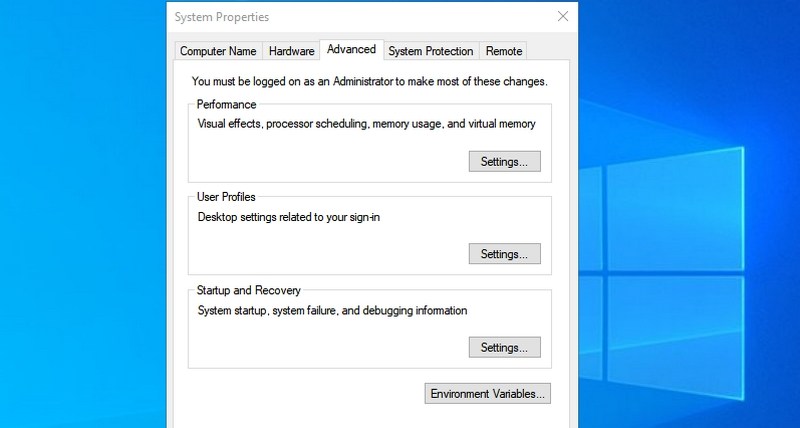
- #7. Access System Properties — “sysdm.cpl”
- #8. Manage Windows Power options — “powercfg.cpl”
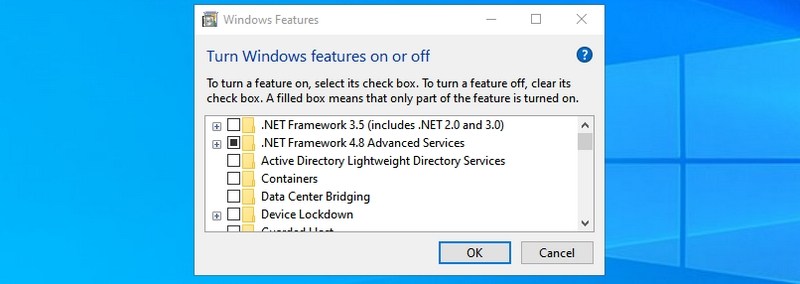
- #9. Open Windows Features — “optionalfeatures”
- #10. Open Magnifier — “magnify”
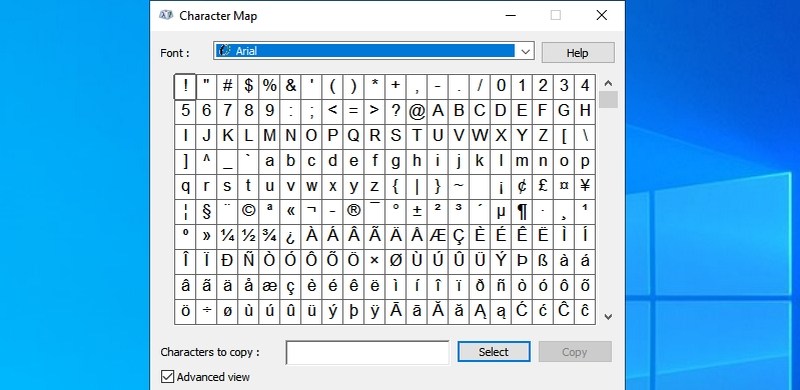
- #11. Open Character Map app — “charmap”
- #12. Access Network Connections — “ncpa.cpl”
- #13. Run Malicious Software Removal Tool — “mrt”
- #14. Open Device Manager — “devmgmt.msc”
- #15. Manage User Accounts — “netplwiz”
- #16. Open Services app — “services.msc”
- #17. Access Programs and Features window — “appwiz.cpl”
- #18. Open Control Panel — “control”
- #19. Open current user folder — “.” (period)
- #20. Open On-Screen Keyboard — “osk”
- #21. Open Snipping Tool — “snippingtool”
- #22. Open Windows Memory Diagnostic — “mdsched”
- #23. Open any website — “Insert website URL”
- #24. Open Remote Desktop Connection — “mstsc”
- #25. Open Command Prompt — “cmd”
- Wrapping up
- How to start and stop services manually on Windows 10
- How to manage services using Services console
- Stop service
- Start service
- Disable service
- Enable service
- How to manage services using Task Manager
- How to manage services using PowerShell
- Stop service
- Start service
- Disable service
- Enable service
- How to manage services using Command Prompt
- Stop service
- Start service
- Disable service
- Enable service
- More Windows 10 resources
- Microsoft’s Surface Duo is not ‘failing up’
- Here’s what you can do if Windows 10 update KB5001330 is causing issues
- Review: NZXT made its first AMD motherboard and it’s brilliant
- These are the best PC sticks when you’re on the move
Start or stop Windows service from command line (CMD)
We normally use Services.msc to start or stop or disable or enable any service. We can do the same from windows command line also using net and sc utilities. Below are commands for controlling the operation of a service.
Command to stop a service:
To start a service:
You need to have administrator privileges to run net start/stop commands. If you are just a normal user on the computer, you would get an error like below.
To disable a service:
To enable a service:
To make a service start automatically with system boot:
Note: Space is mandatory after ‘=’ in the above sc commands.
This SC command works on a Windows 7 machine and also on the down-level editions of Windows i.e Windows XP/2003 and Windows Vista. Again, if you do not have administrator previliges you would get the below error.
Note that the service name is not the display name of a service. Each service is given a unique identification name which can be used with net or sc commands. For example, Remote procedure call (RPC) is the display name of the service. But the service name we need to use in the above commands is RpcSs.
So to start Remote procedure call service the command is:
These service names are listed below for each service. The first column shows the display name of a service and the second column shows the service name that should be used in net start or net stop or sc config commands.
25 Run Commands in Windows You Should Memorize
![]()
Using Run commands in Windows is a very efficient way to access different Windows settings and apps directly.
If you memorize Run commands, you can access a particular app in just 2 steps instead of many clicks.
I personally don’t like frequently reaching out for the mouse; therefore, I have memorized all the required keyboard shortcuts and commands to minimize my interaction with the mouse. And Run commands are core for my day-to-day PC usage to accesses different Windows settings and apps efficiently.
If you are looking to be productive, then I will recommend you to memorize Run commands. To get you started, I will list some of the frequently used commands that I find most useful for day-to-day use.
How to open the Run dialog?
To use Run commands, you need to know how to open the Run dialog to enter the commands. There are two ways to access the Run dialog in Windows 10.
You can either press the Windows+R keys on the keyboard or right-click on the start menu and select Run from the menu.
I will recommend you to use the keyboard shortcut as it’s much faster and you won’t have to use the mouse. Once the Run dialog is open, enter any of the below mentioned commands and press the Enter key or click on the OK button to execute it.
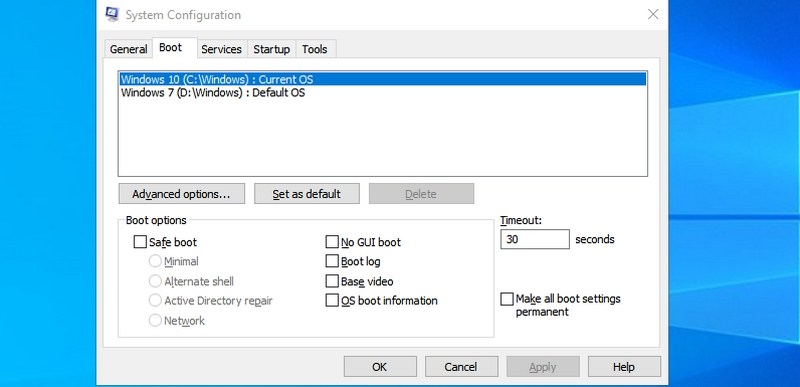
#1. Access System Configuration — “msconfig”
Starting with my favorite command, the System Configuration window consists of multiple tabs to manage boot settings and background services.
If you have a dual boot setup or often need to access safe mode, you will often need to access these settings. Don’t forget to check its Tools section for convenient access to some of the most powerful Windows tools.
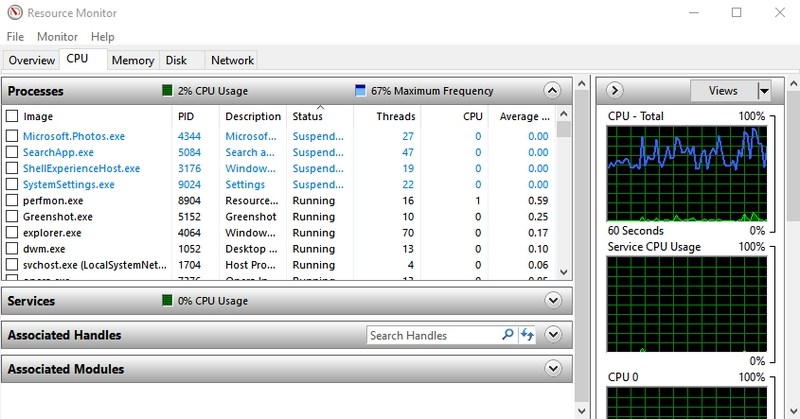
#2. Access Resource Monitor — “resmon”
A very powerful app to see real-time information about your system resources like CPU, RAM, disk, and network. For any computer hanging or performance-related issues, this is the best tool to get the information you need.
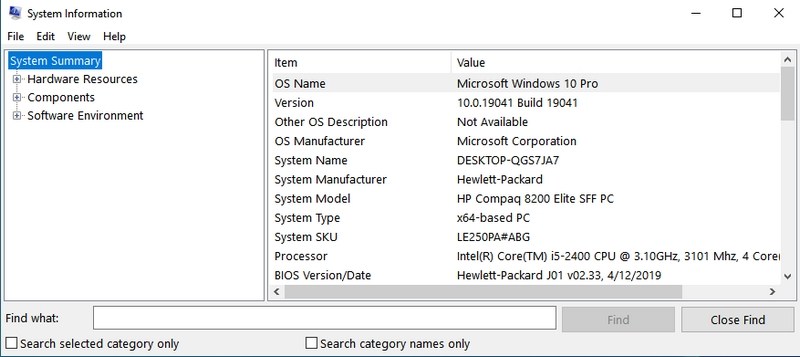
#3. Open System Information — “msinfo32”
System Information app offers extensive information about both the hardware and software of your PC. It’s a must-know command if you need to see the specs of any PC. The information is well laid out using dedicated categories, and you can export the information to a file to share with anyone — perfect for getting online tech assistance.
#4. Access Backup and Restore window — “sdclt”
It opens the backup and restores window where you can either set up a backup of your PC or restore it from an old backup if there is a problem with your PC.
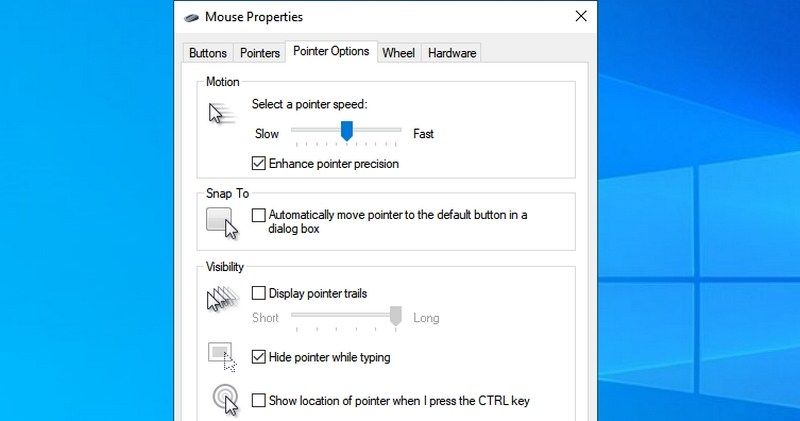
#5. Access mouse properties — “main.cpl”
You can control all the settings related to your computer mouse here. This includes mouse speed, buttons, wheel, and pointer, etc.
#6. Open Windows Registry — “regedit”
If you ever need to access the Windows registry to tweak something, this is the easiest way to do it. I didn’t even know other ways to access the Registry until recently, and I often mess around in the Registry. Other ways are simply too cumbersome to use.
#7. Access System Properties — “sysdm.cpl”
Another powerful settings window to manage system protection and remote connection features. I personally access it often to manage the Performance settings under the Advanced tab. You can manage some interesting performance-boosting options there.
#8. Manage Windows Power options — “powercfg.cpl”
You will find all the options to manage your PC’s power options here. There are a plethora of options to both save power or get better performance. Check this guide to optimize the power options as you find best.
#9. Open Windows Features — “optionalfeatures”
Here you can disable/enable some of the most advanced features of Windows. I wouldn’t recommend you to mess around here if you don’t know what you are doing. You will need to use this window if you ever need to enable features like Telnet client or Hyper-V.
#10. Open Magnifier — “magnify”
This opens the Windows magnifier to magnify the content on the screen up to 1600% if needed. It also has a screen reader built-in to read aloud text on the screen.
#11. Open Character Map app — “charmap”
Windows Character Maps lets you access All the characters in the font of your choice to easily use anywhere you like. You can either copy the character or learn its Alt code to enter anywhere you like. Using the search bar is the easiest way to find the character you need.
#12. Access Network Connections — “ncpa.cpl”
Here you can manage your current network connection and fix any problem with the network device. You can enable/disable the network, check the current status, bridge connections, or see your Wi-Fi password.
#13. Run Malicious Software Removal Tool — “mrt”
It’s an on-demand virus removal tool provided by Microsoft to scan your PC and find any malicious software. If you think your PC got infected by a virus, you can quickly launch this tool to scan your PC.
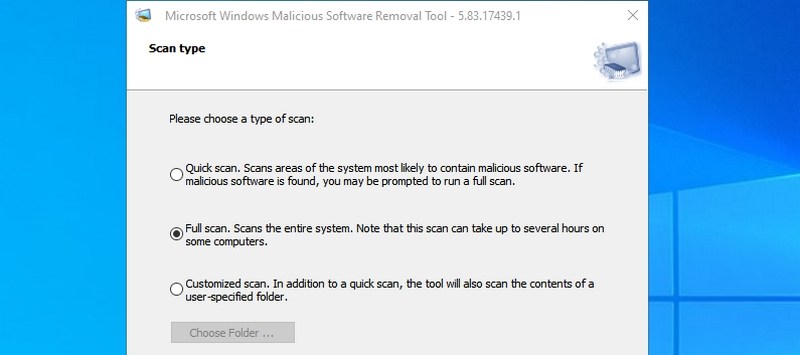
You can also consider installing antivirus software to keep your Windows computer safe.
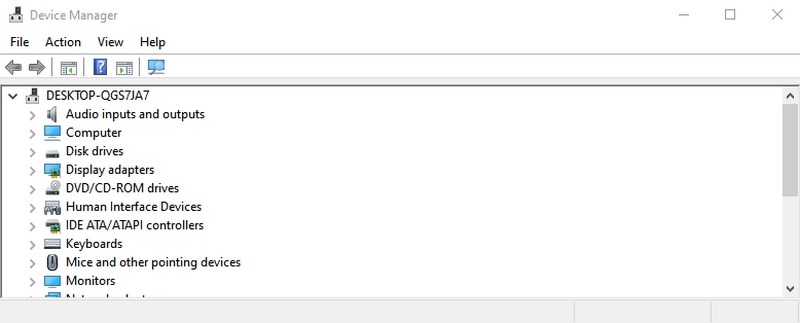
#14. Open Device Manager — “devmgmt.msc”
Device Manager is the go-to place to manage everything related to your hardware components and their drivers. You can enable/disable hardware components or manage their drivers, like uninstalling or updating them.
#15. Manage User Accounts — “netplwiz”
You can quickly manage user accounts here, such as adding a new account or user account types like Administrator or Standard. You can also change the user accounts password here and manage their security.
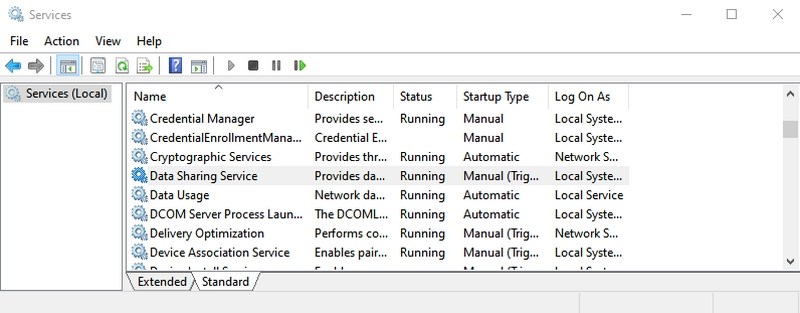
#16. Open Services app — “services.msc”
This app lists all the services that work in the background without an interface and make all the features work in Windows. Again, you shouldn’t mess with any services if you don’t know what you are doing. However, you can click on a service to learn what it does in the left panel. There are many services that you can enable/disable depending on your need. For example, I have disabled the Bluetooth service as I don’t use it.
#17. Access Programs and Features window — “appwiz.cpl”
Although Windows 10 has its own setting to uninstall an app, I still use this command as it only shows third-party apps. The default Windows uninstaller shows all apps, including built-in apps, which are 30+. It can be difficult to always go through so many apps to uninstall a recently installed app. This command makes the process a snap.
#18. Open Control Panel — “control”
This command didn’t hold much value in the older version of Windows as you could easily access Control Panel using different ways. However, in Windows 10, Microsoft promotes the new Settings over the old Control Panel, so it doesn’t offer an easy way to access the Control Panel. This simple command lets you easily access it.
#19. Open current user folder — “.” (period)
We have to access the user folder quite often in Windows, but going through the explorer to access it isn’t needed. Just type a period in the Run dialog, and the current user’s folder will open up.
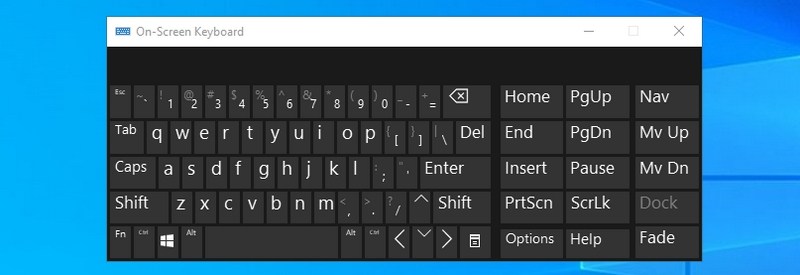
#20. Open On-Screen Keyboard — “osk”
If you want to use the on-screen keyboard, then using the Run command is one of the quickest ways to do it.
#21. Open Snipping Tool — “snippingtool”
Snipping Tool is still the go-to tool for taking screenshots in Windows 10 without using a third-party app. If you use the Snipping Tool for taking screenshots, then this Run command will make it easier.
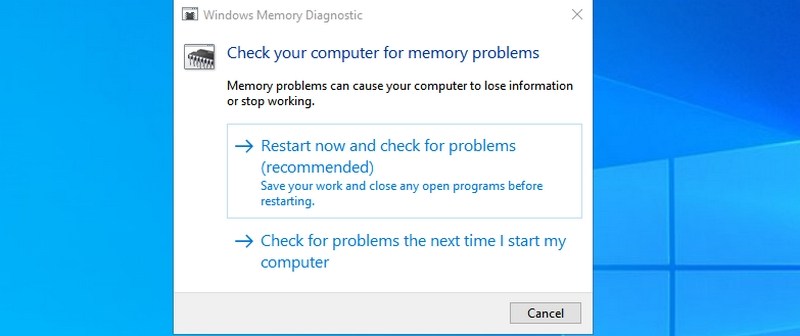
#22. Open Windows Memory Diagnostic — “mdsched”
If you think there is a problem with your RAM, this tool can check your RAM and possibly fix the problem or let you know there is an issue. If you start seeing sudden freezes or crashes, it could mean there is a problem with your RAM.
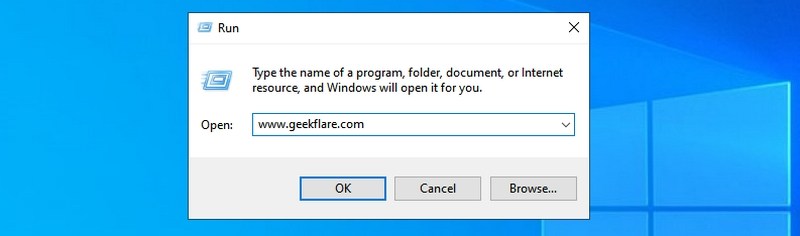
#23. Open any website — “Insert website URL”
You can also enter the URL of any website in the Run dialog, and it will open it in your default browser. For example, if you type www.geekflare.com in the Run command, it will open the Geekflare home page in your default browser.
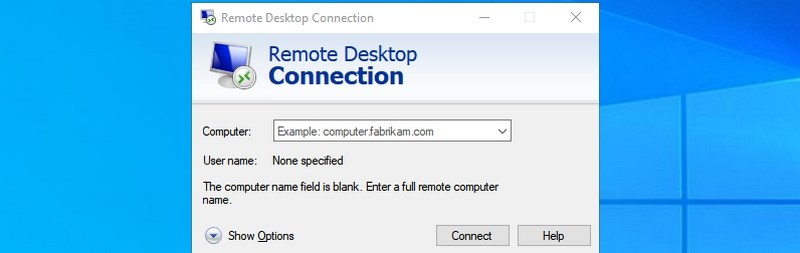
#24. Open Remote Desktop Connection — “mstsc”
You can use this feature to remotely connect to another PC and take full control over it. You’ll have to set up both PCs for the remote connection first, though. This Run command just makes the process easier.
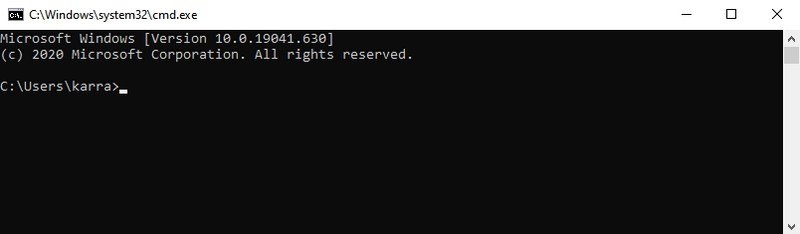
#25. Open Command Prompt — “cmd”
Unlike PowerShell, you can’t access the Command Prompt by right-clicking on the start menu anymore. If you prefer using the Command Prompt over PowerShell to execute commands, this is one of the easier ways to open the Command Prompt.
Wrapping up
The cool thing about Run is that it remembers all the commands you type in it. Therefore, you will only have to type the first letter to enter the command in the future.
I also believe Run commands are more important in Windows 10 as it heavily promotes the use of its default Settings app. Most of the settings and apps that I have mentioned above are more difficult to access Windows 10.
Next, explore some of the best NirSoft utilities for Windows.
How to start and stop services manually on Windows 10
 Source: Windows Central
On Windows 10, services are programs that run in the background without a user interface and enable system features (such as printing, networking, remote access, File Explorer, Windows Search, updates, etc.) and apps to operate as intended.
Although the system does a pretty good job managing background services, sometimes, you may need to control them manually when a feature or app isn’t working correctly, or an app requires you to manage its services manually.
Whatever the case it might be, Windows 10 includes at least four methods to stop, start, disable, or enable services using the Services console, Task Manager, Command Prompt, and PowerShell.
In this Windows 10 guide, we’ll walk you through the steps to manage system and apps services on your computer.
How to manage services using Services console
Using the Services consoles is perhaps the simplest method to stop, start, disable, or enable one or multiple services on Windows 10.
Stop service
To stop a running service using Services, use these steps:
- Open Start.
- Search for Services and click the top result to open the console.
- Double-click the service that you intend to stop.
Click the Stop button.
 Source: Windows Central
Quick tip: You can also manage the state by right-clicking the service and selecting the option. Or you can select the service and then use the controls at the top to start, stop, pause, or restart.
Once you complete the steps, the service will stop running on the device.
If you’re unable to stop a system service, consider that some services are required for the operation of Windows 10, and they can’t be stopped.
Start service
To start a service on Windows 10, use these steps:
- Open Start.
- Search for Services and click the top result to open the console.
- Double-click the service that you intend to stop.
Click the Start button.
Source: Windows Central
After you complete the steps, the service you specified will start for the current session.
Disable service
To set a service a disabled, use these steps:
- Open Start.
- Search for Services and click the top result to open the console.
- Double-click the service that you intend to stop.
- Click the Stop button.
Use the «Start type» drop-down menu and select the Disabled option.
Source: Windows Central
Once you complete the steps, the service will no longer start automatically after restarting your device.
Enable service
To enable a specific service, use these steps:
- Open Start.
- Search for Services and click the top result to open the console.
- Double-click the service that you intend to stop.
- Click the Start button.
Use the «Start type» drop-down menu and select the Automatic option.
These are the Startup types on Windows 10:
- Automatic – service starts at boot.
- Automatic (Delayed Start) – service start after boot.
- Manual – starts service manually as needed.
- Disabled – stops service from running.
Source: Windows Central
After you complete the steps, the Windows 10 or app service will enable, but if it was in a stopped state, you’d need to start it manually or restart the device for the service to run.
How to manage services using Task Manager
Task Manager also includes a section to quickly manage services for Windows 10 and apps.
To stop, start, or restart a service using Task Manager, use these steps:
- Open Start.
Search for Task Manager and click the top result to open the app.
Quick tip: Windows 10 includes many other ways to open the experience, including right-clicking the taskbar and selecting the Task Manager option and using the Ctrl + Shift + ESC keyboard shortcut.
Right-click the service name, and select one of the options:
- Stop.
- Start.
- Restart.
Source: Windows Central
Quick note: Task Manager only displays the service name, not the display name. For example, if you’re using this method, you’ll the «Print Spooler» defined as «Spooler.»
Once you complete the steps, the service will respond to the option you selected.
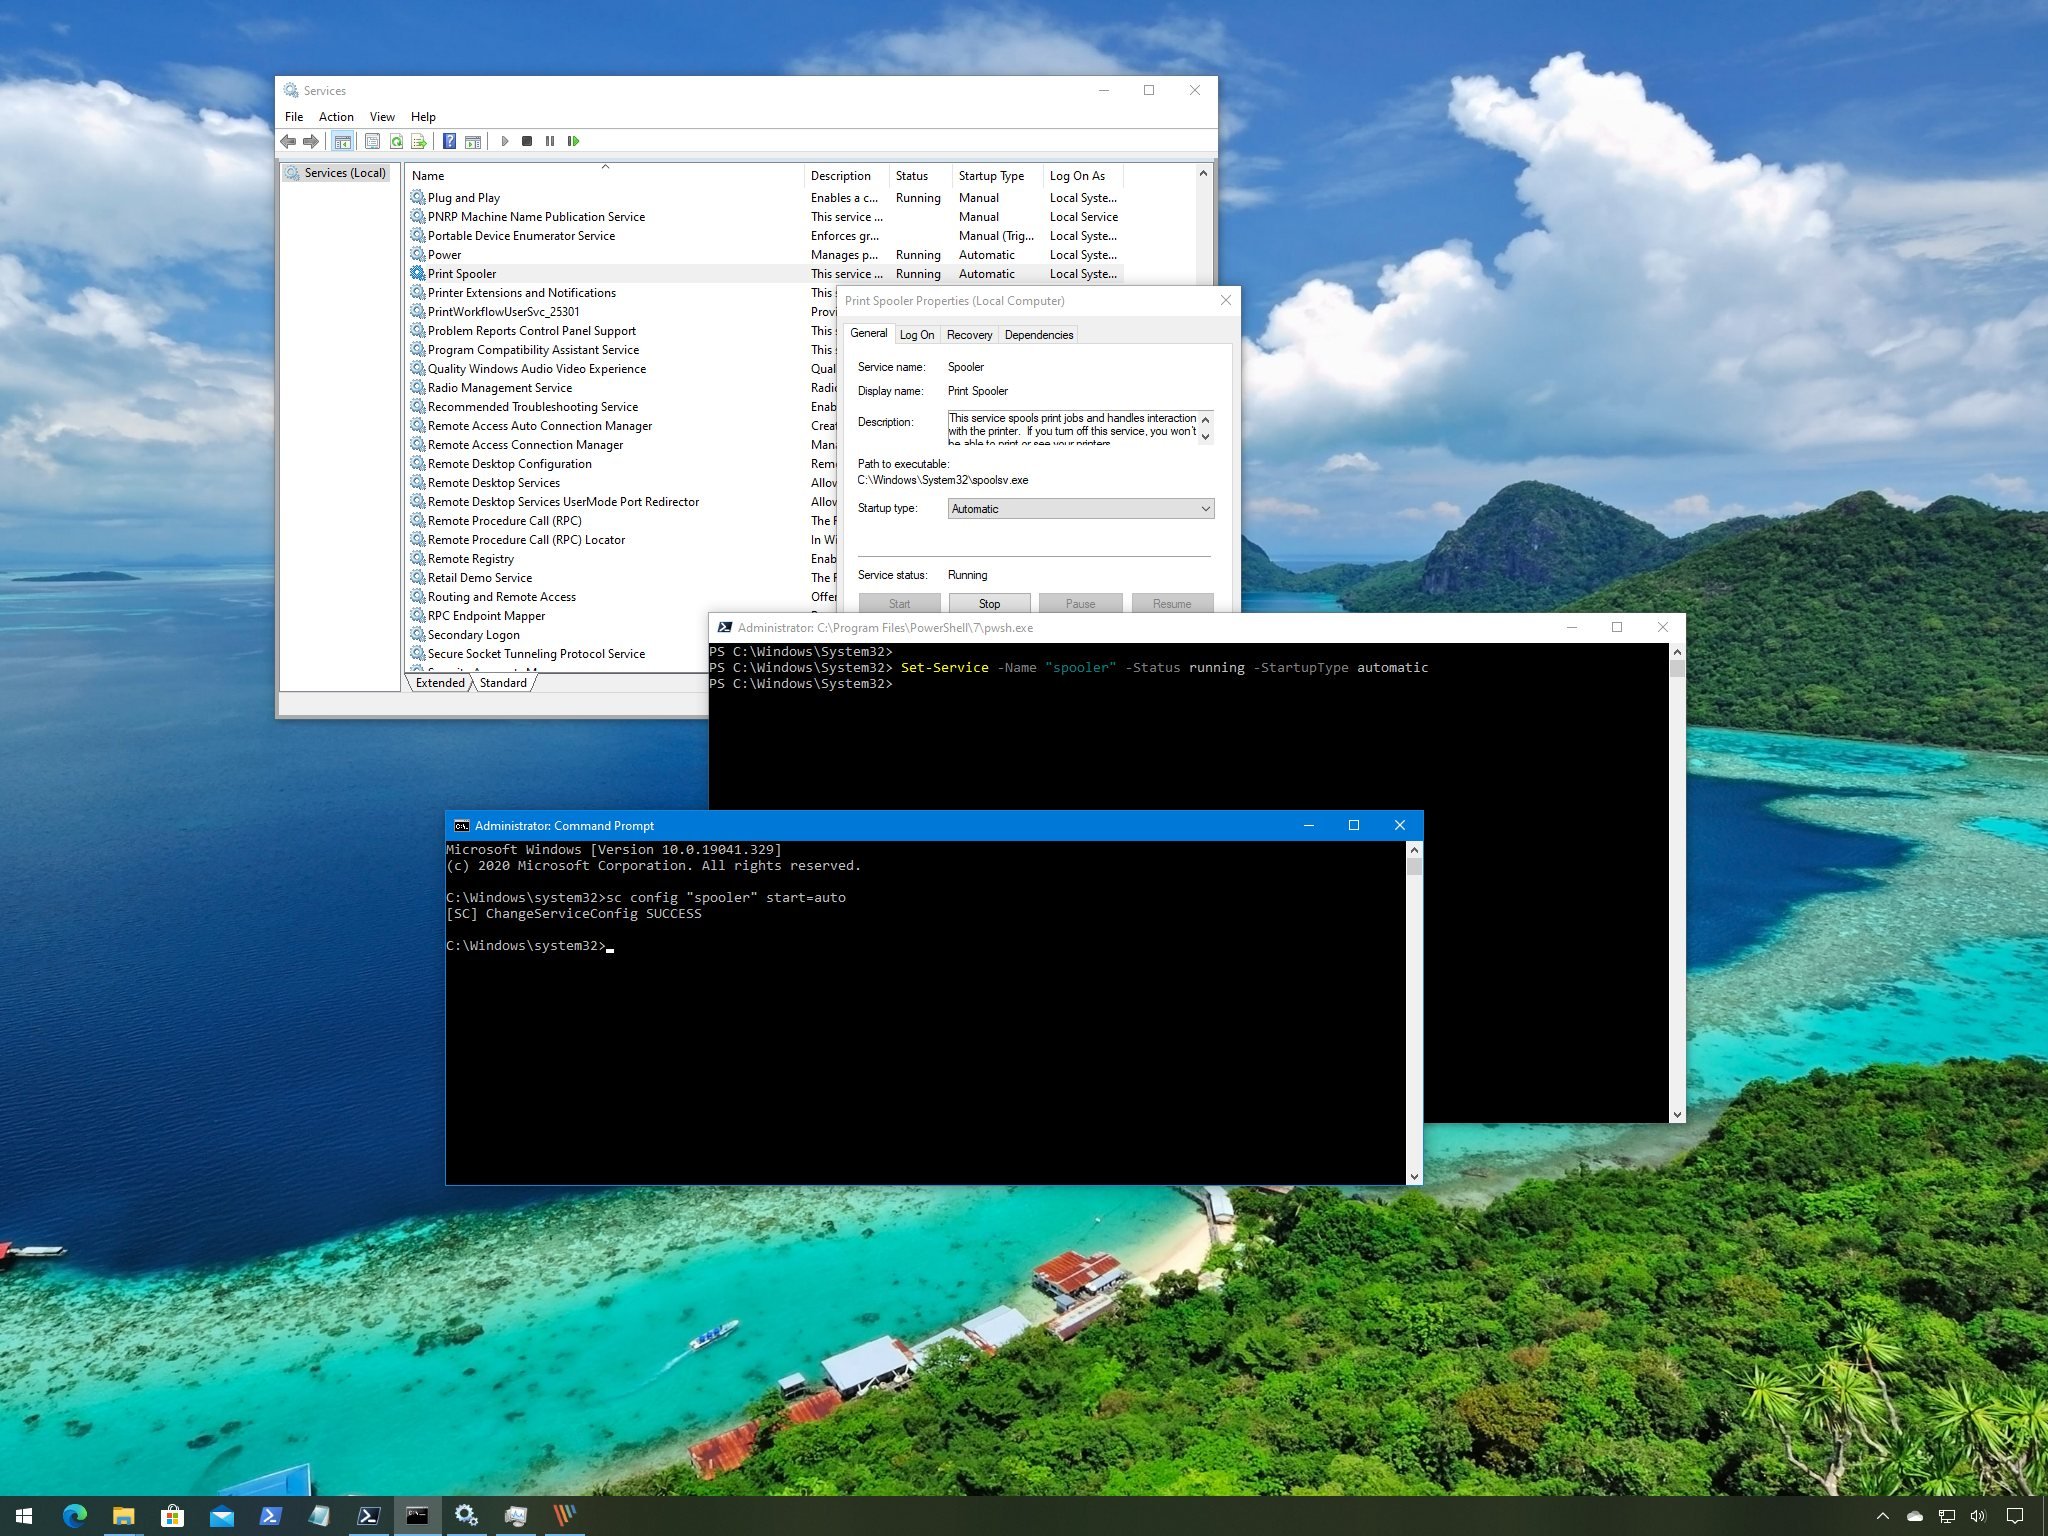
How to manage services using PowerShell
You can also use PowerShell commands to manage background services for Windows 10 and apps.
Stop service
To stop a specific service with PowerShell, use these steps:
- Open Start.
- Search for PowerShell, right-click the top result, and select the Run as administrator option.
(Optional) Type the following command to view a list of all the services and press Enter:
 Source: Windows Central
Type the following command to stop a service and press Enter:
Stop-Service -Name «SERVICE-NAME»
For example, this command stops the printer spooler service on Windows 10:
Stop-Service -Name «spooler»
Source: Windows Central
In the command, replace «SERVICE-NAME» for the name of the service that you intend to stop. If you want to use the display name, replace -Name for -DisplayName and then specify the display name of the service.
Alternatively, you can also use this variant of the command to stop the service:
Set-Service -Name «SERVICE-NAME» -Status stopped
Source: Windows Central
In the command, replace «SERVICE-NAME» for the name of the service that you intend to stop. If you want to use the display name, replace -Name for -DisplayName and then specify the display name of the service. You only need the quotation marks if there’s a space within the name.
Quick tip: If you’re getting a dependency error, you can append the -force option in either of the commands to stop the service. For example, Stop-Service -Name «SERVICE-NAME» -Force .
After you complete the steps, the PowerShell command will stop the service on your device.
Start service
To start a Windows 10 or app service with PowerShell, use these steps:
- Open Start.
- Search for PowerShell, right-click the top result, and select the Run as administrator option.
Type the following command to start a service and press Enter:
Start-Service -Name «SERVICE-NAME»
For example, this command starts the printer spooler service on Windows 10:
Start-Service -Name «spooler»
Source: Windows Central
In the command, replace «SERVICE-NAME» for the name of the service. Using the display name is supported, replacing -Name for -DisplayName and then specify the display name of the service.
Alternatively, you can also use this variant of the command to start a service:
Set-Service -Name «SERVICE-NAME» -Status running
Source: Windows Central
In the command, replace «SERVICE-NAME» for the name of the service. If you want to use the display name, replace -Name for -DisplayName and then specify the display name of the service.
Once you complete the steps, the service will start on your computer.
Disable service
To disable a service using a PowerShell command, use these steps:
- Open Start.
- Search for PowerShell, right-click the top result, and select the Run as administrator option.
Type the following command to disable a service and press Enter:
Set-Service -Name «SERVICE-NAME» -Status stopped -StartupType disabled
In the command, update «SERVICE-NAME» for the name of the service. If you want to use the display name of the service, then replace -Name for -DisplayName and specify the service name. If you want to disable the service without stopping it immediately, you can remove the -Status stopped portion of the command.
For example, this command disables the printer spooler service on Windows 10:
Set-Service -Name «spooler» -Status stopped -StartupType disabled
Source: Windows Central
After you complete the steps, the PowerShell command will disable the specified service.
Enable service
To enable a specific background service with PowerShell, use these steps:
- Open Start.
- Search for PowerShell, right-click the top result, and select the Run as administrator option.
Type the following command to enable a service and press Enter:
Set-Service -Name «SERVICE-NAME» -Status running -StartupType automatic
For example, this command enables the printer spooler service using PowerShell:
Set-Service -Name «spooler» -Status running -StartupType automatic
Source: Windows Central
Quick note: You may able to use the display -DisplayName option, but the command may also prompt you to supply the name of the service, adding an extra step to the process. If you want to enable the service without starting it immediately, you can remove the -Status running portion of the command.
Once you complete the steps, PowerShell will enable the service specified with the command.
How to manage services using Command Prompt
If you’re comfortable using the command line, Command Prompt offers the «net» command (older) to stop or start, or the «sc» command (newer) to stop, start, disable, or enable services on Windows 10.
Stop service
To stop a Windows 10 or app service with Command Prompt, use these steps:
- Open Start.
- Search for Command Prompt, right-click the top result, and select the Run as administrator option.
(Optional) Type the following command to view a list of all the services and press Enter:
sc queryex state=all type=service
Source: Windows Central
Type the following command to stop a service and press Enter:
net stop «SERVICE-NAME»
In the command, replace «SERVICE-NAME» for the name or display name of the service. You only need the quotation marks if there’s a space within the name.
For example, this command stops the printer spooler using the service name:
net stop «spooler»
Source: Windows Central
Alternatively, you can also use the more advanced «sc» command:
sc stop «SERVICE-NAME»
For example, this command stops the printer spooler using the service name:
sc stop «spooler»
Source: Windows Central
After you complete the steps, the command will stop the specified service on Windows 10.
Start service
To start a service with the command line, use these steps:
- Open Start.
- Search for Command Prompt, right-click the top result, and select the Run as administrator option.
Type the following command to start a service and press Enter:
net start «SERVICE-NAME»
In the command, replace «SERVICE-NAME» for the name or display name of the service. You only need the quotation marks if there’s a space within the name.
For example, this command starts the printer spooler using the service name:
net start «spooler»
Source: Windows Central
Alternatively, you can also use the «sc» command:
sc start «SERVICE-NAME»
For example, this command starts the printer spooler using the service name:
sc start «spooler»
Source: Windows Central
Once you complete the steps, the command will execute and start the service you specified.
Disable service
To disable a service with Command Prompt, use these steps:
- Open Start.
- Search for Command Prompt, right-click the top result, and select the Run as administrator option.
Type the following command to disable a service and press Enter:
sc config «SERVICE-NAME» start=disabled
In the command, replace «SERVICE-NAME» for the name of the service that you want to disable.
For example, this command disables printer spooler using the service name:
sc config «spooler» start=disabled
Source: Windows Central
(Optional) Type the following command to stop the service and press Enter:
sc stop «SERVICE-NAME»
Quick note: When you disable a service, it doesn’t stop the current state of the service. You can either restart your computer or stop the service using the above command.
After you complete the steps, the sc command will run disabling the Windows 10 or app service you specified.
Enable service
To enable a service with a command, use these steps:
- Open Start.
- Search for Command Prompt, right-click the top result, and select the Run as administrator option.
Type the following command to enable a service and press Enter:
sc config «SERVICE-NAME» start=auto
In the command, replace «SERVICE-NAME» for the name of the service that you want to enable.
For example, this command enables the printer spooler automatically using the service name:
sc config «spooler» start=auto
Source: Windows Central
These are alternative commands to enable a particular service:
- Manual: sc config «SERVICE-NAME» start=demand
- Automatic Delayed: sc config «SERVICE-NAME» start=delayed-auto
(Optional) Type the following command to start the service and press Enter:
sc start «SERVICE-NAME»
Once you complete the steps, the service will enable and start automatically on reboot according to the command you used.
You can only use the «net» command to start or stop services. The «sc» command allows you to perform more tasks, including start, stop, enable, or disable services, among other options. If you’re choosing to manage services with command lines, then, in either case, it’s best to use the service name instead of the display name.
Also, when using any of the methods outlined above, consider that making modifications to the default settings can alter the operation of one or more features that depend on that service negatively affecting the experience. Furthermore, if you restart a service, you might be required to start its dependencies manually as well to make the app or feature operational again.
We’re focusing this guide on Windows 10, but the ability to manage services has been available for several years, which means that you can refer to this guide if you’re still running Windows 8.1, Windows 7, and older versions.
More Windows 10 resources
For more helpful articles, coverage, and answers to common questions about Windows 10, visit the following resources:
![]()
Microsoft’s Surface Duo is not ‘failing up’
Microsoft announced this week that it was expanding Surface Duo availability to nine new commercial markets. While Surface Duo is undoubtedly a work in progress, this is not a sign of a disaster. It’s also doesn’t mean that Surface Duo is selling a ton either. Instead, the reason for the expansion is a lot more straightforward.
![]()
Here’s what you can do if Windows 10 update KB5001330 is causing issues
In this guide, we’ll show you the steps to get rid of the update KB5001330 to fix profile, gaming, and BSoD problems with the Windows 10 October 2020 Update and May 2020 Update.
![]()
Review: NZXT made its first AMD motherboard and it’s brilliant
NZXT made its first motherboard with an AMD chipset. The N7 B550 supports the latest AMD Ryzen processors and there’s plenty to love about this platform. To differentiate the N7 B550, NZXT made notable changes to the layout of the motherboard to make it easy to create a clean PC build.
![]()
These are the best PC sticks when you’re on the move
Instant computer — just add a screen. That’s the general idea behind the ultra-portable PC, but it can be hard to know which one you want. Relax, we have you covered!


